Vue+Element UI+SpringBoot前后端分离框架
Vue+Element UI+SpringBoot前后端分离框架
- 一、准备工作
- 检查环境
- 安装淘宝镜像
- 二、创建vue项目
- vue项目创建步骤
- 初始vue项目结构
- 安装axios
- 安装element-ui
- 编写vue项目
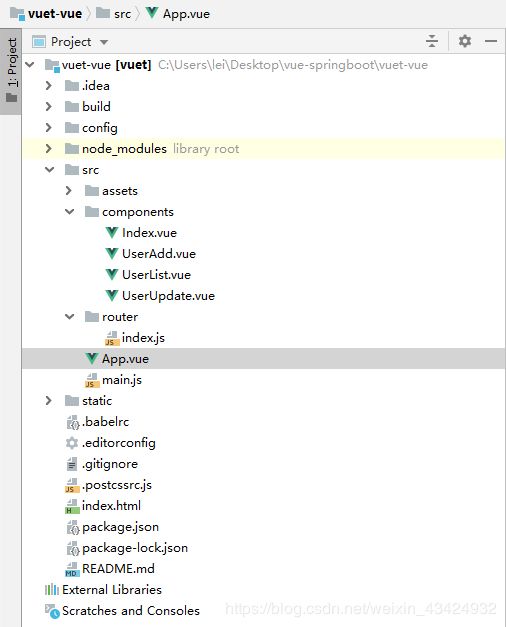
- 编辑后的vue项目结构
- 三、快速创建SpringBoot项目
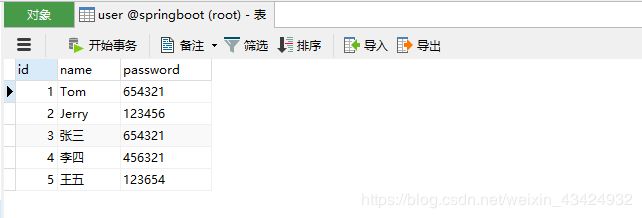
- 新建user表
- SpringBoot创建步骤
- 初始SpringBoot项目结构
- 解决跨域问题
- 编写SpringBoot项目
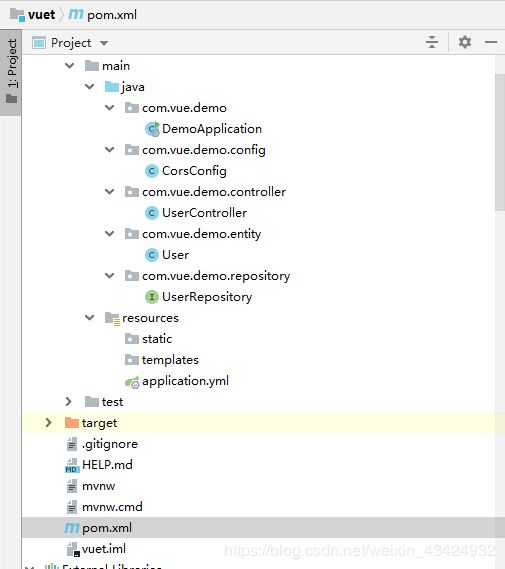
- 编辑后的SpringBoot项目结构
- 四、测试效果展示
一、准备工作
检查环境
打开命令窗口,先看看有没有node和npm。没有的话就安装吧,百度上很多安装教程。
C:\Users\lei>node -v
C:\Users\lei>npm -v
vue -V
vue list
安装淘宝镜像
节省下载资源的时间。
npm install -g cnpm --registry=http://registry.npm.taobao.org
二、创建vue项目
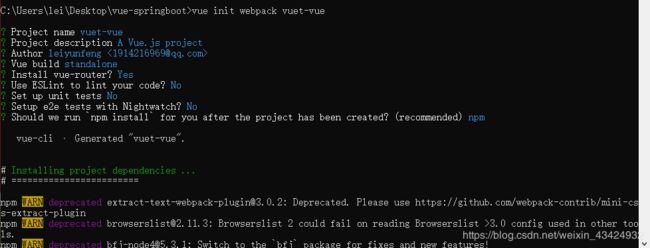
vue项目创建步骤
cd到要创建项目的路径,并创建vue项目。
![]()
vue项目开始创建。
vue init webpack [项目名]
npm run dev
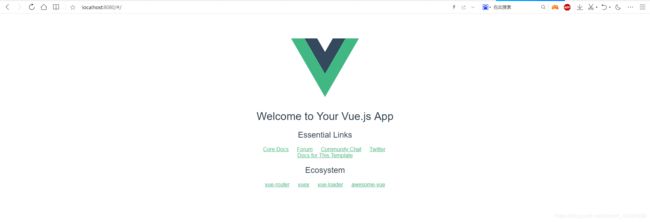
vue项目启动成功。

打开浏览器,项目已经成功运行到了8080端口。
初始vue项目结构
安装axios
安装axios,方便接口请求。
npm install axios --save
安装element-ui
安装ElementUI ,方便快速开发。
npm install element-ui --save
编写vue项目
用IDEA编辑需要安装Vue.js插件。本项目的vue用IDEA编辑,其他编译器请忽略这步。

main.js
main.js文件中引入ElementUI和Axios 。
// The Vue build version to load with the `import` command
// (runtime-only or standalone) has been set in webpack.base.conf with an alias.
import Vue from 'vue'
import App from './App'
import router from './router'
import ElementUI from 'element-ui'
import 'element-ui/lib/theme-chalk/index.css'
import axios from 'axios'
import VueAxios from 'vue-axios'
Vue.config.productionTip = false
Vue.use(ElementUI)
Vue.use(VueAxios, axios)
/* eslint-disable no-new */
new Vue({
el: '#app',
router,
components: { App },
template: 'index.js:
import Vue from 'vue'
import Router from 'vue-router'
import UserList from '../components/UserList'
import UserAdd from '../components/UserAdd'
import Index from '../components/Index'
import UserUpdate from '../components/UserUpdate'
Vue.use(Router)

export default new Router({
  mode: 'history',
  routes: [
    {
      path: '/',
      name: '用户管理',
      show:true,
      component: Index,
      children:[
        {
          path: '/UserList',
          name: '用户列表',
          show:true,
          component: UserList
        },
        {
          path: '/UserAdd',
          name: '用户添加',
          show:true,
          component: UserAdd
        },
        {
          path:'/UserUpdate',
          name: '用户编辑',
          show:false,
          component: UserUpdate,
        }
      ]
    }
  ]
})
App.vue:
<template>
  <div id="app">
    <router-view></router-view>
  </div>
</template>
Index.vue:
<template>
      <el-container style="height: 500px; border: 1px solid #eee">
        <el-aside width="200px" style="background-color: rgb(238, 241, 246)">

          <el-menu  router :default-openeds="['0']">
            <el-submenu v-for="(item,index) in $router.options.routes" :index="index+''" v-if="item.show">
              <template slot="title"><i class="el-icon-message"></i>{{item.name}}</template>
              <el-menu-item-group >
                <el-menu-item v-for="(item2,index2) in item.children" :index="item2.path"
                :class="$route.path==item2.path? 'is-active':''" v-if="item2.show">{{item2.name}}</el-menu-item>
              </el-menu-item-group>
            </el-submenu>
          </el-menu>
        </el-aside>

        <el-container>

          <el-main>
            <router-view></router-view>
          </el-main>
        </el-container>
      </el-container>
</template>
UserAdd.vue:
<template>
<el-form :model="ruleForm" :rules="rules" ref="ruleForm" label-width="100px" class="demo-ruleForm">
  <el-form-item label="用户名" prop="name">
    <el-input v-model="ruleForm.name"></el-input>
  </el-form-item>
  <el-form-item label="密码" prop="password">
    <el-input v-model="ruleForm.password"></el-input>
  </el-form-item>
  <el-form-item>
    <el-button type="primary" @click="submitForm('ruleForm')">确认</el-button>
    <el-button @click="resetForm('ruleForm')">重置</el-button>
  </el-form-item>
</el-form>
</template>
<script>
  export default {
    data() {
      return {
        ruleForm: {
          name: '',
          password:''
        },
        rules: {
          name: [
            { required: true, message: '请输入用户名', trigger: 'blur' }
          ],
          password: [
            { required: true, message: '请输入密码', trigger: 'blur' }
          ]
        }
      };
    },
    methods: {
      submitForm(formName) {
        const _this=this
        this.$refs[formName].validate((valid) => {
          if (valid) {
            let data = new FormData();
            data.append('name',this.ruleForm.name);
            data.append('password',this.ruleForm.password);
            this.axios.post('http://localhost:81/save',data).then(function (res) {
              if (res.data =="cuccess"){
                _this.$alert(_this.ruleForm.name+'添加成功', 'CUCCESS', {
                  confirmButtonText: '确定',
                  callback: action => {
                    this.$message({
                      type: 'info',
                      message: `action: ${ action }`
                    });
                  }
                });
                _this.$router.push("/UserList")
              }

            })
          } else {
            console.log('error submit!!');
            return false;
          }
        });
      },
      resetForm(formName) {
        this.$refs[formName].resetFields();
      }
    }
  }
</script>
UserList.vue:
<template>
  <div>
    <template>
      <el-table
        :data="users"
        border
        style="width: 100%">
        <el-table-column
          fixed
          prop="id"
          label="编号"
          width="150">
        </el-table-column>
        <el-table-column
          prop="name"
          label="姓名"
          width="200">
        </el-table-column>
        <el-table-column
          prop="password"
          label="密码"
          width="300">
        </el-table-column>

        <el-table-column
          fixed="right"
          label="操作"
          width="1000">
          <template slot-scope="scope">
            <el-button @click="handleClick(scope.row)" type="text" size="small">编辑</el-button>
            <el-button @click="userDelete(scope.row)" type="text" size="small">删除</el-button>
          </template>
        </el-table-column>
      </el-table>
    </template>

    <el-pagination
      background
      layout="prev, pager, next"
      :page-size="pageSize"
      :total="total"
      @current-change="page">
    </el-pagination>
  </div>
</template>

<script>
  export default {
    methods: {
      handleClick(row) {
        console.log(row);
        this.$router.push({
          path:"/UserUpdate",
          query:{
            id:row.id
          }
        })
      },
      userDelete(row) {
        console.log(row);
        const _this=this
        this.axios.delete('http://localhost:81/delete?id='+row.id).then(function (res) {
          _this.$alert(row.name+'删除成功', 'CUCCESS', {
            confirmButtonText: '确定',
            callback: action => {
              window.location.reload()
            }
          });
        })
      },
      page(c) {
        const _this=this
        this.axios.get('http://localhost:81/getUserList?page='+(c-1)+'&size=3').then(function (res) {
          console.log(res.data.content)
          _this.users=res.data.content
          _this.pageSize=res.data.size
          _this.total=res.data.totalElements
        })
      }
    },

    data() {
      return {
        pageSize:'',
        total:'',
        users: []
      }
    },
    created() {
      const _this=this
      this.axios.get('http://localhost:81/getUserList?page=0&size=3').then(function (res) {
        console.log(res.data.content)
        _this.users=res.data.content
        _this.pageSize=res.data.size
        _this.total=res.data.totalElements
      })
    }
  }
</script>
UserUpdate.vue:
<template>
<div>

  <el-form :model="ruleForm" :rules="rules" ref="ruleForm" label-width="100px" class="demo-ruleForm">
    <el-form-item label="用户编号" prop="id">
      <el-input v-model="ruleForm.id" readonly=""></el-input>
    </el-form-item>
    <el-form-item label="用户名" prop="name">
      <el-input v-model="ruleForm.name"></el-input>
    </el-form-item>
    <el-form-item label="密码" prop="password">
      <el-input v-model="ruleForm.password"></el-input>
    </el-form-item>
    <el-form-item>
      <el-button type="primary" @click="submitForm('ruleForm')">确认</el-button>
      <el-button @click="resetForm('ruleForm')">重置</el-button>
    </el-form-item>
  </el-form>
</div>
</template>
<script>
  export default {
    data() {
      return {
        ruleForm: {
          id:'',
          name: '',
          password:''
        },
        rules: {
          id: [
            { required: true, message: '请输入用户名', trigger: 'blur' }
          ],
          name: [
            { required: true, message: '请输入用户名', trigger: 'blur' }
          ],
          password: [
            { required: true, message: '请输入密码', trigger: 'blur' }
          ]
        }
      };
    },
    methods: {
      submitForm(formName) {
        const _this=this
        this.$refs[formName].validate((valid) => {
          if (valid) {
            let data = new FormData();
            data.append('id',this.ruleForm.id);
            data.append('name',this.ruleForm.name);
            data.append('password',this.ruleForm.password);
            this.axios.put('http://localhost:81/update',data).then(function (res) {
              if (res.data =="cuccess"){
                _this.$alert(_this.ruleForm.name+'修改成功', 'CUCCESS', {
                  confirmButtonText: '确定',
                  callback: action => {
                    this.$message({
                      type: 'info',
                      message: `action: ${ action }`
                    });
                  }
                });
                _this.$router.push("/UserList")
              }

            })
          } else {
            console.log('error submit!!');
            return false;
          }
        });
      },
      resetForm(formName) {
        this.$refs[formName].resetFields();
      }
    },
    created() {
      const _this=this
      this.axios.get('http://localhost:81/findById?id='+this.$route.query.id).then(function (res) {
        _this.ruleForm=res.data
      })
    }
  }
</script>
编辑后的vue项目结构
三、快速创建SpringBoot项目
新建user表
SpringBoot创建步骤
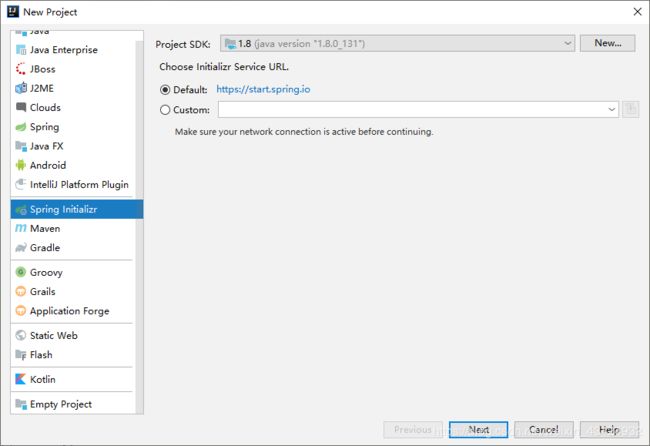
使用Spring Initializr快速创建向导。
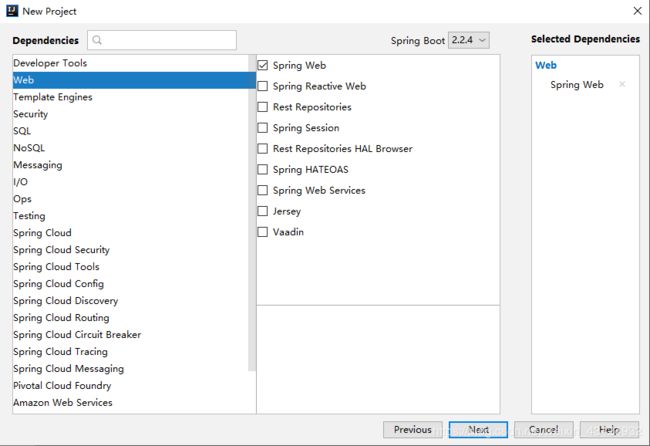
选择要添加的模块。主要选web容器、jpa和mysql驱动,创建向导会自动添加所需依赖。

初始SpringBoot项目结构
解决跨域问题
新建CorsConfig 配置类,重写WebMvcConfigurer 中的addCorsMappings方法。
package com.vue.demo.config;

import org.springframework.context.annotation.Configuration;
import org.springframework.web.servlet.config.annotation.CorsRegistry;
import org.springframework.web.servlet.config.annotation.WebMvcConfigurer;

@Configuration
public class CorsConfig implements WebMvcConfigurer {

    @Override
    public void addCorsMappings(CorsRegistry registry) {
        registry.addMapping("/**")
                .allowedOrigins("*")
                .allowedMethods("GET","HEAD","POST","PUT","DELETE","OPTIONS")
                .allowCredentials(true)
                .maxAge(3600)
                .allowedHeaders("*");
    }
}
编写SpringBoot项目
entity
package com.vue.demo.entity;

import lombok.Data;

import javax.persistence.*;

@Entity
@Table(name = "user")
@Data
public class User {

    @Id
    @GeneratedValue(strategy = GenerationType.IDENTITY )
    private Integer id;
    private String name;
    private String password;
}
repository
package com.vue.demo.repository;

import com.vue.demo.entity.User;
import org.springframework.data.jpa.repository.JpaRepository;

public interface UserRepository extends JpaRepository<User,Integer> {

}
controller
package com.vue.demo.controller;

import com.vue.demo.entity.User;
import com.vue.demo.repository.UserRepository;
import org.springframework.beans.factory.annotation.Autowired;
import org.springframework.data.domain.Page;
import org.springframework.data.domain.PageRequest;
import org.springframework.stereotype.Controller;
import org.springframework.web.bind.annotation.*;

@Controller
public class UserController {

    @Autowired
    UserRepository userRepository;

    @GetMapping("getUserList")
    @ResponseBody
    public Page<User> getUserList(Integer page,Integer size){
        PageRequest pageRequest=PageRequest.of(page,size);
        return userRepository.findAll(pageRequest);
    }

    @GetMapping("findById")
    @ResponseBody
    public User findById(Integer id){
        return userRepository.findById(id).get();
    }

    @PostMapping("save")
    @ResponseBody
    public String save(User user){
        User result=userRepository.save(user);
        if(result==null){
            return "fail";
        }else {
            return "cuccess";
        }
    }

    @PutMapping("update")
    @ResponseBody
    public String update(User user){
        User result=userRepository.save(user);
        if(result==null){
            return "fail";
        }else {
            return "cuccess";
        }
    }

    @DeleteMapping("delete")
    @ResponseBody
    public void delete(Integer id){
        userRepository.deleteById(id);
    }
}
application.yml全局配置文件
spring:
  datasource:
    username: root
    password: 123456
    url: jdbc:mysql://localhost:3306/springboot?serverTimezone=Asia/Shanghai
    driver-class-name: com.mysql.jdbc.Driver
  jpa:
    show-sql: true

server:
  port: 81
pom文件
<project xmlns="http://maven.apache.org/POM/4.0.0" xmlns:xsi="http://www.w3.org/2001/XMLSchema-instance"
         xsi:schemaLocation="http://maven.apache.org/POM/4.0.0 https://maven.apache.org/xsd/maven-4.0.0.xsd">
    <modelVersion>4.0.0modelVersion>
    <parent>
        <groupId>org.springframework.bootgroupId>
        <artifactId>spring-boot-starter-parentartifactId>
        <version>2.2.4.RELEASEversion>
        <relativePath/>
    parent>
    <groupId>com.vuegroupId>
    <artifactId>demoartifactId>
    <version>0.0.1-SNAPSHOTversion>
    <name>demoname>
    <description>Demo project for Spring Bootdescription>

    <properties>
        <java.version>1.8java.version>
    properties>

    <dependencies>
        <dependency>
            <groupId>org.projectlombokgroupId>
            <artifactId>lombokartifactId>
            <version>1.18.4version>
        dependency>
        <dependency>
            <groupId>org.springframework.bootgroupId>
            <artifactId>spring-boot-starter-data-jpaartifactId>
        dependency>
        <dependency>
            <groupId>org.springframework.bootgroupId>
            <artifactId>spring-boot-starter-webartifactId>
        dependency>

        <dependency>
            <groupId>mysqlgroupId>
            <artifactId>mysql-connector-javaartifactId>
            <scope>runtimescope>
        dependency>
        <dependency>
            <groupId>org.springframework.bootgroupId>
            <artifactId>spring-boot-starter-testartifactId>
            <scope>testscope>
            <exclusions>
                <exclusion>
                    <groupId>org.junit.vintagegroupId>
                    <artifactId>junit-vintage-engineartifactId>
                exclusion>
            exclusions>
        dependency>
    dependencies>

    <build>
        <plugins>
            <plugin>
                <groupId>org.springframework.bootgroupId>
                <artifactId>spring-boot-maven-pluginartifactId>
            plugin>
        plugins>
    build>

project>
编辑后的SpringBoot项目结构
四、测试效果展示
IEDA中启动springboot项目,项目运行成功。

IEDA中启动vue项目,项目运行成功。

用户列表展示。

添加用户王二麻子。

添加成功。


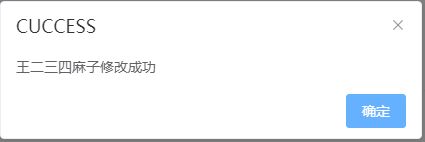
修改用户王二麻子用户名为王二三四麻子和密码为123456。


修改成功。

删除王二三四麻子。
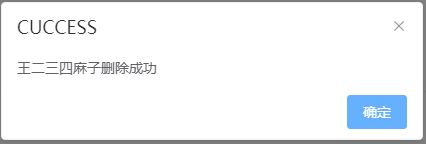
删除成功。

至此实现了用户的基本增删改查操作以及分页功能。
本文项目资源链接 https://download.csdn.net/download/weixin_43424932/12167094。
Axios中文文档 http://www.axios-js.com/zh-cn/docs/vue-axios.html。
Element UI 的使用请参考官网 https://element.eleme.cn/#/zh-CN/component/quickstart(中文官网)。


