VS2017配置最新版PCL1.9.1(win10)
**
VS2017配置最新版PCL1.9.1(win10)
**
配置详细的配置安装过程参见一位大佬的博文,亲测有效,链接如下:
https://blog.csdn.net/weixin_41991128/article/details/83864713
以上的博文中给出了可能出现的问题及解决办法,值得借鉴。
但是按照大佬的博文进行安装配置,最后还是出了一些问题,可能是因为PCL1.9.1与PCL1.9.0安装有些不同导致的吧,这里我直接来干货,给出解决问题的办法。
遇到的新问题:
( 配置过程忘记截图,这里语言描述,望大家谅解!)
安装好PCL试运行出现报错如下:
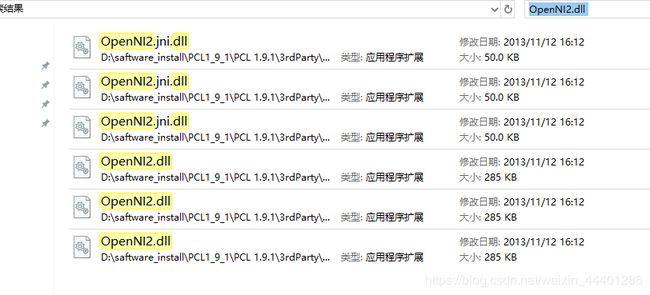
无法找到或者无法打开pcl_io_release.dll等一系列PCL相关的dll文件,以及OpenNI2.dll文件
解决的办法:
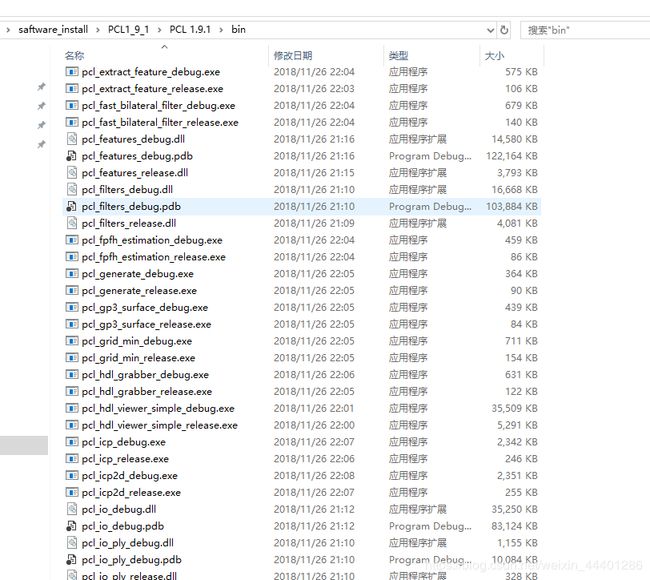
1>在PCL安装目录下搜索确实的文件OpenNI2.dll,及pcl_io_release.dll等缺失的文件(注:pcl_io_release.dll等一系列pcl相关dll文件均在一个文件夹下,搜索一个找到目录即可):
直接点击转到相应的文件夹下:
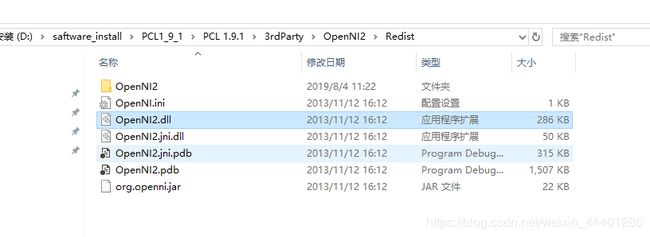
pcl_io_release.dll等一系列文件的查找方法相同:
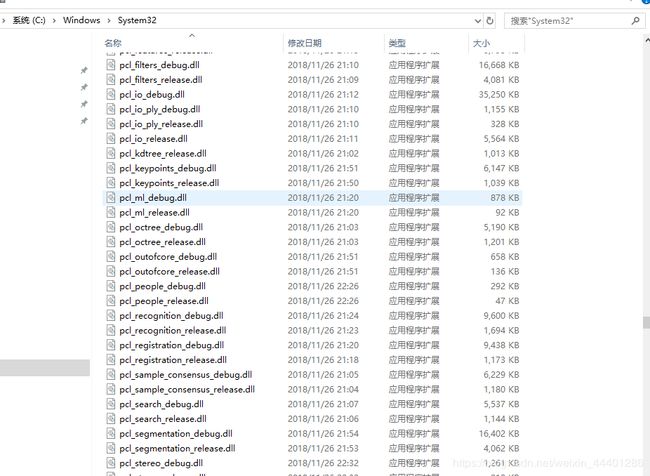
2>选中所有的.dll文件移动至C---->Windows---->System32目录下
到此,问题便成功即可解决,至于在运行过程中出现的其他问题,具体可参见大佬的博客,链接在文章开头。
下面便开始运行炫酷的pcl了:
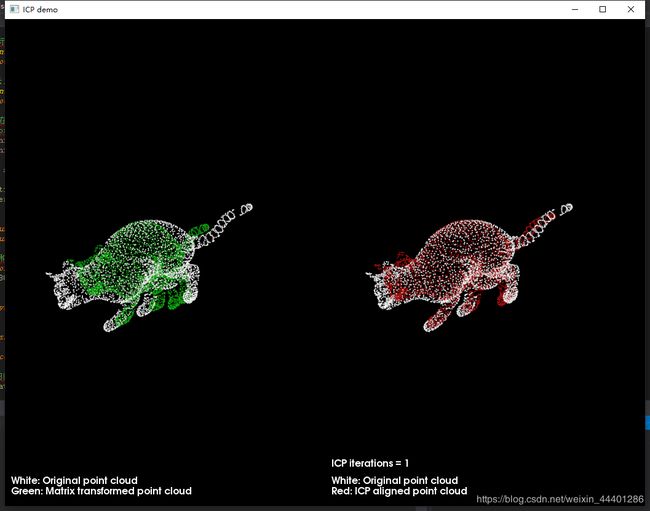
下图为显示效果图,相应的代码附在后文,对于代码运行只能显示一个黑色框图,无点云数据的现象,一般是显示视角的问题,首先考虑按下R切换点云显示视角。
测试代码如下:
#include
#include

#include     //PLY相关头文件
#include     //PCD相关头文件
#include   //

#include //

#include
#include

typedef pcl::PointXYZ PointT;
typedef pcl::PointCloud PointCloudT;   //定义点云的格式

bool next_iteration = false;

void
print4x4Matrix(const Eigen::Matrix4d & matrix)    //打印旋转矩阵和平移矩阵
{
	printf("Rotation matrix :\n");
	printf("    | %6.3f %6.3f %6.3f | \n", matrix(0, 0), matrix(0, 1), matrix(0, 2));
	printf("R = | %6.3f %6.3f %6.3f | \n", matrix(1, 0), matrix(1, 1), matrix(1, 2));
	printf("    | %6.3f %6.3f %6.3f | \n", matrix(2, 0), matrix(2, 1), matrix(2, 2));
	printf("Translation vector :\n");
	printf("t = < %6.3f, %6.3f, %6.3f >\n\n", matrix(0, 3), matrix(1, 3), matrix(2, 3));
}

void
keyboardEventOccurred(const pcl::visualization::KeyboardEvent& event,
	void* nothing)
{  //使用空格键来增加迭代次数,并更新显示
	if (event.getKeySym() == "space" && event.keyDown())
		next_iteration = true;
}

int main()
{
	// 申明点云将要使用的
	PointCloudT::Ptr cloud_in(new PointCloudT);  // 原始点云
	PointCloudT::Ptr cloud_tr(new PointCloudT);  // 转换后的点云
	PointCloudT::Ptr cloud_icp(new PointCloudT);  // ICP 输出点云

	int iterations = 1;  // 默认的ICP迭代次数


	pcl::console::TicToc time;     //申明时间记录
	time.tic();       //time.tic开始  time.toc结束时间
	pcl::io::loadPCDFile("test.pcd", *cloud_in);


	//定义旋转矩阵和平移向量Matrix4d是为4*4的矩阵
	Eigen::Matrix4d transformation_matrix = Eigen::Matrix4d::Identity();  //初始化

																		  // 旋转矩阵的定义可以参考
	double theta = M_PI / 8;  // 旋转的角度用弧度的表示方法
	transformation_matrix(0, 0) = cos(theta);
	transformation_matrix(0, 1) = -sin(theta);
	transformation_matrix(1, 0) = sin(theta);
	transformation_matrix(1, 1) = cos(theta);

	// Z轴的平移向量 (0.4 meters)
	transformation_matrix(2, 3) = 0.4;

	//打印转换矩阵
	std::cout << "Applying this rigid transformation to: cloud_in -> cloud_icp" << std::endl;
	print4x4Matrix(transformation_matrix);

	// 执行点云转换
	pcl::transformPointCloud(*cloud_in, *cloud_icp, transformation_matrix);
	*cloud_tr = *cloud_icp;  // 备份cloud_icp赋值给cloud_tr为后期使用

							 // 迭代最近点算法
	time.tic();        //时间
	pcl::IterativeClosestPoint icp;
	icp.setMaximumIterations(iterations);    //设置最大迭代次数iterations=true
	icp.setInputSource(cloud_icp);   //设置输入的点云
	icp.setInputTarget(cloud_in);    //目标点云
	icp.align(*cloud_icp);          //匹配后源点云
	icp.setMaximumIterations(1);  // 设置为1以便下次调用
	std::cout << "Applied " << iterations << " ICP iteration(s) in " << time.toc() << " ms" << std::endl;

	if (icp.hasConverged())//icp.hasConverged ()=1(true)输出变换矩阵的适合性评估
	{
		std::cout << "\nICP has converged, score is " << icp.getFitnessScore() << std::endl;
		std::cout << "\nICP transformation " << iterations << " : cloud_icp -> cloud_in" << std::endl;
		transformation_matrix = icp.getFinalTransformation().cast();
		print4x4Matrix(transformation_matrix);
	}
	else
	{
		PCL_ERROR("\nICP has not converged.\n");
		return (-1);
	}

	// 可视化ICP的过程与结果
	pcl::visualization::PCLVisualizer viewer("ICP demo");
	// 创建两个观察视点
	int v1(0);
	int v2(1);
	viewer.createViewPort(0.0, 0.0, 0.5, 1.0, v1);
	viewer.createViewPort(0.5, 0.0, 1.0, 1.0, v2);

	// 定义显示的颜色信息
	float bckgr_gray_level = 0.0;  // Black
	float txt_gray_lvl = 1.0 - bckgr_gray_level;

	// 原始的点云设置为白色的
	pcl::visualization::PointCloudColorHandlerCustom cloud_in_color_h(cloud_in, (int)255 * txt_gray_lvl, (int)255 * txt_gray_lvl,
		(int)255 * txt_gray_lvl);
	viewer.addPointCloud(cloud_in, cloud_in_color_h, "cloud_in_v1", v1);//设置原始的点云都是显示为白色
	viewer.addPointCloud(cloud_in, cloud_in_color_h, "cloud_in_v2", v2);

	// 转换后的点云显示为绿色
	pcl::visualization::PointCloudColorHandlerCustom cloud_tr_color_h(cloud_tr, 20, 180, 20);
	viewer.addPointCloud(cloud_tr, cloud_tr_color_h, "cloud_tr_v1", v1);

	// ICP配准后的点云为红色
	pcl::visualization::PointCloudColorHandlerCustom cloud_icp_color_h(cloud_icp, 180, 20, 20);
	viewer.addPointCloud(cloud_icp, cloud_icp_color_h, "cloud_icp_v2", v2);

	// 加入文本的描述在各自的视口界面
	//在指定视口viewport=v1添加字符串“white 。。。”其中"icp_info_1"是添加字符串的ID标志,(10,15)为坐标16为字符大小 后面分别是RGB值
	viewer.addText("White: Original point cloud\nGreen: Matrix transformed point cloud", 10, 15, 16, txt_gray_lvl, txt_gray_lvl, txt_gray_lvl, "icp_info_1", v1);
	viewer.addText("White: Original point cloud\nRed: ICP aligned point cloud", 10, 15, 16, txt_gray_lvl, txt_gray_lvl, txt_gray_lvl, "icp_info_2", v2);

	std::stringstream ss;
	ss << iterations;            //输入的迭代的次数
	std::string iterations_cnt = "ICP iterations = " + ss.str();
	viewer.addText(iterations_cnt, 10, 60, 16, txt_gray_lvl, txt_gray_lvl, txt_gray_lvl, "iterations_cnt", v2);

	// 设置背景颜色
	viewer.setBackgroundColor(bckgr_gray_level, bckgr_gray_level, bckgr_gray_level, v1);
	viewer.setBackgroundColor(bckgr_gray_level, bckgr_gray_level, bckgr_gray_level, v2);

	// 设置相机的坐标和方向
	viewer.setCameraPosition(-3.68332, 2.94092, 5.71266, 0.289847, 0.921947, -0.256907, 0);
	viewer.setSize(1280, 1024);  // 可视化窗口的大小

								 // 注册按键回调函数
	viewer.registerKeyboardCallback(&keyboardEventOccurred, (void*)NULL);

	// 显示
	while (!viewer.wasStopped())
	{
		viewer.spinOnce();

		//按下空格键的函数
		if (next_iteration)
		{
			// 最近点迭代算法
			time.tic();
			icp.align(*cloud_icp);
			std::cout << "Applied 1 ICP iteration in " << time.toc() << " ms" << std::endl;

			if (icp.hasConverged())
			{
				printf("\033[11A");  // Go up 11 lines in terminal output.
				printf("\nICP has converged, score is %+.0e\n", icp.getFitnessScore());
				std::cout << "\nICP transformation " << ++iterations << " : cloud_icp -> cloud_in" << std::endl;
				transformation_matrix *= icp.getFinalTransformation().cast();  // WARNING /!\ This is not accurate!
				print4x4Matrix(transformation_matrix);  // 打印矩阵变换

				ss.str("");
				ss << iterations;
				std::string iterations_cnt = "ICP iterations = " + ss.str();
				viewer.updateText(iterations_cnt, 10, 60, 16, txt_gray_lvl, txt_gray_lvl, txt_gray_lvl, "iterations_cnt");
				viewer.updatePointCloud(cloud_icp, cloud_icp_color_h, "cloud_icp_v2");
			}
			else
			{
				PCL_ERROR("\nICP has not converged.\n");
				return (-1);
			}
		}
		next_iteration = false;
	}
	int a;
	cin >> a;
	return (0);
}
PCD文件可以随便找一个进行测试,也可以在我的网盘连接中进行下载:
链接:https://pan.baidu.com/s/1HaKm7uZlCRZkJYeULW10RA
提取码:bpmi