JVM 使用工具源监控资源消耗(内存、CPU、线程)
1、Jconsole
1.1 无密码登录
(1) 启动java程序
需要在启动脚本加入如下参数
-Dcom.sun.management.jmxremote
-Djava.rmi.server.hostname=192.168.40.226
-Dcom.sun.management.jmxremote.port=60001
-Dcom.sun.management.jmxremote.authenticate=false
-Dcom.sun.management.jmxremote.ssl=false
![]()
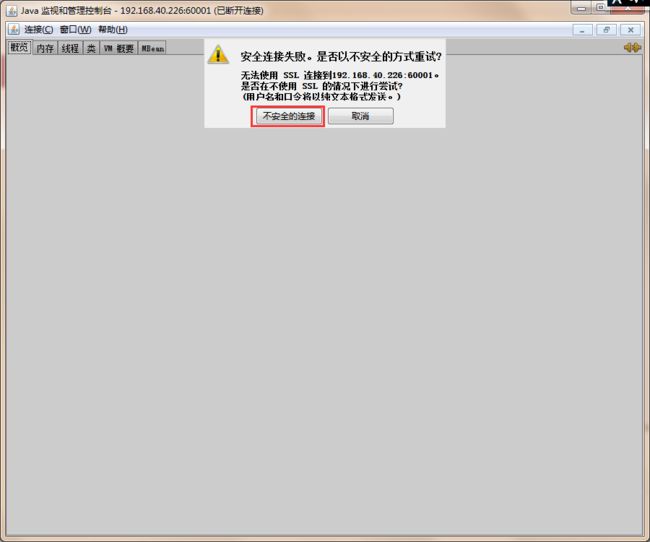
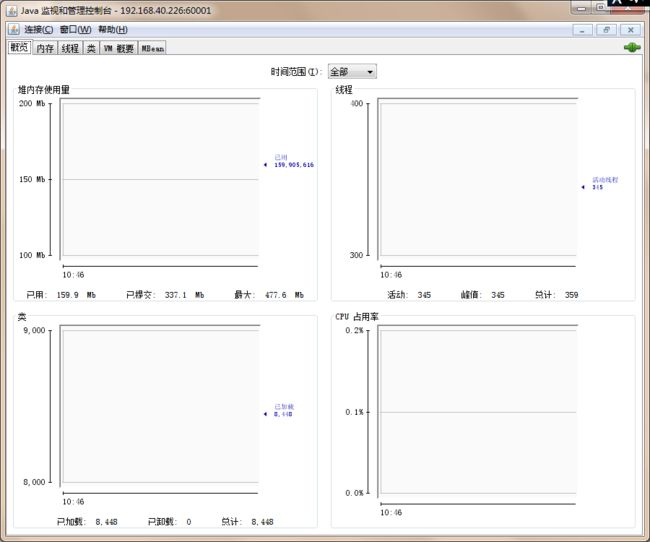
(2) 启动监控程序
在windows环境,在jdk的安装目录下jdk/bin/ ,打开jconsole.exe程序
2、jvisualvm
2.1 JMX远程
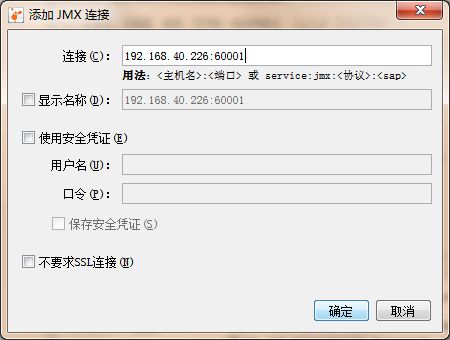
2.1.1 JMX远程连接、无密码登录
(1) 启动java程序
需要在启动脚本加入如下参数
-Dcom.sun.management.jmxremote
-Djava.rmi.server.hostname=192.168.40.226
-Dcom.sun.management.jmxremote.port=60001
-Dcom.sun.management.jmxremote.authenticate=false
-Dcom.sun.management.jmxremote.ssl=false
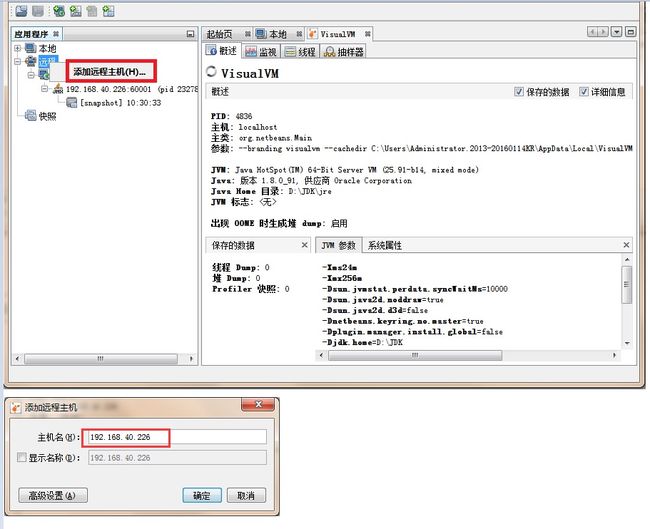
2.1.2 在windows环境,在jdk的安装目录下jdk/bin/ ,打开jvisualvm.exe程序
2.2.1 使用Jstatd
(1)在服务器启动jstatd服务
进入java安装目录下的bin目录,新建 jstatd.all.policy文件,文件名随意
cd $JAVA_HOME/bin
touch jstatd.all.policy
#文件中写入grant codebase"file:${java.home}/../lib/tools.jar"{ permission java.security.AllPermission; };
echo 'grant codebase"file:${java.home}/../lib/tools.jar"{ permission java.security.AllPermission; };' > jstatd.all.policy
#启动jstatd
./jstatd -J-Djava.security.policy=jstatd.all.policy -J-Djava.rmi.server.hostname=192.168.40.226
(2)windows中启动jvisualvm监控
在windows环境,在jdk的安装目录下jdk/bin/ ,打开jvisualvm.exe程序


