Oracle 19c RAC的安装
RDBMS 19.0.0.0
OS redhat7.4
SWAP配置,官方的建议:(单独安装Oracle)
https://docs.oracle.com/en/database/oracle/oracle-database/19/ladbi/server-configuration-checklist-for-oracle-database-installation.html#GUID-CD4657FB-2DDC-4B30-AAB4-2C927045A86D
4G-16G swap = ram
> 16G swap = 16G
SWAP配置,官方建议(安装GI)
Server Configuration Checklist for Oracle Grid Infrastructure
Use this checklist to check minimum server configuration requirements for Oracle Grid Infrastructure installations.
Table 1-3 Server Configuration Checklist for Oracle Grid Infrastructure
| Check | Task |
|---|---|
| Disk space allocated to the temporary file system | At least 1 GB of space in the temporary disk space ( |
| Swap space allocation relative to RAM | Between 4 GB and 16 GB: Equal to RAM |
https://docs.oracle.com/en/database/oracle/oracle-database/19/cwlin/server-configuration-checklist-for-oracle-grid-infrastructure.html#GUID-A7E9141D-1AFC-4CBF-846B-CD579FCFD9C0
Server Configuration Checklist for Oracle Database Installation
Use this checklist to check minimum server configuration requirements for Oracle Database installations.
Table 1-3 Server Configuration Checklist for Oracle Database
| Check | Task |
|---|---|
| Disk space allocated to the |
At least 1 GB of space in the |
| Swap space allocation relative to RAM (Oracle Database) |
Between 1 GB and 2 GB: 1.5 times the size of the RAM |
| Swap space allocation relative to RAM (Oracle Restart) |
Between 8 GB and 16 GB: Equal to the size of the RAM |
OS,以及基本的包的配置,请参考12c的文档(其实就是在12c所在的机器上安装的,只是昨天把12c的rac给卸载掉了,装19c的rac)
https://blog.csdn.net/xxzhaobb/article/details/85773542
安装需要的包(其他OS的包,参考官方文档)
https://docs.oracle.com/en/database/oracle/oracle-database/19/cwlin/supported-oracle-linux-7-distributions-for-x86-64.html#GUID-3E82890D-2552-4924-B458-70FFF02315F7
Supported Oracle Linux 7 Distributions for x86-64
Use the following information to check supported Oracle Linux 7 distributions:
Table 4-1 x86-64 Oracle Linux 7 Minimum Operating System Requirements
| Item | Requirements |
|---|---|
| SSH Requirement |
Ensure that OpenSSH is installed on your servers. OpenSSH is the required SSH software. |
| Oracle Linux 7 |
Subscribe to the Oracle Linux 7 channel on the Unbreakable Linux Network, or configure a yum repository from the Oracle Linux yum server website, and then install the Oracle Preinstallation RPM. This RPM installs all required kernel packages for Oracle Grid Infrastructure and Oracle Database installations, and performs other system configuration. Supported distributions:
|
| Packages for Oracle Linux 7 |
Install the latest released versions of the following packages: bc Note: If you intend to use 32-bit client applications to access 64-bit servers, then you must also install (where available) the latest 32-bit versions of the packages listed in this table. |
| KVM virtualization |
Kernel-based virtual machine (KVM), also known as KVM virtualization, is certified on Oracle Database 19c for all supported Oracle Linux 7 distributions. For more information on supported virtualization technologies for Oracle Database, refer to the virtualization matrix: https://www.oracle.com/database/technologies/virtualization-matrix.html |
安装Oracle软件需要的空间
https://docs.oracle.com/en/database/oracle/oracle-database/19/ladbi/storage-checklist-for-oracle-database-installation.html#GUID-C6184DFA-45A2-4420-99D6-237EA5BAB058
Storage Checklist for Oracle Database Installation
Use this checklist to review storage minimum requirements and assist with configuration planning.
Table 1-5 Storage Checklist for Oracle Database
| Check | Task |
|---|---|
| Minimum local disk storage space for Oracle software | For Linux x86-64: Note: Oracle recommends that you allocate approximately 100 GB to allow additional space for applying any future patches on top of the existing Oracle home. For specific patch-related disk space requirements, please refer to your patch documentation. |
| Select Database File Storage Option | Ensure that you have one of the following storage options available:
|
| Determine your recovery plan | If you want to enable recovery during installation, then be prepared to select one of the following options:
Review the storage configuration sections of this document for more information about configuring recovery. |
ASM磁盘组所需的空间(安装使用的OCR磁盘是3个5G)
https://docs.oracle.com/en/database/oracle/oracle-database/19/cwlin/oracle-clusterware-storage-space-requirements.html#GUID-97FD5D40-A65B-4575-AD12-06C491AF3F41
Oracle Clusterware Storage Space Requirements
Use this information to determine the minimum number of disks and the minimum disk space requirements based on the redundancy type, for installing Oracle Clusterware files for various Oracle Cluster deployments.
Total Oracle Clusterware Available Storage Space Required by Oracle Cluster Deployment Type
During installation of an Oracle Standalone Cluster, if you create the MGMT disk group for Grid Infrastructure Management Repository (GIMR), then the installer requires that you use a disk group with at least 35 GB of available space.
Note:
Starting with Oracle Grid Infrastructure 19c, configuring GIMR is optional for Oracle Standalone Cluster deployments. When upgrading to Oracle Grid Infrastructure 19c, a new GIMR is created only if the source Grid home has a GIMR configured.
Based on the cluster configuration you want to install, the Oracle Clusterware space requirements vary for different redundancy levels. The following tables list the space requirements for each cluster configuration and redundancy level.
Note:
The DATA disk group stores OCR and voting files, and the MGMT disk group stores GIMR and Oracle Clusterware backup files.
Table 8-1 Minimum Available Space Requirements for Oracle Standalone Cluster With GIMR Configuration
| Redundancy Level | DATA Disk Group | MGMT Disk Group | Oracle Fleet Patching and Provisioning | Total Storage |
|---|---|---|---|---|
| External |
1 GB |
28 GB Each node beyond four: 5 GB |
1 GB |
30 GB |
| Normal |
2 GB |
56 GB Each node beyond four: 5 GB |
2 GB |
60 GB |
| High/Flex/Extended |
3 GB |
84 GB Each node beyond four: 5 GB |
3 GB |
90 GB |
-
Oracle recommends that you use a separate disk group, other than
DATA, for GIMR and Oracle Clusterware backup files. -
The initial GIMR sizing for the Oracle Standalone Cluster is for up to four nodes. You must add additional storage space to the disk group containing the GIMR and Oracle Clusterware backup files for each new node added to the cluster.
-
By default, all new Oracle Standalone Cluster deployments are configured with Oracle Fleet Patching and Provisioning for patching that cluster only. This deployment requires a minimal ACFS file system that is automatically configured in the same disk group as the GIMR.
Table 8-2 Minimum Available Space Requirements for Oracle Standalone Cluster Without GIMR Configuration
| Redundancy Level | DATA Disk Group | Oracle Fleet Patching and Provisioning | Total Storage |
|---|---|---|---|
| External |
1 GB |
1 GB |
2 GB |
| Normal |
2 GB |
2 GB |
4 GB |
| High/Flex/Extended |
3 GB |
3 GB |
6 GB |
-
Oracle recommends that you use a separate disk group, other than
DATA, for Oracle Clusterware backup files. -
The initial sizing for the Oracle Standalone Cluster is for up to four nodes. You must add additional storage space to the disk group containing Oracle Clusterware backup files for each new node added to the cluster.
-
By default, all new Oracle Standalone Cluster deployments are configured with Oracle Fleet Patching and Provisioning for patching that cluster only. This deployment requires a minimal ACFS file system that is automatically configured.
Table 8-3 Minimum Available Space Requirements for Oracle Member Cluster with Local ASM
| Redundancy Level | DATA Disk Group | Oracle Clusterware Backup Files | Total Storage |
|---|---|---|---|
| External |
1 GB |
4 GB |
5 GB |
| Normal |
2 GB |
8 GB |
10 GB |
| High/Flex/Extended |
3 GB |
12 GB |
15 GB |
-
For Oracle Member Cluster, the storage space for the GIMR is pre-allocated in the centralized GIMR on the Oracle Domain Services Cluster as described in Table 8–5.
-
Oracle recommends that you use a separate disk group, other than
DATA, for Oracle Clusterware backup files.
Table 8-4 Minimum Available Space Requirements for Oracle Domain Services Cluster
| Redundancy Level | DATA Disk Group | MGMT Disk Group | Trace File Analyzer | Total Storage | Additional Oracle Member Cluster |
|---|---|---|---|---|---|
| External |
1 GB and 1 GB for each Oracle Member Cluster |
140 GB |
200 GB |
345 GB (excluding Oracle Fleet Patching and Provisioning) |
Oracle Fleet Patching and Provisioning: 100 GB GIMR for each Oracle Member Cluster beyond four: 28 GB |
| Normal |
2 GB and 2 GB for each Oracle Member Cluster |
280 GB |
400 GB |
690 GB (excluding Oracle Fleet Patching and Provisioning) |
Oracle Fleet Patching and Provisioning: 200 GB GIMR for each Oracle Member Cluster beyond four: 56 GB |
| High/Flex/Extended |
3 GB and 3 GB for each Oracle Member Cluster |
420 GB |
600 GB |
1035 GB (excluding Oracle Fleet Patching and Provisioning) |
Oracle Fleet Patching and Provisioning: 300 GB GIMR for each Oracle Member Cluster beyond four: 84 GB |
-
By default, the initial space allocation for the GIMR is for the Oracle Domain Services Cluster and four or fewer Oracle Member Clusters. You must add additional storage space for each Oracle Member Cluster beyond four.
-
At the time of installation, TFA storage space requirements are evaluated to ensure the growth to the maximum sizing is possible. Only the minimum space is allocated for the ACFS file system, which extends automatically up to the maximum value, as required.
-
Oracle recommends that you pre-allocate storage space for largest foreseeable configuration of the Oracle Domain Services Cluster according to the guidelines in the above table.
Parent topic: Configuring Storage for Oracle Automatic Storage Management
一 grid的安装
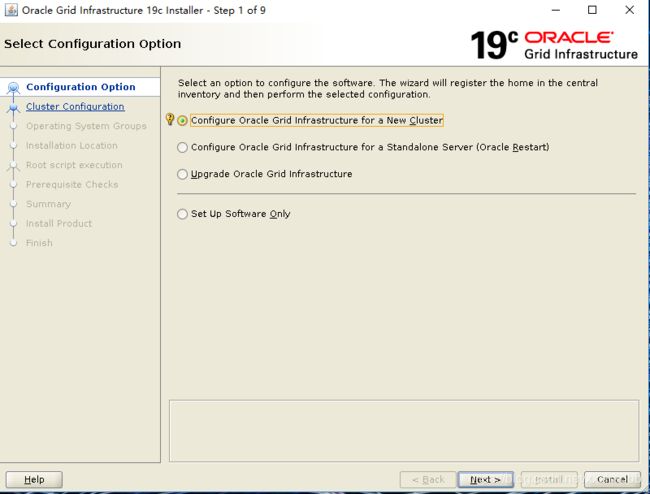
解压开GI的安装包后,有个脚本 gridSetup.sh 运行这个脚本即可。12c及12c之前是runInstaller。
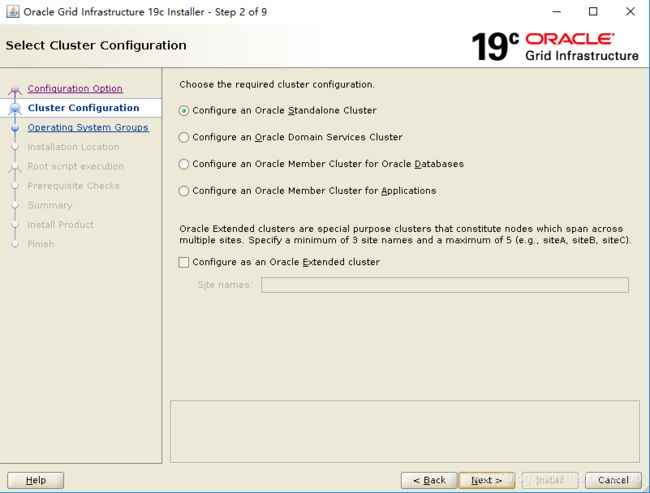
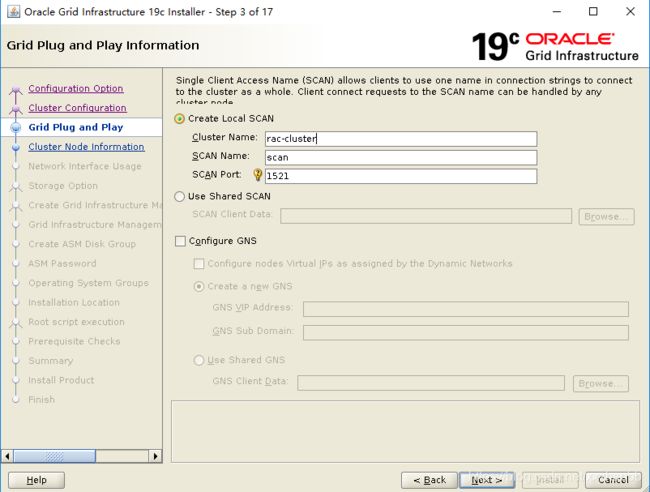
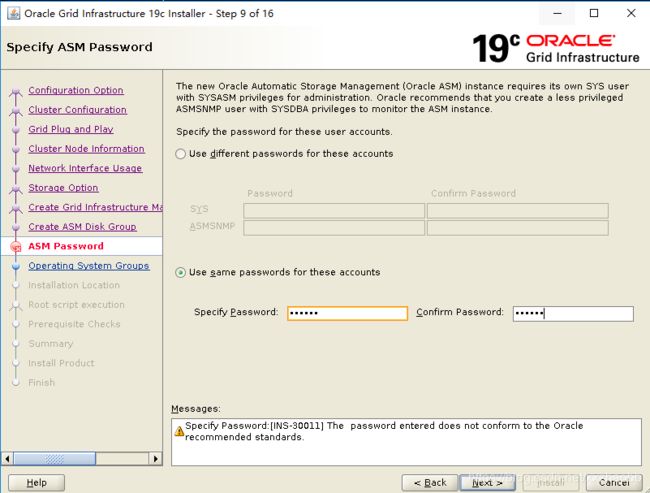
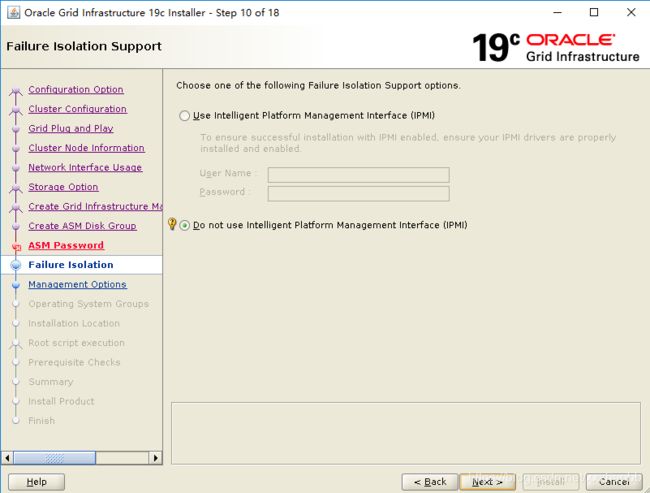
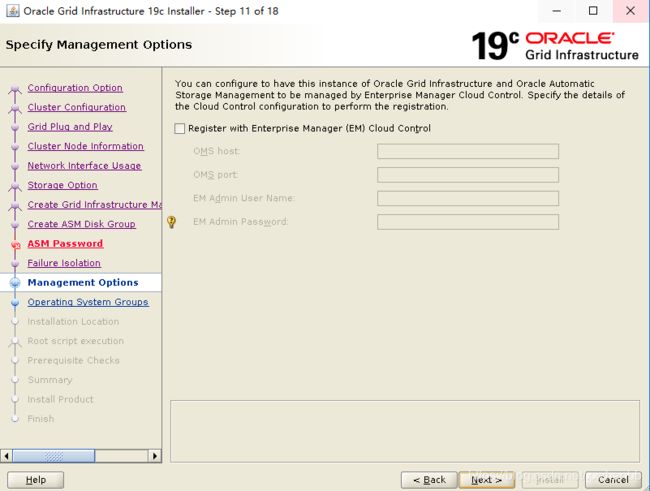
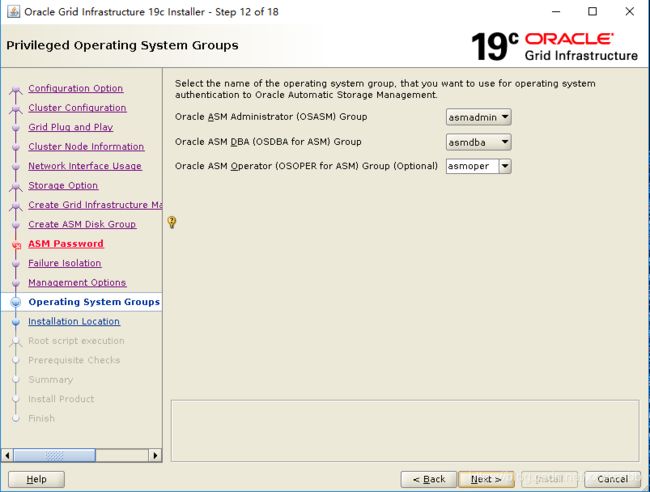
从下面的图中,看到19c的rac有很多新特性,暂时还不是很了解,选择第一个。
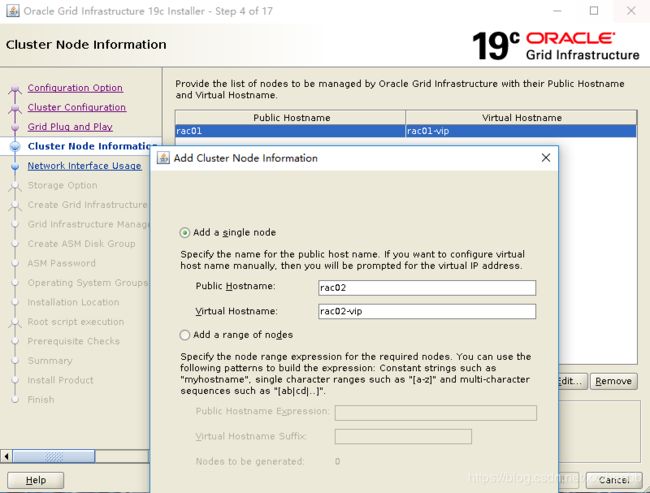
添加三个节点
添加完毕后,验证ssh
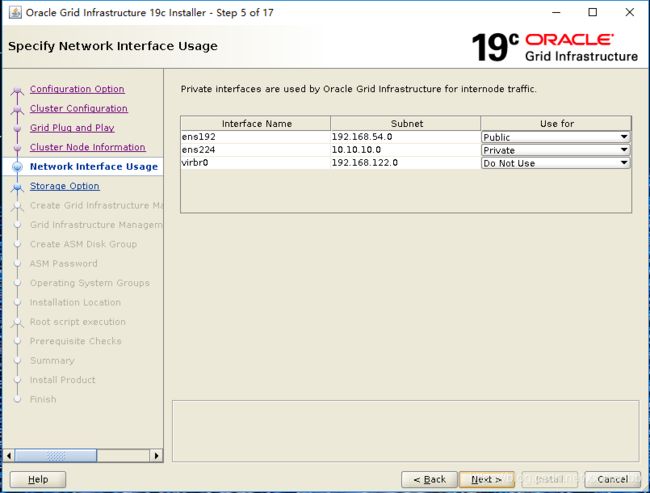
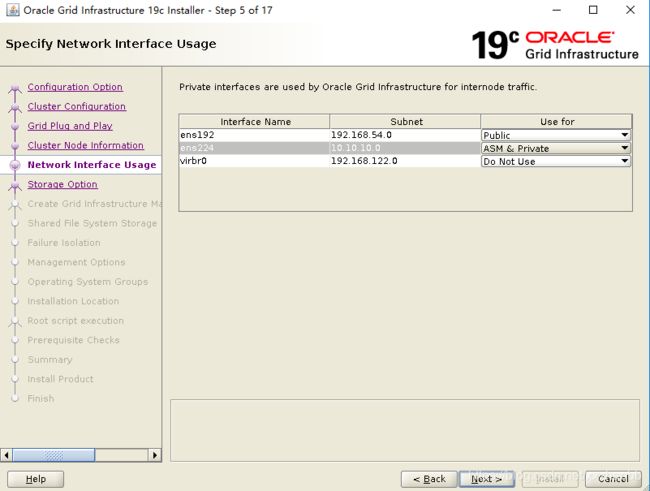
因为这里的私有网络的user for选择了private,导致后面出了问题。
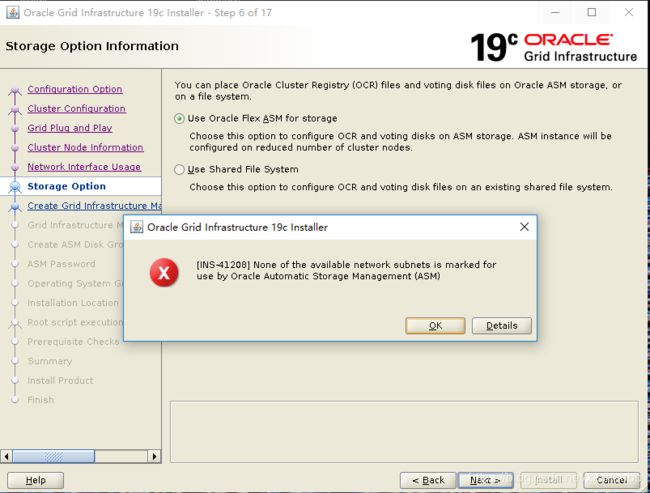
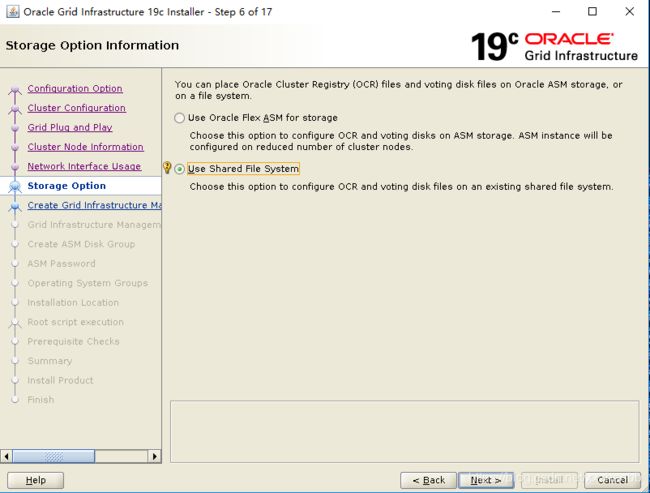
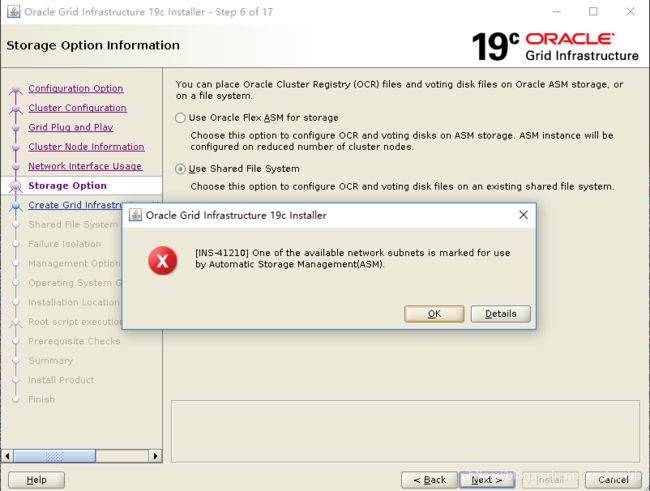
因为上面的选择,导致不能使用ASM,只能使用共享文件系统。
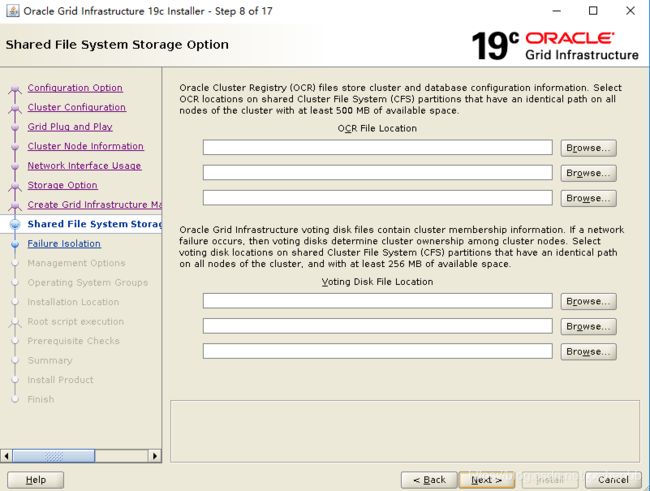
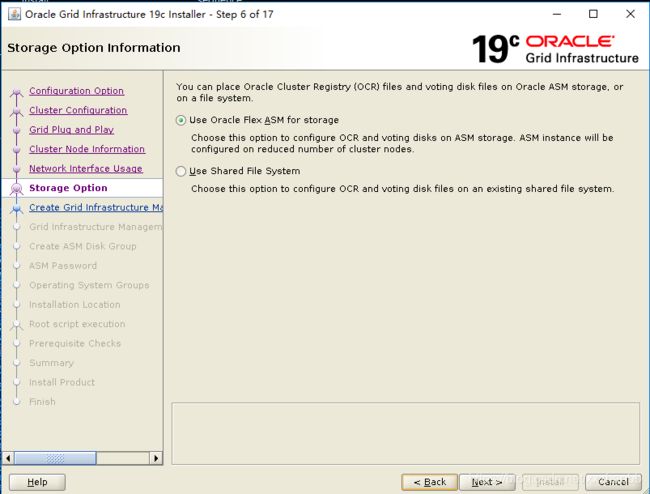
重新选择私网的use for 为ASM & private,后面可以使用ASM磁盘组了(不能使用文件系统了)。
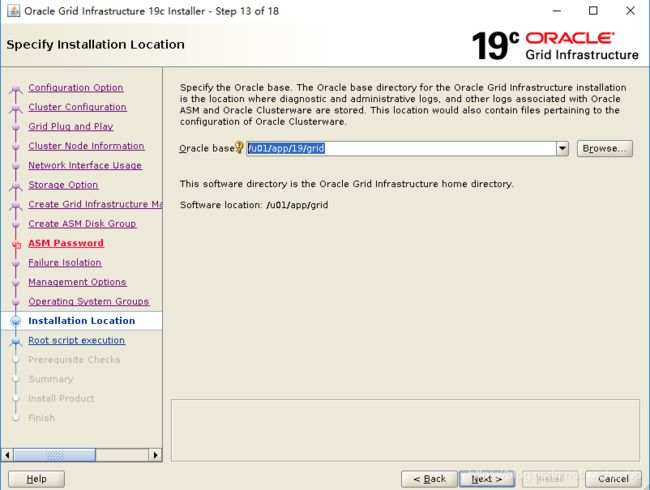
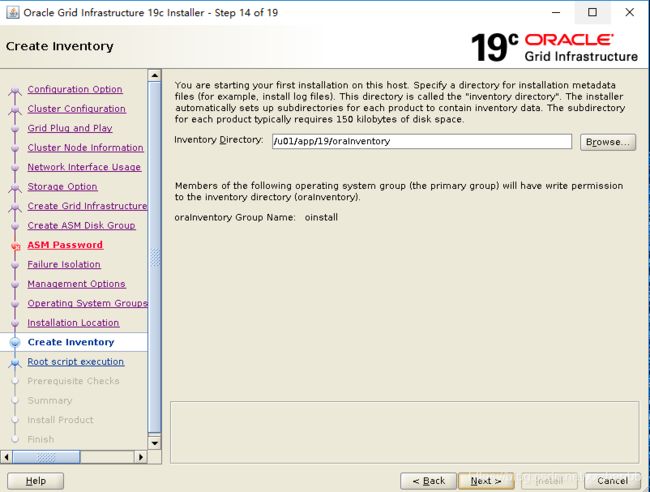
在这里,Oracle base和Oracle home一样,是不可以的。19c将安装文件所在的文件夹(这里直接把安装文件解压到了/u01/app/grid,所以这个目录就是ORACLE_HOME了),认定为ORACLE HOME。后面修正下,继续安装(三个节点都需要修改文件夹)
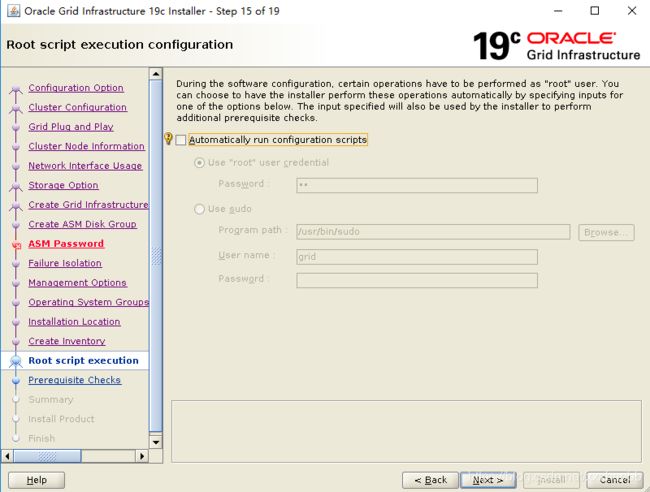
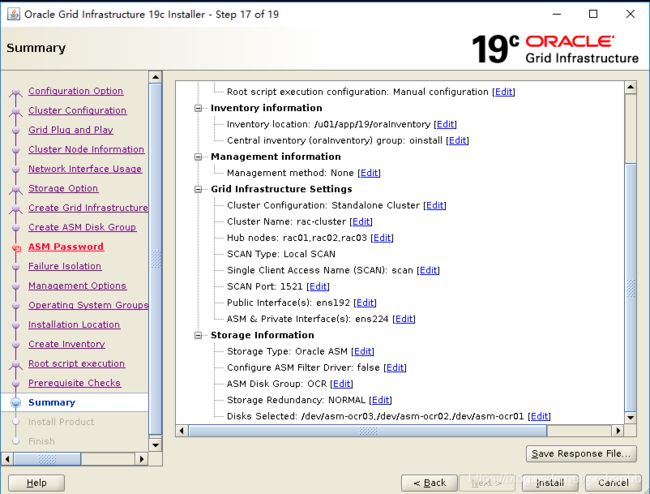
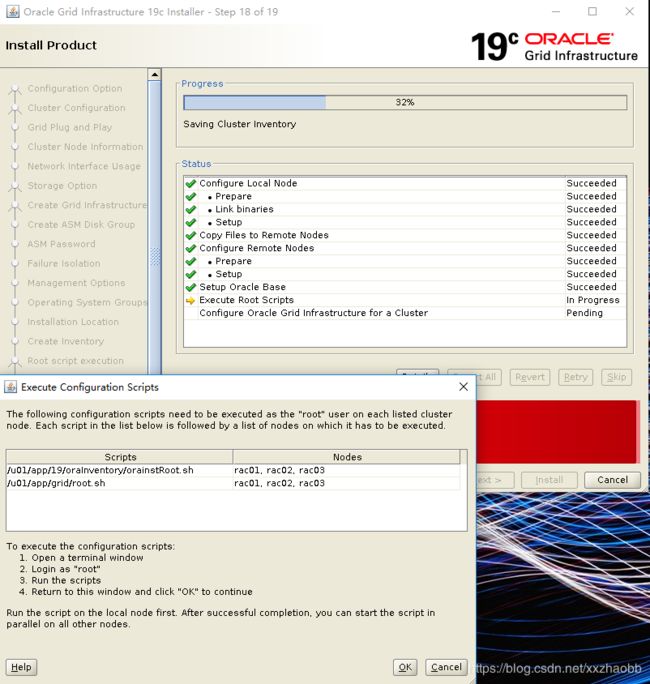
可以选择自动运行root.sh脚本,选择后,安装过程中会弹出窗口,问是否运行脚本。点击是,会自动在后台运行。这里选择手工运行脚本。
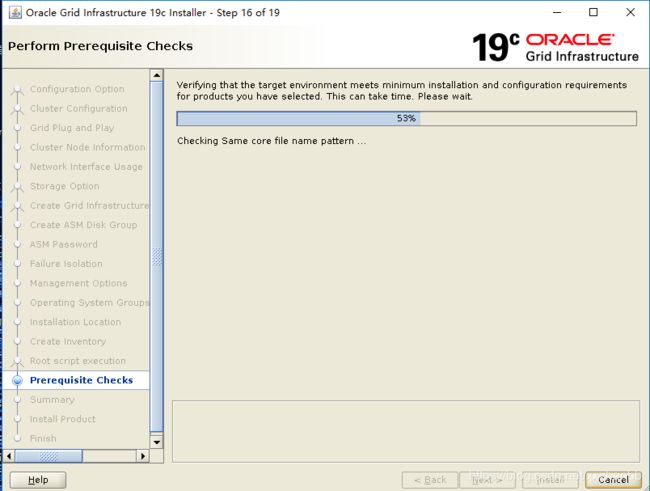
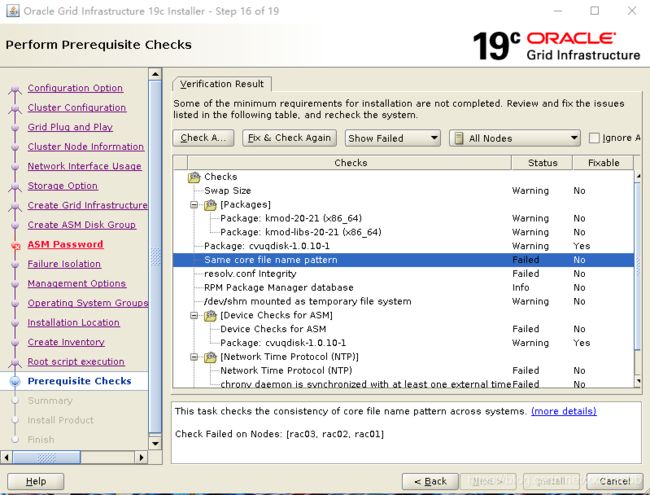
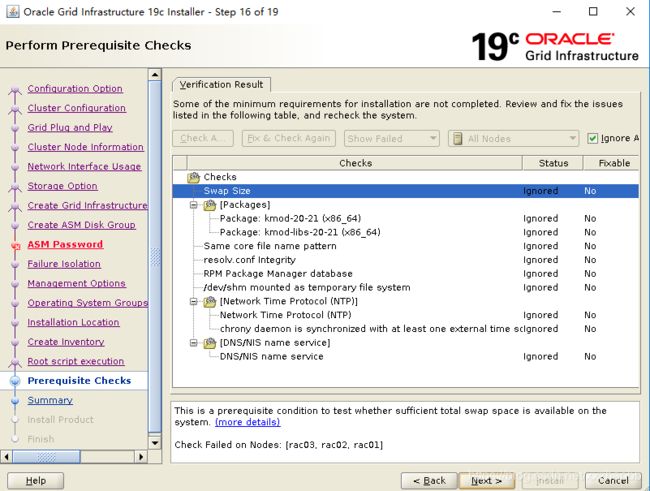
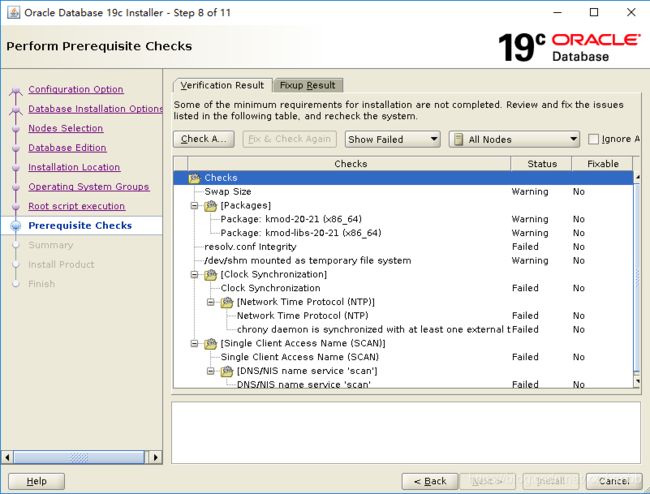
检测到一些问题,这里swap设置的很低。kmod包,和oracle 需要的办版本不一样(操作系统自带的是15,这里需要的是20),还有DNS,和NTP的一些问题,这里忽略。如果是正产环境,建议认真对待。
分别在三个节点上运行脚本。
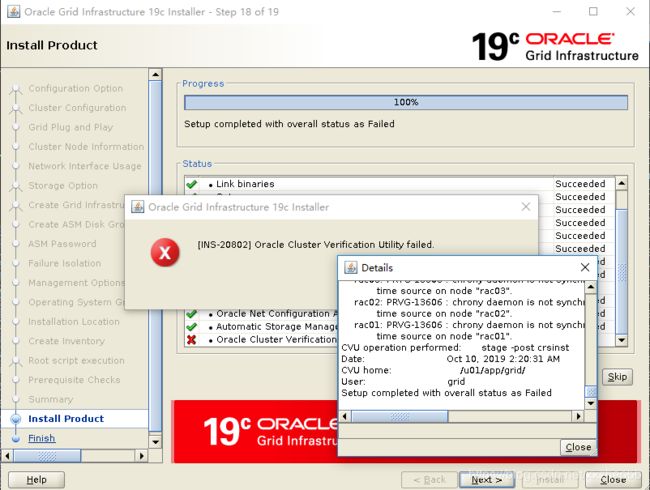
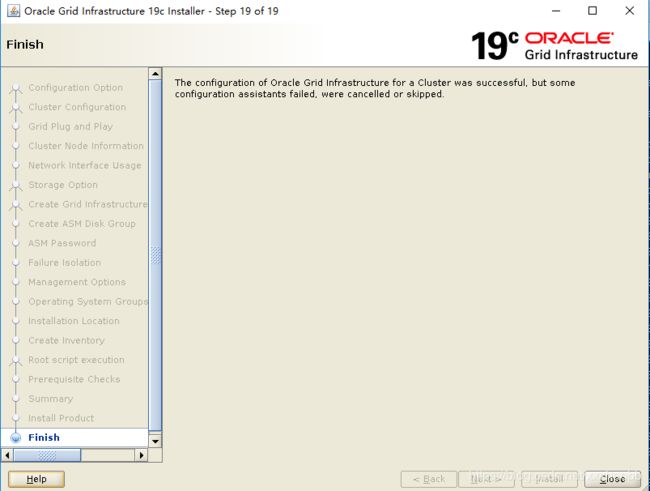
这个INS-20802忽略。
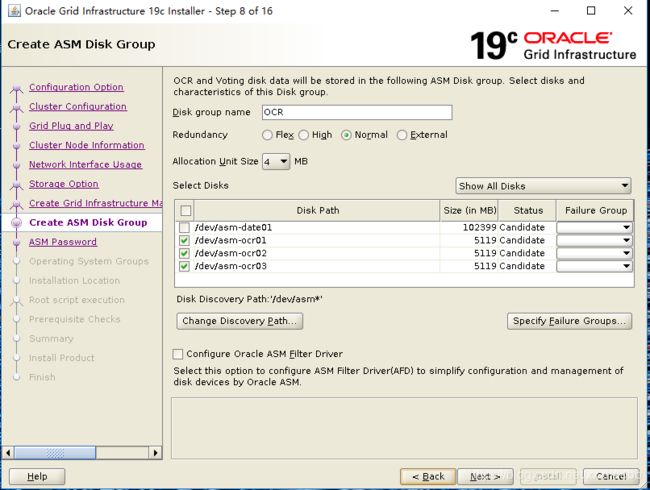
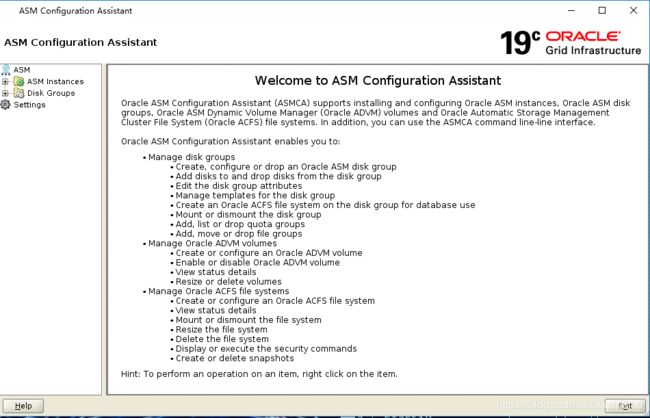
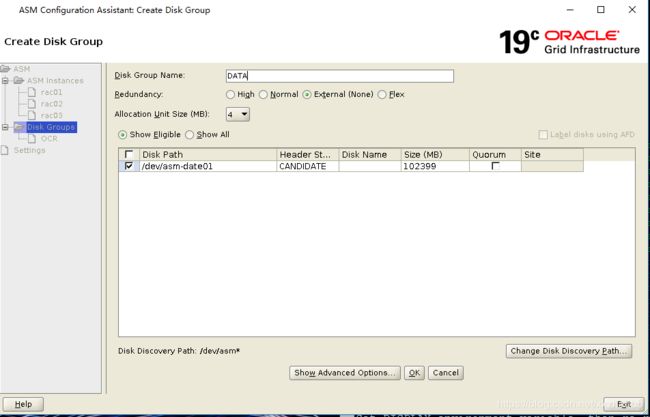
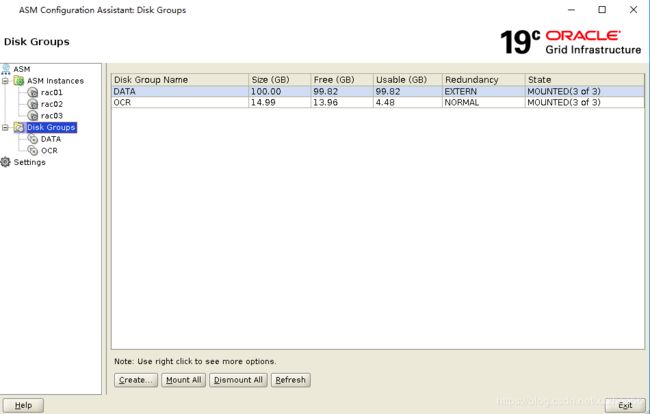
接下来配置磁盘组,ASMCA的界面和之前版本不一样。右键“新建磁盘组”进行创建
[root@rac01 grid]# sh root.sh
Performing root user operation.

The following environment variables are set as:
    ORACLE_OWNER= grid
    ORACLE_HOME=  /u01/app/grid

Enter the full pathname of the local bin directory: [/usr/local/bin]:
The contents of "dbhome" have not changed. No need to overwrite.
The file "oraenv" already exists in /usr/local/bin.  Overwrite it? (y/n)
[n]: y
   Copying oraenv to /usr/local/bin ...
The file "coraenv" already exists in /usr/local/bin.  Overwrite it? (y/n)
[n]: y
   Copying coraenv to /usr/local/bin ...


Creating /etc/oratab file...
Entries will be added to the /etc/oratab file as needed by
Database Configuration Assistant when a database is created
Finished running generic part of root script.
Now product-specific root actions will be performed.
Relinking oracle with rac_on option
Using configuration parameter file: /u01/app/grid/crs/install/crsconfig_params
The log of current session can be found at:
  /u01/app/19/grid/crsdata/rac01/crsconfig/rootcrs_rac01_2019-10-10_02-02-34AM.log
2019/10/10 02:02:46 CLSRSC-594: Executing installation step 1 of 19: 'SetupTFA'.
2019/10/10 02:02:46 CLSRSC-594: Executing installation step 2 of 19: 'ValidateEnv'.
2019/10/10 02:02:46 CLSRSC-363: User ignored prerequisites during installation
2019/10/10 02:02:46 CLSRSC-594: Executing installation step 3 of 19: 'CheckFirstNode'.
2019/10/10 02:02:48 CLSRSC-594: Executing installation step 4 of 19: 'GenSiteGUIDs'.
2019/10/10 02:02:49 CLSRSC-594: Executing installation step 5 of 19: 'SetupOSD'.
2019/10/10 02:02:49 CLSRSC-594: Executing installation step 6 of 19: 'CheckCRSConfig'.
2019/10/10 02:02:50 CLSRSC-594: Executing installation step 7 of 19: 'SetupLocalGPNP'.
2019/10/10 02:03:59 CLSRSC-594: Executing installation step 8 of 19: 'CreateRootCert'.
2019/10/10 02:04:09 CLSRSC-4002: Successfully installed Oracle Trace File Analyzer (TFA) Collector.
2019/10/10 02:04:12 CLSRSC-594: Executing installation step 9 of 19: 'ConfigOLR'.
2019/10/10 02:04:25 CLSRSC-594: Executing installation step 10 of 19: 'ConfigCHMOS'.
2019/10/10 02:04:25 CLSRSC-594: Executing installation step 11 of 19: 'CreateOHASD'.
2019/10/10 02:04:32 CLSRSC-594: Executing installation step 12 of 19: 'ConfigOHASD'.
2019/10/10 02:04:32 CLSRSC-330: Adding Clusterware entries to file 'oracle-ohasd.service'
2019/10/10 02:05:04 CLSRSC-594: Executing installation step 13 of 19: 'InstallAFD'.
2019/10/10 02:05:11 CLSRSC-594: Executing installation step 14 of 19: 'InstallACFS'.
2019/10/10 02:05:19 CLSRSC-594: Executing installation step 15 of 19: 'InstallKA'.
2019/10/10 02:05:30 CLSRSC-594: Executing installation step 16 of 19: 'InitConfig'.

ASM has been created and started successfully.

[DBT-30001] Disk groups created successfully. Check /u01/app/19/grid/cfgtoollogs/asmca/asmca-191010AM020606.log for details.

2019/10/10 02:07:14 CLSRSC-482: Running command: '/u01/app/grid/bin/ocrconfig -upgrade grid oinstall'
CRS-4256: Updating the profile
Successful addition of voting disk 6005aaca18ed4f16bf714cc6934fcdaa.
Successful addition of voting disk 985bbbceb1634f23bf14e02c67219bfb.
Successful addition of voting disk e4b9d2877f454f78bf6f4c947996ccc6.
Successfully replaced voting disk group with +OCR.
CRS-4256: Updating the profile
CRS-4266: Voting file(s) successfully replaced
##  STATE    File Universal Id                File Name Disk group
--  -----    -----------------                --------- ---------
 1. ONLINE   6005aaca18ed4f16bf714cc6934fcdaa (/dev/asm-ocr03) [OCR]
 2. ONLINE   985bbbceb1634f23bf14e02c67219bfb (/dev/asm-ocr02) [OCR]
 3. ONLINE   e4b9d2877f454f78bf6f4c947996ccc6 (/dev/asm-ocr01) [OCR]
Located 3 voting disk(s).
2019/10/10 02:08:51 CLSRSC-594: Executing installation step 17 of 19: 'StartCluster'.
2019/10/10 02:10:19 CLSRSC-343: Successfully started Oracle Clusterware stack
2019/10/10 02:10:19 CLSRSC-594: Executing installation step 18 of 19: 'ConfigNode'.
2019/10/10 02:12:26 CLSRSC-594: Executing installation step 19 of 19: 'PostConfig'.
2019/10/10 02:13:04 CLSRSC-325: Configure Oracle Grid Infrastructure for a Cluster ... succeeded
[root@rac01 grid]#
查看集群的状态
[grid@rac01 bin]$ ./crsctl status resource -t
--------------------------------------------------------------------------------
Name           Target  State        Server                   State details
--------------------------------------------------------------------------------
Local Resources
--------------------------------------------------------------------------------
ora.LISTENER.lsnr
               ONLINE  ONLINE       rac01                    STABLE
               ONLINE  ONLINE       rac02                    STABLE
               ONLINE  ONLINE       rac03                    STABLE
ora.chad
               ONLINE  ONLINE       rac01                    STABLE
               ONLINE  ONLINE       rac02                    STABLE
               ONLINE  ONLINE       rac03                    STABLE
ora.net1.network
               ONLINE  ONLINE       rac01                    STABLE
               ONLINE  ONLINE       rac02                    STABLE
               ONLINE  ONLINE       rac03                    STABLE
ora.ons
               ONLINE  ONLINE       rac01                    STABLE
               ONLINE  ONLINE       rac02                    STABLE
               ONLINE  ONLINE       rac03                    STABLE
--------------------------------------------------------------------------------
Cluster Resources
--------------------------------------------------------------------------------
ora.ASMNET1LSNR_ASM.lsnr(ora.asmgroup)
      1        ONLINE  ONLINE       rac01                    STABLE
      2        ONLINE  ONLINE       rac02                    STABLE
      3        ONLINE  ONLINE       rac03                    STABLE
ora.LISTENER_SCAN1.lsnr
      1        ONLINE  ONLINE       rac02                    STABLE
ora.LISTENER_SCAN2.lsnr
      1        ONLINE  ONLINE       rac03                    STABLE
ora.LISTENER_SCAN3.lsnr
      1        ONLINE  ONLINE       rac01                    STABLE
ora.OCR.dg(ora.asmgroup)
      1        ONLINE  ONLINE       rac01                    STABLE
      2        ONLINE  ONLINE       rac02                    STABLE
      3        ONLINE  ONLINE       rac03                    STABLE
ora.asm(ora.asmgroup)
      1        ONLINE  ONLINE       rac01                    Started,STABLE
      2        ONLINE  ONLINE       rac02                    Started,STABLE
      3        ONLINE  ONLINE       rac03                    Started,STABLE
ora.asmnet1.asmnetwork(ora.asmgroup)
      1        ONLINE  ONLINE       rac01                    STABLE
      2        ONLINE  ONLINE       rac02                    STABLE
      3        ONLINE  ONLINE       rac03                    STABLE
ora.cvu
      1        ONLINE  ONLINE       rac01                    STABLE
ora.qosmserver
      1        ONLINE  ONLINE       rac01                    STABLE
ora.rac01.vip
      1        ONLINE  ONLINE       rac01                    STABLE
ora.rac02.vip
      1        ONLINE  ONLINE       rac02                    STABLE
ora.rac03.vip
      1        ONLINE  ONLINE       rac03                    STABLE
ora.scan1.vip
      1        ONLINE  ONLINE       rac02                    STABLE
ora.scan2.vip
      1        ONLINE  ONLINE       rac03                    STABLE
ora.scan3.vip
      1        ONLINE  ONLINE       rac01                    STABLE
--------------------------------------------------------------------------------
[grid@rac01 bin]$
二 安装Oracle软件
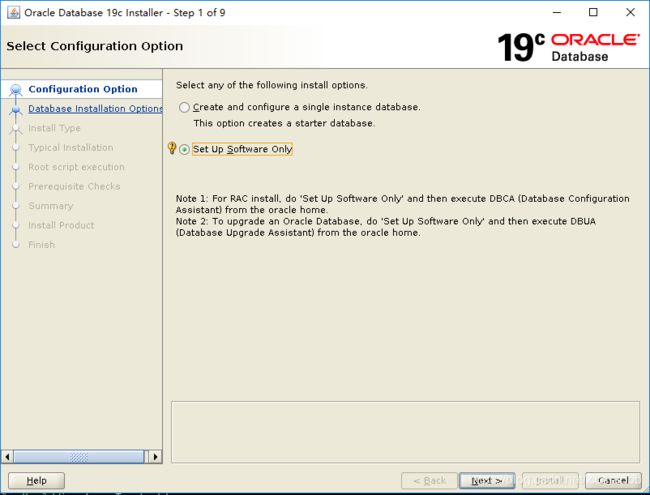
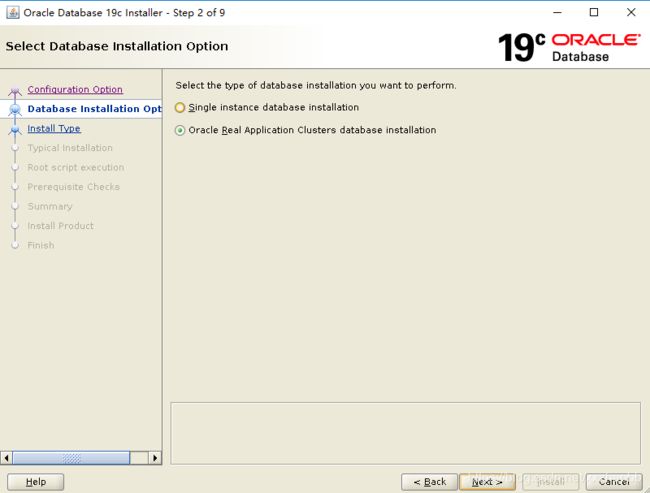
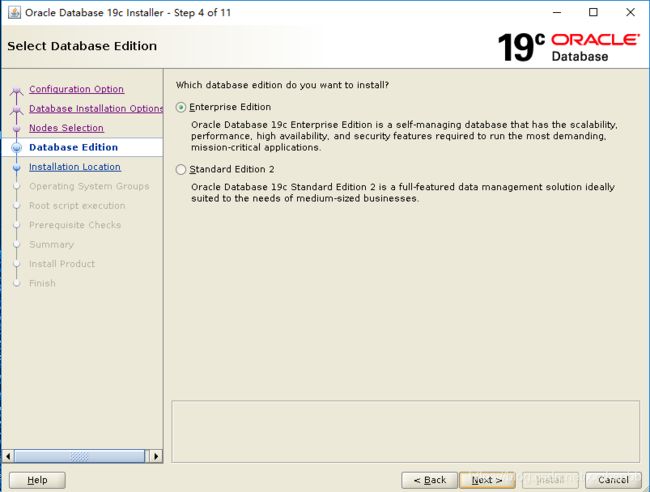
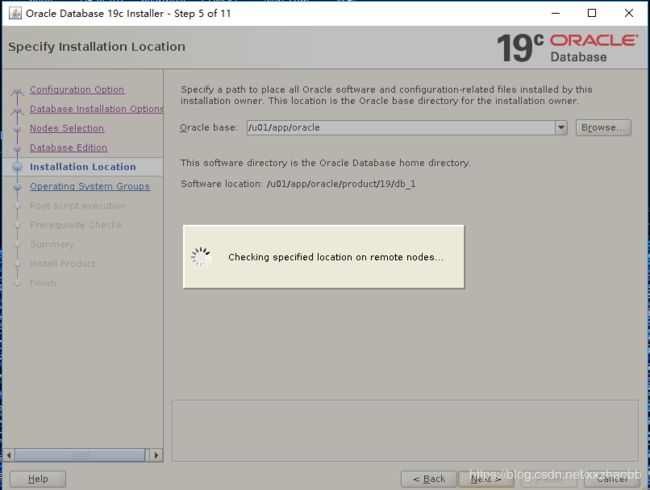
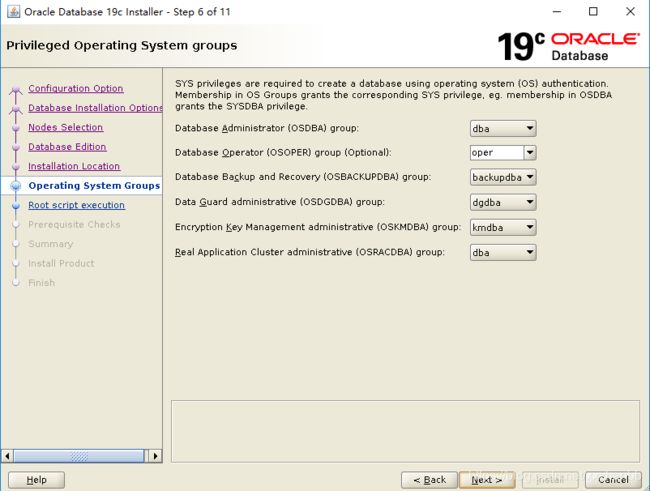
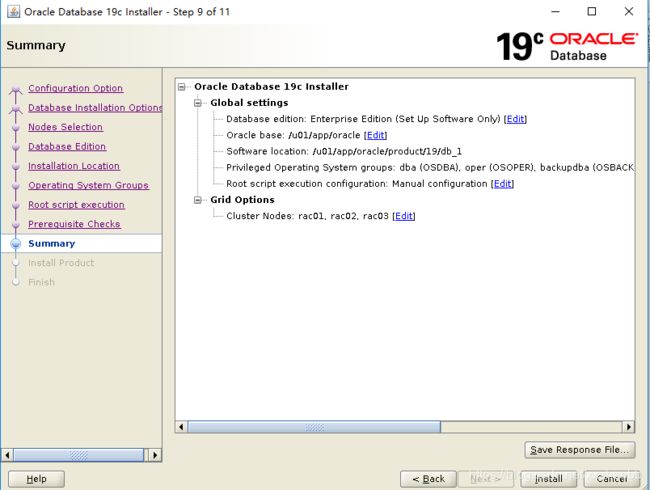
解压Oracle sofe的文件,运行runInstaller ,这个和之前的数据库安装是一样的。仅仅安装software。
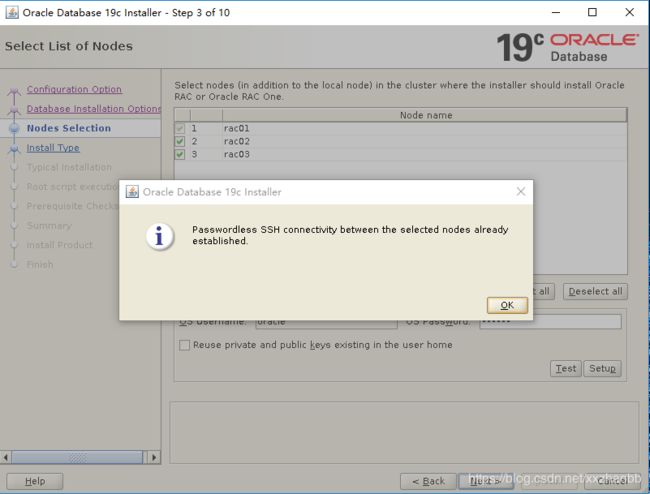
选择三个节点,验证ssh。
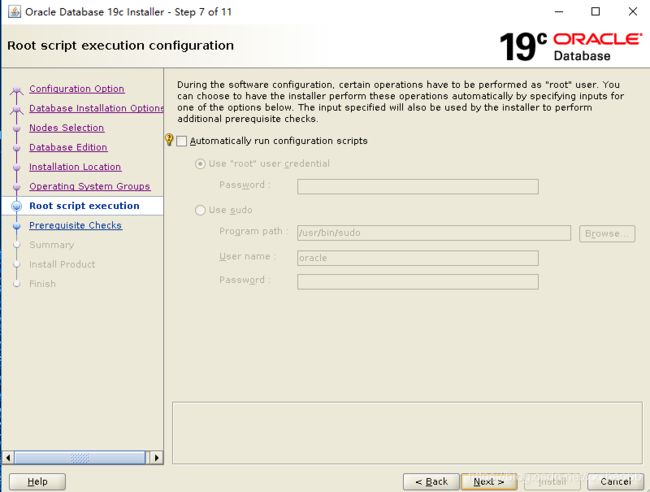
不选择自动运行脚本。后面手工运行。
又有一些问题,问题同上面GI的安装。忽略。
运行脚本。
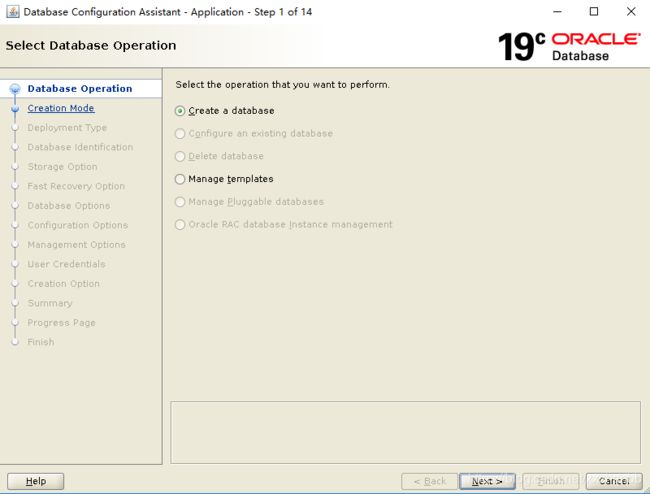
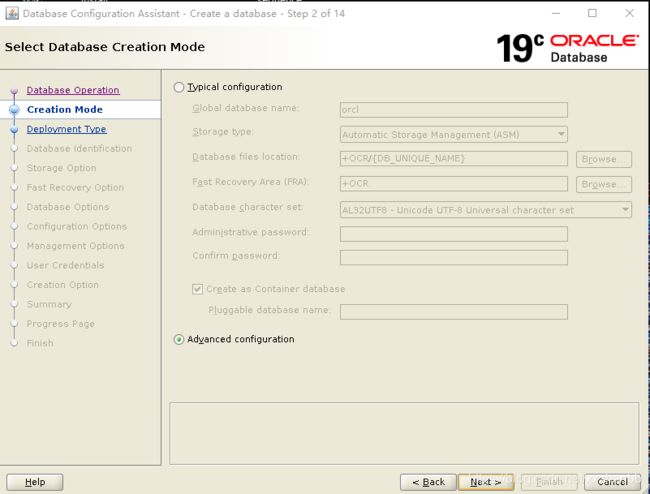
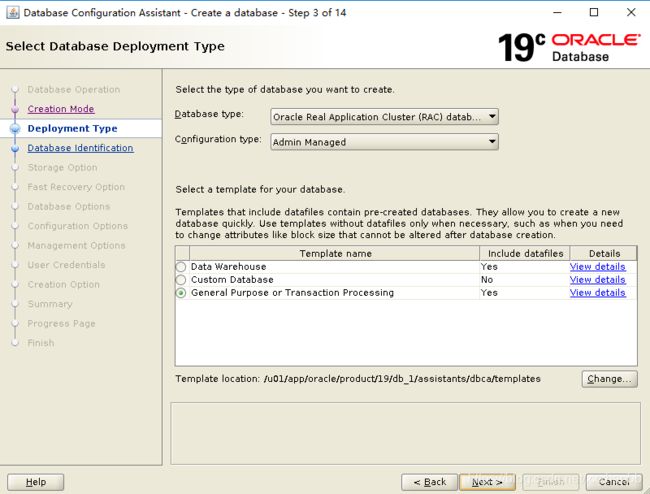
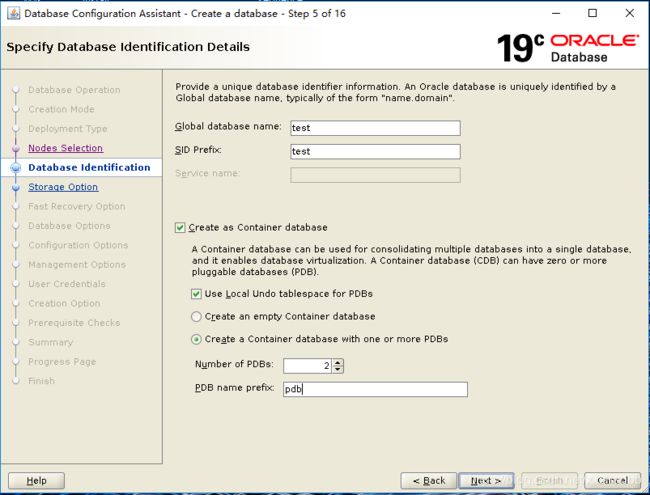
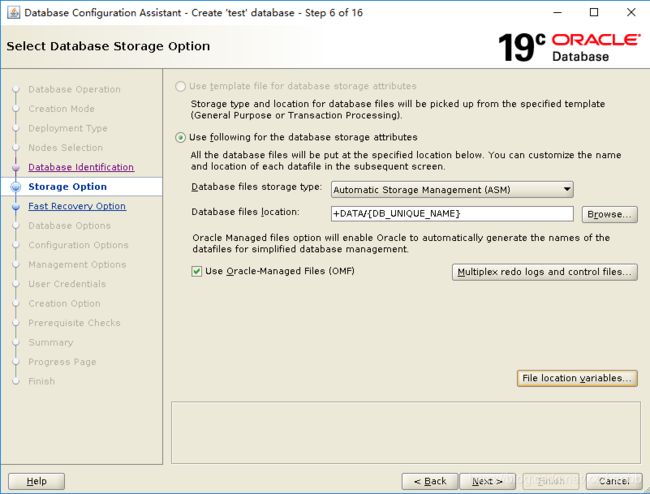
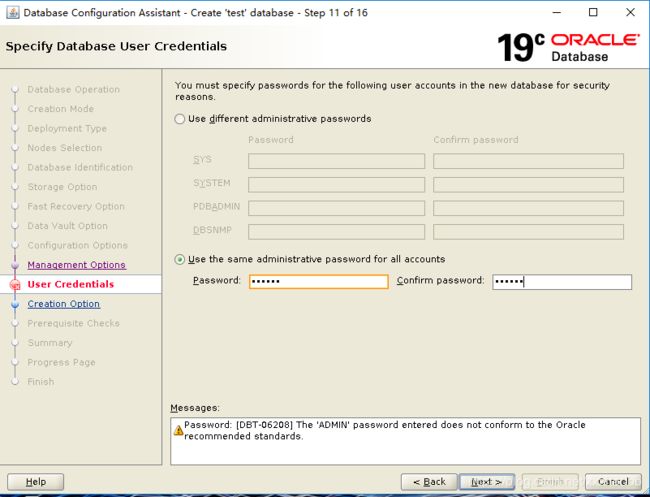
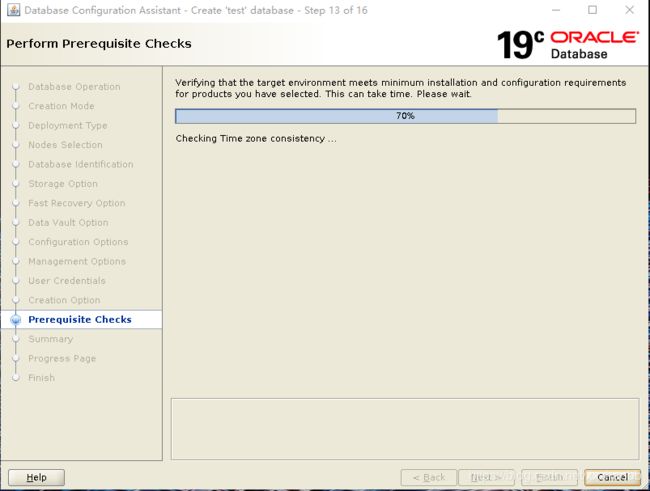
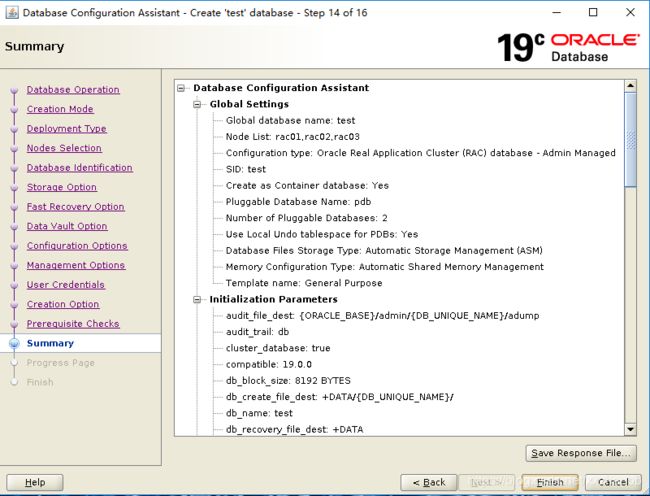
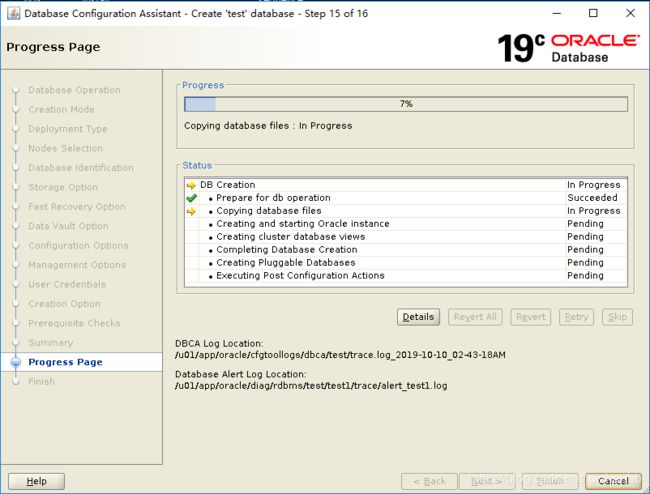
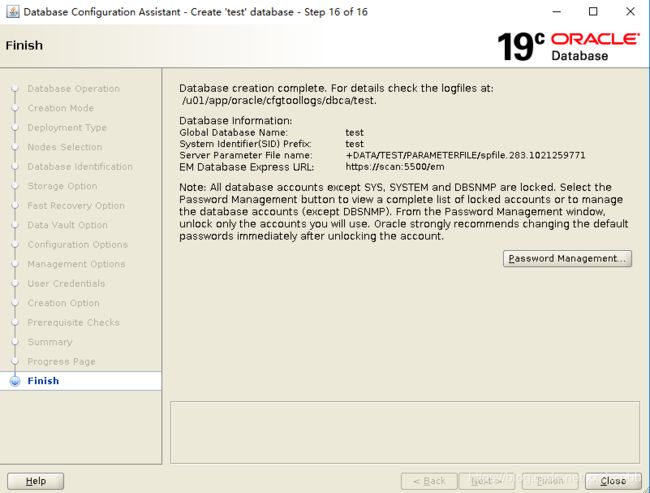
三 使用dbca建库
选择三个节点
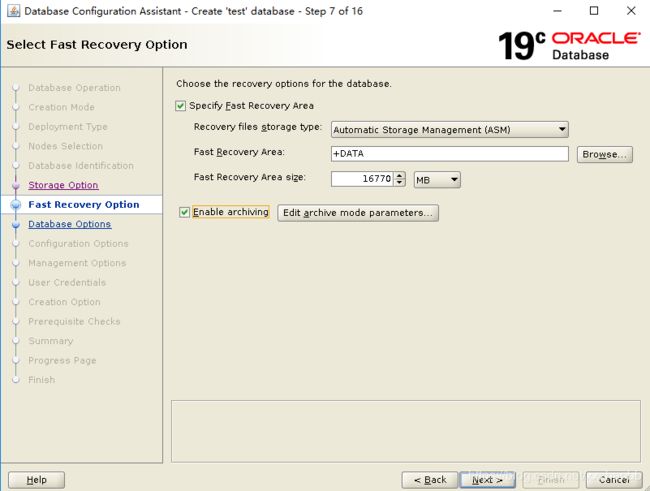
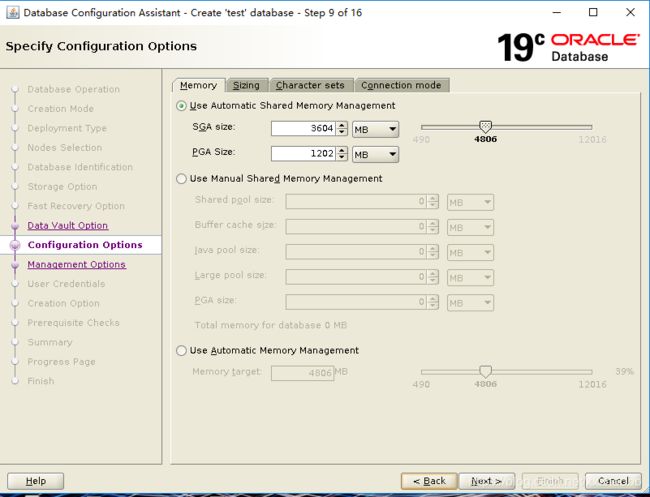
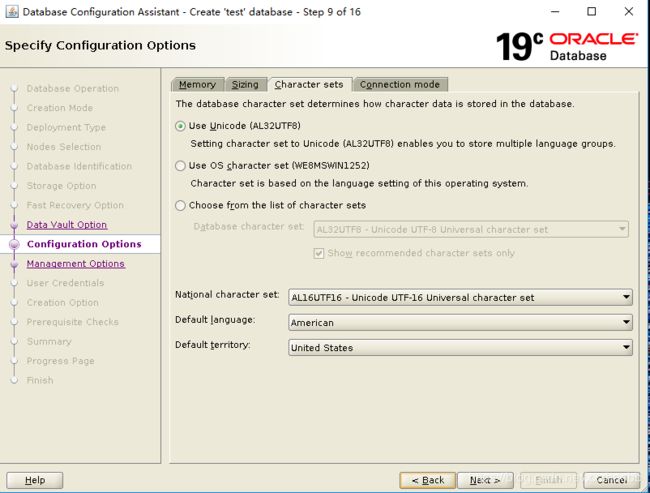
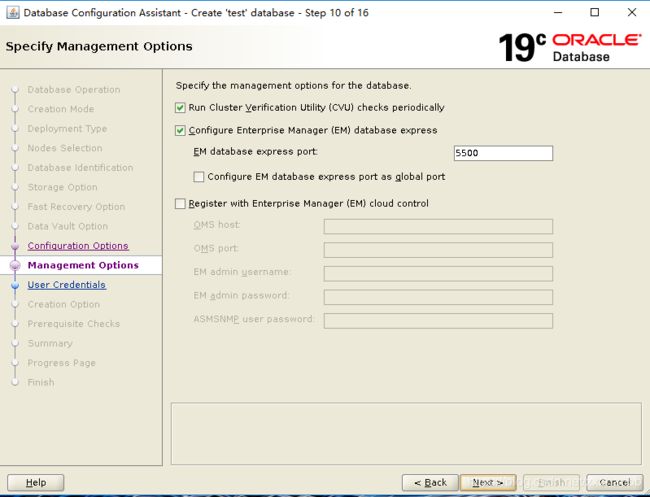
配置EM(安装完毕后,发现访问EM不能访问,可能和浏览器有关,电脑不能联网,电脑的OS和浏览器版本都很低,设置了TLS后还是不可以。)
下面的信息忽略
安装完毕。
END
-- 2019-11-07 add
ip 地址
[grid@rac03 ~]$ cat /etc/hosts
127.0.0.1   localhost localhost.localdomain localhost4 localhost4.localdomain4
::1         localhost localhost.localdomain localhost6 localhost6.localdomain6


#public
192.168.54.96   rac01
192.168.54.98   rac02
192.168.54.70   rac03

#vip
192.168.54.97   rac01-vip
192.168.54.99   rac02-vip
192.168.54.71   rac03-vip

#priv
10.10.10.96      rac01-priv
10.10.10.98      rac02-priv
10.10.10.70      rac03-priv

#scan
192.168.54.107   scan
192.168.54.100   scan
192.168.54.103   scan


[grid@rac03 ~]$
-- 节点3上的IP ,上面有scan地址192.168.54.103
[grid@rac03 ~]$ ifconfig
ens192: flags=4163  mtu 1500
        inet 192.168.54.70  netmask 255.255.255.0  broadcast 192.168.54.255
        inet6 fe80::c79b:7249:aca1:dc07  prefixlen 64  scopeid 0x20
        ether 00:50:56:88:31:15  txqueuelen 1000  (Ethernet)
        RX packets 17024565  bytes 24367762721 (22.6 GiB)
        RX errors 0  dropped 213  overruns 0  frame 0
        TX packets 7832041  bytes 2951236851 (2.7 GiB)
        TX errors 0  dropped 0 overruns 0  carrier 0  collisions 0

ens192:1: flags=4163  mtu 1500
        inet 192.168.54.71  netmask 255.255.255.0  broadcast 192.168.54.255
        ether 00:50:56:88:31:15  txqueuelen 1000  (Ethernet)

ens192:2: flags=4163  mtu 1500
        inet 192.168.54.103  netmask 255.255.255.0  broadcast 192.168.54.255
        ether 00:50:56:88:31:15  txqueuelen 1000  (Ethernet)

ens224: flags=4163  mtu 1500
        inet 10.10.10.70  netmask 255.255.255.0  broadcast 10.10.10.255
        inet6 fe80::118f:1b0f:7bc6:906f  prefixlen 64  scopeid 0x20
        ether 00:50:56:88:2d:21  txqueuelen 1000  (Ethernet)
        RX packets 289955663  bytes 286734267571 (267.0 GiB)
        RX errors 0  dropped 161  overruns 0  frame 0
        TX packets 212421492  bytes 268533222262 (250.0 GiB)
        TX errors 0  dropped 0 overruns 0  carrier 0  collisions 0

ens224:1: flags=4163  mtu 1500
        inet 169.254.12.152  netmask 255.255.224.0  broadcast 169.254.31.255
        ether 00:50:56:88:2d:21  txqueuelen 1000  (Ethernet)

lo: flags=73  mtu 65536
        inet 127.0.0.1  netmask 255.0.0.0
        inet6 ::1  prefixlen 128  scopeid 0x10
        loop  txqueuelen 1  (Local Loopback)
        RX packets 28866757  bytes 8435507332 (7.8 GiB)
        RX errors 0  dropped 0  overruns 0  frame 0
        TX packets 28866757  bytes 8435507332 (7.8 GiB)
        TX errors 0  dropped 0 overruns 0  carrier 0  collisions 0
-- 节点2上的地址 ,上面有scan地址192.168.54.107
[grid@rac02 ~]$ ifconfig
ens192: flags=4163  mtu 1500
        inet 192.168.54.98  netmask 255.255.255.0  broadcast 192.168.54.255
        inet6 fe80::f35b:46d3:d8f0:8c15  prefixlen 64  scopeid 0x20
        ether 00:50:56:88:57:19  txqueuelen 1000  (Ethernet)
        RX packets 13783391  bytes 21860005273 (20.3 GiB)
        RX errors 0  dropped 755  overruns 0  frame 0
        TX packets 4389295  bytes 842522035 (803.4 MiB)
        TX errors 0  dropped 0 overruns 0  carrier 0  collisions 0

ens192:2: flags=4163  mtu 1500
        inet 192.168.54.99  netmask 255.255.255.0  broadcast 192.168.54.255
        ether 00:50:56:88:57:19  txqueuelen 1000  (Ethernet)

ens192:3: flags=4163  mtu 1500
        inet 192.168.54.107  netmask 255.255.255.0  broadcast 192.168.54.255
        ether 00:50:56:88:57:19  txqueuelen 1000  (Ethernet)

ens224: flags=4163  mtu 1500
        inet 10.10.10.98  netmask 255.255.255.0  broadcast 10.10.10.255
        inet6 fe80::39e1:14f2:ad9d:c791  prefixlen 64  scopeid 0x20
        ether 00:50:56:88:04:12  txqueuelen 1000  (Ethernet)
        RX packets 254693238  bytes 240206790817 (223.7 GiB)
        RX errors 0  dropped 194  overruns 0  frame 0
        TX packets 316453984  bytes 431994200076 (402.3 GiB)
        TX errors 0  dropped 0 overruns 0  carrier 0  collisions 0

ens224:1: flags=4163  mtu 1500
        inet 169.254.1.122  netmask 255.255.224.0  broadcast 169.254.31.255
        ether 00:50:56:88:04:12  txqueuelen 1000  (Ethernet)

lo: flags=73  mtu 65536
        inet 127.0.0.1  netmask 255.0.0.0
        inet6 ::1  prefixlen 128  scopeid 0x10
        loop  txqueuelen 1  (Local Loopback)
        RX packets 24747392  bytes 8345325868 (7.7 GiB)
        RX errors 0  dropped 0  overruns 0  frame 0
        TX packets 24747392  bytes 8345325868 (7.7 GiB)
        TX errors 0  dropped 0 overruns 0  carrier 0  collisions 0
-- 节点1 上的地址,上面有scan地址192.168.54.100
[grid@rac01 ~]$ ifconfig
ens192: flags=4163  mtu 1500
        inet 192.168.54.96  netmask 255.255.255.0  broadcast 192.168.54.255
        inet6 fe80::dd6f:e645:58d9:6e76  prefixlen 64  scopeid 0x20
        ether 00:50:56:88:25:46  txqueuelen 1000  (Ethernet)
        RX packets 20038596  bytes 9612597615 (8.9 GiB)
        RX errors 0  dropped 176  overruns 0  frame 0
        TX packets 6043212  bytes 41545014567 (38.6 GiB)
        TX errors 0  dropped 0 overruns 0  carrier 0  collisions 0

ens192:1: flags=4163  mtu 1500
        inet 192.168.54.100  netmask 255.255.255.0  broadcast 192.168.54.255
        ether 00:50:56:88:25:46  txqueuelen 1000  (Ethernet)

ens192:2: flags=4163  mtu 1500
        inet 192.168.54.97  netmask 255.255.255.0  broadcast 192.168.54.255
        ether 00:50:56:88:25:46  txqueuelen 1000  (Ethernet)

ens224: flags=4163  mtu 1500
        inet 10.10.10.96  netmask 255.255.255.0  broadcast 10.10.10.255
        inet6 fe80::135c:d43b:6856:cc2f  prefixlen 64  scopeid 0x20
        ether 00:50:56:88:0c:ad  txqueuelen 1000  (Ethernet)
        RX packets 377655233  bytes 396033743569 (368.8 GiB)
        RX errors 0  dropped 174  overruns 0  frame 0
        TX packets 253973001  bytes 215210668026 (200.4 GiB)
        TX errors 0  dropped 0 overruns 0  carrier 0  collisions 0

ens224:1: flags=4163  mtu 1500
        inet 169.254.2.34  netmask 255.255.224.0  broadcast 169.254.31.255
        ether 00:50:56:88:0c:ad  txqueuelen 1000  (Ethernet)

lo: flags=73  mtu 65536
        inet 127.0.0.1  netmask 255.0.0.0
        inet6 ::1  prefixlen 128  scopeid 0x10
        loop  txqueuelen 1  (Local Loopback)
        RX packets 43997496  bytes 97206716457 (90.5 GiB)
        RX errors 0  dropped 0  overruns 0  frame 0
        TX packets 43997496  bytes 97206716457 (90.5 GiB)
        TX errors 0  dropped 0 overruns 0  carrier 0  collisions 0

virbr0: flags=4099  mtu 1500
        inet 192.168.122.1  netmask 255.255.255.0  broadcast 192.168.122.255
        ether 52:54:00:d8:9f:0a  txqueuelen 1000  (Ethernet)
        RX packets 0  bytes 0 (0.0 B)
        RX errors 0  dropped 0  overruns 0  frame 0
        TX packets 0  bytes 0 (0.0 B)
        TX errors 0  dropped 0 overruns 0  carrier 0  collisions 0

[grid@rac01 ~]$
-- 集群状态 ,scan[1,2,3]和listener_scan[1,2,3]
[grid@rac03 ~]$ crsctl status resource -t
--------------------------------------------------------------------------------
Name           Target  State        Server                   State details
--------------------------------------------------------------------------------
Local Resources
--------------------------------------------------------------------------------
ora.LISTENER.lsnr
               ONLINE  ONLINE       rac01                    STABLE
               ONLINE  ONLINE       rac02                    STABLE
               ONLINE  ONLINE       rac03                    STABLE
ora.chad
               ONLINE  ONLINE       rac01                    STABLE
               ONLINE  ONLINE       rac02                    STABLE
               ONLINE  ONLINE       rac03                    STABLE
ora.net1.network
               ONLINE  ONLINE       rac01                    STABLE
               ONLINE  ONLINE       rac02                    STABLE
               ONLINE  ONLINE       rac03                    STABLE
ora.ons
               ONLINE  ONLINE       rac01                    STABLE
               ONLINE  ONLINE       rac02                    STABLE
               ONLINE  ONLINE       rac03                    STABLE
--------------------------------------------------------------------------------
Cluster Resources
--------------------------------------------------------------------------------
ora.ASMNET1LSNR_ASM.lsnr(ora.asmgroup)
      1        ONLINE  ONLINE       rac01                    STABLE
      2        ONLINE  ONLINE       rac02                    STABLE
      3        ONLINE  ONLINE       rac03                    STABLE
ora.DATA.dg(ora.asmgroup)
      1        ONLINE  ONLINE       rac01                    STABLE
      2        ONLINE  ONLINE       rac02                    STABLE
      3        ONLINE  ONLINE       rac03                    STABLE
ora.LISTENER_SCAN1.lsnr
      1        ONLINE  ONLINE       rac01                    STABLE
ora.LISTENER_SCAN2.lsnr
      1        ONLINE  ONLINE       rac03                    STABLE
ora.LISTENER_SCAN3.lsnr
      1        ONLINE  ONLINE       rac02                    STABLE
ora.OCR.dg(ora.asmgroup)
      1        ONLINE  ONLINE       rac01                    STABLE
      2        ONLINE  ONLINE       rac02                    STABLE
      3        ONLINE  ONLINE       rac03                    STABLE
ora.asm(ora.asmgroup)
      1        ONLINE  ONLINE       rac01                    Started,STABLE
      2        ONLINE  ONLINE       rac02                    Started,STABLE
      3        ONLINE  ONLINE       rac03                    Started,STABLE
ora.asmnet1.asmnetwork(ora.asmgroup)
      1        ONLINE  ONLINE       rac01                    STABLE
      2        ONLINE  ONLINE       rac02                    STABLE
      3        ONLINE  ONLINE       rac03                    STABLE
ora.cvu
      1        ONLINE  ONLINE       rac02                    STABLE
ora.qosmserver
      1        ONLINE  ONLINE       rac02                    STABLE
ora.rac01.vip
      1        ONLINE  ONLINE       rac01                    STABLE
ora.rac02.vip
      1        ONLINE  ONLINE       rac02                    STABLE
ora.rac03.vip
      1        ONLINE  ONLINE       rac03                    STABLE
ora.scan1.vip
      1        ONLINE  ONLINE       rac01                    STABLE
ora.scan2.vip
      1        ONLINE  ONLINE       rac03                    STABLE
ora.scan3.vip
      1        ONLINE  ONLINE       rac02                    STABLE
ora.test.db
      1        ONLINE  ONLINE       rac01                    Open,HOME=/u01/app/o
                                                             racle/product/19/db_
                                                             1,STABLE
      2        ONLINE  ONLINE       rac02                    Open,HOME=/u01/app/o
                                                             racle/product/19/db_
                                                             1,STABLE
      3        ONLINE  ONLINE       rac03                    Open,HOME=/u01/app/o
                                                             racle/product/19/db_
                                                             1,STABLE
--------------------------------------------------------------------------------
end
-- 2020-04-30 add
grid bash 配置
export PATH
export ORACLE_SID=+ASM2
export ORACLE_BASE=/u01/app/grid
export ORACLE_HOME=/u01/app/19.0.0/grid
export PATH=$ORACLE_HOME/bin:$PATH
Oracle bash 配置
export ORACLE_SID=test2
export ORACLE_BASE=/u01/app/oracle
export ORACLE_HOME=/u01/app/oracle/product/19.0.0/db_1
export PATH=$ORACLE_HOME/bin:$PATH
解压grid和oracle安装文件
unzip LINUX.X64_193000_grid_home.zip -d /u01/app/19.0.0/grid
unzip LINUX.X64_193000_db_home.zip -d /u01/app/oracle/product/19.0.0/db_1
这样,就不会出现类似下面的问题了。
END
