CAS之 5.2x版本配置数据库认证-yellowcong
CAS单点登录的5.2版本,真的是变化真尼玛的大啊,我是看了很多资料才搞出来的,配置的大概步骤,配置CAS和数据库搞激的步骤:1、拷贝jar包,2、配置application.properties中数据库配置访问,3、建立数
据库的数据
源码地址
https://gitee.com/yellowcong/cas_demo/tree/master/cas-jdbc-demo
安装前准备
安装前,最好确认搭建好了Cas,如果没有,请参考下面的文章
Tomcat之CAS(单点登录) 5.2x版本安装-yellowcong
添加jar包
jar包下载地址
#官网下载地址
https://oss.sonatype.org/content/repositories/releases/org/apereo/cas/

#个人下载地址
http://yellowcong.qiniudn.com/cas-server-support-jdbc-5.2.0-all.zip
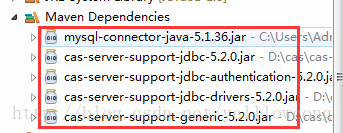
jar包详情
需要导入下面的包到数据库里面,这个直接访问他们官网是真的很慢啊。。。句话疼,啥都不想说了俺的版本是5.2版本的,你们注意自己的版本
#我将这几个jar包都打压缩包放到了
cas-server-support-jdbc-5.2.0.jar
cas-server-support-jdbc-authentication-5.2.0.jar
cas-server-support-jdbc-drivers-5.2.0.jar
cas-server-support-generic-5.2.0.jar
mysql-connector-java-5.1.36.jar
创建数据库
-- 开启远程访问
GRANT ALL PRIVILEGES ON *.*TO 'root'@'%' IDENTIFIED BY 'root' WITH GRANT OPTION;

-- 删除数据库,如果存在这个数据库
DROP DATABASE IF EXISTS yellowcong;

-- 创建数据库
CREATE DATABASE yellowcong;

-- 使用数据库
USE yellowcong;

-- 创建表
CREATE TABLE `yellowcong_users` (
  `id` INT(11) NOT NULL AUTO_INCREMENT,
  `age` INT(11) DEFAULT NULL,
  `nick_name` VARCHAR(32) DEFAULT NULL,
  `password` VARCHAR(32) DEFAULT NULL,
  `user_name` VARCHAR(32) DEFAULT NULL,
  PRIMARY KEY (`id`)
) ENGINE=INNODB AUTO_INCREMENT=15 DEFAULT CHARSET=utf8;


-- 插入数据
INSERT INTO yellowcong_users
  (id, age, nick_name, PASSWORD, user_name)
VALUES
  -- 4748f3d238406505bd50e5accc3a8aa2  这个是 doubi 的md5码
  (1, 12, 'yellowocng', '4748f3d238406505bd50e5accc3a8aa2', 'yellowcong'),
  (12, 1314, 'doubi', '4748f3d238406505bd50e5accc3a8aa2', 'test'),
  (13, 1314, 'doubi', '4748f3d238406505bd50e5accc3a8aa2', 'test2'),
  (14, NULL, NULL, 'doubi', 'doubi');
数据库配置
注意,我们是直接修改tomcat下面的cas/WEB-INF/classes目录下面的application.properties 配置文件

配置数据库信息,下面的配置,建议你们直接拷贝一份,然后在上面的基础上修改,这个地方我配置了md5加密
##
# CAS Server Context Configuration
#
server.context-path=/cas
server.port=8443

#添加认证服务
cas.serviceRegistry.initFromJson=true

#STEP 4签发证书,如果是用spring boot之类嵌入式的容器,则需要改这里的配置,如果是直接部在tomcat中,则需要把tomcat改成https的
#server.ssl.key-store=file:/etc/cas/thekeystore
#server.ssl.key-store-password=changeit
#server.ssl.key-password=changeit
# server.ssl.ciphers=
# server.ssl.client-auth=
# server.ssl.enabled=
# server.ssl.key-alias=
# server.ssl.key-store-provider=
# server.ssl.key-store-type=
# server.ssl.protocol=
# server.ssl.trust-store=
# server.ssl.trust-store-password=
# server.ssl.trust-store-provider=
# server.ssl.trust-store-type=

#server.max-http-header-size=2097152
#server.use-forward-headers=true
#server.connection-timeout=20000
#server.error.include-stacktrace=ALWAYS

#server.compression.enabled=true
#server.compression.mime-types=application/javascript,application/json,application/xml,text/html,text/xml,text/plain

#server.tomcat.max-http-post-size=2097152
#server.tomcat.basedir=build/tomcat
#server.tomcat.accesslog.enabled=true
#server.tomcat.accesslog.pattern=%t %a "%r" %s (%D ms)
#server.tomcat.accesslog.suffix=.log
#server.tomcat.max-threads=10
#server.tomcat.port-header=X-Forwarded-Port
#server.tomcat.protocol-header=X-Forwarded-Proto
#server.tomcat.protocol-header-https-value=https
#server.tomcat.remote-ip-header=X-FORWARDED-FOR
#server.tomcat.uri-encoding=UTF-8

spring.http.encoding.charset=UTF-8
spring.http.encoding.enabled=true
spring.http.encoding.force=true

##
# CAS Cloud Bus Configuration
#
spring.cloud.bus.enabled=false
# spring.cloud.bus.refresh.enabled=true
# spring.cloud.bus.env.enabled=true
# spring.cloud.bus.destination=CasCloudBus
# spring.cloud.bus.ack.enabled=true

endpoints.enabled=false
endpoints.sensitive=true

endpoints.restart.enabled=false
endpoints.shutdown.enabled=false

management.security.enabled=true
management.security.roles=ACTUATOR,ADMIN
management.security.sessions=if_required
management.context-path=/status
management.add-application-context-header=false

security.basic.authorize-mode=role
security.basic.enabled=false
security.basic.path=/cas/status/**

##
# CAS Web Application Session Configuration
#
server.session.timeout=300
server.session.cookie.http-only=true
server.session.tracking-modes=COOKIE

##
# CAS Thymeleaf View Configuration
#
spring.thymeleaf.encoding=UTF-8
spring.thymeleaf.cache=false
spring.thymeleaf.mode=HTML
##
# CAS Log4j Configuration
#
# logging.config=file:/etc/cas/log4j2.xml
server.context-parameters.isLog4jAutoInitializationDisabled=true

##
# CAS AspectJ Configuration
#
spring.aop.auto=true
spring.aop.proxy-target-class=true

##
# CAS Authentication Credentials
#
#cas.authn.accept.users=casuser::Mellon


#数据库配置
#配置密码加密
cas.authn.jdbc.query[0].passwordEncoder.type=DEFAULT
cas.authn.jdbc.query[0].passwordEncoder.characterEncoding=UTF-8
cas.authn.jdbc.query[0].passwordEncoder.encodingAlgorithm=MD5

cas.authn.jdbc.query[0].sql=SELECT * FROM yellowcong_users WHERE user_name =?
#select * from cms_auth_user where user_name=?
cas.authn.jdbc.query[0].healthQuery=
cas.authn.jdbc.query[0].isolateInternalQueries=false
cas.authn.jdbc.query[0].url=jdbc:mysql://127.0.0.1:3306/yellowcong?useUnicode=true&characterEncoding=UTF-8&autoReconnect=true&useSSL=false
cas.authn.jdbc.query[0].failFast=true
cas.authn.jdbc.query[0].isolationLevelName=ISOLATION_READ_COMMITTED
cas.authn.jdbc.query[0].dialect=org.hibernate.dialect.MySQLDialect
cas.authn.jdbc.query[0].leakThreshold=10
cas.authn.jdbc.query[0].propagationBehaviorName=PROPAGATION_REQUIRED
cas.authn.jdbc.query[0].batchSize=1
cas.authn.jdbc.query[0].user=root
#cas.authn.jdbc.query[0].ddlAuto=create-drop
cas.authn.jdbc.query[0].maxAgeDays=180
cas.authn.jdbc.query[0].password=root
cas.authn.jdbc.query[0].autocommit=false
cas.authn.jdbc.query[0].driverClass=com.mysql.jdbc.Driver
cas.authn.jdbc.query[0].idleTimeout=5000
# cas.authn.jdbc.query[0].credentialCriteria=
# cas.authn.jdbc.query[0].name=
# cas.authn.jdbc.query[0].order=0
# cas.authn.jdbc.query[0].dataSourceName=
# cas.authn.jdbc.query[0].dataSourceProxy=false
cas.authn.jdbc.query[0].fieldPassword=PASSWORD

#多属性
cas.authn.attributeRepository.jdbc[0].singleRow=true
cas.authn.attributeRepository.jdbc[0].order=0
cas.authn.attributeRepository.jdbc[0].url=jdbc:mysql://127.0.0.1:3306/yellowcong?useUnicode=true&characterEncoding=UTF-8&autoReconnect=true&useSSL=false
cas.authn.attributeRepository.jdbc[0].username=user_name
cas.authn.attributeRepository.jdbc[0].user=root
cas.authn.attributeRepository.jdbc[0].password=root
cas.authn.attributeRepository.jdbc[0].sql=select * from yellowcong_users where {0}
cas.authn.attributeRepository.jdbc[0].dialect=org.hibernate.dialect.MySQLDialect
cas.authn.attributeRepository.jdbc[0].ddlAuto=none
cas.authn.attributeRepository.jdbc[0].driverClass=com.mysql.jdbc.Driver
cas.authn.attributeRepository.jdbc[0].leakThreshold=10
cas.authn.attributeRepository.jdbc[0].propagationBehaviorName=PROPAGATION_REQUIRED
cas.authn.attributeRepository.jdbc[0].batchSize=1
cas.authn.attributeRepository.jdbc[0].healthQuery=SELECT 1
cas.authn.attributeRepository.jdbc[0].failFast=true
配置密码加密
配置密码为md5加密的方式
cas.authn.jdbc.query[0].passwordEncoder.type=DEFAULT
cas.authn.jdbc.query[0].passwordEncoder.characterEncoding=UTF-8
cas.authn.jdbc.query[0].passwordEncoder.encodingAlgorithm=MD5
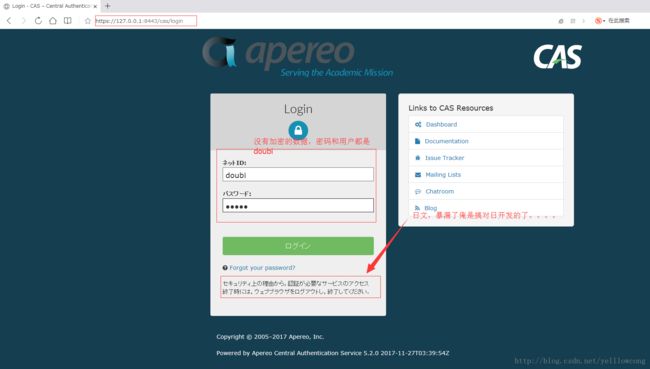
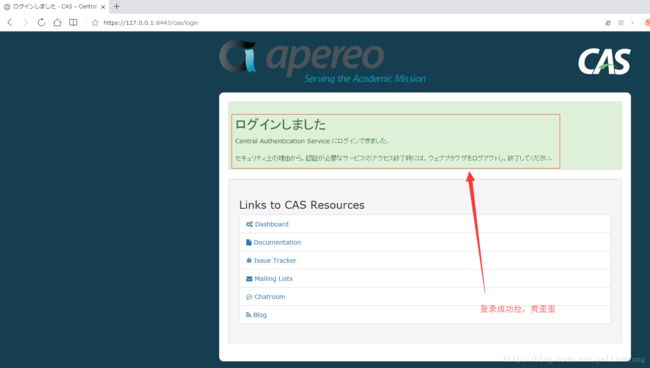
访问测试
数据库密码
参考文章
https://apereo.github.io/cas/5.1.x/installation/Configuration-Properties.html#jdbc
https://apereo.github.io/cas/5.1.x/installation/Configuration-Server-Management.html


