/*
 *    GeoTools - The Open Source Java GIS Toolkit
 *    http://geotools.org
 *
 *    (C) 2019, Open Source Geospatial Foundation (OSGeo)
 *
 *    This library is free software; you can redistribute it and/or
 *    modify it under the terms of the GNU Lesser General Public
 *    License as published by the Free Software Foundation;
 *    version 2.1 of the License.
 *
 *    This library is distributed in the hope that it will be useful,
 *    but WITHOUT ANY WARRANTY; without even the implied warranty of
 *    MERCHANTABILITY or FITNESS FOR A PARTICULAR PURPOSE.  See the GNU
 *    Lesser General Public License for more details.
 *
 */

package org.geotools.tutorial.quickstart;

import java.io.File;
import org.geotools.data.FileDataStore;
import org.geotools.data.FileDataStoreFinder;
import org.geotools.data.simple.SimpleFeatureSource;
import org.geotools.map.FeatureLayer;
import org.geotools.map.Layer;
import org.geotools.map.MapContent;
import org.geotools.styling.SLD;
import org.geotools.styling.Style;
import org.geotools.swing.JMapFrame;
import org.geotools.swing.data.JFileDataStoreChooser;

/**
 * Prompts the user for a shapefile and displays the contents on the screen in a map frame.
 *
 * This is the GeoTools Quickstart application used in documentationa and tutorials. *
 */
public class Quickstart {

    /**
     * GeoTools Quickstart demo application. Prompts the user for a shapefile and displays its
     * contents on the screen in a map frame
     */
    public static void main(String[] args) throws Exception {
        // display a data store file chooser dialog for shapefiles
        File file = JFileDataStoreChooser.showOpenFile("shp", null);
        if (file == null) {
            return;
        }

        FileDataStore store = FileDataStoreFinder.getDataStore(file);
        SimpleFeatureSource featureSource = store.getFeatureSource();

        // Create a map content and add our shapefile to it
        MapContent map = new MapContent();
        map.setTitle("Quickstart");

        Style style = SLD.createSimpleStyle(featureSource.getSchema());
        Layer layer = new FeatureLayer(featureSource, style);
        map.addLayer(layer);

        // Now display the map
        JMapFrame.showMap(map);
    }
}
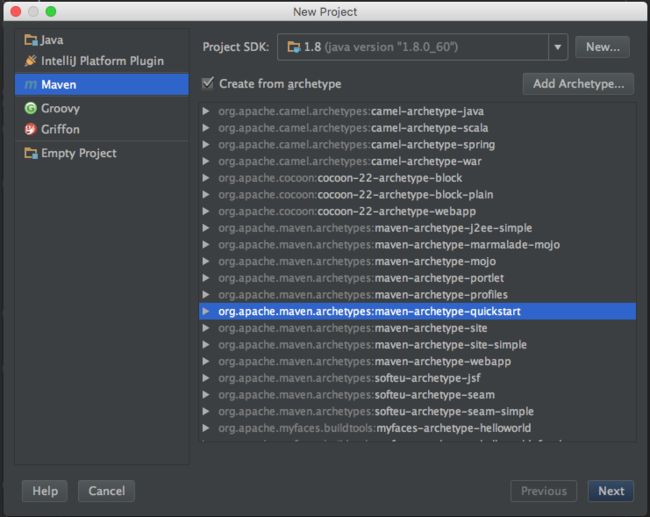
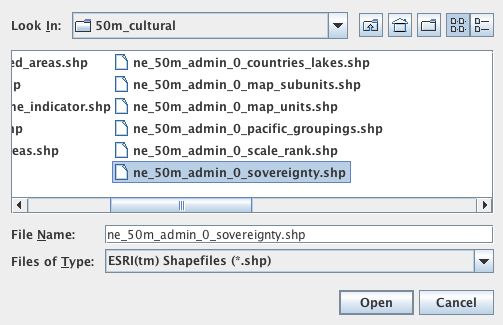
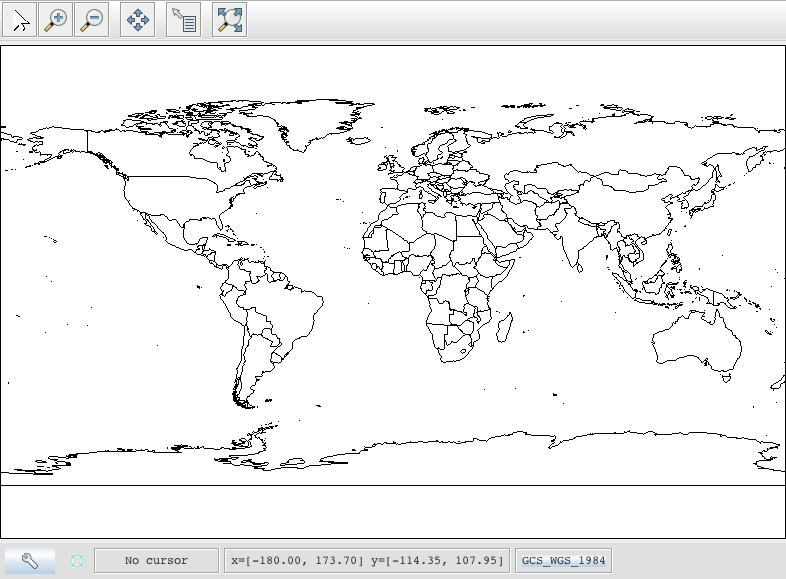
1.我们需要下载一些示例数据来使用。http://www.naturalearthdata.com/项目是一个由北美制图信 息协会支持的伟大项目。到下面的链接下载一些文化载体。你可以使用顶部的“Download all 50m cultural themes”。 1:50m文化载体 请将上述数据解压到您可以轻松找到的位置,如桌面。 1:50m Cultural Vectors 解压到一个容易找到的地方 2.运行应用程序以打开文件选择器。从示例数据集中选择一个shapefile
/**
     * This method demonstrates using a memory-based cache to speed up the display (e.g. when
     * zooming in and out).
     *
     * There is just one line extra compared to the main method, where we create an instance of
     * CachingFeatureStore.
     */
    public static void main(String[] args) throws Exception {
        // display a data store file chooser dialog for shapefiles
        File file = JFileDataStoreChooser.showOpenFile("shp", null);
        if (file == null) {
            return;
        }

        FileDataStore store = FileDataStoreFinder.getDataStore(file);
        SimpleFeatureSource featureSource = store.getFeatureSource();
        SimpleFeatureSource cachedSource =
                DataUtilities.source(
                        new SpatialIndexFeatureCollection(featureSource.getFeatures()));

        // Create a map content and add our shapefile to it
        MapContent map = new MapContent();
        map.setTitle("Using cached features");
        Style style = SLD.createSimpleStyle(featureSource.getSchema());
        Layer layer = new FeatureLayer(cachedSource, style);
        map.addLayer(layer);

        // Now display the map
        JMapFrame.showMap(map);
    }
A ROWID is an identification tag unique for each row of an Oracle Database table. The ROWID can be thought of as a virtual column, containing the ID for each row.
The oracle.sql.ROWID class i
public class DeleteNode_O1_Time {
/**
* Q 60 在O(1)时间删除链表结点
* 给定链表的头指针和一个结点指针(!!),在O(1)时间删除该结点
*
* Assume the list is:
* head->...->nodeToDelete->mNode->nNode->..
格式定义The format specifiers supported by the NSString formatting methods and CFString formatting functions follow the IEEE printf specification; the specifiers are summarized in Table 1. Note that you c
概念
AngularJS is a structural framework for dynamic web apps.
了解更多详情请见原文链接:http://www.gbtags.com/gb/share/5726.htm
Directive
扩展html,给html添加声明语句,以便实现自己的需求。对于页面中html元素以ng为前缀的属性名称,ng是angular的命名空间