离线安装部署ES权限控制search-guard
安装部署:
Elasticsearch 2.x和 Elasticsearch 5.x安装方式有所不同,以下以Elasticsearch 2.4.1版本
1、将从maven上面下载的ssl和guard的zip文件:https://bit.ly/2tNA8vY,并将下载的两个zip包放到别的目录下,千万不能放到es下plugins下
2、安装ssl和guard:
./bin/plugin install -b file:///etl_home/search-guard-ssl-2.4.1.18.zip
[root@webSvr elasticsearch-2.4.1]# ./bin/plugin install -b file:///etl_home/search-guard-ssl-2.4.1.18.zip
-> Installing from file:/etl_home/search-guard-ssl-2.4.1.18.zip...
Trying file:/etl_home/search-guard-ssl-2.4.1.18.zip ...
Downloading ...............DONE
Verifying file:/etl_home/search-guard-ssl-2.4.1.18.zip checksums if available ...
NOTE: Unable to verify checksum for downloaded plugin (unable to find .sha1 or .md5 file to verify)
@@@@@@@@@@@@@@@@@@@@@@@@@@@@@@@@@@@@@@@@@@@@@@@@@@@@@@@@@@@
@ WARNING: plugin requires additional permissions @
@@@@@@@@@@@@@@@@@@@@@@@@@@@@@@@@@@@@@@@@@@@@@@@@@@@@@@@@@@@
* java.lang.RuntimePermission accessClassInPackage.sun.misc
* java.lang.RuntimePermission getClassLoader
* java.lang.RuntimePermission loadLibrary.*
* java.lang.reflect.ReflectPermission suppressAccessChecks
* java.security.SecurityPermission getProperty.ssl.KeyManagerFactory.algorithm
See http://docs.oracle.com/javase/8/docs/technotes/guides/security/permissions.html
for descriptions of what these permissions allow and the associated risks.
Installed search-guard-ssl into /etl_home/elasticsearch-2.4.1/plugins/search-guard-ssl
[root@webSvr elasticsearch-2.4.1]# ./bin/plugin install -b file:///etl_home/search-guard-2-2.4.1.12.zip
-> Installing from file:/etl_home/search-guard-2-2.4.1.12.zip...
Trying file:/etl_home/search-guard-2-2.4.1.12.zip ...
Downloading ..DONE
Verifying file:/etl_home/search-guard-2-2.4.1.12.zip checksums if available ...
NOTE: Unable to verify checksum for downloaded plugin (unable to find .sha1 or .md5 file to verify)
@@@@@@@@@@@@@@@@@@@@@@@@@@@@@@@@@@@@@@@@@@@@@@@@@@@@@@@@@@@
@ WARNING: plugin requires additional permissions @
@@@@@@@@@@@@@@@@@@@@@@@@@@@@@@@@@@@@@@@@@@@@@@@@@@@@@@@@@@@
* java.lang.RuntimePermission accessDeclaredMembers
* java.lang.RuntimePermission getClassLoader
* java.lang.RuntimePermission setContextClassLoader
* java.lang.RuntimePermission shutdownHooks
* java.lang.reflect.ReflectPermission suppressAccessChecks
* javax.security.auth.AuthPermission doAs
* javax.security.auth.AuthPermission modifyPrivateCredentials
* javax.security.auth.kerberos.ServicePermission * accept
See http://docs.oracle.com/javase/8/docs/technotes/guides/security/permissions.html
for descriptions of what these permissions allow and the associated risks.
Installed search-guard-2 into /etl_home/elasticsearch-2.4.1/plugins/search-guard-2
安装成功ssl和guard,会在es的plugins下看到2个目录:
drwxr-xr-x. 4 root root 4096 10月 11 10:53 search-guard-2
drwxr-xr-x. 2 root root 4096 10月 11 10:52 search-guard-ssl
3.下载ssl对应的源码包,里面包含自动创建证书的脚本,解压进入目录
https://github.com/floragunncom/search-guard-ssl/tree/es-2.4.1
[root@webSvr etl_home]# unzip search-guard-ssl-es-2.4.1.zip
[root@webSvr etl_home]# cd search-guard-ssl-es-2.4.1
[root@webSvr search-guard-ssl-es-2.4.1]# cd example-pki-scripts
4、 编辑脚本 vim example.sh
原始内容
修改为:
#!/bin/bash
set -e
./clean.sh
./gen_root_ca.sh 12345678 12345678
./gen_node_cert.sh 116 12345678 12345678 && ./gen_node_cert.sh 119 12345678 12345678 && ./gen_node_cert.sh 2 12345678 12345678
./gen_client_node_cert.sh admin 12345678 12345678
rm -f ./*tmp*
(其中clean.sh是清除生成的证书文件)
5、执行example.sh生成密钥库和信任库
MAC verified OK
MAC verified OK
MAC verified OK
All done for admin
[etl@webSvr example-pki-scripts]$ ll
总用量 164
-rw-rw-r--. 1 etl etl 7081 10月 11 17:29 admin.all.pem
-rw-rw-r--. 1 etl etl 4565 10月 11 17:29 admin.crtfull.pem
-rw-rw-r--. 1 etl etl 1665 10月 11 17:29 admin.crt.pem
-rw-rw-r--. 1 etl etl 1039 10月 11 17:29 admin.csr
-rw-rw-r--. 1 etl etl 1846 10月 11 17:29 admin.key.pem
-rw-rw-r--. 1 etl etl 4426 10月 11 17:29 admin-keystore.jks
-rw-rw-r--. 1 etl etl 5258 10月 11 17:29 admin-keystore.p12
-rw-rw-r--. 1 etl etl 1399 10月 11 17:29 admin-signed.pem
drwxrwxr-x. 4 etl etl 4096 10月 11 17:28 ca
drwxrwxr-x. 2 etl etl 4096 10月 11 17:28 certs
-rwxr-xr-x. 1 etl etl 141 4月 16 01:23 clean.sh
drwxrwxr-x. 2 etl etl 4096 10月 11 17:28 crl
drwxr-xr-x. 2 etl etl 4096 4月 16 01:23 etc
-rwxr-xr-x. 1 etl etl 214 10月 11 17:28 example.sh
-rwxr-xr-x. 1 etl etl 2286 4月 16 01:23 gen_client_node_cert.sh
-rwxr-xr-x. 1 etl etl 1764 4月 16 01:23 gen_node_cert_openssl.sh
-rwxr-xr-x. 1 etl etl 2746 4月 16 01:23 gen_node_cert.sh
-rwxr-xr-x. 1 etl etl 1993 4月 16 01:23 gen_root_ca.sh
-rw-rw-r--. 1 etl etl 5342 10月 11 17:28 node-116.crt.pem
-rw-rw-r--. 1 etl etl 1132 10月 11 17:28 node-116.csr
-rw-rw-r--. 1 etl etl 1849 10月 11 17:28 node-116.key.pem
-rw-rw-r--. 1 etl etl 4498 10月 11 17:28 node-116-keystore.jks
-rw-rw-r--. 1 etl etl 5336 10月 11 17:28 node-116-keystore.p12
-rw-rw-r--. 1 etl etl 1493 10月 11 17:28 node-116-signed.pem
-rw-rw-r--. 1 etl etl 5342 10月 11 17:28 node-119.crt.pem
-rw-rw-r--. 1 etl etl 1132 10月 11 17:28 node-119.csr
-rw-rw-r--. 1 etl etl 1849 10月 11 17:28 node-119.key.pem
-rw-rw-r--. 1 etl etl 4496 10月 11 17:28 node-119-keystore.jks
-rw-rw-r--. 1 etl etl 5336 10月 11 17:28 node-119-keystore.p12
-rw-rw-r--. 1 etl etl 1493 10月 11 17:28 node-119-signed.pem
-rw-rw-r--. 1 etl etl 1096 10月 11 17:28 truststore.jks
6、复制密钥库和信任库文件
在每个节点上,将keystore.jks和truststore.jks文件放在了Elasticsearch的配置文件目录中。
并且给予Elasticsearch用户读取文件权限。keystore.jks在每个节点上是特定的
[etl@webSvr example-pki-scripts]$ cp node-116-keystore.jks truststore.jks /etl_home/elasticsearch-2.4.1/config/
[etl@webSvr example-pki-scripts]$ cp admin-keystore.jks truststore.jks /etl_home/elasticsearch-2.4.1/plugins/search-guard-2/sgconfig/
7、修改节点的elasticsearch.yml配置文件,比如119节点机器
# -------------------search guard config--------------------------
searchguard.authcz.admin_dn:
- "CN=admin, OU=client, O=client, L=Test, C=DE"
# 上面的CN的值是要和example.sh中的对应上
# -------------------search guard ssl-----------------------------
searchguard.ssl.transport.enabled: true
searchguard.ssl.transport.keystore_type: JKS
searchguard.ssl.transport.keystore_filepath: node-119-keystore.jks
searchguard.ssl.transport.keystore_password: 12345678
searchguard.ssl.transport.truststore_filepath: truststore.jks
searchguard.ssl.transport.truststore_password: 12345678
searchguard.ssl.transport.enforce_hostname_verification: false
searchguard.ssl.transport.resolve_hostname: false
searchguard.ssl.transport.enable_openssl_if_available: false
searchguard.ssl.transport.enabled_protocols:
- "TLSv1"
- "TLSv1.1"
- "TLSv1.2"
# http配置,这里我只是为了测试方便,配置完,应该设置为true
searchguard.ssl.http.enabled: false
searchguard.ssl.http.keystore_filepath: node-119-keystore.jks
searchguard.ssl.http.keystore_password: 12345678
searchguard.ssl.http.truststore_filepath: truststore.jks
searchguard.ssl.http.truststore_password: 12345678
searchguard.allow_all_from_loopback: true
8、执行脚本
./plugins/search-guard-2/tools/sgadmin.sh -cn dic_etl -h 192.168.129.116 -cd plugins/search-guard-2/sgconfig -ks plugins/search-guard-2/sgconfig/admin-keystore.jks -kspass 12345678 -ts plugins/search-guard-2/sgconfig/truststore.jks -tspass 12345678 -nhnv
验证权限
1、 生成密码,添加用户
[root@webSvr tools]# ./hash.sh -p zyl
$2a$12$RuFlJX31YeaLehfz.LGTDuBwKNSaAblM5hddGlYmZWgnK8KA/.KGG
[root@webSvr sgconfig]# vi sg_internal_users.yml
2、 添加用户权限映射关系权限
vim sg_roles_mapping.yml
3、重新写入配置文件(无需启动ES)
./plugins/search-guard-2/tools/sgadmin.sh -cn dic_etl -h 192.168.129.116 -cd plugins/search-guard-2/sgconfig -ks plugins/search-guard-2/sgconfig/admin-keystore.jks -kspass 12345678 -ts plugins/search-guard-2/sgconfig/truststore.jks -tspass 12345678 -nhnv
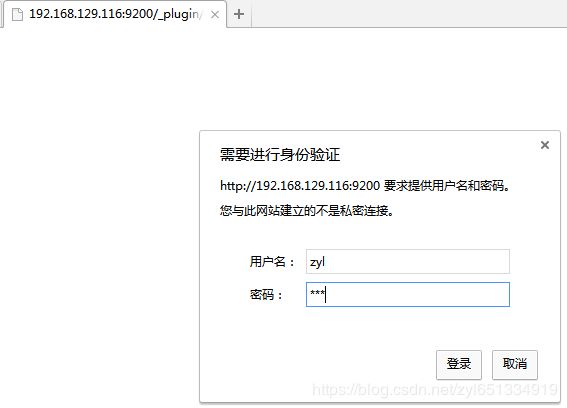
登录zyl用户之后拥有了admin的权限,对ES中下的索引都可操作
现要求zyl用户只对customer索引有权限,对dic_etl无权限操作
问题:
1、启动报错
解决方法:下载更新版本的ssl,search-guard-ssl-2.4.1.21.zip
http://floragunncom.github.io/search-guard-docs/installation.html
2、
[2017-10-11 21:07:45,557][INFO ][com.floragunn.searchguard.action.configupdate.TransportConfigUpdateAction] [node-116] searchguard index does not exist yet, so no need to load config on node startup. Use sgadmin to initialize cluster
[2017-10-11 21:07:45,995][INFO ][cluster.routing.allocation] [node-116] Cluster health status changed from [RED] to [YELLOW] (reason: [shards started [[customer][3]] ...]).
[2017-10-11 21:11:48,597][ERROR][com.floragunn.searchguard.auth.BackendRegistry] Not yet initialized (you may need to run sgadmin)
[2017-10-11 21:12:01,601][ERROR][com.floragunn.searchguard.auth.BackendRegistry] Not yet initialized (you may need to run sgadmin)
解决方法:执行脚本
./plugins/search-guard-2/tools/sgadmin.sh -cn dic_etl -h 192.168.129.116 -cd plugins/search-guard-2/sgconfig -ks plugins/search-guard-2/sgconfig/admin-keystore.jks -kspass 12345678 -ts plugins/search-guard-2/sgconfig/truststore.jks -tspass 12345678 -nhnv
3、启动服务 bin/elasticsearch时报错
解决方法:elasticsearch.yml修改改文件的时候格式有错误,注意保持空格,有且唯一的空格


