第一步:
以下的注释以及解释均为我个人对于SSM整合的理解,不能保证完全正确。
导入jar包

导入jar包所要注意的问题是,版本是否兼容,如果你构建的是一个非maven项目,那么在导入jar包之后,需要手动进行build path。
第二步:
编写配置文件
我们需要编写的xml文件有,springmvc.xml、applicationContext.xml、web.xml。
注意:如果你想使用xml文件来管理sql语句,那么需要另外编写一个配置文件。
右键点击src,选择new,点击Source Folder,我将其命名为config。
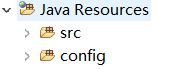
config下需要有如下文件

其中jdbc.properties中存储的是连库所需的信息,这个文件并不是必须的。
2.1
我一般先从mybatis整合Spring的配置文件开始编写,首先,把applicationContext.xml的“大头”粘贴进来。
<beans xmlns="http://www.springframework.org/schema/beans"
    xmlns:xsi="http://www.w3.org/2001/XMLSchema-instance"
    xmlns:p="http://www.springframework.org/schema/p"
    xmlns:aop="http://www.springframework.org/schema/aop"
    xmlns:context="http://www.springframework.org/schema/context"
    xmlns:jee="http://www.springframework.org/schema/jee"
    xmlns:tx="http://www.springframework.org/schema/tx"
    xsi:schemaLocation="
        http://www.springframework.org/schema/aop http://www.springframework.org/schema/aop/spring-aop-4.0.xsd
        http://www.springframework.org/schema/beans http://www.springframework.org/schema/beans/spring-beans-4.0.xsd
        http://www.springframework.org/schema/context http://www.springframework.org/schema/context/spring-context-4.0.xsd
        http://www.springframework.org/schema/jee http://www.springframework.org/schema/jee/spring-jee-4.0.xsd
        http://www.springframework.org/schema/tx http://www.springframework.org/schema/tx/spring-tx-4.0.xsd">

beans>
读取jdbc文件,将以下代码放入
<context:property-placeholder location="classpath:jdbc.properties"/>
编写数据源,用于连接数据库,将以下代码放入配置文件
<bean id="dataSource" class="org.apache.commons.dbcp.BasicDataSource">
        <property name="url" value="${jdbc.url}">property>
        <property name="driverClassName" value="${jdbc.driverClass}">property>
        <property name="username" value="${jdbc.user}">property>
        <property name="password" value="${jdbc.password}">property>
        <property name="maxActive" value="10">property>
        <property name="maxIdle" value="5">property>
    bean>
创建sqlSessionFactory,这个对象是用于获取sqlSession的,操作数据库时需要使用。由于本练习项目是使用注解进行开发的,所以不需要关联管理sql语句的配置文件。
<bean id="sqlSessionFactory" class="org.mybatis.spring.SqlSessionFactoryBean">
        <property name="dataSource" ref="dataSource"/>
    bean>
对dao进行接口扫描
<bean class="org.mybatis.spring.mapper.MapperScannerConfigurer">
    <property name="basePackage" value="com.ssm.pra.dao"/>
bean>
包扫描(我个人的理解就是,由于本项目是使用注解开发的,所以要进行这一步,便于程序扫描到注解时进行处理)
<context:component-scan base-package="com.ssm.pra"/>
最后一步,配置事务,并且开启事务注解(这一步同样不是必须的,取决于你是否要使用事务)
<bean id="transactionManager" class="org.springframework.jdbc.datasource.DataSourceTransactionManager">
           <property name="dataSource" ref="dataSource"/>
bean>

<tx:annotation-driven transaction-manager="transactionManager"/>
全代码如下:
xml version="1.0" encoding="UTF-8"?>
<beans xmlns="http://www.springframework.org/schema/beans"
    xmlns:xsi="http://www.w3.org/2001/XMLSchema-instance"
    xmlns:p="http://www.springframework.org/schema/p"
    xmlns:aop="http://www.springframework.org/schema/aop"
    xmlns:context="http://www.springframework.org/schema/context"
    xmlns:jee="http://www.springframework.org/schema/jee"
    xmlns:tx="http://www.springframework.org/schema/tx"
    xsi:schemaLocation="
        http://www.springframework.org/schema/aop http://www.springframework.org/schema/aop/spring-aop-4.0.xsd
        http://www.springframework.org/schema/beans http://www.springframework.org/schema/beans/spring-beans-4.0.xsd
        http://www.springframework.org/schema/context http://www.springframework.org/schema/context/spring-context-4.0.xsd
        http://www.springframework.org/schema/jee http://www.springframework.org/schema/jee/spring-jee-4.0.xsd
        http://www.springframework.org/schema/tx http://www.springframework.org/schema/tx/spring-tx-4.0.xsd">

    <context:property-placeholder location="classpath:jdbc.properties"/>

    <bean id="dataSource" class="org.apache.commons.dbcp.BasicDataSource">
        <property name="url" value="${jdbc.url}">property>
        <property name="driverClassName" value="${jdbc.driverClass}">property>
        <property name="username" value="${jdbc.user}">property>
        <property name="password" value="${jdbc.password}">property>
        <property name="maxActive" value="10">property>
        <property name="maxIdle" value="5">property>
    bean>

    <bean id="sqlSessionFactory" class="org.mybatis.spring.SqlSessionFactoryBean">
        <property name="dataSource" ref="dataSource"/>
    bean>

    <bean class="org.mybatis.spring.mapper.MapperScannerConfigurer">
           <property name="basePackage" value="com.ssm.pra.dao"/>
       bean>

       <context:component-scan base-package="com.ssm.pra"/>

       <bean id="transactionManager" class="org.springframework.jdbc.datasource.DataSourceTransactionManager">
           <property name="dataSource" ref="dataSource"/>
       bean>

       <tx:annotation-driven transaction-manager="transactionManager"/>
beans>
2.2编写springmvc.xml文件
xml version="1.0" encoding="UTF-8"?>
<beans xmlns="http://www.springframework.org/schema/beans"
    xmlns:xsi="http://www.w3.org/2001/XMLSchema-instance"
    xmlns:p="http://www.springframework.org/schema/p"
    xmlns:aop="http://www.springframework.org/schema/aop"
    xmlns:context="http://www.springframework.org/schema/context"
    xmlns:jee="http://www.springframework.org/schema/jee"
    xmlns:tx="http://www.springframework.org/schema/tx"
    xmlns:mvc="http://www.springframework.org/schema/mvc"
    xsi:schemaLocation="
        http://www.springframework.org/schema/aop http://www.springframework.org/schema/aop/spring-aop-4.0.xsd
        http://www.springframework.org/schema/beans http://www.springframework.org/schema/beans/spring-beans-4.0.xsd
        http://www.springframework.org/schema/mvc   http://www.springframework.org/schema/mvc/spring-mvc.xsd
        http://www.springframework.org/schema/context http://www.springframework.org/schema/context/spring-context-4.0.xsd
        http://www.springframework.org/schema/jee http://www.springframework.org/schema/jee/spring-jee-4.0.xsd
        http://www.springframework.org/schema/tx http://www.springframework.org/schema/tx/spring-tx-4.0.xsd">

        <context:component-scan base-package="com.ssm.pra.controller"/>


        <mvc:annotation-driven>mvc:annotation-driven>

beans>
2.3编写web.xml
xml version="1.0" encoding="UTF-8"?>
<web-app xmlns:xsi="http://www.w3.org/2001/XMLSchema-instance" xmlns="http://java.sun.com/xml/ns/javaee" xsi:schemaLocation="http://java.sun.com/xml/ns/javaee http://java.sun.com/xml/ns/javaee/web-app_3_0.xsd" id="WebApp_ID" version="3.0">
  <display-name>ssm20190710display-name>


  <servlet>
      <servlet-name>DispatcherServletservlet-name>
      <servlet-class>org.springframework.web.servlet.DispatcherServletservlet-class>
      <init-param>
          <param-name>contextConfigLocationparam-name>
          <param-value>classpath:springmvc.xmlparam-value>
      init-param>
  servlet>
  <servlet-mapping>
      <servlet-name>DispatcherServletservlet-name>
      <url-pattern>*.dourl-pattern>
  servlet-mapping>


  <listener>
      <listener-class>org.springframework.web.context.ContextLoaderListenerlistener-class>
  listener>


  <context-param>
      <param-name>contextConfigLocationparam-name>
      <param-value>classpath:applicationContext.xmlparam-value>
  context-param>
  <welcome-file-list>
    <welcome-file>index.htmlwelcome-file>
    <welcome-file>index.htmwelcome-file>
    <welcome-file>index.jspwelcome-file>
    <welcome-file>default.htmlwelcome-file>
    <welcome-file>default.htmwelcome-file>
    <welcome-file>default.jspwelcome-file>
  welcome-file-list>
web-app>