基于linux系统安装hadoop+zk+flume+kafka+mysql+hive+redis+es+Rmq+hbase+spark+storm+azkaban
基于linux系统安装hadoop+zk+flume+kafka+mysql+hive+redis+es+Rmq+hbase+spark+storm+azkaban
- 安装zookeeper
(1)解压zookeeper安装包(/opt)
#tar -zxvf zookeeper-3.4.7.tar.gz
(2)将zookeeper解压包移到/usr/house/zookeeper下
mv zookeeper-3.4.7 /usr/house/zookeeper
(3)在zookeeper安装包下新建文件夹data(存储zookeeper数据的目录)
#mkdir -p /usr/house/zookeeper/zoo1/data[其他两台机器相同]
#mkdir -p /usr/house/zookeeper/zoo2/data
#mkdir -p /usr/house/zookeeper/zoo3/data
(4)产生标记文件
echo ‘1’> /usr/house/zookeeper/zoo1/data/myid[其他两台机器相同]
echo ‘2’> /usr/house/zookeeper/zoo2/data/myid
echo ‘3’> /usr/house/zookeeper/zoo3/data/myid
(5)创建zoo.cfg文件,并且配置(安装包 conf/ 下)
vi zoo.cfg
路径:/usr/house/zookeeper/zookeeper-3.4.7/conf
# The number of milliseconds of each tick
tickTime=2000
# The number of ticks that the initial
# synchronization phase can take
initLimit=10
# The number of ticks that can pass between
# sending a request and getting an acknowledgement
syncLimit=5
# the directory where the snapshot is stored.
# do not use /tmp for storage, /tmp here is just
# example sakes.
dataDir=/usr/house/zookeeper/zoo1/data
# the port at which the clients will connect
clientPort=2181
# the maximum number of client connections.
# increase this if you need to handle more clients
#maxClientCnxns=60
#
# Be sure to read the maintenance section of the
# administrator guide before turning on autopurge.
#
# http://zookeeper.apache.org/doc/current/zookeeperAdmin.html#sc_maintenance
#
# The number of snapshots to retain in dataDir
#autopurge.snapRetainCount=3
# Purge task interval in hours
# Set to "0" to disable auto purge feature
#autopurge.purgeInterval=1
server.1=192.168.127.21:2888:3888
server.2=192.168.127.22:2888:3888
server.3=192.168.127.23:2888:3888
tickTime=2000 心跳时间间隔
initLimit=10 zookeeper peers向zookeeper集群初次初始化汇报时间 间隔,超过则认为server启动失败
syncLimit=5 peers与leader请求响应超时时间不超过ticktime的倍数
dataDir=/usr/house/zookeeper/zoo1/data zookeeper具体数据存储路径
clientPort=2181 client端口
server.1=192.168.127.21:2888:3888 各个serverIP地址及其选举端口
server.2=192.168.127.22:2888:3888
server.3=192.168.127.23:2888:3888

(6)将1号机上的zookeeper包发送到2,3号机上
scp -r /usr/house/zookeeper/zookeeper-3.4.7/ hadoop03.icccuat:/usr/house/zookeeper
![]()
(7)修改2,3号机上的cfg文件 (改成各自的绝对路径)
(8)配置zookeeper的环境(改成自己的安装包绝对路径)
vi /etc/profile source /etc/profile
export ZOOKEEPER_INSTALL=/usr/house/zookeeper/zookeeper-3.4.7
export PATH=$PATH:$ZOOKEEPER_INSTALL/bin
(9)验证安装(启动zookeeper)
zkServer.sh start
分别在三台机器上执行 # zkServer.sh start
查看每台及其zookeeper状态 # zkServer.sh status
回馈结果: 1个leader 2个follower
Zookeeper产生log地址:zookeeper安装包下的zoo1/2/3下
(10)修改zookeeper日志的zookeeper.输出路径
- 修改zookeeper安装包下/bin目录下的zkEnv.sh文件,ZOO_LOG_DIR指定要输出的路径。ZOO_LOG4J_PROP,指定INFO,ROLLINGFILE日志APPENDER
2
- 修改$ZOOKEEPER_HOME/conf/log4j.properties文件的: zookeeper.root.logger的值与前一个文件的ZOO_LOG4J_PROP 保持 一致,该日志配置是以日志文件大小轮转的,如果想要按照天轮转, 可以修改为DaliyRollingFileAppender

2. 安装Hadoop HA*
(1)解压hadoop安装包(/opt)
tar -zxvf hadoop-2.8.2.tar.gz
(2)将hadoop解压包移到/usr/house/hadoop下
mv hadoop-2.8.2 /usr/house/hadoop
(3)配置hadoop配置文件
路径:/usr/house/hadoop/hadoop-2.8.2/etc/hadoop
a、core-site.xml(common属性配置)
"1.0" encoding="UTF-8"?>
-stylesheet type="text/xsl" href="configuration.xsl"?>
<!--
  Licensed under the Apache License, Version 2.0 (the "License");
  you may not use this file except in compliance with the License.
  You may obtain a copy of the License at

    http://www.apache.org/licenses/LICENSE-2.0

  Unless required by applicable law or agreed to in writing, software
  distributed under the License is distributed on an "AS IS" BASIS,
  WITHOUT WARRANTIES OR CONDITIONS OF ANY KIND, either express or implied.
  See the License for the specific language governing permissions and
  limitations under the License. See accompanying LICENSE file.
-->

<!-- Put site-specific property overrides in this file. -->


                fs.defaultFS</name>
                hdfs://192.168.127.21:8020</value>
        </property>

                fs.trash.checkpoint.interval</name>
                0</value>
        </property>

                fs.trash.interval</name>
                1440</value>
        </property>

                hadoop.tmp.dir</name>
                /usr/house/hadoop/hadoop-2.8.2/tmp</value>
        </property>

                ha.zookeeper.quorum</name>
                hadoop01.icccuat:2181,hadoop02.icccuat:2181,hadoop03.icccuat:2181</value>
        </property>

                ha.zookeeper.session-timeout.ms</name>
                2000</value>
        </property>

           hadoop.proxyuser.root.hosts</name>
           *</value>
        </property>

            hadoop.proxyuser.root.groups</name>
            *</value>
       </property>

          io.compression.codecs</name>
          org.apache.hadoop.io.compress.GzipCodec,
            org.apache.hadoop.io.compress.DefaultCodec,
            org.apache.hadoop.io.compress.BZip2Codec,
            org.apache.hadoop.io.compress.SnappyCodec
          </value>
      </property>
</configuration>
<!-- 这个属性用来指定namenode的hdfs协议的文件系统通信地址,可以指定一个主机+端口,也可		以指定为一个namenode服务(这个服务内部可以有多台namenode实现ha的namenode服务) -->
                fs.defaultFS</name>
                hdfs://192.168.127.21:8020</value>
        </property>

<!-- hadoop文件系统指向路径-->
                hadoop.tmp.dir</name>
                /usr/house/hadoop/hadoop-2.8.2/tmp</value>
        </property>

<!--指定 HaZookeeper路径-->
                ha.zookeeper.quorum</name>
                hadoop01.icccuat:2181,hadoop02.icccuat:2181,hadoop03.icccuat:2181</value>
        </property>
b、配置hdfs-site.xml文件
"1.0" encoding="UTF-8"?>
-stylesheet type="text/xsl" href="configuration.xsl"?>
<!--
  Licensed under the Apache License, Version 2.0 (the "License");
  you may not use this file except in compliance with the License.
  You may obtain a copy of the License at

    http://www.apache.org/licenses/LICENSE-2.0

  Unless required by applicable law or agreed to in writing, software
  distributed under the License is distributed on an "AS IS" BASIS,
  WITHOUT WARRANTIES OR CONDITIONS OF ANY KIND, either express or implied.
  See the License for the specific language governing permissions and
  limitations under the License. See accompanying LICENSE file.
-->

<!-- Put site-specific property overrides in this file. -->


        dfs.permissions.superusergroup</name>
        root</value>
    </property>

        dfs.webhdfs.enabled</name>
        true</value>
    </property>

        dfs.namenode.name.dir</name>
        /usr/house/hadoop/hadoop-2.8.2/data/dfs/name</value>
    </property>

        dfs.namenode.edits.dir</name>
        ${dfs.namenode.name.dir}</value>
    </property>

        dfs.datanode.data.dir</name>
        /usr/house/hadoop/hadoop-2.8.2/data/dfs/data</value>
    </property>

        dfs.replication</name>
        3</value>
    </property>

        dfs.blocksize</name>
        268435456</value>
    </property>

        dfs.nameservices</name>
        mycluster</value>
    </property>

        dfs.ha.namenodes.mycluster</name>
        nn1,nn2</value>
    </property>

        dfs.namenode.rpc-address.mycluster.nn1</name>
        hadoop01.icccuat:8020</value>
    </property>

        dfs.namenode.rpc-address.mycluster.nn2</name>
        hadoop02.icccuat:8020</value>
    </property>

        dfs.namenode.http-address.mycluster.nn1</name>
        hadoop01.icccuat:50070</value>
    </property>

        dfs.namenode.http-address.mycluster.nn2</name>
        hadoop02.icccuat:50070</value>
    </property>

        dfs.journalnode.http-address</name>
        0.0.0.0:8480</value>
    </property>

        dfs.journalnode.rpc-address</name>
        0.0.0.0:8485</value>
    </property>

        dfs.namenode.shared.edits.dir</name>
        qjournal://hadoop01.icccuat:8485;hadoop02.icccuat:8485;hadoop03.icccuat:8485/mycluster</value>
    </property>

        dfs.journalnode.edits.dir</name>
        /usr/house/hadoop/hadoop-2.8.2/data/dfs/jd</value>
    </property>

        dfs.client.failover.proxy.provider.mycluster</name>
        org.apache.hadoop.hdfs.server.namenode.ha.ConfiguredFailoverProxyProvider</value>
    </property>

        dfs.ha.fencing.methods</name>
        sshfence</value>
    </property>

        dfs.ha.fencing.ssh.private-key-files</name>
        /root/.ssh/id_rsa</value>
    </property>

        dfs.ha.fencing.ssh.connect-timeout</name>
        30000</value>
    </property>

        dfs.ha.automatic-failover.enabled</name>
        true</value>
    </property>

       dfs.hosts</name>
       /usr/house/hadoop/hadoop-2.8.2/etc/hadoop/slaves</value>
     </property>
</configuration>
<property>
<!--hdfs的元数据保存路径-->
        <name>dfs.namenode.name.dir</name>
   <value>/usr/house/hadoop/hadoop-2.8.2/data/dfs/name</value>
    </property>
    <property>
        <name>dfs.namenode.edits.dir</name>
        <value>${dfs.namenode.name.dir}</value>
    </property>
<property>
<!--hadoop中datanode的data路径-->
        <name>dfs.datanode.data.dir</name>
      <value>/usr/house/hadoop/hadoop-2.8.2/data/dfs/data</value>
    </property>
<property>
<!--hdfs备份数量-->
        <name>dfs.replication</name>
        <value>3</value>
    </property>
<property>
<!--hdfsblock块大小-->
        <name>dfs.blocksize</name>
        <value>268435456</value>
    </property>
    <property>
<!---->
        <name>dfs.nameservices</name>
        <value>mycluster</value>
    </property>
    <property>
        <name>dfs.ha.namenodes.mycluster</name>
        <value>nn1,nn2</value>
    </property>
    <property>
        <name>dfs.namenode.rpc-address.mycluster.nn1</name>
        <value>hadoop01.icccuat:8020</value>
    </property>
    <property>
        <name>dfs.namenode.rpc-address.mycluster.nn2</name>
        <value>hadoop02.icccuat:8020</value>
    </property>
    <property>
        <name>dfs.namenode.http-address.mycluster.nn1</name>
        <value>hadoop01.icccuat:50070</value>
    </property>
    <property>
        <name>dfs.namenode.http-address.mycluster.nn2</name>
        <value>hadoop02.icccuat:50070</value>
    </property>
    <property>
        <name>dfs.journalnode.http-address</name>
        <value>0.0.0.0:8480</value>
    </property>
    <property>
        <name>dfs.journalnode.rpc-address</name>
        <value>0.0.0.0:8485</value>
    </property>
    <property>
        <name>dfs.namenode.shared.edits.dir</name>  <value>qjournal://hadoop01.icccuat:8485;hadoop02.icccuat:8485;hadoop03.icccuat:8485/mycluster
    </property>
    <property>
        <name>dfs.journalnode.edits.dir</name>
  <value>/usr/house/hadoop/hadoop-2.8.2/data/dfs/jd</value>
    </property>
    <property>
     <name>dfs.client.failover.proxy.provider.mycluster</name>    <value>org.apache.hadoop.hdfs.server.namenode.ha.ConfiguredFailoverProxyProvider</value>
    </property>
c、配置mapred-site.xml文件
mv mapred-site.xml.template mapred-site.xml
d、yarn-site.xml(关于yarn相关配置)
"1.0"?>
<!--
  Licensed under the Apache License, Version 2.0 (the "License");
  you may not use this file except in compliance with the License.
  You may obtain a copy of the License at

    http://www.apache.org/licenses/LICENSE-2.0

  Unless required by applicable law or agreed to in writing, software
  distributed under the License is distributed on an "AS IS" BASIS,
  WITHOUT WARRANTIES OR CONDITIONS OF ANY KIND, either express or implied.
  See the License for the specific language governing permissions and
  limitations under the License. See accompanying LICENSE file.
-->


        yarn.nodemanager.aux-services</name>
        mapreduce_shuffle</value>
    </property>

        yarn.nodemanager.aux-services.mapreduce.shuffle.class</name>
        org.apache.hadoop.mapred.ShuffleHandler</value>
    </property>

        yarn.nodemanager.localizer.address</name>
        0.0.0.0:23344</value>
        Address where the localizer IPC is.</description>
    </property>

        yarn.nodemanager.webapp.address</name>
        0.0.0.0:23999</value>
        NM Webapp address.</description>
    </property>

        yarn.resourcemanager.connect.retry-interval.ms</name>
        2000</value>
    </property>

        yarn.resourcemanager.ha.enabled</name>
        true</value>
    </property>

        yarn.resourcemanager.ha.automatic-failover.enabled</name>
        true</value>
    </property>

        yarn.resourcemanager.ha.automatic-failover.embedded</name>
        true</value>
    </property>

        yarn.resourcemanager.cluster-id</name>
        yarn-cluster</value>
    </property>

        yarn.resourcemanager.ha.rm-ids</name>
        rm1,rm2</value>
    </property>

        yarn.resourcemanager.scheduler.class</name>
        org.apache.hadoop.yarn.server.resourcemanager.scheduler.fair.FairScheduler</value>
    </property>

        yarn.resourcemanager.recovery.enabled</name>
        true</value>
    </property>

        yarn.app.mapreduce.am.scheduler.connection.wait.interval-ms</name>
        5000</value>
    </property>

        yarn.resourcemanager.store.class</name>
        org.apache.hadoop.yarn.server.resourcemanager.recovery.ZKRMStateStore</value>
    </property>

        yarn.resourcemanager.zk-address</name>
        hadoop01.icccuat:2181,hadoop02.icccuat:2181,hadoop03.icccuat:2181</value>
    </property>

        yarn.resourcemanager.zk.state-store.address</name>
        hadoop01.icccuat:2181,hadoop02.icccuat:2181,hadoop03.icccuat:2181</value>
    </property>

        yarn.resourcemanager.address.rm1</name>
        hadoop01.icccuat:23140</value>
    </property>

        yarn.resourcemanager.address.rm2</name>
        hadoop02.icccuat:23140</value>
    </property>

        yarn.resourcemanager.scheduler.address.rm1</name>
        hadoop01.icccuat:23130</value>
    </property>

        yarn.resourcemanager.scheduler.address.rm2</name>
        hadoop02.icccuat:23130</value>
    </property>

        yarn.resourcemanager.admin.address.rm1</name>
        hadoop01.icccuat:23141</value>
    </property>

        yarn.resourcemanager.admin.address.rm2</name>
        hadoop02.icccuat:23141</value>
    </property>

        yarn.resourcemanager.resource-tracker.address.rm1</name>
        hadoop01.icccuat:23125</value>
    </property>

        yarn.resourcemanager.resource-tracker.address.rm2</name>
        hadoop02.icccuat:23125</value>
    </property>

        yarn.resourcemanager.webapp.address.rm1</name>
        hadoop01.icccuat:8088</value>
    </property>

        yarn.resourcemanager.webapp.address.rm2</name>
        hadoop02.icccuat:8088</value>
    </property>

        yarn.resourcemanager.webapp.https.address.rm1</name>
        hadoop01.icccuat:23189</value>
    </property>

        yarn.resourcemanager.webapp.https.address.rm2</name>
        hadoop02.icccuat:23189</value>
    </property>

       yarn.log-aggregation-enable</name>
       true</value>
    </property>

         yarn.log.server.url</name>
         http://hadoop01.icccuat:19888/jobhistory/logs</value>
    </property>

        yarn.nodemanager.resource.memory-mb</name>
        2048</value>
    </property>

        yarn.scheduler.minimum-allocation-mb</name>
        1024</value>
     </property>

    yarn.scheduler.maximum-allocation-mb</name>
    2048</value>
  </property>

       yarn.nodemanager.resource.cpu-vcores</name>
       2</value>
     </property>
</configuration>
、配置slaves文件 指定datanode(从机相关配置ip,hostname)
hadoop02.icccuat
hadoop03.icccuat
hadoop01.icccuat
f、配置hadoop-env.sh文件
# Licensed to the Apache Software Foundation (ASF) under one
# or more contributor license agreements.  See the NOTICE file
# distributed with this work for additional information
# regarding copyright ownership.  The ASF licenses this file
# to you under the Apache License, Version 2.0 (the
# "License"); you may not use this file except in compliance
# with the License.  You may obtain a copy of the License at
#
#     http://www.apache.org/licenses/LICENSE-2.0
#
# Unless required by applicable law or agreed to in writing, software
# distributed under the License is distributed on an "AS IS" BASIS,
# WITHOUT WARRANTIES OR CONDITIONS OF ANY KIND, either express or implied.
# See the License for the specific language governing permissions and
# limitations under the License.

# Set Hadoop-specific environment variables here.

# The only required environment variable is JAVA_HOME.  All others are
# optional.  When running a distributed configuration it is best to
# set JAVA_HOME in this file, so that it is correctly defined on
# remote nodes.

# The java implementation to use.
export JAVA_HOME=/usr/house/jdk/jdk1.8.0_131
export HADOOP_OPTS="$HADOOP_OPTS  -Djava.library.path=$HADOOP_HOME/lib:$HADOOP_HOME/bin/native"
# The jsvc implementation to use. Jsvc is required to run secure datanodes
# that bind to privileged ports to provide authentication of data transfer
# protocol.  Jsvc is not required if SASL is configured for authentication of
# data transfer protocol using non-privileged ports.
#export JSVC_HOME=${JSVC_HOME}

export HADOOP_CONF_DIR=${HADOOP_CONF_DIR:-"/etc/hadoop"}

# Extra Java CLASSPATH elements.  Automatically insert capacity-scheduler.
for f in $HADOOP_HOME/contrib/capacity-scheduler/*.jar; do
  if [ "$HADOOP_CLASSPATH" ]; then
    export HADOOP_CLASSPATH=$HADOOP_CLASSPATH:$f
  else
    export HADOOP_CLASSPATH=$f
  fi
done

# The maximum amount of heap to use, in MB. Default is 1000.
#export HADOOP_HEAPSIZE=
#export HADOOP_NAMENODE_INIT_HEAPSIZE=""

# Enable extra debugging of Hadoop's JAAS binding, used to set up
# Kerberos security.
# export HADOOP_JAAS_DEBUG=true

# Extra Java runtime options.  Empty by default.
# For Kerberos debugging, an extended option set logs more invormation
# export HADOOP_OPTS="-Djava.net.preferIPv4Stack=true -Dsun.security.krb5.debug=true -Dsun.security.spnego.debug"
export HADOOP_OPTS="$HADOOP_OPTS -Djava.net.preferIPv4Stack=true"

# Command specific options appended to HADOOP_OPTS when specified
export HADOOP_NAMENODE_OPTS="-Dhadoop.security.logger=${HADOOP_SECURITY_LOGGER:-INFO,RFAS} -Dhdfs.audit.logger=${HDFS_AUDIT_LOGGER:-INFO,NullAppender} $HADOOP_NAMENODE_OPTS"
export HADOOP_DATANODE_OPTS="-Dhadoop.security.logger=ERROR,RFAS $HADOOP_DATANODE_OPTS"

export HADOOP_SECONDARYNAMENODE_OPTS="-Dhadoop.security.logger=${HADOOP_SECURITY_LOGGER:-INFO,RFAS} -Dhdfs.audit.logger=${HDFS_AUDIT_LOGGER:-INFO,NullAppender} $HADOOP_SECONDARYNAMENODE_OPTS"

export HADOOP_NFS3_OPTS="$HADOOP_NFS3_OPTS"
export HADOOP_PORTMAP_OPTS="-Xmx512m $HADOOP_PORTMAP_OPTS"

# The following applies to multiple commands (fs, dfs, fsck, distcp etc)
export HADOOP_CLIENT_OPTS="$HADOOP_CLIENT_OPTS"
# set heap args when HADOOP_HEAPSIZE is empty
if [ "$HADOOP_HEAPSIZE" = "" ]; then
  export HADOOP_CLIENT_OPTS="-Xmx512m $HADOOP_CLIENT_OPTS"
fi
#HADOOP_JAVA_PLATFORM_OPTS="-XX:-UsePerfData $HADOOP_JAVA_PLATFORM_OPTS"

# On secure datanodes, user to run the datanode as after dropping privileges.
# This **MUST** be uncommented to enable secure HDFS if using privileged ports
# to provide authentication of data transfer protocol.  This **MUST NOT** be
# defined if SASL is configured for authentication of data transfer protocol
# using non-privileged ports.
export HADOOP_SECURE_DN_USER=${HADOOP_SECURE_DN_USER}

# Where log files are stored.  $HADOOP_HOME/logs by default.
#export HADOOP_LOG_DIR=${HADOOP_LOG_DIR}/$USER

# Where log files are stored in the secure data environment.
#export HADOOP_SECURE_DN_LOG_DIR=${HADOOP_LOG_DIR}/${HADOOP_HDFS_USER}

###
# HDFS Mover specific parameters
###
# Specify the JVM options to be used when starting the HDFS Mover.
# These options will be appended to the options specified as HADOOP_OPTS
# and therefore may override any similar flags set in HADOOP_OPTS
#
# export HADOOP_MOVER_OPTS=""

###
# Advanced Users Only!
###

# The directory where pid files are stored. /tmp by default.
# NOTE: this should be set to a directory that can only be written to by
#       the user that will run the hadoop daemons.  Otherwise there is the
#       potential for a symlink attack.
export HADOOP_PID_DIR=${HADOOP_PID_DIR}
export HADOOP_SECURE_DN_PID_DIR=${HADOOP_PID_DIR}

# A string representing this instance of hadoop. $USER by default.
export HADOOP_IDENT_STRING=$USER
export JAVA_HOME=/usr/house/jdk/jdk1.8.0_131
export HADOOP_OPTS="$HADOOP_OPTS  -Djava.library.path=$HADOOP_HOME/lib:$HADOOP_HOME/bin/native"
(4)添加hadoop环境变量 (添加)
vim /etc/proflie # source /etc/profile
export JAVA_HOME=/usr/house/jdk/jdk1.8.0_131
export HADOOP_HOME=/usr/house/hadoop/hadoop-2.8.2
export PATH=$PATH:$HADOOP_HOME/bin
export PATH=$PATH:$HADOOP_HOME/sbin
export PATH=$PATH:$ZOOKEEPER_HOME/bin
(5)创建hadoop的数据存储目录(安装包目录下/usr/house/hadoop/hadoop-2.8.2/)
mkdir -p data/dfs/data
注:data为datanode的dir指向路径,在hdfs-site.xml中配置
mkdir -p data/dfs/name
注:name为namenode的dir指向路径,在hdfs-site.xml中配置****
mkdir -p data/dfs/jd
注:jd为journalnode的dir指向路径,在hdfs-site.xml中配置
(6)将hadoop安装包复制到2,3号机
scp -r hadoop-2.8.2 hadoop02.icccuat:/usr/house/hadoop/
scp -r hadoop-2.8.2 hadoop03.icccuat:/usr/house/hadoop/
(7)验证(启动hadoop服务)
启动zookeeper服务 :见zookeeper安装验证
启动hadoop服务:
启动journalnode(三台机器都要执行)
sbin/hadoop-daemon.sh start journalnode
jps  -->journalnode
格式化namenode(主机执行,hadoop安装包 /sbin)
sbin/hadoop namenode -format
将hadoop01.icccuat元数据传到hadoop02.icccuat(secondNamenode)
scp -r name hadoop02.icccuat:/usr/house/hadoop/data/dfs/name
注:操作路径 /usr/house/hadoop/data/dfs
初始化zookeeper服务
hdfs zkfc -formatZK
启动dfs服务(1号机) # start-dfs.sh

启动yarn服务(1号机) # start-yarn.sh
jps --> resourcemanager nodemanager
备机启动resourcemanager服务(2号机resourcemanager得自己启动)
yarn-daemon.sh start resourcemanager
(一号机)# jps
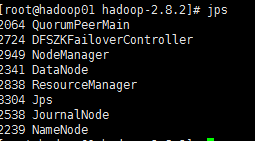
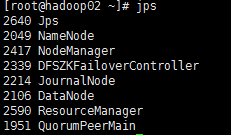
(二号机)
jps
(三号机)
jps
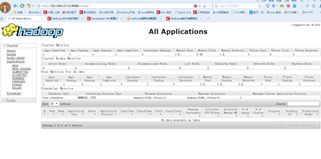
(8)监控页面:
http://192.168.127.21:50070 (HDFS管理界面)

http://192.168.127.21:8088 (MR管理界面)
hadoop集群启动后,两个namenode都是standby问题:
- 确认配置没有问题 hdfs-xite.xml
- 必须先启动zookeeper服务然后再启动hadoop服务
- 在配置namenode的两个节点机器上确认DFSZKFailoverController选举机制已经启动
- Namenode主从切换:
注:比如想要node1节点为active,则在node2节点执行命令,反之则在node1节点执行命令
先停掉 hadoop-daemon.sh stop zkfc
重启 hadoop-daemon.sh start zkfc - 安装 Mysql
(1) 从新创建/克隆一个虚拟机(参照上文虚拟机克隆或者创建)
(2) 安装mysql
- 如果操作系统能够联网(或者有本地yum仓库)且安装有yum,可直接 使用yum进行安装,比较方便:
a. 下载wget包
# yum -y install wget
b. 下载mysql的repo源
# wget http://repo.mysql.com/mysql-community-release-el7-5.noarch.rpm
c. 下载mysql-community-release-el7-5.noarch.rpm包
# rpm -ivh mysql-community-release-el7-5.noarch.rpm
d. 安装mysql
# yum install mysql-server
e. 查询mysql的服务状态
# service mysql status
或者 # systemctl start mysqld.service
f. 启动mysql服务
# service mysql start

g.设置开机自启mysql
以前都用service命令管理mysql,现在liunx系统升级了,又有了新的更好的方法管理系统进程,systemctl命令管理mysql
# systemctl enable mysqld.service
h.进入mysql
# mysql -uroot
i.更改密码
update mysql.user set password=PASSWORD('icccuat') where user='root';
j.设置所有机器访问mysql权限
grant all privileges on *.* to 'root'@'%' identified by 'root';
flush privileges;
>建表 create
>察看表格 show tables;
>删除表格 drop table +表名;
2)如果操作系统无法联网(也没有本地yum仓库)则可以使用rpm包的方式进行安装,需要注意的是,由于操作系统上所含有的软件多少不确定,所以安装过程中可能需要解决包依赖问题,在此不再赘述。
a.查看mysql有关依赖:
#rpm -qa|grep mysql(没有依赖可不必删除)
b.删除原有mysql依赖:
# rpm -e --nodeps *
c.安装mysql客户端:
#rpm -ivh MySQL-client-5.5.47-1.linux2.6.x86_64.rpm --force --nodeps
d.安装mysql服务端:
# rpm -ivh MySQL-server-5.5.47-1.linux2.6.x86_64.rpm --force --nodeps
e.查询mysql的服务状态:
# service mysql status
f.启动mysql服务:
# service mysql start
g.设置开机自启mysql
# systemctl enable mysqld.service
h.进入mysql
#mysql -uroot
i.更改密码
update mysql.user set password=PASSWORD('icccuat') where user='root';
j.设置所有机器访问myql权限
grant all privileges on *.* to 'root'@'%' identified by 'root';
flush privileges;
>建表 create
>察看表格 show tables;
>删除表格 drop table +表名;

注:后期hive服务要依赖mysql 注意每台机器中的hosts文件中都加入安装mysql服务的机器ip和hostname
Windows下的hosts文件加入该机器所在ip和hostname
1.1.安装 Hive(注:Hive只需在一个节点上安装)
(1)Hive和hadoop关系
Hive通过/etc/profile 文件中配置的HADOOP_HOME跟hadoop进行沟通,hive的配置跟hadoop无关系
(2)将压缩文件进行解压
# tar –zxvf apache-hive-1.2.0-bin.tar.gz
(3)将hive解压包移到/usr/house/hive下
# mv apache-hive-1.2.0-bin /usr/house/hive
(4)设置hive的环境变量
# vi /etc/profile
export HIVE_HOME=/usr/house/hive/apache-hive-1.2.0-bin
export PATH=$PATH:$HIVE_HOME/bin:
(5)配置hive-site.xml文件
路径:/usr/house/hive/apache-hive-1.2.0-bin/conf
<configuration>
  <property>
        <name>javax.jdo.option.ConnectionURL</name>     <value>jdbc:mysql://192.168.127.24:3306/hive?characterEncoding=UTF-8</value>
</property>
<property>
        <name>javax.jdo.option.ConnectionDriverName</name>
        <value>com.mysql.jdbc.Driver</value>
</property>
<property>
        <name>javax.jdo.option.ConnectionUserName</name>
        <value>hiveuser</value>
</property>
<property>
        <name>javax.jdo.option.ConnectionPassword</name>
        <value>icccuat</value>
</property>
<property>
		<name>hive.metastore.warehouse.dir</name>
	<value>/usr/house/hive/apache-hive-1.2.0-bin/warehourse</value>
	</property>
	<property>
		<name>hive.metastore.uris</name>
		<value>thrift://192.168.127.21:9083</value>
      </property>
</configuration>
<?xml version="1.0" encoding="UTF-8" standalone="no"?>
<?xml-stylesheet type="text/xsl" href="configuration.xsl"?><!--
   Licensed to the Apache Software Foundation (ASF) under one or more
   contributor license agreements.  See the NOTICE file distributed with
   this work for additional information regarding copyright ownership.
   The ASF licenses this file to You under the Apache License, Version 2.0
   (the "License"); you may not use this file except in compliance with
   the License.  You may obtain a copy of the License at

       http://www.apache.org/licenses/LICENSE-2.0

   Unless required by applicable law or agreed to in writing, software
   distributed under the License is distributed on an "AS IS" BASIS,
   WITHOUT WARRANTIES OR CONDITIONS OF ANY KIND, either express or implied.
   See the License for the specific language governing permissions and
   limitations under the License.
-->
<configuration>
  <property>
        <name>javax.jdo.option.ConnectionURL</name>
        <value>jdbc:mysql://192.168.127.24:3306/hive?characterEncoding=UTF-8</value>
</property>
<property>
        <name>javax.jdo.option.ConnectionDriverName</name>
        <value>com.mysql.jdbc.Driver</value>
</property>
<property>
        <name>javax.jdo.option.ConnectionUserName</name>
        <value>hiveuser</value>
</property>
<property>
        <name>javax.jdo.option.ConnectionPassword</name>
        <value>icccuat</value>
</property>
<property>
		<name>hive.metastore.warehouse.dir</name>
		<value>/usr/house/hive/apache-hive-1.2.0-bin/warehourse</value>
	</property>
	<property>
		<name>hive.metastore.uris</name>
		<value>thrift://192.168.127.21:9083</value>
      </property>
</configuration>
(6)配置hive-env.sh文件
路径:/usr/house/hive/apache-hive-1.2.0-bin/conf
# Licensed to the Apache Software Foundation (ASF) under one
# or more contributor license agreements.  See the NOTICE file
# distributed with this work for additional information
# regarding copyright ownership.  The ASF licenses this file
# to you under the Apache License, Version 2.0 (the
# "License"); you may not use this file except in compliance
# with the License.  You may obtain a copy of the License at
#
#     http://www.apache.org/licenses/LICENSE-2.0
#
# Unless required by applicable law or agreed to in writing, software
# distributed under the License is distributed on an "AS IS" BASIS,
# WITHOUT WARRANTIES OR CONDITIONS OF ANY KIND, either express or implied.
# See the License for the specific language governing permissions and
# limitations under the License.

# Set Hive and Hadoop environment variables here. These variables can be used
# to control the execution of Hive. It should be used by admins to configure
# the Hive installation (so that users do not have to set environment variables
# or set command line parameters to get correct behavior).
#
# The hive service being invoked (CLI/HWI etc.) is available via the environment
# variable SERVICE


# Hive Client memory usage can be an issue if a large number of clients
# are running at the same time. The flags below have been useful in
# reducing memory usage:
#
# if [ "$SERVICE" = "cli" ]; then
#   if [ -z "$DEBUG" ]; then
#     export HADOOP_OPTS="$HADOOP_OPTS -XX:NewRatio=12 -Xms10m -XX:MaxHeapFreeRatio=40 -XX:MinHeapFreeRatio=15 -XX:+UseParNewGC -XX:-UseGCOverheadLimit"
#   else
#     export HADOOP_OPTS="$HADOOP_OPTS -XX:NewRatio=12 -Xms10m -XX:MaxHeapFreeRatio=40 -XX:MinHeapFreeRatio=15 -XX:-UseGCOverheadLimit"
#   fi
# fi

# The heap size of the jvm stared by hive shell script can be controlled via:
#
# export HADOOP_HEAPSIZE=1024
#
# Larger heap size may be required when running queries over large number of files or partitions.
# By default hive shell scripts use a heap size of 256 (MB).  Larger heap size would also be
# appropriate for hive server (hwi etc).


# Set HADOOP_HOME to point to a specific hadoop install directory
# HADOOP_HOME=${bin}/../../hadoop

# Hive Configuration Directory can be controlled by:
# export HIVE_CONF_DIR=

# Folder containing extra ibraries required for hive compilation/execution can be controlled by:
# export HIVE_AUX_JARS_PATH=

 export HADOOP_HOME=/usr/house/hadoop/hadoop-2.8.2
 export HIVE_HOME=/usr/house/hive/apache-hive-1.2.0-bin
 export HIVE_CONF_DIR=/usr/house/hive/apache-hive-1.2.0-bin/conf
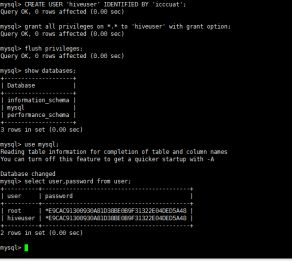
(7)Mysql可以创建单独的hive用户(安装mysql的节点上操作)
#mysql -uroot -picccuat
> CREATE USER 'hiveuser' IDENTIFIED BY 'icccuat';
> grant all privileges on *.* to 'hiveuser' with grant option;
> flush privileges;
> select user,password from user;
> create database hive;
(8)验证(启动hive服务时要先启动hadoop服务)
启动hive服务(安装hive的机器 启动两个shell连接):
(shell1)# hive --service metastore
(shell2)# hive
![]()

Hive log日志存储位置:/tmp/root/hive/log
进入hive shell界面
4.安装 Hbase(伪分布式单节点安装)
(1)解压hbase安装包 (/opt)
# tar -zxvf hbase-1.2.6-bin.tar.gz
(2)将hbase解压包移到/usr/house/hbase下
# mv hbase-1.2.6 /usr/house/hbase
(3)配置hbase-env.sh文件添加如下
路径:/usr/house/hbase/hbase-1.2.6/conf
#
#/**
# * Licensed to the Apache Software Foundation (ASF) under one
# * or more contributor license agreements.  See the NOTICE file
# * distributed with this work for additional information
# * regarding copyright ownership.  The ASF licenses this file
# * to you under the Apache License, Version 2.0 (the
# * "License"); you may not use this file except in compliance
# * with the License.  You may obtain a copy of the License at
# *
# *     http://www.apache.org/licenses/LICENSE-2.0
# *
# * Unless required by applicable law or agreed to in writing, software
# * distributed under the License is distributed on an "AS IS" BASIS,
# * WITHOUT WARRANTIES OR CONDITIONS OF ANY KIND, either express or implied.
# * See the License for the specific language governing permissions and
# * limitations under the License.
# */

# Set environment variables here.

# This script sets variables multiple times over the course of starting an hbase process,
# so try to keep things idempotent unless you want to take an even deeper look
# into the startup scripts (bin/hbase, etc.)

# The java implementation to use.  Java 1.7+ required.
# export JAVA_HOME=/usr/java/jdk1.6.0/

# Extra Java CLASSPATH elements.  Optional.
# export HBASE_CLASSPATH=

# The maximum amount of heap to use. Default is left to JVM default.
# export HBASE_HEAPSIZE=1G

# Uncomment below if you intend to use off heap cache. For example, to allocate 8G of
# offheap, set the value to "8G".
# export HBASE_OFFHEAPSIZE=1G

# Extra Java runtime options.
# Below are what we set by default.  May only work with SUN JVM.
# For more on why as well as other possible settings,
# see http://wiki.apache.org/hadoop/PerformanceTuning
export HBASE_OPTS="-XX:+UseConcMarkSweepGC"

# Configure PermSize. Only needed in JDK7. You can safely remove it for JDK8+
export HBASE_MASTER_OPTS="$HBASE_MASTER_OPTS -XX:PermSize=128m -XX:MaxPermSize=128m"
export HBASE_REGIONSERVER_OPTS="$HBASE_REGIONSERVER_OPTS -XX:PermSize=128m -XX:MaxPermSize=128m"

export HBASE_MANAGES_ZK=false
export HADOOP_HOME=/usr/house/hadoop/hadoop-2.8.2
export JAVA_HOME=/usr/house/jdk/jdk1.8.0_131

# Uncomment one of the below three options to enable java garbage collection logging for the server-side processes.

# This enables basic gc logging to the .out file.
# export SERVER_GC_OPTS="-verbose:gc -XX:+PrintGCDetails -XX:+PrintGCDateStamps"

# This enables basic gc logging to its own file.
# If FILE-PATH is not replaced, the log file(.gc) would still be generated in the HBASE_LOG_DIR .
# export SERVER_GC_OPTS="-verbose:gc -XX:+PrintGCDetails -XX:+PrintGCDateStamps -Xloggc:"

# This enables basic GC logging to its own file with automatic log rolling. Only applies to jdk 1.6.0_34+ and 1.7.0_2+.
# If FILE-PATH is not replaced, the log file(.gc) would still be generated in the HBASE_LOG_DIR .
# export SERVER_GC_OPTS="-verbose:gc -XX:+PrintGCDetails -XX:+PrintGCDateStamps -Xloggc: -XX:+UseGCLogFileRotation -XX:NumberOfGCLogFiles=1 -XX:GCLogFileSize=512M"

# Uncomment one of the below three options to enable java garbage collection logging for the client processes.

# This enables basic gc logging to the .out file.
# export CLIENT_GC_OPTS="-verbose:gc -XX:+PrintGCDetails -XX:+PrintGCDateStamps"

# This enables basic gc logging to its own file.
# If FILE-PATH is not replaced, the log file(.gc) would still be generated in the HBASE_LOG_DIR .
# export CLIENT_GC_OPTS="-verbose:gc -XX:+PrintGCDetails -XX:+PrintGCDateStamps -Xloggc:"

# This enables basic GC logging to its own file with automatic log rolling. Only applies to jdk 1.6.0_34+ and 1.7.0_2+.
# If FILE-PATH is not replaced, the log file(.gc) would still be generated in the HBASE_LOG_DIR .
# export CLIENT_GC_OPTS="-verbose:gc -XX:+PrintGCDetails -XX:+PrintGCDateStamps -Xloggc: -XX:+UseGCLogFileRotation -XX:NumberOfGCLogFiles=1 -XX:GCLogFileSize=512M"

# See the package documentation for org.apache.hadoop.hbase.io.hfile for other configurations
# needed setting up off-heap block caching.

# Uncomment and adjust to enable JMX exporting
# See jmxremote.password and jmxremote.access in $JRE_HOME/lib/management to configure remote password access.
# More details at: http://java.sun.com/javase/6/docs/technotes/guides/management/agent.html
# NOTE: HBase provides an alternative JMX implementation to fix the random ports issue, please see JMX
# section in HBase Reference Guide for instructions.

# export HBASE_JMX_BASE="-Dcom.sun.management.jmxremote.ssl=false -Dcom.sun.management.jmxremote.authenticate=false"
# export HBASE_MASTER_OPTS="$HBASE_MASTER_OPTS $HBASE_JMX_BASE -Dcom.sun.management.jmxremote.port=10101"
# export HBASE_REGIONSERVER_OPTS="$HBASE_REGIONSERVER_OPTS $HBASE_JMX_BASE -Dcom.sun.management.jmxremote.port=10102"
# export HBASE_THRIFT_OPTS="$HBASE_THRIFT_OPTS $HBASE_JMX_BASE -Dcom.sun.management.jmxremote.port=10103"
# export HBASE_ZOOKEEPER_OPTS="$HBASE_ZOOKEEPER_OPTS $HBASE_JMX_BASE -Dcom.sun.management.jmxremote.port=10104"
# export HBASE_REST_OPTS="$HBASE_REST_OPTS $HBASE_JMX_BASE -Dcom.sun.management.jmxremote.port=10105"

# File naming hosts on which HRegionServers will run.  $HBASE_HOME/conf/regionservers by default.
# export HBASE_REGIONSERVERS=${HBASE_HOME}/conf/regionservers

# Uncomment and adjust to keep all the Region Server pages mapped to be memory resident
#HBASE_REGIONSERVER_MLOCK=true
#HBASE_REGIONSERVER_UID="hbase"

# File naming hosts on which backup HMaster will run.  $HBASE_HOME/conf/backup-masters by default.
# export HBASE_BACKUP_MASTERS=${HBASE_HOME}/conf/backup-masters

# Extra ssh options.  Empty by default.
# export HBASE_SSH_OPTS="-o ConnectTimeout=1 -o SendEnv=HBASE_CONF_DIR"

# Where log files are stored.  $HBASE_HOME/logs by default.
# export HBASE_LOG_DIR=${HBASE_HOME}/logs

# Enable remote JDWP debugging of major HBase processes. Meant for Core Developers
# export HBASE_MASTER_OPTS="$HBASE_MASTER_OPTS -Xdebug -Xrunjdwp:transport=dt_socket,server=y,suspend=n,address=8070"
# export HBASE_REGIONSERVER_OPTS="$HBASE_REGIONSERVER_OPTS -Xdebug -Xrunjdwp:transport=dt_socket,server=y,suspend=n,address=8071"
# export HBASE_THRIFT_OPTS="$HBASE_THRIFT_OPTS -Xdebug -Xrunjdwp:transport=dt_socket,server=y,suspend=n,address=8072"
# export HBASE_ZOOKEEPER_OPTS="$HBASE_ZOOKEEPER_OPTS -Xdebug -Xrunjdwp:transport=dt_socket,server=y,suspend=n,address=8073"

# A string representing this instance of hbase. $USER by default.
# export HBASE_IDENT_STRING=$USER

# The scheduling priority for daemon processes.  See 'man nice'.
# export HBASE_NICENESS=10

# The directory where pid files are stored. /tmp by default.
# export HBASE_PID_DIR=/var/hadoop/pids

# Seconds to sleep between slave commands.  Unset by default.  This
# can be useful in large clusters, where, e.g., slave rsyncs can
# otherwise arrive faster than the master can service them.
# export HBASE_SLAVE_SLEEP=0.1

# Tell HBase whether it should manage it's own instance of Zookeeper or not.
# export HBASE_MANAGES_ZK=true

# The default log rolling policy is RFA, where the log file is rolled as per the size defined for the
# RFA appender. Please refer to the log4j.properties file to see more details on this appender.
# In case one needs to do log rolling on a date change, one should set the environment property
# HBASE_ROOT_LOGGER to ",DRFA".
# For example:
# HBASE_ROOT_LOGGER=INFO,DRFA
# The reason for changing default to RFA is to avoid the boundary case of filling out disk space as
# DRFA doesn't put any cap on the log size. Please refer to HBase-5655 for more context.
export HBASE_MANAGES_ZK=false
export HADOOP_HOME=/usr/house/hadoop/hadoop-2.8.2
export JAVA_HOME=/usr/house/jdk/jdk1.8.0_131
(4)配置hbase-site.xml文件
路径:/usr/house/hbase/hbase-1.2.6/conf
<?xml version="1.0"?>
<?xml-stylesheet type="text/xsl" href="configuration.xsl"?>
<!--
/**
 *
 * Licensed to the Apache Software Foundation (ASF) under one
 * or more contributor license agreements.  See the NOTICE file
 * distributed with this work for additional information
 * regarding copyright ownership.  The ASF licenses this file
 * to you under the Apache License, Version 2.0 (the
 * "License"); you may not use this file except in compliance
 * with the License.  You may obtain a copy of the License at
 *
 *     http://www.apache.org/licenses/LICENSE-2.0
 *
 * Unless required by applicable law or agreed to in writing, software
 * distributed under the License is distributed on an "AS IS" BASIS,
 * WITHOUT WARRANTIES OR CONDITIONS OF ANY KIND, either express or implied.
 * See the License for the specific language governing permissions and
 * limitations under the License.
 */
-->
<configuration>
<property>
        <name>hbase.cluster.distributed</name>
        <value>true</value>
    </property>
    <property>
        <name>root.dir</name>
        <value>hdfs://hadoop01.icccuat:8020/hbase-1.2.6</value>
</property>
    <property>
        <name>hbase.zookeeper.quorum</name>
        <value>hadoop01.icccuat,hadoop02.icccuat,hadoop03.icccuat</value>
    </property>
    <property>
        <name>hbase.zookeeper.property.data.dir</name>
        <value>/usr/house/data/hbase/var/zookeeper</value>
</property>
 <property>
        <name>hbase.master.info.port </name>
        <value>60010</value>
</property>

</configuration>
<property>
        <name>hbase.cluster.distributed</name>
        <value>true</value>
    </property>
    <property>
        <name>root.dir</name>
<!--hbase在hdfs上的存储路径-->        <value>hdfs://hadoop01.icccuat:8020/hbase-1.2.6</value>
</property>
    <property>
        <name>hbase.zookeeper.quorum</name>
        <value>hadoop01.icccuat,hadoop02.icccuat,hadoop03.icccuat</value>
    </property>
    <property>
        <name>hbase.zookeeper.property.data.dir</name>
        <value>/usr/house/data/hbase/var/zookeeper</value>
</property>
创建hbase的元数据存储路径
# mkdir -p /usr/house/data/hbase/var/zookeeper
(5)配置regionserver文件
注:写入HRegionserver的ip或者hostname
192.168.127.22
192.168.127.23
(6)将hbase拷贝到2,3号机器(/usr/house/hbase)
# scp hbase-1.2.6/ hadoop02.icccuat:/usr/house/hbase/
# scp hbase-1.2.6/ hadoop03.icccuat:/usr/house/hbase/
(7)验证(启动hbase服务在HMaster所在机器操作)
注:启动hbase服务必须先启动zookeeper和hadoop服务
# /usr/house/hbase/hbase-1.2.6/bin/start-hbase.sh
分别查看安装hbase三台机器的jps
# jps


进入hbase sehll(HMaster所在机器)
# bin/hbase shell
启动后打开 http://192.168.127.21:60010 主界面,可以查看hbase集群状态运行状态
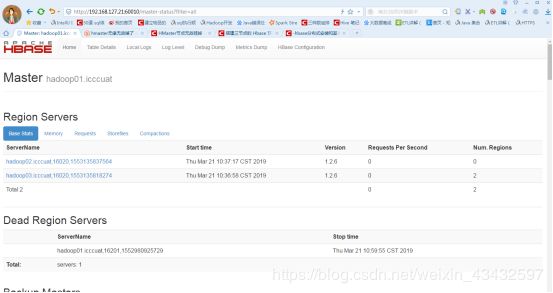
注:hbase 1.0 以后的版本,需要自己手动配置,在文件 hbase-site.xml 中添加如下配置 hbase.master.info.port 60010 这样才可以打开localhost:60010
关闭hbase服务
# stop-hbase.sh

5.安装 Storm(三节点安装)
(1)解压storm安装包(/opt)
# tar -zxvf apache-storm-1.1.3.tar.gz
(2)将storm解压包移到/usr/house/storm
# mv apache-storm-1.1.3 /usr/house/storm
(3)新建storm文本存储路径
# mkdir /usr/house/storm/apache-storm-1.1.3/storm-dir
(4)配置storm.yaml配置文件
路径:/usr/house/storm/apache-storm-1.1.3/conf
# Licensed to the Apache Software Foundation (ASF) under one
# or more contributor license agreements.  See the NOTICE file
# distributed with this work for additional information
# regarding copyright ownership.  The ASF licenses this file
# to you under the Apache License, Version 2.0 (the
# "License"); you may not use this file except in compliance
# with the License.  You may obtain a copy of the License at
#
# http://www.apache.org/licenses/LICENSE-2.0
#
# Unless required by applicable law or agreed to in writing, software
# distributed under the License is distributed on an "AS IS" BASIS,
# WITHOUT WARRANTIES OR CONDITIONS OF ANY KIND, either express or implied.
# See the License for the specific language governing permissions and
# limitations under the License.
########### These MUST be filled in for a storm configuration
 storm.zookeeper.servers:
 - "192.168.127.21"
 - "192.168.127.22"
 - "192.168.127.23"
 storm.zookeeper.port: 2181
 storm.zookeeper.root: "/apache-storm-1.1.3"
#nimbusHA主机名称或配置
 nimbus.seeds: ["192.168.127.21", "192.168.127.22"]
#Nimbus dir
 storm.local.dir: "/usr/house/storm/apache-storm-1.1.3/storm-dir"
 supervisor.slots.ports:
 - 6700
 - 6701
 - 6702
 - 6703
# ##### These may optionally be filled in:
#
## List of custom serializations
# topology.kryo.register:
#     - org.mycompany.MyType
#     - org.mycompany.MyType2: org.mycompany.MyType2Serializer
#
## List of custom kryo decorators
# topology.kryo.decorators:
#     - org.mycompany.MyDecorator
#
## Locations of the drpc servers
# drpc.servers:
#     - "server1"
#     - "server2"

## Metrics Consumers
## max.retain.metric.tuples
## - task queue will be unbounded when max.retain.metric.tuples is equal or less than 0.
## whitelist / blacklist
## - when none of configuration for metric filter are specified, it'll be treated as 'pass all'.
## - you need to specify either whitelist or blacklist, or none of them. You can't specify both of them.
## - you can specify multiple whitelist / blacklist with regular expression
## expandMapType: expand metric with map type as value to multiple metrics
## - set to true when you would like to apply filter to expanded metrics
## - default value is false which is backward compatible value
## metricNameSeparator: separator between origin metric name and key of entry from map
## - only effective when expandMapType is set to true
# topology.metrics.consumer.register:
#   - class: "org.apache.storm.metric.LoggingMetricsConsumer"
#     max.retain.metric.tuples: 100
#     parallelism.hint: 1
#   - class: "org.mycompany.MyMetricsConsumer"
#     max.retain.metric.tuples: 100
#     whitelist:
#       - "execute.*"
#       - "^__complete-latency$"
#     parallelism.hint: 1
#     argument:
#       - endpoint: "metrics-collector.mycompany.org"
#     expandMapType: true
#     metricNameSeparator: "."

## Cluster Metrics Consumers
# storm.cluster.metrics.consumer.register:
#   - class: "org.apache.storm.metric.LoggingClusterMetricsConsumer"
#   - class: "org.mycompany.MyMetricsConsumer"
#     argument:
#       - endpoint: "metrics-collector.mycompany.org"
#
# storm.cluster.metrics.consumer.publish.interval.secs: 60
注:每一个配置点前面都需要加一个空格,否则启动会报配置文件相关异常。
storm.zookeeper.servers:
- “192.168.127.21”
- “192.168.127.22”
- “192.168.127.23”
storm.zookeeper.port: 2181
storm.zookeeper.root: “/apache-storm-1.1.3”
#nimbusHA主机名称或配置
nimbus.seeds: [“192.168.127.21”, “192.168.127.22”]
#Nimbus dir
storm.local.dir: “/usr/house/storm/apache-storm-1.1.3/storm-dir”
supervisor.slots.ports:- 6700
- 6701
- 6702
- 6703

(5)将storm复制到其他机器上(/usr/house/storm/)
# scp -r apache-storm-1.1.3 hadoop02.icccuat:/usr/house/storm
# scp -r apache-storm-1.1.3 hadoop03.icccuat:/usr/house/storm
(6)验证(启动storm服务)
配置完成后,使用命令storm nimbus &后台启动storm主节点,使用命令storm supervisor &后台启动storm从节点,在storm的主节点服务器也就是使用命令storm nimbus &启动storm的那台服务器上,使用命令storm ui &后台启动storm管控台
Log日志位置:/usr/house/storm/apache-storm-1.1.3/logs


6.安装 Spark(三节点安装)
(1)解压spark安装包 (/opt)
#tar -zxvf spark-2.3.0-bin-hadoop2.6.tgz
(2)将spark解压包移到/usr/house/spark
# mv spark-2.3.0-bin-hadoop2.6 /usr/house/spark
(3)配置spark配置文件
a.spark-env.sh.配置文件修改添加配置如下
路径:/usr/house/spark/spark-2.3.0-bin-hadoop2.6/conf
# mv spark-env.sh.template spark-env.sh
# vi spark-env.sh
#!/usr/bin/env bash

#
# Licensed to the Apache Software Foundation (ASF) under one or more
# contributor license agreements.  See the NOTICE file distributed with
# this work for additional information regarding copyright ownership.
# The ASF licenses this file to You under the Apache License, Version 2.0
# (the "License"); you may not use this file except in compliance with
# the License.  You may obtain a copy of the License at
#
#    http://www.apache.org/licenses/LICENSE-2.0
#
# Unless required by applicable law or agreed to in writing, software
# distributed under the License is distributed on an "AS IS" BASIS,
# WITHOUT WARRANTIES OR CONDITIONS OF ANY KIND, either express or implied.
# See the License for the specific language governing permissions and
# limitations under the License.
#

# This file is sourced when running various Spark programs.
# Copy it as spark-env.sh and edit that to configure Spark for your site.

# Options read when launching programs locally with
# ./bin/run-example or ./bin/spark-submit
# - HADOOP_CONF_DIR, to point Spark towards Hadoop configuration files
# - SPARK_LOCAL_IP, to set the IP address Spark binds to on this node
# - SPARK_PUBLIC_DNS, to set the public dns name of the driver program

# Options read by executors and drivers running inside the cluster
# - SPARK_LOCAL_IP, to set the IP address Spark binds to on this node
# - SPARK_PUBLIC_DNS, to set the public DNS name of the driver program
# - SPARK_LOCAL_DIRS, storage directories to use on this node for shuffle and RDD data
# - MESOS_NATIVE_JAVA_LIBRARY, to point to your libmesos.so if you use Mesos

# Options read in YARN client/cluster mode
# - SPARK_CONF_DIR, Alternate conf dir. (Default: ${SPARK_HOME}/conf)
# - HADOOP_CONF_DIR, to point Spark towards Hadoop configuration files
# - YARN_CONF_DIR, to point Spark towards YARN configuration files when you use YARN
# - SPARK_EXECUTOR_CORES, Number of cores for the executors (Default: 1).
# - SPARK_EXECUTOR_MEMORY, Memory per Executor (e.g. 1000M, 2G) (Default: 1G)
# - SPARK_DRIVER_MEMORY, Memory for Driver (e.g. 1000M, 2G) (Default: 1G)

# Options for the daemons used in the standalone deploy mode
# - SPARK_MASTER_HOST, to bind the master to a different IP address or hostname
# - SPARK_MASTER_PORT / SPARK_MASTER_WEBUI_PORT, to use non-default ports for the master
# - SPARK_MASTER_OPTS, to set config properties only for the master (e.g. "-Dx=y")
# - SPARK_WORKER_CORES, to set the number of cores to use on this machine
# - SPARK_WORKER_MEMORY, to set how much total memory workers have to give executors (e.g. 1000m, 2g)
# - SPARK_WORKER_PORT / SPARK_WORKER_WEBUI_PORT, to use non-default ports for the worker
# - SPARK_WORKER_DIR, to set the working directory of worker processes
# - SPARK_WORKER_OPTS, to set config properties only for the worker (e.g. "-Dx=y")
# - SPARK_DAEMON_MEMORY, to allocate to the master, worker and history server themselves (default: 1g).
# - SPARK_HISTORY_OPTS, to set config properties only for the history server (e.g. "-Dx=y")
# - SPARK_SHUFFLE_OPTS, to set config properties only for the external shuffle service (e.g. "-Dx=y")
# - SPARK_DAEMON_JAVA_OPTS, to set config properties for all daemons (e.g. "-Dx=y")
# - SPARK_DAEMON_CLASSPATH, to set the classpath for all daemons
# - SPARK_PUBLIC_DNS, to set the public dns name of the master or workers

# Generic options for the daemons used in the standalone deploy mode
# - SPARK_CONF_DIR      Alternate conf dir. (Default: ${SPARK_HOME}/conf)
# - SPARK_LOG_DIR       Where log files are stored.  (Default: ${SPARK_HOME}/logs)
# - SPARK_PID_DIR       Where the pid file is stored. (Default: /tmp)
# - SPARK_IDENT_STRING  A string representing this instance of spark. (Default: $USER)
# - SPARK_NICENESS      The scheduling priority for daemons. (Default: 0)
# - SPARK_NO_DAEMONIZE  Run the proposed command in the foreground. It will not output a PID file.
# Options for native BLAS, like Intel MKL, OpenBLAS, and so on.
# You might get better performance to enable these options if using native BLAS (see SPARK-21305).
# - MKL_NUM_THREADS=1        Disable multi-threading of Intel MKL
# - OPENBLAS_NUM_THREADS=1   Disable multi-threading of OpenBLAS
export JAVA_HOME=/usr/house/jdk/jdk1.8.0_131
#export SPARK_MASTER_IP=hadoop01.icccuat
export SPARK_MASTER_PORT=7077
export SPARK_DAEMON_JAVA_OPTS="-Dspark.deploy.recoveryMode=ZOOKEEPER -Dspark.deploy.zookeeper.url=hadoop02.icccuat:2181,hadoop03.icccuat:2181,hadoop04.icccuat:2181 -Dspark.deploy.zookeeper.dir=/spark"
export  SPARK_WORKER_CORES=2
export  SPARK_WORKER_MEMORY=1536m

(4)将spark安装包拷贝到2,3号机(usr/house/spark)
# scp -r spark-2.3.0-bin-hadoop2.6 hadoop02.icccuat:/usr/house/spark
# scp -r spark-2.3.0-bin-hadoop2.6 hadoop03.icccuat:/usr/house/spark
(5)启动spark服务(HA)
1号机:# usr/house/spark/spark-2.3.0-bin-hadoop2.6/sbin/ start-all.sh    --> hmaster
2号机:# usr/house/spark/spark-2.3.0-bin-hadoop2.6/sbin/ start-master.sh  --> hmaster  worker
3号机:--> worker
1号机:# usr/house/spark/spark-2.3.0-bin-hadoop2.6/bin/ spark shell
Log日志路径:usr/house/spark/spark-2.3.0-bin-hadoop2.6/logs

7.安装 Redis(单节点安装)
(1)安装redis编译的c环境
# yum install gcc-c++
(2)解压redis安装包(/opt)
# tar -zxvf redis-4.0.12.tar.gz
(3)将redis解压包移到/usr/house/redis
# mv redis-4.0.12 /usr/house/redis
(4)在redis安装目录下,使用make PREFIX= /usr/house/redis
路径:/usr/house/redis/redis-4.0.12
# make PREFIX= /usr/house/redis
(5)启动redis 在src下执行命令
# redis-server redis.conf

启动后看到如上欢迎页面,但此窗口不能关闭,窗口关闭就认为redis 也关闭了(类 似Tomcat通过bin下的startup.bat的方式)
解决方案:可以通过修改配置文件 配置redis后台启动,即服务器启 动了但不会 穿件控制台窗口
将redis.conf文件中的daemonize从false修改成true表示后台启动
使用命令查看6379端口是否启动ps -ef | grep redis
(6)Redis设置日志目录及其loglevel
在redis.conf中添加配置(如果配置已存在就修改):
loglevel notice#日志等级
logfile “/usr/redis/log/redis.log”#日志保存路径
使用前台方式启动Redis时,出现Creating Server TCP listening socket 127.0.0.1:6379: bind: Address already in use报错
在linux终端命令行中运行:# redis-cli


Redis集群cluster安装
在/usr/house/redis/redis-4.0.12目录下创建cluster目录
# mkdir -p /usr/house/redis/redis-4.0.12/cluster
在cluster目录下,创建名为7001、7002、7003、7004、7005、7006的目录
# cd cluster/
	# mkdir 7001 7002 7003 7004 7005 7006
在每个目录下分别新建配置文件,把如下 redis.conf 配置 内容粘贴进去
# vi 7001/redis.conf
# vi 7002/redis.conf
# vi 7003/redis.conf
# vi 7004/redis.conf
# vi 7005/redis.conf
# vi 7006/redis.conf
redis.conf 配置
#端口,每个节点端口要不一致
port 7001
#默认ip为127.0.0.1,需要改为本机ip,否则创建集群时无法访问对应的端口,无法创建集群bind 192.168.6.105
#redis后台运行
daemonize yes
#pidfile文件
pidfile /var/run/redis_7001.pid
#开启集群
cluster-enabled yes
#集群的配置,配置文件首次启动自动生成
cluster-config-file nodes_7001.conf
#aof日志开启,有需要就开启,它会每次写操作都记录一条日志
appendonly yes
启动redis实例
# cd /usr/house/redis/redis-4.0.12
# for((i=1;i<=6;i++)); do src/redis-server cluster/700$i/redis.conf; done
检查服务
# ps -ef | grep redis           //redis是否启动成功
# netstat -tnlp | grep redis    //监听redis端口

创建redis集群
src/redis-trib.rb create --replicas 1 192.168.127.21:7001 192.168.127.21:7002 192.168.127.21:7003 192.168.127.21:7004 192.168.127.21:7005 192.168.127.21:7006 如果直接启动redis集群会报错,原因:执行ruby脚本,没有ruby环境。
搭建Ruby环境
1.安装curl
# sudo yum install curl
- 安装RVM
# curl -L get.rvm.io | bash -s stablesource /usr/local/rvm/scripts/rvm
- 查看rvm库中已知的ruby版本
# rvm list known
- 安装一个ruby版本(可离线安装)
# rvm install 2.4.1
离线安装:
# tar -zxvf ruby-2.4.5.tar.gz
# cd ruby-2.4.5
# ./configure
# make
# sudo make install
- 查看Ruby版本
# ruby -v
- 安装Redis库
# gem install redis
启动集群
# src/redis-trib.rb create --replicas 1 192.168.127.21:7001 192.168.127.21:7002 192.168.127.21:7003 192.168.127.21:7004 192.168.127.21:7005 192.168.127.21:7006


输入yes
至此redis集群即搭建成功!
查看redis集群状态:
# /usr/house/redis/redis-4.0.12/src/redis-cli -c -h 192.168.127.21 -p 7001 cluster info

gem install时报错:Unable to require openssl,install OpenSSL and rebuild ruby (preferred) or use …

解决步骤:
- yum install openssl-devel -y
- 在ruby安装包/root/ruby-2.4.1/ext/openssl,执行ruby ./extconf.rb
3.执行make,若出现make: *** No rule to make target/include/ruby.h', needed byossl.o’. Stop.;在Makefile文件中的内的top_srcdir修改为 …/…
4.执行make install
5.再次执行gem -install redis
8.安装 Elasticsearch(三节点安装)
(1)添加非root用户
a、创建elasticsearch用户
# useradd elasticsearch
b、为elasticsearch设置密码
# passwd elasticsearch
c、创建一个用户组 es
# groupadd es
D、分配elasticsearch到es
# groupadd es
E、为elasticsearch设置权限
# chown -r elasticsearch *
F、赋予文件读写权限
# chmod -r 755 bin/*
G、切换elasticsearch用户
# su elasticsearch
(2)解压elasticsearch压缩包
# tar -zxvf elasticsearch-6.3.2.tar.gz
(3)将elasticsearch解压包移到/usr/house/es
# mv elasticsearch-6.3.2 /usr/house/es
(4)配置文件 elasticsearch.yml
路径:/usr/house/es/elasticsearch-6.3.2/config
# ======================== Elasticsearch Configuration =========================
#
# NOTE: Elasticsearch comes with reasonable defaults for most settings.
#       Before you set out to tweak and tune the configuration, make sure you
#       understand what are you trying to accomplish and the consequences.
#
# The primary way of configuring a node is via this file. This template lists
# the most important settings you may want to configure for a production cluster.
#
# Please consult the documentation for further information on configuration options:
# https://www.elastic.co/guide/en/elasticsearch/reference/index.html
#
# ---------------------------------- Cluster -----------------------------------
#
# Use a descriptive name for your cluster:
#
 cluster.name: es-6.3.2
#
# ------------------------------------ Node ------------------------------------
#
# Use a descriptive name for the node:
#
 node.name: hadoop01.icccuat
 node.master: true
 node.data: true
#
# Add custom attributes to the node:
#
#node.attr.rack: r1
#
# ----------------------------------- Paths ------------------------------------
#
# Path to directory where to store the data (separate multiple locations by comma):
#
 path.data: /usr/house/es/elasticsearch-6.3.2/data
#
# Path to log files:
#
 path.logs: /usr/house/es/elasticsearch-6.3.2/logs
#
# ----------------------------------- Memory -----------------------------------
#
# Lock the memory on startup:
#
#bootstrap.memory_lock: true
#
# Make sure that the heap size is set to about half the memory available
# on the system and that the owner of the process is allowed to use this
# limit.
#
# Elasticsearch performs poorly when the system is swapping the memory.
#
# ---------------------------------- Network -----------------------------------
#
# Set the bind address to a specific IP (IPv4 or IPv6):
#
 network.host: 192.168.127.21
#
# Set a custom port for HTTP:
#
 http.port: 9200
#
# For more information, consult the network module documentation.
#
# --------------------------------- Discovery ----------------------------------
#
# Pass an initial list of hosts to perform discovery when new node is started:
# The default list of hosts is ["127.0.0.1", "[::1]"]
#
 discovery.zen.ping.unicast.hosts: ["192.168.127.21:9300", "192.168.127.22:9300", "192.168.127.23:9300"]
#
# Prevent the "split brain" by configuring the majority of nodes (total number of master-eligible nodes / 2 + 1):
#
 discovery.zen.minimum_master_nodes: 2
#
# For more information, consult the zen discovery module documentation.
#
# ---------------------------------- Gateway -----------------------------------
#
# Block initial recovery after a full cluster restart until N nodes are started:
#
#gateway.recover_after_nodes: 3
#
# For more information, consult the gateway module documentation.
#
# ---------------------------------- Various -----------------------------------
#
# Require explicit names when deleting indices:
#
#action.destructive_requires_name: true
cluster.name: es-6.3.2
node.name: hadoop01.icccuat
node.master: true
node.data: true
path.data: /usr/house/es/elasticsearch-6.3.2/data
path.logs: /usr/house/es/elasticsearch-6.3.2/logs
network.host: 192.168.127.21
discovery.zen.ping.unicast.hosts: [“192.168.127.21:9300”, “192.168.127.22:9300”, “192.168.127.23:9300”]>
(5)复制es安装包到其他机器上修改node.name,network.host(/usr/house)
#scp -r es hadoop02.icccuat:/usr/house
#scp -r es hadoop03.icccuat:/usr/house
(6)启动es集群[三台都执行] -d 后台执行
# /usr/house/es/elasticsearch-6.3.2/bin
# ./elasticsearch -d
#出现错误
[1]: max file descriptors [4096] for elasticsearch process is too low, increase to at least [65536]
[2]: max virtual memory areas vm.max_map_count [65530] is too low, increase to at least [262144]
[1]: max number of threads [3802] for user [hadoop] is too low, increase to at least [4096]
用户最大可创建文件数太小[切换root用户 修改]
# exit
# sudo vi /etc/security/limits.conf

* soft nofile 65536
* hard nofile 65536
* soft nproc 5000
* hard nproc 5000
#查看可打开文件数量
# ulimit -Hn
#最大虚拟内存太小
sudo vi /etc/sysctl.conf
vm.max_map_count=262144
#查看虚拟内存的大小
sudo sysctl -p
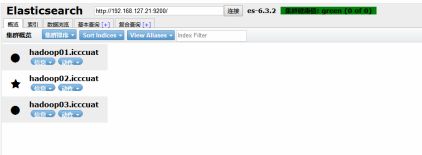
(7)用浏览器访问es所在机器的9200端口
(8)Log日志查看路径 /usr/house/es/elasticsearch-6.3.2/logs

9.安装 Azkaban (单节点安装)
(1)解压azkaban安装包(/opt)
# tar -zxvf azkaban-exec-server-0.1.0-SNAPSHOT.tar.gz
# tar -zxvf azkaban-web-server-0.1.0-SNAPSHOT.tar.gz
# tar -zxvf azkaban-db-0.1.0-SNAPSHOT.tar.gz
# tar -azkaban-solo-server-0.1.0-SNAPSHOT.tar.gz
azkaban-common : 常用工具类
azkaban-db-0.1.0-SNAPSHOT : 对应的sql脚本
azkaban-Hadoop-secutity-plugin : hadoop有关kerberos插件
azkaban-solo-server: web和executor运行在同一进程的项目
azkaban-web-server:azkaban的web-server单独模块
azkaban-executor-server: azkaban的executor-server单独模块
azkaban-spi: azkaban存储接口以及exception类
注:上面只上传了4个用到的包
(2)将azkaban解压包移到/usr/house/azkaban
# mv azkaban-exec-server-0.1.0-SNAPSHOT  /usr/house/azkaban
# mv azkaban-web-server-0.1.0-SNAPSHOT  /usr/house/azkaban
# mv azkaban-db-0.1.0-SNAPSHOT  /usr/house/azkaban
# mv azkaban-solo-server-0.1.0-SNAPSHOT  /usr/house/azkaban
(3)配置mysql数据库(mysql.icccuat机器上)
路径:主节点 hadoop01.cuat
将azkaban-db-0.1.0-SNAPSHOT 包发送到mysql.icccuat节点上
# scp -r /usr/house/azkaban/azkaban-db-0.1.0-SNAPSHOT/ mysql.icccuat:/usr/house/
A.创建一个azkaban的数据库:
# mysql -uroot -picccuat
> CREATE DATABASE azkaban;
授权:
> CREATE USER 'azkaban'@'%' IDENTIFIED BY 'icccuat';
> GRANT ALL ON azkaban.* to 'azkaban'@'%' WITH GRANT OPTION;
> flush privileges;
> EXIT
B.导入建表语句
mysql -uazkaban -p
> use azkaban;
> source /usr/house/azkaban-db-0.1.0-SNAPSHOT/create-all-sql-0.1.0-SNAPSHOT.sql;

(4)配置azkaban文件
这里将安装1个exec-server和一个web-server,相关组件分配如下:
A.配置azkaban web server
a配置jetty ssl
# keytool -keystore keystore -alias jetty -genkey -keyalg RSA

b 将生成的keystone文件拷贝到web-server的安装目录下,和conf等目录同级
c 修改conf/azkaban.properties配置文件
路径:/usr/house/azkaban/azkaban-web-server-0.1.0-SNAPSHOT/conf
database.type=mysql #数据库类型
mysql.port=3306 #数据库端口号
mysql.host=192.168.127.25 #数据库连接地址
mysql.database=azkaban #数据库实例名
mysql.user=azkaban #数据库用户名
mysql.password=azkaban #数据库密码
mysql.numconnections=100 #数据库最大连接数
user.manager.xml.file=/usr/house/azkaban/azkaban-web-server-0. 1.0-SNAPSHOT/conf/azkaban-users.xml
executor.global.properties=/usr/house/azkaban/azkaban-web-serv er-0.1.0-SNAPSHOT/conf/global.properties
# Azkaban Personalization Settings
azkaban.name=Test
azkaban.label=My Local Azkaban
azkaban.color=#FF3601
azkaban.default.servlet.path=/index
web.resource.dir=web/
default.timezone.id=Asia/Shanghai
# Azkaban UserManager class
user.manager.class=azkaban.user.XmlUserManager
user.manager.xml.file=/usr/house/azkaban/azkaban-web-server-0.1.0-SNAPSHOT/conf/azkaban-users.xml
# Loader for projects
executor.global.properties=/usr/house/azkaban/azkaban-web-server-0.1.0-SNAPSHOT/conf/global.properties
azkaban.project.dir=projects
database.type=h2
h2.path=./h2
h2.create.tables=true
# Velocity dev mode
velocity.dev.mode=false
# Azkaban Jetty server properties.
jetty.use.ssl=false
jetty.maxThreads=25
jetty.port=8081
# Azkaban Executor settings
executor.port=12321
# mail settings
mail.sender=
mail.host=
# User facing web server configurations used to construct the user facing server URLs. They are useful when there is a reverse proxy between Azkaban web servers and users.
# enduser -> myazkabanhost:443 -> proxy -> localhost:8081
# when this parameters set then these parameters are used to generate email links.
# if these parameters are not set then jetty.hostname, and jetty.port(if ssl configured jetty.ssl.port) are used.
# azkaban.webserver.external_hostname=myazkabanhost.com
# azkaban.webserver.external_ssl_port=443
# azkaban.webserver.external_port=8081
job.failure.email=
job.success.email=
lockdown.create.projects=false
cache.directory=cache
# JMX stats
jetty.connector.stats=true
executor.connector.stats=true
# Azkaban plugin settings
azkaban.jobtype.plugin.dir=plugins/jobtypes
database.type=mysql
mysql.port=3306
mysql.host=192.168.127.25
mysql.database=azkaban
mysql.user=root
mysql.password=icccuat
mysql.numconnections=100
在conf目录下创建logs文件夹在conf目录中创建log4j文件
路径:/usr/house/azkaban/azkaban-web-server-0.1.0-SNAPSHOT/conf
log4j.rootLogger=DEBUG,C
log4j.appender.C=org.apache.log4j.ConsoleAppender
log4j.appender.C.Target=System.err
log4j.appender.C.layout=org.apache.log4j.PatternLayout
log4j.appender.C.layout.ConversionPattern=%d{yyyy-MM-dd HH:mm:ss} %-5p %c{1}:%L - %m%n

添加azkaban.native.lib=false 和 execute.as.user=false属性
# pwd
/usr/house/azkaban/azkaban-web-server-0.1.0-SNAPSHOT/plugins/jobtypes

#vi commonprivate.properties
azkaban.native.lib=false
execute.as.user=false

(5)将conf 和plugins下的文件传输到exec-server同等目录下
/conf # scp -r * /usr/house/azkaban/azkaban-exec-server-0.1.0-SNAPSHOT/conf/
/plugins # scp -r * /usr/house/azkaban/azkaban-exec-server-0.1.0-SNAPSHOT/plugins/
(6)启动web-server

进入到web-server的目录,执行如下脚本,需要在bin级目录执行,否则汇报找不到配置文件的错误
(7)启动 exec-server
# ./azkaban-executor.sh
![]()
10.安装sqoop(单节点安装)
Sqoop是一个用来将Hadoop和关系型数据库中的数据相互转移的工具,可以将一个关系型数据库(例如 : MySQL ,Oracle ,Postgres等)中的数据导进到Hadoop的HDFS中,也可以将HDFS的数据导进到关系型数据库中。Sqoop只需要部署一份即可。如果你的Sqoop工具要与Hive、Hbase等系统或者MySQL进行交互,你安装的Sqoop软件的节点一定要包含以上你要使用的集群或者软件系统的安装包
(1)解压sqoop安装包 (/opt)
# tar -zxvf sqoop-1.4.7.bin__hadoop-2.6.0.tar.gz
(2)将sqoop解压包移到/usr/house/sqoop
# mv sqoop-1.4.7.bin__hadoop-2.6.0 /usr/house/sqoop
(3)在文件/etc/profile中设置环境变量SQOOP_HOME:
# vim /etc/profile
# source /etc/profile
export SQOOP_HOME=/usr/house/sqoop/sqoop-1.4.7.bin__hadoop-2.6.0
export PATH= P A T H : PATH: PATH:SQOOP_HOME/bin:
(4)将mysql的jdbc驱动 mysql-connection-java-*.jar复制到sqoop安装包的lib下(rz)
路径 :/usr/house/sqoop-1.4.7.bin__hadoop-2.6.0/lib
(5)配置sqoop-env.sh
路径:/usr/house/sqoop/sqoop-1.4.7.bin__hadoop-2.6.0/conf
# cp sqoop-env-template.sh sqoop-env.sh
# Licensed to the Apache Software Foundation (ASF) under one or more
# contributor license agreements.  See the NOTICE file distributed with
# this work for additional information regarding copyright ownership.
# The ASF licenses this file to You under the Apache License, Version 2.0
# (the "License"); you may not use this file except in compliance with
# the License.  You may obtain a copy of the License at
#
#     http://www.apache.org/licenses/LICENSE-2.0
#
# Unless required by applicable law or agreed to in writing, software
# distributed under the License is distributed on an "AS IS" BASIS,
# WITHOUT WARRANTIES OR CONDITIONS OF ANY KIND, either express or implied.
# See the License for the specific language governing permissions and
# limitations under the License.

# included in all the hadoop scripts with source command
# should not be executable directly
# also should not be passed any arguments, since we need original $*

# Set Hadoop-specific environment variables here.

#Set path to where bin/hadoop is available
export HADOOP_COMMON_HOME=/usr/house/hadoop/hadoop-2.8.2

#Set path to where hadoop-*-core.jar is available
export HADOOP_MAPRED_HOME=/usr/house/hadoop/hadoop-2.8.2

#set the path to where bin/hbase is available
export HBASE_HOME=/usr/house/hbase/hbase-1.2.6

#Set the path to where bin/hive is available
export HIVE_HOME=/usr/house/hive/apache-hive-1.2.0-bin
export HIVE_CONF_DIR=/usr/house/hive/apache-hive-1.2.0-bin/conf

#Set the path for where zookeper config dir is
export ZOOCFGDIR=/usr/house/zookeeper/zookeeper-3.4.7

(6)验证(查看sqoop版本)
# sqoop version

Success!
11.Kafka安装(三节点安装)
(1)解压kafka安装包(/opt)
# tar -zxvf kafka_2.11-0.10.2.1.tgz
(2)将kafka解压包移到/usr/house/kafka
# mv kafka_2.11-0.10.2.1 /usr/house/kafka
(3)修改配置文件 config/server.properties
路径:/usr/house/kafka/kafka_2.11-0.10.2.1/config
# Licensed to the Apache Software Foundation (ASF) under one or more
# contributor license agreements.  See the NOTICE file distributed with
# this work for additional information regarding copyright ownership.
# The ASF licenses this file to You under the Apache License, Version 2.0
# (the "License"); you may not use this file except in compliance with
# the License.  You may obtain a copy of the License at
#
#    http://www.apache.org/licenses/LICENSE-2.0
#
# Unless required by applicable law or agreed to in writing, software
# distributed under the License is distributed on an "AS IS" BASIS,
# WITHOUT WARRANTIES OR CONDITIONS OF ANY KIND, either express or implied.
# See the License for the specific language governing permissions and
# limitations under the License.

# see kafka.server.KafkaConfig for additional details and defaults

############################# Server Basics #############################

# The id of the broker. This must be set to a unique integer for each broker.
broker.id=0

# Switch to enable topic deletion or not, default value is false
#delete.topic.enable=true

############################# Socket Server Settings #############################

# The address the socket server listens on. It will get the value returned from
# java.net.InetAddress.getCanonicalHostName() if not configured.
#   FORMAT:
#     listeners = listener_name://host_name:port
#   EXAMPLE:
#     listeners = PLAINTEXT://your.host.name:9092
#listeners=PLAINTEXT://:9092

# Hostname and port the broker will advertise to producers and consumers. If not set,
# it uses the value for "listeners" if configured.  Otherwise, it will use the value
# returned from java.net.InetAddress.getCanonicalHostName().
#advertised.listeners=PLAINTEXT://your.host.name:9092

# Maps listener names to security protocols, the default is for them to be the same. See the config documentation for more details
#listener.security.protocol.map=PLAINTEXT:PLAINTEXT,SSL:SSL,SASL_PLAINTEXT:SASL_PLAINTEXT,SASL_SSL:SASL_SSL

# The number of threads handling network requests
num.network.threads=3

# The number of threads doing disk I/O
num.io.threads=8

# The send buffer (SO_SNDBUF) used by the socket server
socket.send.buffer.bytes=102400

# The receive buffer (SO_RCVBUF) used by the socket server
socket.receive.buffer.bytes=102400

# The maximum size of a request that the socket server will accept (protection against OOM)
socket.request.max.bytes=104857600


############################# Log Basics #############################

# A comma seperated list of directories under which to store log files
log.dirs=/usr/house/kafka/kafka_2.11-0.10.2.1/data/kafka-logs

# The default number of log partitions per topic. More partitions allow greater
# parallelism for consumption, but this will also result in more files across
# the brokers.
num.partitions=1

# The number of threads per data directory to be used for log recovery at startup and flushing at shutdown.
# This value is recommended to be increased for installations with data dirs located in RAID array.
num.recovery.threads.per.data.dir=1

############################# Log Flush Policy #############################

# Messages are immediately written to the filesystem but by default we only fsync() to sync
# the OS cache lazily. The following configurations control the flush of data to disk.
# There are a few important trade-offs here:
#    1. Durability: Unflushed data may be lost if you are not using replication.
#    2. Latency: Very large flush intervals may lead to latency spikes when the flush does occur as there will be a lot of data to flush.
#    3. Throughput: The flush is generally the most expensive operation, and a small flush interval may lead to exceessive seeks.
# The settings below allow one to configure the flush policy to flush data after a period of time or
# every N messages (or both). This can be done globally and overridden on a per-topic basis.

# The number of messages to accept before forcing a flush of data to disk
#log.flush.interval.messages=10000

# The maximum amount of time a message can sit in a log before we force a flush
#log.flush.interval.ms=1000

############################# Log Retention Policy #############################

# The following configurations control the disposal of log segments. The policy can
# be set to delete segments after a period of time, or after a given size has accumulated.
# A segment will be deleted whenever *either* of these criteria are met. Deletion always happens
# from the end of the log.

# The minimum age of a log file to be eligible for deletion due to age
log.retention.hours=168

# A size-based retention policy for logs. Segments are pruned from the log as long as the remaining
# segments don't drop below log.retention.bytes. Functions independently of log.retention.hours.
#log.retention.bytes=1073741824

# The maximum size of a log segment file. When this size is reached a new log segment will be created.
log.segment.bytes=1073741824

# The interval at which log segments are checked to see if they can be deleted according
# to the retention policies
log.retention.check.interval.ms=300000

############################# Zookeeper #############################

# Zookeeper connection string (see zookeeper docs for details).
# This is a comma separated host:port pairs, each corresponding to a zk
# server. e.g. "127.0.0.1:3000,127.0.0.1:3001,127.0.0.1:3002".
# You can also append an optional chroot string to the urls to specify the
# root directory for all kafka znodes.
zookeeper.connect=hadoop01.icccuat:2181,hadoop02.icccuat:2181,hadoop03.icccuat:2181

# Timeout in ms for connecting to zookeeper
zookeeper.connection.timeout.ms=6000

host.name=hadoop01.icccuat
broker.id=0 #brokerid应该为唯一性
(4)将配置好的kafka拷贝到其他机器上
(5)分别修改2,3号机器上对应kafka安装包下的config/server.properties中的broker.id和host.name
# scp -r kafka_2.11-0.10.2.1/ hadoop02.icccuat:/usr/house/kafka/
# scp -r kafka_2.11-0.10.2.1/ hadoop03.icccuat:/usr/house/kafka/
注:broker.id为唯一 可分别设置为为0,1,2
(6)启动kafka的3节点集群步骤:
1启动kafka进程
分别启动(node1,node2,node3)
#/usr/house/kafka/kafka_2.11-0.10.2.1/bin/kafka-server-start.sh -daemon /usr/house/kafka/kafka_2.11-0.10.2.1/config/server.properties
2创建topic
./kafka-topics.sh --zookeeper hadoop01.icccuat:2181,hadoop02.icccuat:2181,hadoop03.icccuat:2181 --create --topic t-testTopic --replication-factor 3 --partitions 3
或者:./kafka-topics.sh --zookeeper hadoop01.icccuat:2181 --create --topic t-testTopic --replication-factor 3 --partitions 3
3查看topic和topic详情
./kafka-topics.sh --zookeeper hadoop01.icccuat:2181,hadoop02.icccuat:2181,hadoop03.icccuat:2181 --list
./kafka-topics.sh --zookeeper hadoop01.icccuat:2181,hadoop02.icccuat:2181,hadoop03.icccuat:2181 --describe --topic t-testTopic
或者:
./kafka-topics.sh --zookeeper hadoop01.icccuat:2181 --list
./kafka-topics.sh --zookeeper hadoop01.icccuat:2181 --describe --topic t-testTopic
5:开启kafka producer生产者 (在三台机子上都可以)
./kafka-console-producer.sh --broker-list hadoop01.icccuat:9092,hadoop02.icccuat:9092,hadoop03.icccuat:9092 --topic t-testTopic
或者:
./kafka-console-producer.sh --broker-list hadoop01.icccuat:9092 --topic t-testTopic
手动网kafka的topic里面发送消息
5:开启consumer消费者(三台机子上都可以)
./kafka-console-consumer.sh --zookeeper hadoop01.icccuat:2181,hadoop02.icccuat:2181,hadoop03.icccuat:2181 --topic t-testTopic--from-beginning
或者:
./kafka-console-consumer.sh --zookeeper hadoop01.icccuat:2181 --topic t-testTopic
6:关闭kafka
kadka-server-stop.sh 或者kill -9
彻底删除topic:
1、删除kafka存储目录(server.properties文件log.dirs配置,默认为"/tmp/kafka-logs")相关topic目录
2、如果配置了delete.topic.enable=true直接通过命令删除,如果命令删除不掉,直接通过zookeeper-client 删除掉broker下的topic即可。
[[email protected] bin]$ ./kafka-topics.sh --delete --zookeeper hadoop01.icccuat:2181,hadoop02.icccuat:2181,hadoop03.icccuat:2181 --topic t-testTopic
12.Flume安装(单节点安装)
(1)解压flume安装包(/opt)
# tar -zxvf apache-flume-1.6.0-bin.tar.gz
(2)将flume解压包移到/usr/house/flume
# mv apache-flume-1.6.0-bin /usr/house/flume
(3)配置环境变量
export FLUME_HOME=/usr/house/flume/apache-flume-1.6.0-bin
export PATH= P A T H : PATH: PATH:FLUME_HOME/bin:
(4)验证flume(查看flume版本)
# > flume-ng version
会看到以下输出:

**
13.rocketMQ安装(单master安装单节点)
**
(1)Maven安装
创建maven文件夹
路径:/usr/house/
# mkdir maven
注:rocketmq 支持maven2.2版本以上
解压apache-maven-3.3.9-bin.tar.gz包
# tar -zxvf apache-maven-3.3.9-bin.tar.gz
将maven解压包移到/usr/house/maven下
# cp apache-maven-3.3.9 /usr/house/maven
为maven配置环境变量,在/etc/profile文件配置
export M2_HOME=/usr/house/maven/apache-maven-3.3.9
export PATH= P A T H : PATH: PATH:M2_HOME/bin
(2)安装rocketMQ
创建rocketmq文件夹
路径:/usr/house/
# mkdir rocketmq
解压alibaba-rocketmq-3.2.6-alibaba-rocketmq.tar.gz包
# tar -zxvf alibaba-rocketmq-3.2.6-alibaba-rocketmq.tar.gz
将rocketmq解压包移到/usr/house/rocketmq下
# cp alibaba-rocketmq /usr/house/rocketmq
为rocketmq配置环境变量,在/etc/profile文件配置
export ROCKETMQ_HOME=/usr/house/rocketMQ/alibaba-rocketmq
export PATH= P A T H : PATH: PATH:ROCKETMQ_HOME/bin
刷新profile文件
# source /etc/profile
验证:
路径 :/usr/house/rocketMQ/alibaba-rocketmq/bin
启动namesrv:
#nohup sh mqnamesrv -n “192.168.127.21:9876” autoCreateTopicEnable=true &
启动broker:
# nohup sh mqbroker -n "192.168.127.21:9876" &
查看进程 或者查看nohub.out
# jps
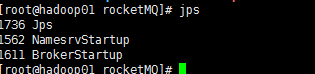

关闭nameserver和所有的broker:
进入到bin下:
sh mqshutdown namesrv
sh mqshutdown broker
在idea中开发测试
1.创建一个maven项目,其pom.xml的内容见pom.xml
2. 编写消息产生者Producer,见Producer.java
3.编写消息消费者Consumer,见PushConsumer.java
<?xml version="1.0" encoding="UTF-8"?>
<project xmlns="http://maven.apache.org/POM/4.0.0"
         xmlns:xsi="http://www.w3.org/2001/XMLSchema-instance"
         xsi:schemaLocation="http://maven.apache.org/POM/4.0.0 http://maven.apache.org/xsd/maven-4.0.0.xsd">
    <modelVersion>4.0.0</modelVersion>

    <groupId>rocketmq</groupId>
    <artifactId>rocketmq</artifactId>
    <version>1.0-SNAPSHOT</version>
    <build>
        <plugins>
            <plugin>
                <groupId>org.apache.maven.plugins</groupId>
                <artifactId>maven-compiler-plugin</artifactId>
                <configuration>
                    <source>1.8</source>
                    <target>1.8</target>
                </configuration>
            </plugin>
        </plugins>
    </build>
    <name>RocketMQTest</name>
    <url>http://maven.apache.org</url>
    <properties>
        <project.build.sourceEncoding>UTF-8</project.build.sourceEncoding>
    </properties>
    <dependencies>
        <dependency>
            <groupId>com.alibaba.rocketmq</groupId>
            <artifactId>rocketmq-client</artifactId>
            <version>3.0.10</version>
        </dependency>
        <dependency>
            <groupId>com.alibaba.rocketmq</groupId>
            <artifactId>rocketmq-all</artifactId>
            <version>3.0.10</version>
            <type>pom</type>
        </dependency>
        <dependency>
            <groupId>ch.qos.logback</groupId>
            <artifactId>logback-classic</artifactId>
            <version>1.1.1</version>
        </dependency>
        <dependency>
            <groupId>ch.qos.logback</groupId>
            <artifactId>logback-core</artifactId>
            <version>1.1.1</version>
        </dependency>
        <dependency>
            <groupId>junit</groupId>
            <artifactId>junit</artifactId>
            <version>4.11</version>
            <scope>test</scope>
        </dependency>
    </dependencies>
</project>
package com.rocketmq;

import com.alibaba.rocketmq.client.exception.MQClientException;
import com.alibaba.rocketmq.client.producer.DefaultMQProducer;
import com.alibaba.rocketmq.client.producer.SendResult;
import com.alibaba.rocketmq.common.message.Message;

import java.util.Date;
public class Producer {
    public static void main(String[] args) throws MQClientException {
        DefaultMQProducer producer = new DefaultMQProducer("rmq-group");
   //     producer.setNamesrvAddr("121.42.179.195:9876");
        producer.setNamesrvAddr("192.168.127.22:9876");
        producer.setInstanceName("producer");
        producer.start();
        //messageDelayLevel = 1s 5s 10s 30s 1m 2m 3m 4m 5m 6m 7m 8m 9m 10m 20m 30m 1h 2h
        // 1,2,3,4,5,6,7,8,9 ... 各自对应具体的延时时间
        // 例如 msg.setDelayTimeLevel(5);   对应延时1min
        try {
            for (int i = 0; i < 10; i++) {
                Thread.sleep(1000);  //每秒发送一次MQ
                Message msg = new Message("TopicA-test",// topic
                        "TagA",// tag
                        (new Date() + "Hello RocketMQ ,QuickStart" + i)
                                .getBytes()// body
                );
                msg.setDelayTimeLevel(5);
                SendResult sendResult = producer.send(msg);
            }
        } catch (Exception e) {
            e.printStackTrace();
        }
        producer.shutdown();
    }
}
package com.rocketmq;

import com.alibaba.rocketmq.client.consumer.DefaultMQPushConsumer;
import com.alibaba.rocketmq.client.consumer.listener.ConsumeConcurrentlyContext;
import com.alibaba.rocketmq.client.consumer.listener.ConsumeConcurrentlyStatus;
import com.alibaba.rocketmq.client.consumer.listener.MessageListenerConcurrently;
import com.alibaba.rocketmq.client.exception.MQClientException;
import com.alibaba.rocketmq.common.message.MessageExt;

import java.util.List;
public class Consumer {
    public static void main(String[] args) throws MQClientException {
        DefaultMQPushConsumer consumer = new DefaultMQPushConsumer(
                "rmq-group");

     //   consumer.setNamesrvAddr("121.42.179.195:9876");
        consumer.setNamesrvAddr("192.168.127.22:9876");
        consumer.setInstanceName("consumer");
        consumer.subscribe("TopicA-test", "TagA");

        consumer.registerMessageListener(new MessageListenerConcurrently() {
            @Override
            public ConsumeConcurrentlyStatus consumeMessage(
                    List<MessageExt> msgs, ConsumeConcurrentlyContext context) {
                for (MessageExt msg : msgs) {
                    System.out.println(new String(msg.getBody()));
                }
                return ConsumeConcurrentlyStatus.CONSUME_SUCCESS;
            }
        });
        consumer.start();
        System.out.println("Consumer Started.");
    }
}