redhat6.9上安装oracle11g操作手册(史上最详细)
第一次在linux系统上安装oracle数据库,安装过程不算顺利,遇到各种问题,但是最终还是一一解决了,感觉从这次安装安装过程,让我们对oracle的安装和使用有更深层次的理解,成就感满满!
不瞎掰,为了让其它人员也能承担安装工作,所以把整个安装过程及遇到哪些问题、怎么解决的都记录下来,项目组其它成员按照我的手册飞快的就能搞定。详情往下看
Oracle数据库部署手册
- Oracle安装
- Linux安装Oracle系统要求
内存 必须高于1G的物理内存
交换空间 一般为内存的2倍,例如:1G的内存可以设置swap 分区为3G大小
如果8G内存,则swap分区至少8G
若内存空间为16G以上,则swap分区至少为16G。
- 修改操作系统核心参数
在Root用户下执行以下步骤:
1)修改用户的SHELL的限制,修改/etc/security/limits.conf文件
输入命令:vi /etc/security/limits.conf,按i键进入编辑模式,将下列内容加入该文件。
oracle soft nproc 2047
oracle hard nproc 16384
oracle soft nofile 1024
oracle hard nofile 65536
编辑完成后按Esc键,输入“:wq”存盘退出
2)修改/etc/pam.d/login 文件,输入命令:vi /etc/pam.d/login,按i键进入编辑模式,将下列内容加入该文件。
session required /lib/security/pam_limits.so
session required pam_limits.so
编辑完成后按Esc键,输入“:wq”存盘退出
3)修改linux内核,修改/etc/sysctl.conf文件,输入命令: vi /etc/sysctl.conf ,按i键进入编辑模式,将下列内容加入该文件
fs.file-max = 6815744
fs.aio-max-nr = 1048576
kernel.shmall = 2097152
kernel.shmmax = 2147483648
kernel.shmmni = 4096
kernel.sem = 250 32000 100 128
net.ipv4.ip_local_port_range = 9000 65500
net.core.rmem_default = 4194304
net.core.rmem_max = 4194304
net.core.wmem_default = 262144
net.core.wmem_max = 1048576
编辑完成后按Esc键,输入“:wq”存盘退出
4)要使 /etc/sysctl.conf 更改立即生效,执行以下命令。 输入:sysctl -p 显示如下:
linux:~ # sysctl -p
net.ipv4.ip_forward = 0
net.ipv4.conf.default.rp_filter = 1
net.ipv4.conf.default.accept_source_route = 0
kernel.sysrq = 0
kernel.core_uses_pid = 1
net.ipv4.tcp_syncookies = 1
error: "net.bridge.bridge-nf-call-ip6tables" is an unknown key
error: "net.bridge.bridge-nf-call-iptables" is an unknown key
error: "net.bridge.bridge-nf-call-arptables" is an unknown key
kernel.msgmnb = 65536
kernel.msgmax = 65536
kernel.shmmax = 68719476736
kernel.shmall = 4294967296
fs.file-max = 6815744
fs.aio-max-nr = 1048576
kernel.shmall = 2097152
kernel.shmmax = 2147483648
kernel.shmmni = 4096
kernel.sem = 250 32000 100 128
net.ipv4.ip_local_port_range = 9000 65500
net.core.rmem_default = 4194304
net.core.rmem_max = 4194304
net.core.wmem_default = 262144
net.core.wmem_max = 1048576
5)编辑 /etc/profile ,输入命令:vi /etc/profile,按i键进入编辑模式,将下列内容加入该文件。
if [ $USER = "oracle" ]; then
if [ $SHELL = "/bin/ksh" ]; then
ulimit -p 16384
ulimit -n 65536
else
ulimit -u 16384 -n 65536
fi
fi
编辑完成后按Esc键,输入“:wq”存盘退出
- 创建用户及用户组
6)创建相关用户和组,作为软件安装和支持组的拥有者。
创建用户,输入命令:
groupadd oinstall
groupadd dba
创建Oracle用户和密码,输入命令:
useradd -g oinstall -g dba -m oracle
passwd oracle
然后会让你输入密码,密码任意输入2次,但必须保持一致,回车确认
- 安装前准备
7)创建数据库软件目录和数据文件存放目录,目录的位置,根据自己的情况来定,注意磁盘空间即可,这里我把其放到oracle用户下,例如:
输入命令:
mkdir /home/oracle/app
mkdir /home/oracle/app/oracle
mkdir /home/oracle/app/oradata
mkdir /home/oracle/app/oracle/product
8)更改目录属主为Oracle用户所有,输入命令:
chown -R oracle:oinstall /home/oracle/app
9)配置oracle用户的环境变量,首先,切换到新创建的oracle用户下,
输入:su – oracle ,然后直接在输入 : vi .bash_profile
按i编辑 .bash_profile,进入编辑模式,增加以下内容:
umask 022
export ORACLE_BASE=/home/oracle/app
export ORACLE_HOME=$ORACLE_BASE/oracle/product/11.2.0/dbhome_1
export ORACLE_SID=orcl
export PATH=$PATH:$HOME/bin:$ORACLE_HOME/bin
export LD_LIBRARY_PATH=$ORACLE_HOME/lib:/usr/lib
编辑完成后按Esc键,输入“:wq”存盘退出
测试环境变量是否有效:
[gis@localhost ~]$ echo $ORACLE_HOME
发现为空。执行下面命令
[gis@localhost ~]$ . ./.bash_profile
再次测试,ok
[gis@localhost ~]$ echo $ORACLE_HOME
/home/oracle/app/oracle/product/11.2.0/dbhome_1
安装过程
上传安装包到目录/home/oracle/app,并使用cksum命令检查包的完整性,与oracle官网上对应的包cksum值比对(下载包路径那都会有cksum值),如果匹配不上,则需要重新下载按照包。我就因为包不完整折腾了我一整天。
注:如果包不完整,在按照到图形化界面会弹出异常:valid entry size(expected ….
也可以直接拷贝:
scp linux.x64_11gR2_database_1of2.zip [email protected]:/home/oracle/app
scp linux.x64_11gR2_database_2of2.zip [email protected]:/home/oracle/app
| -bash-4.1$ ls -l -rw-r--r-- 1 oracle oinstall 1111416131 Mar 22 15:44 linux.x64_11gR2_database_2of2.zip -rw-r--r-- 1 oracle oinstall 1239269270 Mar 23 10:05 linux.x64_11gR2_database_1of2.zip -bash-4.1$ -bash-4.1$ cksum linux.x64_11gR2_database_1of2.zip 3152418844 1239269270 linux.x64_11gR2_database_1of2.zip -bash-4.1$ cksum linux.x64_11gR2_database_2of2.zip 3669256139 1111416131 linux.x64_11gR2_database_2of2.zip |
解压安装包到 database文件夹
| -bash-4.1$ unzip linux.x64_11gR2_database_1of2.zip -bash-4.1$ unzip linux.x64_11gR2_database_2of2.zip |
- 安装过程
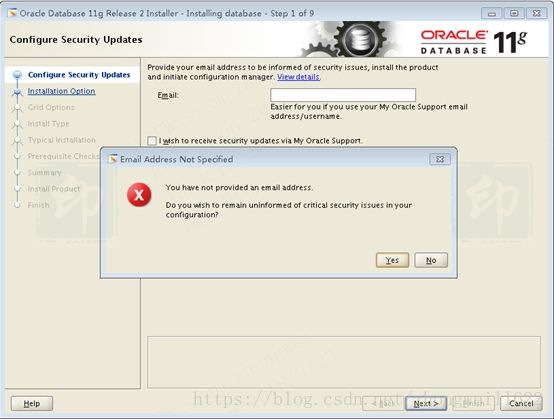
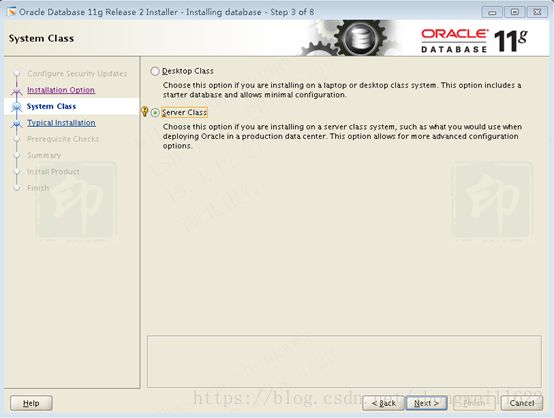
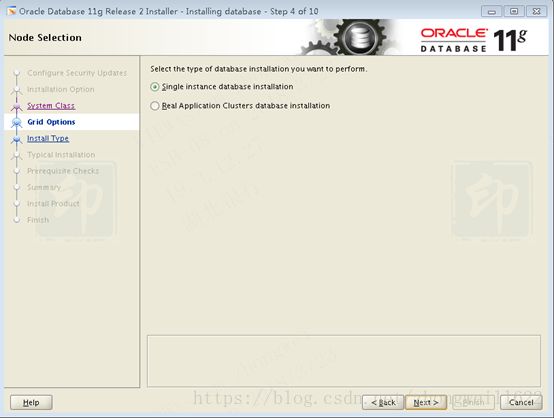
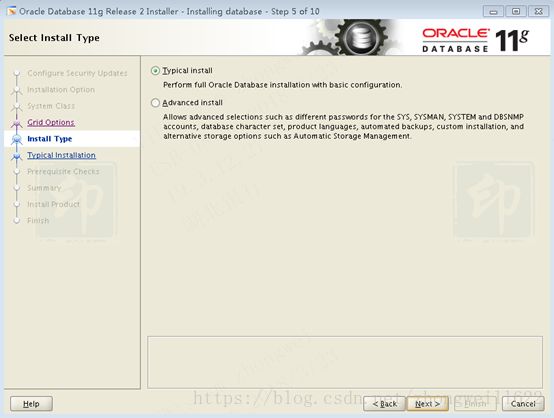
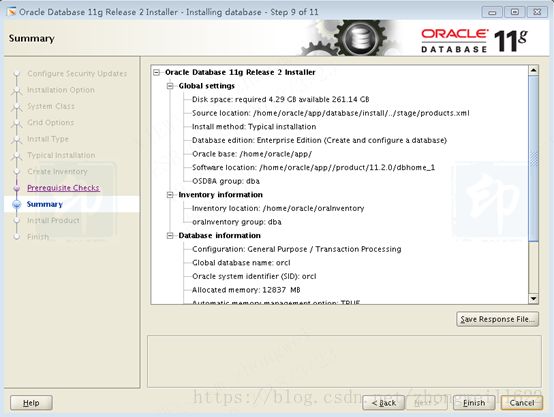
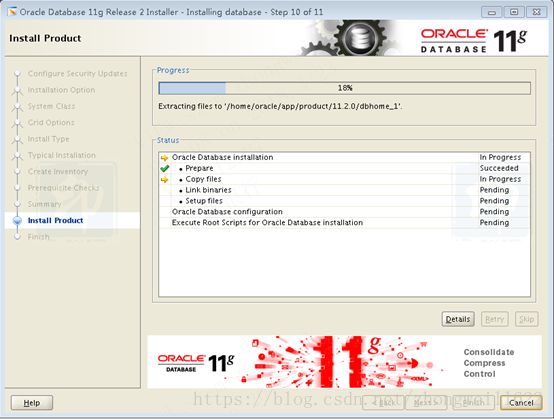
进入目录/home/oracle/app/database目录,执行命令 ./runnInstaller
注意:此处一定要用oracle用户登录的窗口执行(用root用户登录切换到oracle用户执行可能会报错。)例如:
正确的要用oracle登陆执行.
| -bash-4.1$ ./runInstaller Starting Oracle Universal Installer... Checking Temp space: must be greater than 120 MB. Actual 15390 MB Passed Checking swap space: must be greater than 150 MB. Actual 17611 MB Passed Checking monitor: must be configured to display at least 256 colors. Actual 16777216 Passed #如果此处检查不过,解决方法: #su – root 切换到root用户 #xhost 执行xhost命令 #su – oracle 切换到oracle用户 #export DISPLAY=:0.0 Preparing to launch Oracle Universal Installer from /tmp/OraInstall2018-03-23_10-23-20AM. Please wait ...-bash-4.1$ |
注意:如果缺少按照包或者其它条件不符合,不会跳转到此页面
此处check点包括
- 环境变量是否已经设置,比如:net.ipv4.ip_local_port_range = 9000 65500 如果范围不对,会要求修改
- Swap空间大小是否符合要求,增加swap的方法:
| 一、查看系统当前的分区情况: >free -m total used free shared buffers cached Mem: 438 432 6 0 8 141 -/+ buffers/cache: 282 156 Swap: 2047 1375 671 二、创建用于交换分区的文件:如果要增加2G大小的交换分区,则命令写法如下,其中的 count 等于想要的块大小
>dd if=/dev/zero of=/home/swap bs=block_size count=number_of_block dd if=/dev/zero of=/home/swap bs=1024 count=2048000 2048000+0 records in 2048000+0 records out 2097152000 bytes (2.1 GB) copied, 60.4492 seconds, 34.7 MB/s 三、设置交换分区文件: >mkswap /home/swap 四、立即启用交换分区文件: >swapon /home/swap 五、若要想使开机时自启用,则需修改文件/etc/fstab中的swap行: /home/swap swap swap defaults 0 0 |
- rpm安装包
下载缺少的rpm包,上传到指定目录,用root用户登录,并到指定目录执行以下命令:
rpm -ivh 包名 --nodeps --force
| [root@localhost Downloads]# rpm -ivh unixODBC-2.2.11-7.1.i386.rpm --nodeps --force warning: unixODBC-2.2.11-7.1.i386.rpm: Header V3 DSA/SHA1 Signature, key ID 37017186: NOKEY Preparing... ########################################### [100%] 1:unixODBC ########################################### [100%]
|
| [root@esbApp1 dbhome_1]# ./root.sh Running Oracle 11g root.sh script...
The following environment variables are set as: ORACLE_OWNER= oracle ORACLE_HOME= /home/oracle/app/product/11.2.0/dbhome_1
Enter the full pathname of the local bin directory: [/usr/local/bin]: /usr/local/bin Copying dbhome to /usr/local/bin ... Copying oraenv to /usr/local/bin ... Copying coraenv to /usr/local/bin ... Creating /etc/oratab file... Entries will be added to the /etc/oratab file as needed by Database Configuration Assistant when a database is created Finished running generic part of root.sh script. Now product-specific root actions will be performed. Finished product-specific root actions |
至此,oracle已经安装完成。
使用sqlplus测试下。
安装完成。
启动数据库
| -bash-4.1$ sqlplus / as sysdba SQL*Plus: Release 11.2.0.1.0 Production on Fri Mar 23 11:26:17 2018 Copyright (c) 1982, 2009, Oracle. All rights reserved. Connected to an idle instance. SQL> startup ORA-00845: MEMORY_TARGET not supported on this system SQL>
|
ORA-00845: MEMORY_TARGET not supported on this system 解决方法
Root用户登录,编辑/etc/fstab 修改记录成以下,增加size=8G
tmpfs /dev/shm tmpfs defaults,size=8G 0 0
重启生效,或者重新挂载
挂载命令:mount -o remount,size=16G /dev/shm
一般Size大小跟机器内存保持一致。
| SQL> startup ORACLE instance started. Total System Global Area 1.3429E+10 bytes Fixed Size 2217992 bytes Variable Size 6845106168 bytes Database Buffers 6576668672 bytes Redo Buffers 4661248 bytes ORA-01102: cannot mount database in EXCLUSIVE mode SQL> |
ORA-01102: cannot mount database in EXCLUSIVE mode解决方法:
| [root@esbApp1 dbhome_1]# ipcs -s ------ Semaphore Arrays -------- key semid owner perms nsems 0x00000000 0 root 600 1 0x00000000 65537 root 600 1 0x01ad2954 655362 oracle 660 154 0x62052f41 131075 root 644 1 0xaea4f7b4 786436 oracle 660 154
[root@esbApp1 dbhome_1]# ipcrm -s 655362 [root@esbApp1 dbhome_1]# ipcrm -s 655362 ipcrm: invalid id (655362) [root@esbApp1 dbhome_1]# ipcrm -s 786436 [root@esbApp1 dbhome_1]# |
再次启动,启动成功。
| -bash-4.1$ sqlplus / as sysdba SQL*Plus: Release 11.2.0.1.0 Production on Fri Mar 23 11:41:03 2018 Copyright (c) 1982, 2009, Oracle. All rights reserved. Connected to an idle instance. SQL> startup ORACLE instance started. Total System Global Area 1.3429E+10 bytes Fixed Size 2217992 bytes Variable Size 6845106168 bytes Database Buffers 6576668672 bytes Redo Buffers 4661248 bytes Database mounted. Database opened. SQL> -bash-4.1$ lsnrctl start LSNRCTL for Linux: Version 11.2.0.1.0 - Production on 23-MAR-2018 11:48:28 Copyright (c) 1991, 2009, Oracle. All rights reserved. TNS-01106: Listener using listener name LISTENER has already been started -bash-4.1$ |
- 创建oracle数据库实例
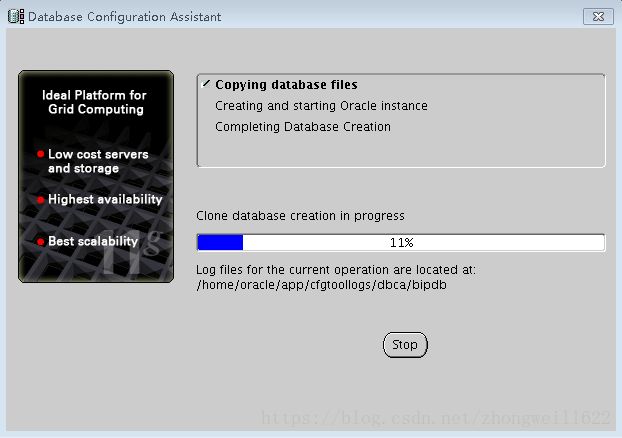
Oracle数据库创建成功,默认的数据库实例为orcl,如何实现一个数据库多实例运行.?下面是创建数据库实例的步骤
- oracle用户登录(一定是oracle用户登录,不能su – oracle方式dengl)
- 修改.bash_profile中SID的值为要增加的实例名,比如:bipdb
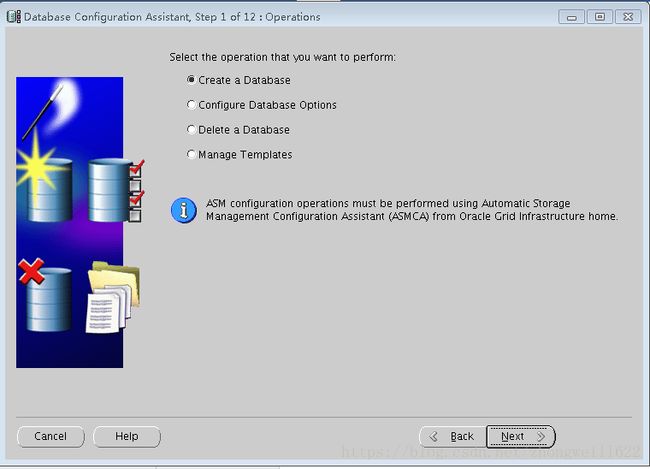
- 执行命令dbca,弹出图形化界面
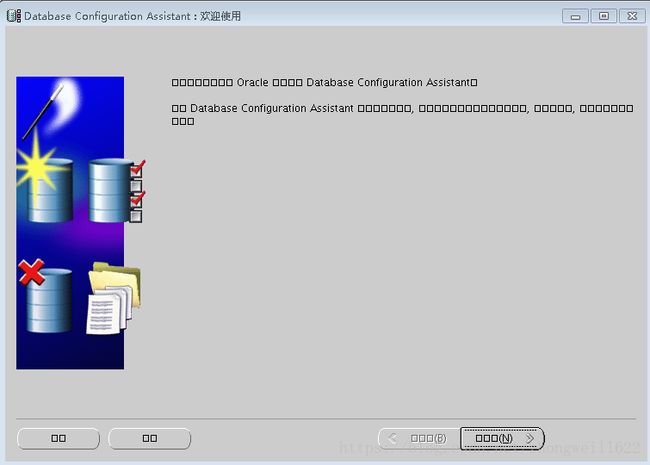
上图弹出界面乱码 ,查看LANG的值。执行export LANG=C,后再执行dbca命令。
注意:此处需要修改默认的数据库编码,默认的数据库编码格式不支持中文字符.
后面全部默认按钮就好。
- 启动多个数据库实例
循环执行下列命令:
export SID=实例名
sqlplus / as sysdba
startup
- 删除数据库实例
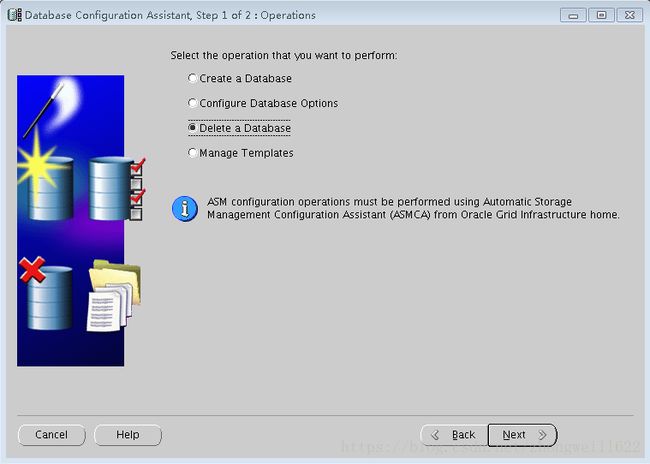
orace用户登录,执行命令:dbca
注意:有可能会遇到dbca命令执行后,“DELETE A DATABASE”,是灰色的,无法选择,这时候需要坚持/etc/oratab文件中是否存在“SID:ORACLE_HOME:N” 如:esbdb:/home/oracle/app/oracle/database/11g........:N。
以上就是我们在安装oracle数据的整个过程所有操作和遇到的一些问题,当然操作系统版本不同和oracle安装版本不同可能遇到的问题也会不同,我后面用centenos7.5操作系统来安装oracle,遇到又是另外一些问题,这个在下篇再介绍。

