arm-linux-gcc4.5.1 交叉编译Qt4.7.0 + qtcreator
经过几天的不断尝试,终于成功在板子上运行第一个qt程序,记录配置过程与心得。
配置环境
搭建好linux最小系统的arm板子。
虚拟机 ubuntu16.04
交叉编译器 友善之臂arm-linux-gcc4.5.1 https://github.com/friendlyarm/prebuilts.git
Qt源码 qt-everywhere-opensource-src-4.7.0 https://download.qt.io/archive/qt/4.7 下载qt-everywhere-opensource-src-4.7.0.tar.gz
本配置会在ubuntu的/opt路径下进行,至于为什么我也不懂,其他教程也是这样做的。
经过几天的失败尝试,我发现要特别注意交叉编译器和qt版本的对应问题,大家在编译时要根据别人成功编译通过的例子选择编译器和qt,例如在这里选择arm-linux-gcc4.5.1和qt-everywhere-opensource-src-4.7.0。
配置交叉编译器
提供的下载文件里面有gcc和gcc-x64两个文件夹,每个文件家又有两个版本的编译器,我们只需用到gcc下的arm-linux-gcc-4.5.1-v6-vfp.tar.xz编译器。完整操作过程如下:
终端下
git clone https://github.com/friendlyarm/prebuilts.git
sudo mkdir -p /opt/FriendlyARM/toolchain
sudo tar xf prebuilts/gcc/arm-linux-gcc-4.5.1-v6-vfp.tar.xz -C /opt/FriendlyARM/toolchain/
此时/opt/FriendlyARM/toolchain/4.5.1/bin下就会有所需的编译器。
添加环境变量:
修改/etc/profile, 在末尾添加:export PATH=/opt/FriendlyARM/toolchain/4.5.1/bin:$PATH
然后
source /etc/profile
测试:
arm-linux-gcc -v
如果出现很多字,最后是gcc version 4.5.1 (ctng-1.8.1-FA)就说明成功了。
交叉编译Qt4.7.0
将下载好的qt-everywhere-opensource-src-4.7.0.tar.gz移动至/opt下
在/opt目录下解压:sudo tar -zxvf qt-everywhere-opensource-src-4.7.0.tar.gz
然后进入解压后目录:cd qt-everywhere-opensource-src-4.7.0
接下来修改配置文件:/opt/qt-everywhere-opensource-src-4.7.0/mkspecs/qws/linux-arm-g++/qmake.conf
在此之前大家可以打开路径/opt/qt-everywhere-opensource-src-4.7.0/mkspecs/qws,
该路径下有许多文件夹,每个文件夹对应一个编译器平台,由于我们使用arm-linux-gcc交叉编译器,因此只修改linux-arm-g++/qmake.conf。
然后在/opt/qt-everywhere-opensource-src-4.7.0路径下执行:
sudo ./configure -prefix /opt/QtEmbedded-4.7.3 -release -shared -fast -pch -no-qt3support -qt-sql-sqlite -no-libtiff -no-libmng -qt-libjpeg -qt-zlib -qt-libpng -qt-freetype -no-openssl -nomake examples -nomake demos -nomake tools -optimized-qmake -no-phonon -no-nis -no-opengl -no-cups -no-xcursor -no-xfixes -no-xrandr -no-xrender -no-xkb -no-sm -no-xinerama -no-xshape -no-separate-debug-info -xplatform qws/linux-arm-g++ -embedded arm -depths 16 -no-qvfb -qt-gfx-linuxfb -no-gfx-qvfb -no-kbd-qvfb -no-mouse-qvfb -confirm-license
这个命令会生成makefile文件,其中-xplatform qws/linux-arm-g++指明使用哪个编译平台,要选择我们修改了qmake.conf的那一个。-prefix /opt/QtEmbedded-4.7.3这个指明编译路径。(因为这个命令是复制别人的,忘了改路径后来才发现,虽然不影响编译,但应该改为4.7.0比较好)
等待执行结束,然后:
sudo make
等待很久,执行结束,然后:
sudo make install
至此,编译完成。
这时在/opt/QtEmbedded-4.7.3下就有编译好的qt文件。
配置板子
将编译安装得到的lib、plugins拷贝到开发板中,lib中存放的是QT程序运行所需的动态库文件,plugins中存放的应该是所需的插件。放在板子的/opt/Qt4.7.0路径。
远程传送文件,电脑和嵌入式在同一局域网情况下,在电脑终端
scp -r lib plugins [email protected]:/opt/Qt4.7.0
修改板子环境变量,同样是/etc/profile,添加
export LD_LIBRARY_PATH=/opt/Qt4.7.0/lib
export QT_QPA_PLATFORM_PLUGIN_PATH=/opt/Qt4.7.0/plugins
export QT_QPA_PLATFORM=linuxfb:fb=/dev/fb0
export QT_QPA_FONTDIR=/opt/Qt4.7.0/lib/fonts
配置QtCreator
打开QtCreator,在“工具->选项 ”进行如下操作:
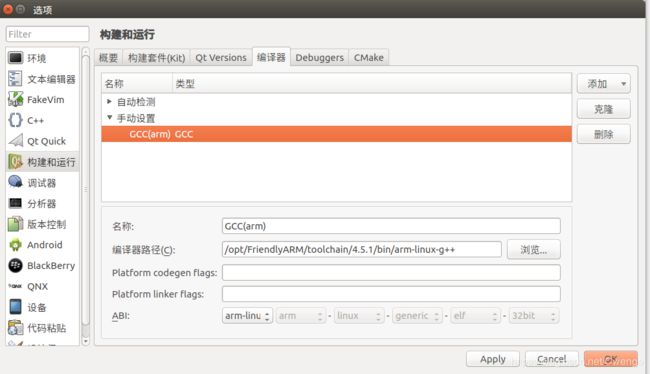
- 添加编译器

路径为自己的交叉编译器,arm-linux-g++ - 添加Qt Versions

路径为交叉编译好的QtEmbedded-4.7.3/bin/qmake。 - 添加kit
 设备类型设为通用linux设备,Sysboot设置为对应好的lib路径,编译器、Qt版本为前面添加好的。ARM_Qt4.7.0左边的黄色标志说明改配置能用但不完整,红色说明不能用,将鼠标移至上面会有更多信息。
 - 点击Apply。
测试
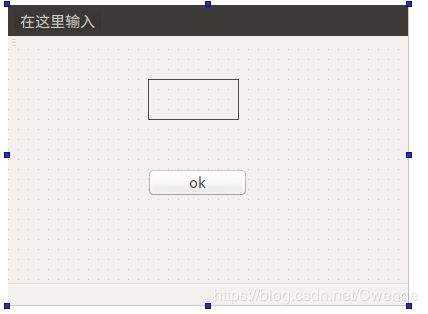
在QtCreator下编写测试程序程序hello,

然后点击构建hello。
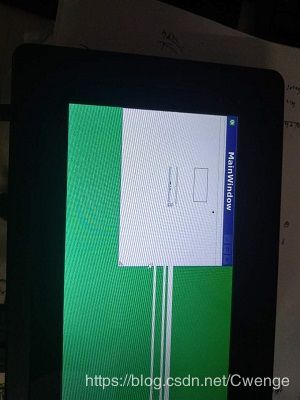
将编译好的可执行程序发送至板子上,在板子终端下执行:
./hello -qws
