Markdown编辑器之Editor.md v1.5.0应用
在开始写CSDN博客前一直使用的是类似xhEditor、百度的ueditor编辑器,新版本的有道云笔记也实现了markdown编辑器,的确用过markdown后感觉很喜欢,再用之前的编辑器很别扭,然后项目中用到编辑器的时候我就想使用markdown来实现,而非传统的编辑器
开始我是使用底层的markdown.js实现,发现虽然可以实现此种编辑风格,如下方这样
    <textarea id="text-input" oninput="this.editor.update()"
              rows="6" cols="60">Type **Markdown** here.textarea>
    <div id="preview"> div>
    <script>
        function Editor(input, preview) {
            this.update = function () {
                preview.innerHTML = markdown.toHTML(input.value);
            };
            input.editor = this;
            this.update();
        }
        var $dom = function (id) { return document.getElementById(id); };
        new Editor($dom("text-input"), $dom("preview"));
    script>
body>
但是发现后面要做的事太多,相当于要设计一个产品,从UI到交互,所幸了解到Editor.md,完成了几乎我想做的所有事。
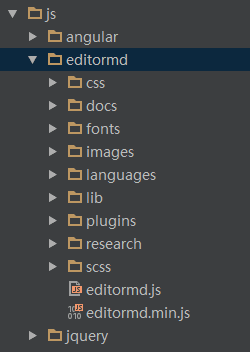
下载
我下载的是Editor.md 1.5.0版本,此时还是最新版本,官网打开成功率有点低,所以我在百度云盘有分享 点击我集成demo
具体的插件api我就不多赘述了,你可以去官网看下你想了解的功能,下面的demo应该也满足了大部分的编辑需求
下面是jsp页面(include.jsp页面是我自定义的,内含jquery文件,所以你们别忘了引入jquery.js)
<%@ page language="java" contentType="text/html; charset=utf-8"
         pageEncoding="utf-8"%>
<jsp:include page="../common/include.jsp">jsp:include>
<%@include file="../common/taglib.jsp"%>

<html>
<head>
    <link rel="stylesheet" href="${root}/content/js/editormd/css/editormd.preview.min.css" />
    <link rel="stylesheet" href="${root}/content/js/editormd/css/editormd.css" />
    <script src="${root}/content/js/editormd/lib/marked.min.js">script>
    <script src="${root}/content/js/editormd/lib/prettify.min.js">script>
    <script src="${root}/content/js/editormd/editormd.js">script>
    <script type="text/javascript">
        editormd.markdownToHTML("content");
    script>
head>
<body>
    <form action="save" method="post">
        <input type="submit" value="提交">
        <div class="editormd" id="test-editormd">
            <textarea class="editormd-markdown-textarea" name="test-editormd-markdown-doc">textarea>
            <textarea class="editormd-html-textarea" name="mdtext">textarea>
        div>
    form>
<script type="text/javascript">
    $(function() {
        editormd("test-editormd", {
            width   : "90%",
            height  : 640,
            syncScrolling : "single",
            path    : "${root}/content/js/editormd/lib/",
            //让构造出来的HTML代码直接在name="mdtext"的textarea域中,实现提交到后台获取。
            saveHTMLToTextarea : true,
            //实现图片上传
            imageUpload : true,
            imageFormats : ["jpg", "jpeg", "gif", "png", "bmp"],
            imageUploadURL : "${root}/uploadfile"
            //编辑区域主题
            /*editorTheme : "dark",*/
            //预览区域主题,1.5版本后支持dark黑色主题,此处我没使用,根据喜好配置
            /*previewTheme : "dark"*/
        });
    });
script>
body>
html>
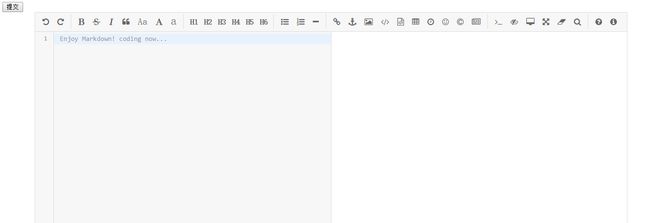
然后,我们在action层,简单实现跳转到该页面,显示如下
不过注意一下,我上图中圈的两处,你们下载下来的文件测试结果跟我是不一样的,因为我根据自己操作习惯和喜好简单修改了一下
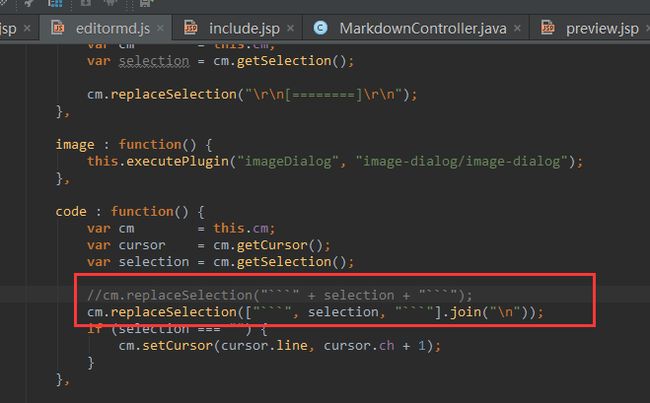
第一处修改,原始的实现是操作单行代码,我习惯用多行进行代码标注,就像CSDN的相同图标实现的功能一样,当然此编辑器也可以使用快捷键Shift+Alt+C实现对选中的多行进行代码片标注。修改如下:
编辑editormd.js,做法如下图红框内,同时我也减少了一个工具栏图标,因为我觉得没什么用第二处修改,我觉得挺有必要,我参照CSDN的代码显示格式稍微优化了一下,显示更明了、好看点
修改editormd.css一下两处样式
简单优化后,我们看下图片上传
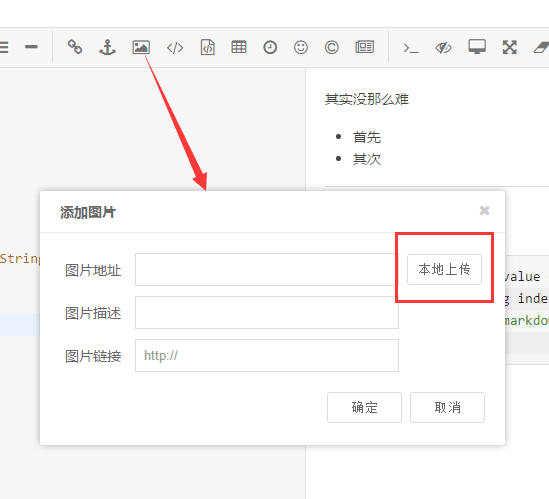
点击后弹出此弹窗,此处也有两点需要注意
- 本地上传按钮只在你页面加载editormd对象时指定的imageUpload参数为true时才出现
- 弹出窗在最新版的Chrome浏览器中打开会有些慢,不是有点慢,这应该是谷歌的一个bug,可以通过如下修改避免
后台上传逻辑简单写下
@Controller
public class UploadController {
    @RequestMapping(value="/uploadfile",method=RequestMethod.POST)
    public void hello(HttpServletRequest request,HttpServletResponse response,@RequestParam MultipartFile attach){
        try {
            String rootPath = request.getSession().getServletContext().getRealPath("/content/upload/");
            //创建文件
            File filePath=new File(rootPath);
            if(!filePath.exists()){
                filePath.mkdirs();
            }
            SimpleDateFormat sdf = new SimpleDateFormat("yyyyMMddHHssmmSS");
            String fileNewName = sdf.format(new Date())+"."+attach.getOriginalFilename().substring(attach.getOriginalFilename().lastIndexOf(".")+1);;
            File realFile=new File(rootPath+File.separator+fileNewName);
            FileUtils.copyInputStreamToFile(attach.getInputStream(), realFile);
            response.setHeader( "Content-Type" , "text/html" );
            //返回的json字符串需要这样写,这是Editor.md api要求的标准返回格式
            response.getWriter().write( "{\"success\": 1, \"message\":\"上传成功\",\"url\":\""+request.getSession().getServletContext().getContextPath()+"/content/upload/" + fileNewName + "\"}" );
        } catch (Exception e) {
            try {
                response.getWriter().write( "{\"success\":0}" );
            } catch (IOException e1) {
                e1.printStackTrace();
            }
        }
    }
}
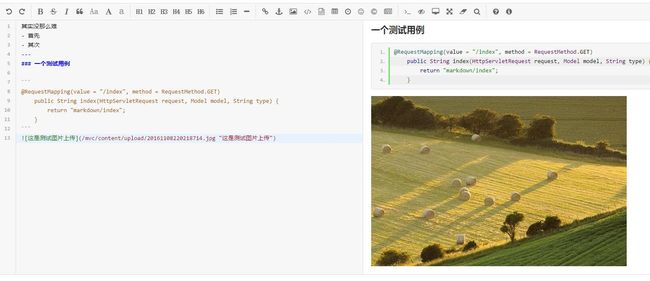
上传结果:
最后,我们看下保存编辑的数据如何展示
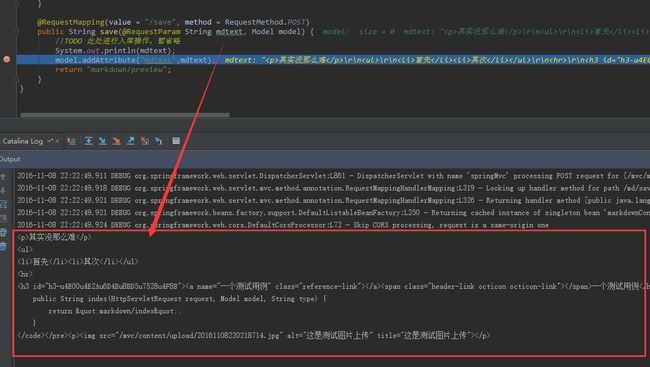
上面在编辑页面简单加了个提交按钮用于提交form表单,后台接受数据后进行入库操作,展示时取出数据再展示,我就简单重现这个过程
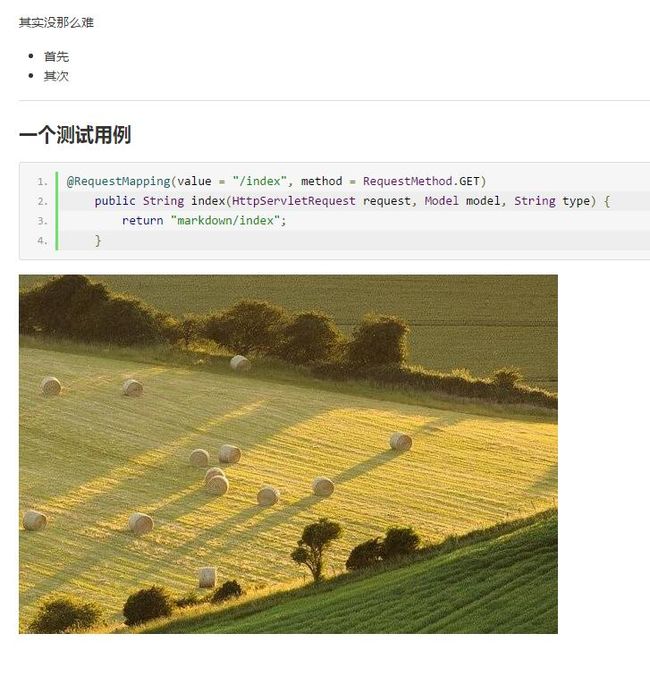
跳转到的预览页面:
preview.jsp
<%@ page language="java" contentType="text/html; charset=utf-8"
         pageEncoding="utf-8"%>
<jsp:include page="../common/include.jsp">jsp:include>
<%@include file="../common/taglib.jsp"%>

<html>
<head>
  <link rel="stylesheet" href="${root}/content/js/editormd/css/editormd.preview.min.css" />
  <link rel="stylesheet" href="${root}/content/js/editormd/css/editormd.css" />
  <script src="${root}/content/js/editormd/lib/marked.min.js">script>
  <script src="${root}/content/js/editormd/lib/prettify.min.js">script>
  <script src="${root}/content/js/editormd/editormd.js">script>
  <script type="text/javascript">
    $(function(){
      editormd.markdownToHTML("content");
    });
  script>
head>
<body>
<div id="content">${mdtext}div>
body>
html>