create-react-app配置总结
create-react-app配置总结
最近在用react全家桶做一个管理后台的项目,项目采用的create-react-app脚手架,用的ui框架是ant design与ant design pro。中间碰到了一些问题,在这里总结一下。
2018年十月初,create-react-app 2.0发布。这次 create-react-app 的更新主要是解决其所依赖的相关工具的更新,create-react-app所依赖的许多工具均发布了新的功能和版本,例如 Babel 7、Webpack 4、Jest 23,因此 create-react-app 在这次更新中将一年中值得更新的依赖全部进行了更新。
下面是它这次更新的全部内容:

1. 添加less支持,css module配置 antd配置
项目中添加less less-loader antd
yarn add --dev less less-loader
yarn add antd ant-design-pro
修改webpack.config.js
const lessRegex = /\.less$/
const lessModuleRegex = /\.module\.less$/
const antdRegex = /\.(css|less)$/

// 添加第三个参数otherConfig
const getStyleLoaders = (cssOptions, preProcessor, otherConfig) => {
    ...
    if (preProcessor) {
      loaders.push({
        loader: require.resolve(preProcessor),
        options: {
          sourceMap: isEnvProduction && shouldUseSourceMap,
          ...otherConfig
        }
      })
    }
    return loaders
}

// Add antd setting
...
{
  test: lessRegex,
    exclude: /node_modules|antd\.css/,
  use: getStyleLoaders(
  {
    importLoaders: 2,
    sourceMap: isEnvProduction && shouldUseSourceMap,
    localIdentName: '[name]__[local]__[contenthash:base64:5]',
    modules: true
  },
  'less-loader',
  {
    javascriptEnabled: true
  }
),
  sideEffects: true
},
{
  test: lessModuleRegex,
    use: getStyleLoaders(
  {
    importLoaders: 2,
    sourceMap: isEnvProduction && shouldUseSourceMap,
    modules: true,
    getLocalIdent: getCSSModuleLocalIdent
  },
  'less-loader',
  {
    javascriptEnabled: true
  }
)
},
{
  test: antdRegex,
    include: /node_modules|antd\.css/,
  use: getStyleLoaders(
  {
    importLoaders: 2,
    sourceMap: isEnvProduction && shouldUseSourceMap
  },
  'less-loader',
  {
    javascriptEnabled: true
  }
),
  sideEffects: true
},
...
2. 生产环境去除console
修改webpack.config.js
 compress: {
            ecma: 5,
            warnings: false,
            drop_debugger: true,
            drop_console: true,
            // Disabled because of an issue with Uglify breaking seemingly valid code:
            // https://github.com/facebook/create-react-app/issues/2376
            // Pending further investigation:
            // https://github.com/mishoo/UglifyJS2/issues/2011
            comparisons: false,
            ......
3. 生产环境去除sourcemap
修改webpack.config.js
// const shouldUseSourceMap = process.env.GENERATE_SOURCEMAP !== 'false';
const shouldUseSourceMap = process.env.REACT_APP_GENERATE_SOURCEMAP !== 'false'
环境变量文件中使用
REACT_APP_GENERATE_SOURCEMAP=false
4. 添加装饰器插件transform-decorators-legacy
安装 @babel/plugin-proposal-decorators
yarn add --dev @babel/plugin-proposal-decorators
修改package.json中plugins
"plugins": [
       [
        "@babel/plugin-proposal-decorators",
        {
          "legacy": true
        }
      ],
      ....
    ]
5. 添加插件 webpack-bundle-analyzer
安装 webpack-bundle-analyzer
yarn add --dev webpack-bundle-analyzer
修改 webpack.config.js
const BundleAnalyzerPlugin = require('webpack-bundle-analyzer').BundleAnalyzerPlugin

// use BundleAnalyzerPlugin
const shouldUseBundleAnalyzer = process.env.REACT_APP_USE_ANALYZER !== 'false'

plugins:[
	....,
	isEnvProduction && shouldUseBundleAnalyzer && new BundleAnalyzerPlugin(),
]
环境变量文件中添加
REACT_APP_USE_ANALYZER=false
6. 项目中添加redux-logger
安装redux-logger
yarn add --dev redux-logger
项目中使用 configureStore.js
import { createStore, applyMiddleware } from 'redux'
import logger from 'redux-logger'
import rootReducer from '../reducers'

const debug = process.env.NODE_ENV !== 'production'

const middleware = [
  debug && logger,
].filter(Boolean)

const createStoreWithMiddleware = applyMiddleware(...middleware)(createStore)

export default function configureStore (initialState) {
  const store = createStoreWithMiddleware(rootReducer, initialState,
    window.__REDUX_DEVTOOLS_EXTENSION__ ? window.__REDUX_DEVTOOLS_EXTENSION__() : undefined)
  return store
}
7. 项目中添加nprogress进度条
安装nprogress
yarn add nprogress
项目中使用 App.js
import NProgress from 'nprogress'

class App extends Component {
  componentWillUpdate () {
    NProgress.start()
  }

  componentDidUpdate () {
    NProgress.done()
  }

  render () {
    return (
      <div className="App">
        <Switch>
          ........
        </Switch>
      </div>
    )
  }
}
8. 项目打包生成.gz文件
安装插件compression-webpack-plugin
yarn add --dev compression-webpack-plugin
修改webpack.config.js
const CompressionPlugin = require("compression-webpack-plugin");

plugins: [
	...
	isEnvProduction && new CompressionPlugin({
        filename: '[path].gz[query]',
        algorithm: 'gzip',
        test: /\.js$|\.css$|\.html$/,
        threshold: 10240,
        minRatio: 0.8
    }),
]
9. 按需加载ant design与ant design pro
安装插件compression-webpack-plugin
yarn add --dev babel-plugin-import
修改package.json中plugins
 "plugins": [
     ...
    [
        "import",
        {
          "libraryName": "antd",
           "libraryDirectory": "es",
          "style": "css"
        },
        "antd"
      ],
      [
        "import",
        {
          "libraryName": "ant-design-pro",
          "libraryDirectory": "lib",
          "style": true,
          "camel2DashComponentName": false
        },
        "ant-design-pro"
      ]
    ]
10. 多环境支持
因为create-react-app只支持development,production,test三个环境,当需要对更多环境提供支持的时候(比如,公司有两个测试环境,对应的接口都不一样),就需要修改下配置了。
其实很简单,只需要将create-react-app查找.env文件的一个变量
例如:
- 开发环境(development)
- 测试环境(production)
- 发布环境(release)
安装插件cross-env
yarn add --dev cross-env
项目根目录添加文件.env.development,.env.production,.env.release
//.env.development
NODE_ENV=development
REACT_APP_XXX=XXX
...

//.env.production
NODE_ENV=production
REACT_APP_XXX=XXX
...

//.env.release
NODE_ENV=production
REACT_APP_XXX=XXX
...
修改config/env.js
//有一个特殊的内置环境变量叫做NODE_ENV,你可以输出process.env.NODE_ENV,但无法手动覆盖NODE_ENV。这可以防止开发人员意外地将缓慢的开发构建部署到生产环境中。
// const NODE_ENV = process.env.NODE_ENV;
const NODE_ENV = process.env.REACT_ENV || process.env.NODE_ENV;
修改package.json
"scripts": {
    "start": "node scripts/start.js",
    "build": "cross-env REACT_ENV=production node scripts/build.js",
    "release": "cross-env REACT_ENV=release node scripts/build.js",
    "test": "node scripts/test.js"
  },
打包命令
- 打包测试版本:
yarn build - 打包正式版本:
yarn release
11. 使用DllPlugin拆分第三方资源代码
什么是DLL
DLL(Dynamic Link Library)文件为动态链接库文件,在Windows中,许多应用程序并不是一个完整的可执行文件,它们被分割成一些相对独立的动态链接库,即DLL文件,放置于系统中。当我们执行某一个程序时,相应的DLL文件就会被调用。
举个例子:很多产品都用到螺丝,但是工厂在生产不同产品时,不需要每次连带着把螺丝也生产出来,因为螺丝可以单独生产,并给多种产品使用。在这里螺丝的作用就可以理解为是dll。
通常来说,我们的代码都可以至少简单区分成业务代码和第三方库。如果不做处理,每次构建时都需要把所有的代码重新构建一次,耗费大量的时间。然后大部分情况下,很多第三方库的代码并不会发生变更(除非是版本升级),这时就可以用到dll:把复用性较高的第三方模块打包到动态链接库中,在不升级这些库的情况下,动态库不需要重新打包,每次构建只重新打包业务代码。
还是上面的例子:把每次构建,当做是生产产品的过程,我们把生产螺丝的过程先提取出来,之后我们不管调整产品的功能或者设计(对应于业务代码变更),都不必重复生产螺丝(第三方模块不需要重复打包);除非是产品要使用新型号的螺丝(第三方模块需要升级),才需要去重新生产新的螺丝,然后接下来又可以专注于调整产品本身。
新建webpack.vendor.config.js文件
const path = require('path')
const { CleanWebpackPlugin } = require('clean-webpack-plugin')
const webpack = require('webpack')

function resolve (dir) {
  return path.join(__dirname, '..', dir)
}

module.exports = {
  mode: 'production',
  entry: {
    vendor: [
      'react',
      'react-container-query',
      'react-document-title',
      'react-dom',
      'react-redux',
      'react-router-dom',
      'redux',
      'whatwg-fetch',
      'classnames',
      'enquire-js',
      'es6-promise',
      'good-storage',
      'nprogress',
      'numeral',
      'path-to-regexp',
    ],
  },
  output: {
    filename: '[name].[contenthash:8].chunk.js',
    path: resolve('./vendor'),
    library: '[name]'
  },
  plugins: [
    new CleanWebpackPlugin(),
    new webpack.DllPlugin({
      name: '[name]',
      path: resolve('./vendor/[name].manifest.json')
    })
  ]
}
修改webpack.config.js文件
const AddAssetHtmlWebpackPlugin = require('add-asset-html-webpack-plugin')

function pathResolve (dir) {
  return path.resolve(__dirname, '..', dir)
}

//检测文件或者文件夹存在
function fsExistsSync (path) {
  try {
    fs.accessSync(path, fs.F_OK)
  } catch (e) {
    return false
  }
  return true
}

const createVendorPlugins = (publicPath) => {
  const plugins = []
  const hasVendor = fsExistsSync('./vendor')
  if (hasVendor) {
    const files = fs.readdirSync(pathResolve('./vendor'))
    files.forEach(file => {
      if (/.*\.chunk.js/.test(file)) {
        plugins.push(
          new AddAssetHtmlWebpackPlugin({
            filepath: pathResolve(`./vendor/${file}`),
            publicPath: `${publicPath}static/js`,
            outputPath: 'static/js'
          })
        )
      }
      if (/.*\.manifest.json/.test(file)) {
        plugins.push(
          new webpack.DllReferencePlugin({
            manifest: pathResolve(`./vendor/${file}`)
          })
        )
      }
    })
  }
  return plugins
}

...
plugins:[...].filter(Boolean).concat(createVendorPlugins(publicPath))
...
修改package.json文件
"scripts":{
   "vendor": "webpack --config ./config/webpack.vendor.config.js",
   ...
}
然后控制台使用yarn vendor yarn start||yarn build即可。
12. Webpack alias配置
修改webpack.config.js文件
      alias: {
        // Support React Native Web
        // https://www.smashingmagazine.com/2016/08/a-glimpse-into-the-future-with-react-native-for-web/
        'react-native': 'react-native-web',
        '@': pathResolve('src')
      },
13. ESLint + Standard 项目配置
安装插件
yarn add --dev eslint-config-standard eslint-config-standard-react eslint-plugin-node eslint-plugin-promise eslint-plugin-standard
修改webpack.config.js文件
{
          test: /\.(js|mjs|jsx|ts|tsx)$/,
          enforce: 'pre',
          use: [
            {
              options: {
                formatter: require.resolve('react-dev-utils/eslintFormatter'),
                eslintPath: require.resolve('eslint'),
                emitWarning: true// 添加内容
              },
              loader: require.resolve('eslint-loader')
            }
          ],
          include: paths.appSrc
},
项目根目录新建.eslintrc.js文件
module.exports = {
  env: {
    browser: true,
    es6: true,
    node: true
  },
  extends: ['standard', 'standard-react'],
  parser: 'babel-eslint',
  parserOptions: {
    ecmaVersion: 6,
    ecmaFeatures: {
      experimentalObjectRestSpread: true,
      modules: true,
      jsx: true,
    },
    parser: 'babel-eslint',
    sourceType: 'module',
  },
  plugins: ['react'],
  root: true,
  globals: {
    Atomics: 'readonly',
    SharedArrayBuffer: 'readonly'
  },
  rules: {
    'camelcase': 0,// 强制驼峰法命名
    'handle-callback-err': 0,// nodejs 处理错误
    "indent": 0,// 缩进风格
    'no-console': 0,// 禁止使用console
    'no-unused-vars': [0, {
      // 允许声明未使用变量
      'vars': 'local',
      // 参数不检查
      'args': 'none'
    }],
    'no-return-assign': 0,// return 语句中不能有赋值表达式
    'no-undef': 0,// 不能有未定义的变量
    'node/no-deprecated-api': 0,
    'react/prop-types': 0,
     // jsx 的开始和闭合处禁止有空格
    'react/jsx-tag-spacing': [
      'error',
      {
        'closingSlash': 'never',
        'beforeSelfClosing': 'allow',
        'afterOpening': 'never'
      }
    ],
    'react/jsx-indent': ['error', 2],
    'standard/no-callback-literal': 0
  }
}
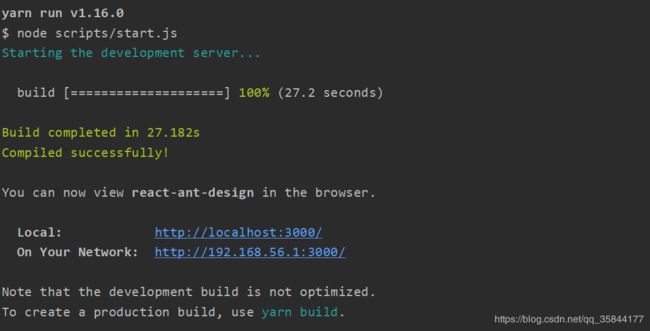
14. 编译进度条配置
安装progress-bar-webpack-plugin
yarn add --dev progress-bar-webpack-plugin
修改webpack.config.js文件
const ProgressBarPlugin = require('progress-bar-webpack-plugin')
const chalk = require('chalk')

plugins:[
	...
	new ProgressBarPlugin({
        format: '  build [:bar] ' + chalk.green.bold(':percent') + ' (:elapsed seconds)',
        clear: false
   })
]
运行结果如下:
15. 项目热更新配置
create-react-app默认修改代码后会直接刷新页面,我们需要修改的部分自动刷新,和自动刷新网页不同的是,hot-loader并不会刷新网页,仅仅是替换修改的部分。
15.1 使用react-hot-loader
安装react-hot-loader
yarn add --dev react-hot-loader
修改webpack.config.js文件
entry:[
	 // 添加内容
      'react-hot-loader/patch',
      isEnvDevelopment &&
      require.resolve('react-dev-utils/webpackHotDevClient'),
      // Finally, this is your app's code:
      paths.appIndexJs
]
...
plugins: [
	[
		require.resolve('babel-plugin-named-asset-import'),
			{
				loaderMap: {
					svg: {
						ReactComponent: '@svgr/webpack?-svgo,+ref![path]'
					}
				}
			},
			'react-hot-loader/babel'//添加内容
	]
],
修改App.js文件
import { hot } from 'react-hot-loader'

...

export default hot(module)(App)
15.2 使用webpack内置HMR
修改index.js文件
const app = (
  <Provider store={store}>
    <LocaleProvider locale={zhCN}>
      <HashRouter>
        <App/>
      </HashRouter>
    </LocaleProvider>
  </Provider>
)

ReactDOM.render(
  app,
  document.getElementById('root'))

....

if (module.hot) {
  module.hot.accept()
}
重启后可以看到修改部分已经刷新而浏览器网页没有刷新。
16. 优化create-react-app编译打包速度
使用babel-plugin-dynamic-import-node插件,原理是转换 import()为 require(),将所有异步组件都用同步的方式引入
安装babel-plugin-dynamic-import-node
yarn add --dev babel-plugin-dynamic-import-node
修改.env.development文件与.env.production文件
//.env.development
NODE_ENV=development
...

//.env.production
NODE_ENV=production
...
修改package.json文件
"babel": {
    "env": {
      "development": {
        "plugins": [
          "dynamic-import-node"
        ]
      }
    },
    ......
}
重启项目可查看运行效果。
17. 修改antd组件库主题色
修改webpack.config.js文件
{
  test: antdRegex,
  include: /node_modules|antd\.css/,
  use: getStyleLoaders(
      {
        importLoaders: 2,
        sourceMap: isEnvProduction && shouldUseSourceMap
      },
      'less-loader',
      {
        javascriptEnabled: true,
        // 添加如下配置
        modifyVars: {
          '@primary-color': '#7298ff'
        }
      }
  ),
  sideEffects: true
},
重启项目即可修改默认主题色。
github链接:react-ant-design,欢迎star