以太坊开发 | 如何部署和调用智能合约
这篇写于搭建好私链之后、第一次尝试部署智能合约。用到了三种部署方法:(1)网页版Remix,(2)网页版Remix+MetaMask,(2)网页版Remix+geth客户端。
操作系统:macOS Mojave 10.14
Remix是Solidity官方推荐的编译器,有网页版和本地编译版(安装方法)。
教程1:适合新手部署简单合约
利用Remix网页版编译器和MetaMask(浏览器版Etherreum钱包)部署智能合约至测试网络-原文链接
教程中给出了两种方法。如下。
1. 利用Remix的在线编译器编译并在本地部署一个简单的智能合约。由于文中的示例代码没有断行,所以可以copy下面这段我整理的有断行的。
pragma solidity >=0.4.0 <0.6.0;

contract My_Token {
    /* This creates an array with all balances */
    mapping (address => uint256) public balanceOf;
    /* Initializes contract with initial supply tokens to the creator of the contract */
    function MyToken(uint256 initialSupply) public {
        balanceOf[msg.sender] = initialSupply; // Give the creator all initial tokens
    }
        /* Send coins */
    function transfer(address _to, uint256 _value) public {
        require(balanceOf[msg.sender] >= _value); // Check if the sender has enough
        require(balanceOf[_to] + _value >= balanceOf[_to]); // Check for overflows
        balanceOf[msg.sender] -= _value; // Subtract from the sender
        balanceOf[_to] += _value; // Add the same to the recipient
    }
}
2. Remix + MetaMask 在以太坊测试网络中部署智能合约。具体方法见教程。
教程2:利用geth客户端搭建私链并部署合约
1. 调试智能合约并编译
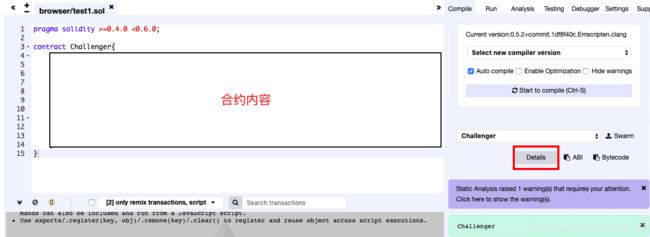
用网页版Remix在私链中调试智能合约,调试完成后,点击红框中的“Details”获取编译后的json字符串。
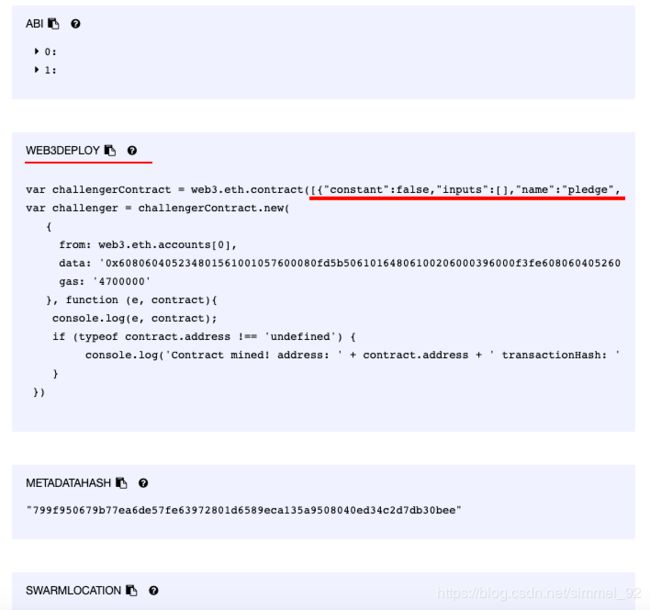
出现如下界面,选中粗红笔画出的json字符串并复制粘贴到文本编辑器中:
2. 将编译后的合约粘贴到终端
打开终端,启动geth客户端(且保证私链中账户有钱),然后输入“abi=刚刚复制的json字符串”:
> abi=[{"constant":false,"inputs":[],"name":"pledge","outputs":[],"payable":true,"stateMutability":"payable","type":"function"},{"constant":true,"inputs":[{"name":"","type":"address"}],"name":"cloud","outputs":[{"name":"total_pledge","type":"uint256"}],"payable":false,"stateMutability":"view","type":"function"}]
[{
    constant: false,
    inputs: [],
    name: "pledge",
    outputs: [],
    payable: true,
    stateMutability: "payable",
    type: "function"
}, {
    constant: true,
    inputs: [{
        name: "",
        type: "address"
    }],
    name: "cloud",
    outputs: [{
        name: "total_pledge",
        type: "uint256"
    }],
    payable: false,
    stateMutability: "view",
    type: "function"
}]
3. 创建合约:
> multiplyContract=eth.contract(abi)
{
  abi: [{
      constant: false,
      inputs: [],
      name: "pledge",
      outputs: [],
      payable: true,
      stateMutability: "payable",
      type: "function"
  }, {
      constant: true,
      inputs: [{...}],
      name: "cloud",
      outputs: [{...}],
      payable: false,
      stateMutability: "view",
      type: "function"
  }],

...
4. 解锁要调用合约的账户
> personal.unlockAccount(eth.accounts[0])
Unlock account 0x65d86e70d7f4bc3b0c7c47e4d24d18c24ae1dd8c
再将上面这个json串按照教程中的方法拷贝到终端中。
教程3:如何调用智能合约中的某个function
点击链接查看原文。
另:
以上教程都是给了现成的智能合约,教你怎么把它部署到区块链里,而没有提及智能合约的写法。关于智能合约怎么写,用得最多的语言是Solidity。可以参考官方英文教程和翻译版本教程。或我的下一篇博文[链接]

