python httpx 模块教程 比requests 更快
快速开始
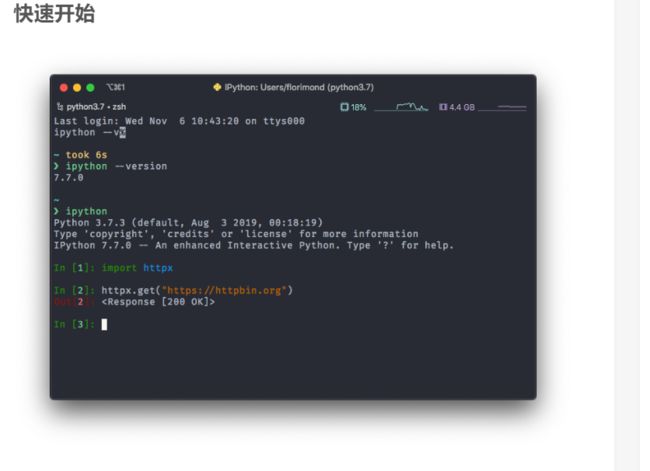
首先,首先导入 HTTPX:
>>> import httpx
现在,让我们尝试获取一个网页。
>>> r = httpx.get('https://httpbin.org/get')
>>> r
同样,发出HTTP POST请求:
>>> r = httpx.post('https://httpbin.org/post', data={'key': 'value'})
PUT,DELETE,HEAD和OPTIONS请求都遵循相同的样式:
>>> r = httpx.put('https://httpbin.org/put', data={'key': 'value'})
>>> r = httpx.delete('https://httpbin.org/delete')
>>> r = httpx.head('https://httpbin.org/get')
>>> r = httpx.options('https://httpbin.org/get')
在URL中传递参数
要在请求中包括URL查询参数,请使用params关键字:
>>> params = {'key1': 'value1', 'key2': 'value2'}
>>> r = httpx.get('https://httpbin.org/get', params=params)
要查看这些值如何编码为URL字符串,我们可以检查用于发出请求的结果URL:
>>> r.url
URL('https://httpbin.org/get?key2=value2&key1=value1'))
您还可以将项目列表作为值传递:
>>> params = {'key1': 'value1', 'key2': ['value2', 'value3']}
>>> r = httpx.get('https://httpbin.org/get', params=params)
>>> r.url
URL('https://httpbin.org/get?key1=value1&key2=value2&key2=value3')
响应内容
HTTPX将自动处理将响应内容解码为Unicode文本。
>>> r = httpx.get('https://www.example.org/')
>>> r.text
'\n\n\nExample Domain ...'
您可以检查已使用哪种编码来解码响应。
>>> r.encoding
'UTF-8'
如果您需要覆盖标准行为并明确设置要使用的编码,则也可以这样做。
>>> r.encoding = 'ISO-8859-1'
二进制响应内容
对于非文本响应,响应内容也可以字节形式访问:
>>> r.content
b'\n\n\nExample Domain ...'
任何gzip和deflateHTTP响应编码都会自动为您解码。如果brotlipy已安装,则brotli还将支持响应编码。
例如,要根据请求返回的二进制数据创建图像,可以使用以下代码:
>>> from PIL import Image
>>> from io import BytesIO
>>> i = Image.open(BytesIO(r.content))
返回 JSON 响应内容
通常,Web API 响应将被编码为 JSON。
>>> r = httpx.get('https://api.github.com/events')
>>> r.json()
[{u'repository': {u'open_issues': 0, u'url': 'https://github.com/...' ...  }}]
自定义 Headers
要在传出请求中包含其他标头,请使用headers关键字参数:
>>> url = 'http://httpbin.org/headers'
>>> headers = {'user-agent': 'my-app/0.0.1'}
>>> r = httpx.get(url, headers=headers)
发送表单数据
某些类型的HTTP请求(例如POST和PUT请求)可以在请求正文中包含数据。一种常见的添加方式是作为表单编码数据,用于HTML表单。
>>> data = {'key1': 'value1', 'key2': 'value2'}
>>> r = httpx.post("https://httpbin.org/post", data=data)
>>> print(r.text)
{
  ...
  "form": {
    "key2": "value2",
    "key1": "value1"
  },
  ...
}
表单编码的数据还可以包括给定键的多个值。
>>> data = {'key1': ['value1', 'value2']}
>>> r = httpx.post("https://httpbin.org/post", data=data)
>>> print(r.text)
{
  ...
  "form": {
    "key1": [
      "value1",
      "value2"
    ]
  },
  ...
}
发送分段文件上传
您还可以使用HTTP分段编码上传文件:
>>> files = {'upload-file': open('report.xls', 'rb')}
>>> r = httpx.post("https://httpbin.org/post", files=files)
>>> print(r.text)
{
  ...
  "files": {
    "upload-file": "<... binary content ...>"
  },
  ...
}
您还可以通过使用项目元组作为文件值来显式设置文件名和内容类型:
>>> files = {'upload-file': ('report.xls', open('report.xls', 'rb'), 'application/vnd.ms-excel')}
>>> r = httpx.post("https://httpbin.org/post", files=files)
>>> print(r.text)
{
  ...
  "files": {
    "upload-file": "<... binary content ...>"
  },
  ...
}
发送 JSON 编码数据
如果您只需要一个简单的键值数据结构,就可以使用表单编码的数据。对于更复杂的数据结构,您通常需要改用JSON编码。
>>> data = {'integer': 123, 'boolean': True, 'list': ['a', 'b', 'c']}
>>> r = httpx.post("https://httpbin.org/post", json=data)
>>> print(r.text)
{
  ...
  "json": {
    "boolean": true,
    "integer": 123,
    "list": [
      "a",
      "b",
      "c"
    ]
  },
  ...
}
发送二进制请求数据
对于其他编码,应使用bytesyield 的类型或生成器bytes。
Content-Type在上传二进制数据时,您可能还需要设置自定义标头。
响应状态码
我们可以检查响应的HTTP状态代码:
>>> r = httpx.get('https://httpbin.org/get')
>>> r.status_code
200
HTTPX还包括一个简单的快捷方式,用于通过其文本短语访问状态代码。
>>> r.status_code == httpx.codes.OK
True
我们可以针对任何客户端或服务器错误响应(4xx或5xx状态代码)引发异常:
>>> not_found = httpx.get('https://httpbin.org/status/404')
>>> not_found.status_code
404
>>> not_found.raise_for_status()
Traceback (most recent call last):
  File "/Users/tomchristie/GitHub/encode/httpcore/httpx/models.py", line 776, in raise_for_status
    raise HttpError(message)
httpx.exceptions.HttpError: 404 Not Found
任何成功的响应代码都将简单地返回None而不是引发异常。
>>> r.status_code == httpx.codes.OK
True
响应 Headers
响应标头可作为类似于字典的接口使用。
>>> r.headers
Headers({
    'content-encoding': 'gzip',
    'transfer-encoding': 'chunked',
    'connection': 'close',
    'server': 'nginx/1.0.4',
    'x-runtime': '148ms',
    'etag': '"e1ca502697e5c9317743dc078f67693f"',
    'content-type': 'application/json'
})
该Headers数据类型是不区分大小写的,所以你可以使用任何资本。
>>> r.headers['Content-Type']
'application/json'

>>> r.headers.get('content-type')
'application/json'
根据RFC 7230,单个响应 headers 的多个值表示为单个逗号分隔的值:
接收者可以通过将每个随后的字段值按顺序附加到合并的字段值上,并用下列分隔符分隔,将多个具有相同字段名的头字段组合成一对“字段名:字段值”,而不会改变消息的语义。逗号。
流响应
对于大型下载,您可能需要使用不将整个响应主体立即加载到内存中的流式响应。
您可以流式传输响应的二进制内容…
>>> with httpx.stream("GET", "https://www.example.com") as r:
...     for data in r.iter_bytes():
...         print(data)
或回应文字…
>>> with httpx.stream("GET", "https://www.example.com") as r:
...     for text in r.iter_text():
...         print(text)
或逐行流文本…
>>> with httpx.stream("GET", "https://www.example.com") as r:
...     for line in r.iter_lines():
...         print(line)
HTTPX将使用通用行结尾,将所有情况标准化为\n。
在某些情况下,您可能希望在不应用任何HTTP内容解码的情况下访问响应上的原始字节。在这种情况下的任何内容编码web服务器已诸如施加gzip,deflate或brotli将不会自动解码。
>>> with httpx.stream("GET", "https://www.example.com") as r:
...     for chunk in r.iter_raw():
...         print(chunk)
如果您以上述任何一种方式使用流式响应,则response.contentand response.text属性将不可用,并且如果访问将引发错误。但是,您还可以使用响应流功能来有条件地加载响应主体:
>>> with httpx.stream("GET", "https://www.example.com") as r:
...     if r.headers['Content-Length'] < TOO_LONG:
...         r.read()
...         print(r.text)
Cookies
可以轻松访问响应中设置的任何cookie:
>>> r = httpx.get('http://httpbin.org/cookies/set?chocolate=chip', allow_redirects=False)
>>> r.cookies['chocolate']
'chip'
要将Cookie包含在外发请求中,请使用cookies参数:
>>> cookies = {"peanut": "butter"}
>>> r = httpx.get('http://httpbin.org/cookies', cookies=cookies)
>>> r.json()
{'cookies': {'peanut': 'butter'}}
Cookie是在Cookies实例中返回的,该实例是一种类似dict的数据结构,带有用于按其域或路径访问Cookie的其他API。
>>> cookies = httpx.Cookies()
>>> cookies.set('cookie_on_domain', 'hello, there!', domain='httpbin.org')
>>> cookies.set('cookie_off_domain', 'nope.', domain='example.org')
>>> r = httpx.get('http://httpbin.org/cookies', cookies=cookies)
>>> r.json()
{'cookies': {'cookie_on_domain': 'hello, there!'}}
url 重定向 和 历史
默认情况下,HTTPX将对重定向执行除HEAD请求之外的任何操作。
history响应的属性可用于检查所有后续重定向。它包含遵循它们的顺序的所有重定向响应的列表。
例如,GitHub将所有HTTP请求重定向到HTTPS。
>>> r = httpx.get('http://github.com/')
>>> r.url
URL('https://github.com/')
>>> r.status_code
200
>>> r.history
[]
您可以使用allow_redirects参数修改默认的重定向处理:
>>> r = httpx.get('http://github.com/', allow_redirects=False)
>>> r.status_code
301
>>> r.history
[]
如果要发出HEAD请求,则可以使用它来启用重定向:
>>> r = httpx.head('http://github.com/', allow_redirects=True)
>>> r.url
'https://github.com/'
>>> r.history
[]
超时时间
HTTPX默认为所有网络操作都包括合理的超时,这意味着,如果未正确建立连接,则它应始终引发错误而不是无限期地挂起。
网络不活动的默认超时为五秒。您可以将值修改为或多或少严格:
>>> httpx.get('https://github.com/', timeout=0.001)
您还可以完全禁用超时行为…
>>> httpx.get('https://github.com/', timeout=None)
有关高级超时管理,请参阅“ 超时微调”。
认证方式
HTTPX支持基本和摘要HTTP身份验证。
要提供基本身份验证凭据,请将2个元组的纯文本str或bytes对象作为auth参数传递给请求函数:
>>> httpx.get("https://example.com", auth=("my_user", "password123"))
要提供摘要式身份验证的凭据,您需要DigestAuth使用纯文本用户名和密码作为参数实例化一个对象。然后可以将该对象作为auth参数传递给上述请求方法:
>>> auth = httpx.DigestAuth("my_user", "password123")
>>> httpx.get("https://example.com", auth=auth)
