ROS 发布和订阅自定义消息数组
今天学习使用ros发布和订阅自定义的消息以及消息数组,记录,备忘!
说明:
以ubuntu14.04,indigo版本为例
ros工作空间位置:~/workspace/catkin_ws
定义的消息数组为:
std_msgs/Header header
geometry_msgs/Pose[] path
其中Header是由uint32 seq,time stamp,string frame_id组成,它的消息定义在/opt/ros/indigo/share/std_msgs/msg 目录下有详细说明,而Pose是包含了Point和Quaternion类型组成,Point是3维的坐标点,Quaternion是四元数,他们的具体说明在/opt/ros/indigo/share/geometry_msgs/msg目录下。Pose[] 则表示后面定义的path是一个Pose类型的数组。接下来上代码:
cd ~/workspace/catkin_ws/src
#创建功能包
catkin_create_pkg mytest std_msgs rospy roscpp
cd mytest/
mkdir msg && cd msg
新建mypath.msg 的文件,将上面我想创建的两行消息粘贴进来,保存退出。打开mytest目录下的package.xml文件,在下面添加两行:
  <build_depend>message_generationbuild_depend>
  <exec_depend>message_runtimeexec_depend>
保存退出,然后打开mytest目录下的CMakeLists.txt文件:
- 在find_package中添加geometry_msgs message_generation,
- 取消add_message_files和FILES以及下面反括号的注释,在下面添加一行mypath.msg
- 取消generate_messages所在部分的注释,将geometry_msgs添加进去
- 取消catkin_package所在部分的注释,在std_msgs后面添加message_runtime
然后重新catkin_make编译一下,没有报错。进入mytest/src目录下,新建发布消息节点mytalk.cpp,将下面发布消息代码粘贴进去:
#include ("talking", 1000);
ros::Rate loop_rate(10);
while (ros::ok())
{
mytest::mypath P;
geometry_msgs::Pose p1, p2;
p1.position.x = 1;
p1.position.y = 2;
p1.position.z = 3;
p1.orientation.x = 0;
p1.orientation.y = 0;
p1.orientation.z = 0;
p1.orientation.w = 1;
p2.position.x = 4;
p2.position.y = 5;
p2.position.z = 6;
p2.orientation.x = 0;
p2.orientation.y = 0;
p2.orientation.z = 1;
p2.orientation.w = 1;
std::vector arrp;
arrp.push_back(p1);
arrp.push_back(p2);
arrp.push_back(p1);
arrp.push_back(p2);
arrp.push_back(p1);
arrp.push_back(p2);
arrp.push_back(p1);
P.path = arrp;
pub.publish(P);
ros::spinOnce();
loop_rate.sleep();
}
return 0;
} 再新建接受消息节点mylisten.cpp,添加如下代码:
#include 然后在CMakeLists.txt中添加下面四行,保存退出,然后catkin_make重新编译,就OK了。(**注意,下面四行一定不要添加太靠前,否则当你运行这个节点的时候系统会提示在xxx目录下找不到可执行文件…,记得尽量粘贴到后面,原因可能是前面的find_package,add_message_files,generate_messages,catkin_package等部分会添加依赖,路径一类的操作,如果把add_executable等操作添加到他们前面,可能会因为找不到某些文件路径或者依赖库导致在运行时报错)然后我并没有定义”mytest/mypath.h”的头文件,为什么就可以直接include这个头文件而不报错呢,因为前面在CMakeLists.txt中的一系列操作会生成名为“mypath.h”的头文件,不信的话可以在catkin_ws目录下find一下:
find ./ -name mypath.h 结果显示:./devel/include/mytest/mypath.h,它包含的头文件其实是在这个目录下的。
add_executable(mytalk src/mytalk.cpp)
target_link_libraries(mytalk ${catkin_LIBRARIES})
add_executable(mylisten src/mylisten.cpp)
target_link_libraries(mylisten ${catkin_LIBRARIES})
add_executable(mytalk src/mytalk.cpp)这一行的意思时将src/mytalk.cpp文件生成名为mytalk的可执行文件,而生成的可执行文件最后放在devel/lib/mytest目录下,每次rosrun 的时候其实就是运行的这个可执行文件。target_link_libraries(mytalk ${catkin_LIBRARIES})的意思是将可执行文件mytalk链接catkin_ws空间下的库中,pwd ${catkin_LIBRARIES}一下,终端显示:/home/sun/workspace/catkin_ws 其实${catkin_LIBRARIES}就指的是catkin_ws目录。到最后就是验证消息的接受与发布了。
roscore
rosrun mytest mytalk
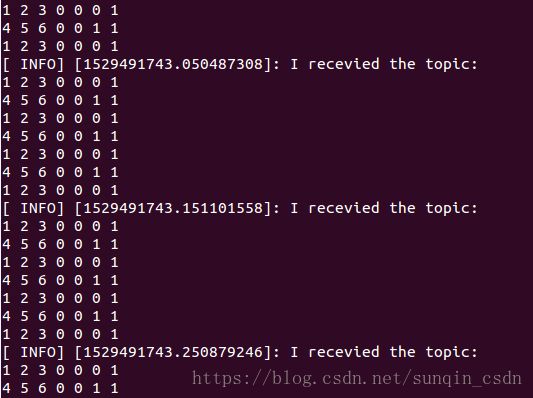
rosrun mytest mylisten效果,mytalk终端没有输出,mylisten终端显示如下:
参考链接:
https://www.cnblogs.com/hong2016/p/7550258.html
http://wiki.ros.org/cn/ROS/Tutorials/CreatingMsgAndSrv