Ubuntu16.04 编译OpenCV 和 Tesseract-OCR
由于最近工作需要将实现的图像识别算法,封装到安卓机器上进行测试。因此,初步考虑在公司Windows 7 旗舰版 64位系统中,利用VirtualBox安装Ubuntu系统;然后,在Ubuntu系统中,编译OpenCV和Tesseract-OCR。 具体步骤如下:
一、 安装VirtualBox
- 下载安装VirtualBox
- 安装增强扩展程序VirtualBox 5.1.8 Oracle VM VirtualBox Extension Pack
二、安装Ubuntu
- 下载Ubuntu16.04 64位
- 利用VirtualBox安装Ubuntu16.04
三、编译安装OpenCV
$ sudo apt-get update
$ sudo apt-get upgrade
$ sudo apt-get install build-essential cmake pkg-config
$ sudo apt-get install libjpeg8-dev libtiff5-dev libjasper-dev libpng12-dev
$ sudo apt-get install libavcodec-dev libavformat-dev libswscale-dev libv4l-dev
$ sudo apt-get install libxvidcore-dev libx264-dev
$ sudo apt-get install libgtk-3-dev
$ sudo apt-get install libatlas-base-dev gfortran
$ sudo apt-get install python2.7-dev python3.5-dev- 下载OpenCV文件
$ cd ~
$ wget -O opencv.zip https://github.com/Itseez/opencv/archive/3.1.0.zip
$ unzip opencv.zip
$ wget -O opencv_contrib.zip https://github.com/Itseez/opencv_contrib/archive/3.1.0.zip
$ unzip opencv_contrib.zip- 设置Python环境
$ cd ~
$ wget https://bootstrap.pypa.io/get-pip.py
$ sudo python get-pip.py
$ sudo pip install virtualenv virtualenvwrapper
$ sudo rm -rf ~/get-pip.py ~/.cache/pip修改~/.bashrc
$ echo -e "\n# virtualenv and virtualenvwrapper" >> ~/.bashrc
$ echo "export WORKON_HOME=$HOME/.virtualenvs" >> ~/.bashrc
$ echo "source /usr/local/bin/virtualenvwrapper.sh" >> ~/.bashrc
$ source ~/.bashrc
如果你用python2
$ mkvirtualenv cv -p python2
(cv)$ pip install numpy
(cv)$ cd ~/opencv-3.1.0/
(cv)$ mkdir build
(cv)$ cd build
(cv)$ cmake -D CMAKE_BUILD_TYPE=RELEASE \
    -D CMAKE_INSTALL_PREFIX=/usr/local \
    -D INSTALL_PYTHON_EXAMPLES=ON \
    -D INSTALL_C_EXAMPLES=OFF \
    -D OPENCV_EXTRA_MODULES_PATH=~/opencv_contrib-3.1.0/modules \
    -D PYTHON_EXECUTABLE=~/.virtualenvs/cv/bin/python \
    -D BUILD_EXAMPLES=ON ..
需要的请下载ippicv_linux_20151201.tgz
需要的请下载protobuf-cpp-3.1.0.tar.gz
Make sure Python 2 section includes valid paths to the Interpreter , Libraries , numpy , and packages path.
(cv)$ make -j4 # 4 表示处理器核数目
(cv)$ sudo make install
(cv)$ sudo ldconfig
(cv)$ ls -l /usr/local/lib/python2.7/site-packages/
(cv)$ cd ~/.virtualenvs/cv/lib/python2.7/site-packages/
(cv)$ ln -s /usr/local/lib/python2.7/site-packages/cv2.so cv2.so
如果你用python3
$ mkvirtualenv cv -p python3
(cv) $ pip install numpy
(cv)$ cd ~/opencv-3.1.0/
(cv)$ mkdir build
(cv)$ cd build
(cv)$ cmake -D CMAKE_BUILD_TYPE=RELEASE \
    -D CMAKE_INSTALL_PREFIX=/usr/local \
    -D INSTALL_PYTHON_EXAMPLES=ON \
    -D INSTALL_C_EXAMPLES=OFF \
    -D OPENCV_EXTRA_MODULES_PATH=~/opencv_contrib-3.1.0/modules \
    -D PYTHON_EXECUTABLE=~/.virtualenvs/cv/bin/python \
    -D BUILD_EXAMPLES=ON ..
需要的请下载ippicv_linux_20151201.tgz
需要的请下载protobuf-cpp-3.1.0.tar.gz
Make sure Python 3 section includes valid paths to the Interpreter , Libraries , numpy , and packages path.
(cv)$ make -j4 # 4 表示处理器核数目
(cv)$ sudo make install
(cv)$ sudo ldconfig
(cv)$ ls -l /usr/local/lib/python3.5/site-packages/
(cv)$ cd /usr/local/lib/python3.5/site-packages/
(cv)$ sudo mv cv2.cpython-35m-x86_64-linux-gnu.so cv2.so
(cv)$ cd ~/.virtualenvs/cv/lib/python3.5/site-packages/
(cv)$ ln -s /usr/local/lib/python3.5/site-packages/cv2.so cv2.so
$ cd ~
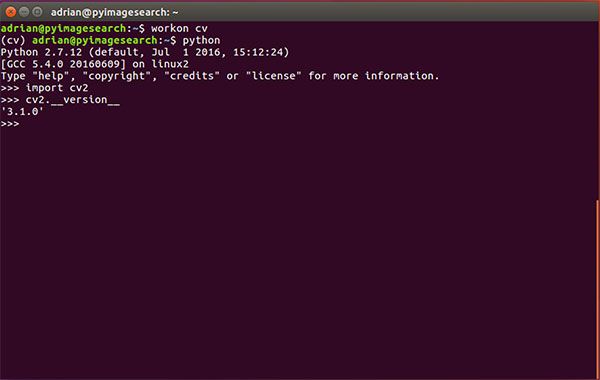
$ workon cv
(cv)$ python
Python 3.5.2 (default, Jul 5 2016, 12:43:10)
[GCC 5.4.0 20160609] on linux
Type "help", "copyright", "credits" or "license" for more information.
>>> import cv2
>>> cv2.__version__
'3.1.0'
>>>四、安装Tesseract-OCR
$ sudo apt-get update
$ sudo apt-get upgrade
$ sudo apt-get install tesseract-ocr
五、测试OpenCV和Tesseract
- tesscv.cpp
// Using Tesseract API with OpenCV
// Tesseract-OCR
#include - 编译命令
(cv) tzx@ubuntu:~/Project/test$ g++ -o tesscv tesscv.cpp `pkg-config --cflags --libs opencv tesseract`
(cv) tzx@ubuntu:~/Project/test$ ls
418.jpg  418.txt  tesscv  tesscv.cpp
(cv) tzx@ubuntu:~/Project/test$ ./tesscv 418.jpg
418


(cv) tzx@ubuntu:~/Project/test$- g++参数执行顺序的大坑
特别注意g++后面参数的顺序,不然,容易导致未引用的错误。
例如:
(cv) tzx@ubuntu:~/Project/test$ g++ `pkg-config --cflags --libs opencv tesseract` -o tesscv tesscv.cpp
/tmp/ccTkiDPs.o: In function `main':
tesscv.cpp:(.text+0x91): undefined reference to `cv::imread(cv::String const&, int)'
tesscv.cpp:(.text+0x134): undefined reference to `cv::cvtColor(cv::_InputArray const&, cv::_OutputArray const&, int, int)'
/tmp/ccTkiDPs.o: In function `cv::String::String(char const*)':
tesscv.cpp:(.text._ZN2cv6StringC2EPKc[_ZN2cv6StringC5EPKc]+0x4d): undefined reference to `cv::String::allocate(unsigned long)'
/tmp/ccTkiDPs.o: In function `cv::String::~String()':
tesscv.cpp:(.text._ZN2cv6StringD2Ev[_ZN2cv6StringD5Ev]+0x14): undefined reference to `cv::String::deallocate()'
/tmp/ccTkiDPs.o: In function `cv::Mat::~Mat()':
tesscv.cpp:(.text._ZN2cv3MatD2Ev[_ZN2cv3MatD5Ev]+0x39): undefined reference to `cv::fastFree(void*)'
/tmp/ccTkiDPs.o: In function `cv::Mat::release()':
tesscv.cpp:(.text._ZN2cv3Mat7releaseEv[_ZN2cv3Mat7releaseEv]+0x4b): undefined reference to `cv::Mat::deallocate()'
collect2: error: ld returned 1 exit status
问题:
tesseract header not found!
sudo apt-get install tesseract-ocr-devlept.pc not found!
sudo apt-get install libleptonica-devlibippicv not found!
sudo apt-get install libippicv-dev如果,libippicv 还是not found!
(cv) $ cd /usr/local/include
(cv) $ sudo mkdir ippicv && cd ippicv
(cv) $ sudo cp ~/opencv-3.1.0/3rdparty/ippicv/unpack/ippicv_lnx/include/* .
(cv) $ cd ~
(cv) $ cd /usr/local/lib

# 如果你用的是64位Ubuntu系统

(cv) $ sudo cp ~/opencv-3.1.0/3rdparty/ippicv/unpack/ippicv_lnx/lib/intel64/libippicv.a .

# 如果你是32位系统Ubuntu系统

(cv) $ sudo cp ~/opencv-3.1.0/3rdparty/ippicv/unpack/ippicv_lnx/lib/ia32/libippicv.a .
参考
Ubuntu 16.04: How to install OpenCV
Done!

