HTML5 canvas样式和颜色
上一篇博客中,我们讨论了canvas的一些基本的绘制路径API,我们可以用这些API绘制想要的形状。而在这里,我们将会给这些形状添加样式。这些样式包括:色彩,透明度,线型,渐变,图案样式,阴影,填充。
1.色彩Colors
在用fill()方法和stroke()方法时,我们可以用fillStyle和strokeStyle设置填充和边框的颜色:
-
fillStyle = “color” 设置图形的填充颜色。
-
strokeStyle=“color” 设置图形轮廓的颜色。
注意: 一旦设置了 strokeStyle 或者 fillStyle 的值,那么这个新值就会成为新绘制的图形的默认值。如果要给每个图形上不同的颜色,需要重新设置 fillStyle 或 strokeStyle 的值。
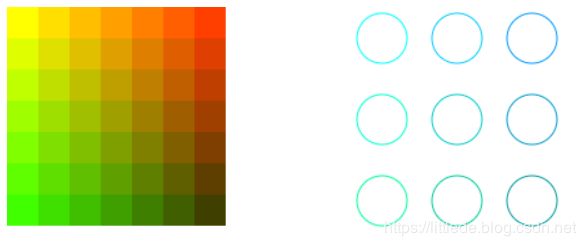
fillStyle和strokeStyle示例
function draw_rect()
{
	var canvas=document.getElementById("canvas");
	if(canvas.getContext)
	{
		var ctx=canvas.getContext('2d');
		for(var i=0;i<7;i++)
		{
			for(var j=0;j<7;j++)
			{
				ctx.beginPath();
				ctx.fillStyle="rgb("+Math.floor(255-32*i)+","+Math.floor(255-32*j)+",0)";
				ctx.fillRect(j*25,i*25,25,25);
			}
		}
	}
}
function draw_arc()
{
	var canvas=document.getElementById("canvas");
	if(canvas.getContext)
	{
		var ctx=canvas.getContext('2d');

		for(var i=0;i<3;i++)
		{
			for(var j=0;j<3;j++)
			{
				ctx.beginPath();
				ctx.strokeStyle="rgb(0,"+Math.floor(255-50*i)+","+Math.floor(255-50*j)+")";
				ctx.arc(300+i*60,25+65*j,20,0,Math.PI*2,true);
				ctx.stroke();
			}
		}
	}
}
2.透明度Transparency
我们在绘制图形时也可以给填充和轮廓设置透明度,而透明度的设置可以通过globalAlpha或直接用rgba函数:
- globalAlpha使用方法:
globalAlpha = transparencyValue
如
globalAlpha = 0.2;
- rgba使用方法:
ctx.fillStyle="rgba(255,0,0,0.2);
ctx.strokeStyle='rgba(255,0,0,0.2);
注意:
- 不透明度有效范围是从 0.0(完全透明)到 1.0(完全不透明)。
- globalAlpha 属性在需要绘制大量拥有相同透明度的图形时候相当高效。但是实际使用过程中rgba函数可能更加实用。
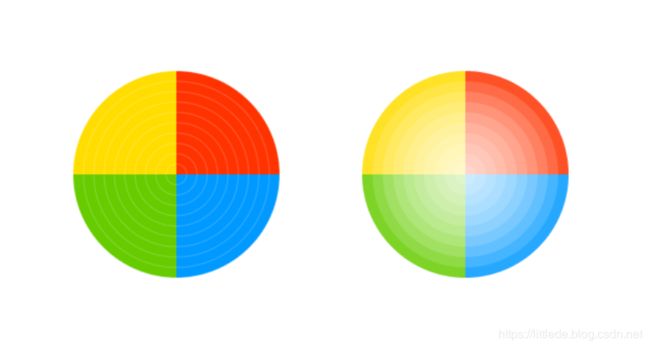
globalAlpha示例
function draw_globalAlpha()
{
	var canvas=document.getElementById("canvas");
	if(canvas.getContext)
	{
		var ctx=canvas.getContext('2d');
		ctx.beginPath();
		ctx.arc(200,200,100,0,-Math.PI/2,true);
		ctx.lineTo(200,200);
		ctx.fillStyle='#F30';
		ctx.fill();

		ctx.beginPath();
		ctx.arc(200,200,100,-Math.PI/2,-Math.PI,true);
		ctx.fillStyle='#FD0';
		ctx.lineTo(200,200);
		ctx.fill();

		ctx.beginPath();
		ctx.arc(200,200,100,-Math.PI,Math.PI/2,true);
		ctx.lineTo(200,200);
		ctx.fillStyle='#6C0';
		ctx.fill();

		ctx.beginPath();
		ctx.arc(200,200,100,Math.PI/2,0,true);
		ctx.lineTo(200,200);
		ctx.fillStyle='#09F';
		ctx.fill();


		for(var i=0;i<10;i++)
		{
			ctx.beginPath();
			ctx.arc(200,200,i*10+10,Math.PI*2,0,true);
			ctx.globalAlpha=0.2;
			ctx.strokeStyle="#FFF";
			ctx.stroke();
		}

		ctx.globalAlpha=1;
		ctx.beginPath();
		ctx.arc(480,200,100,0,-Math.PI/2,true);
		ctx.lineTo(480,200);
		ctx.fillStyle='#F30';
		ctx.fill();

		ctx.beginPath();
		ctx.arc(480,200,100,-Math.PI/2,-Math.PI,true);
		ctx.fillStyle='#FD0';
		ctx.lineTo(480,200);
		ctx.fill();

		ctx.beginPath();
		ctx.arc(480,200,100,-Math.PI,Math.PI/2,true);
		ctx.lineTo(480,200);
		ctx.fillStyle='#6C0';
		ctx.fill();

		ctx.beginPath();
		ctx.arc(480,200,100,Math.PI/2,0,true);
		ctx.lineTo(480,200);
		ctx.fillStyle='#09F';
		ctx.fill();

		for(var i=0;i<10;i++)
		{
			ctx.beginPath();
			ctx.arc(480,200,i*10+10,Math.PI*2,0,true);
			ctx.globalAlpha=0.15;
			ctx.fillStyle="#FFF";
			ctx.fill();
		}
	}
}
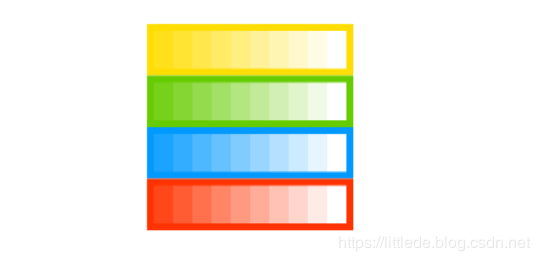
rgba()示例
function draw_rgba()
{
	var canvas=document.getElementById("canvas");
	if(canvas.getContext)
	{

		var ctx=canvas.getContext('2d');
		ctx.globalAlpha=1;

		ctx.fillStyle="rgb(255,221,0)";
		ctx.fillRect(120,400,150,37.5);

		ctx.fillStyle="rgb(102,204,0)";
		ctx.fillRect(120,437.5,150,37.5);

		ctx.fillStyle="rgb(0,153,255)";
		ctx.fillRect(120,475,150,37.5);

		ctx.fillStyle="rgb(255,51,0)";
		ctx.fillRect(120,512.5,150,37.5);

		for(var i=0;i<10;i++)
		{
			ctx.fillStyle="rgba(255,255,255,"+(i+1)/10+")";
			for(var j=0;j<4;j++)
			{
				ctx.fillRect(125+14*i,405+37.5*j,14,27.5)
			}
		}
    }
  }
3.线型Line styles
线型是轮廓或者lineTo方法的重要属性,line的属性包括:
- lineWidth = value设置线条宽度
- lineCap = type设置线条末端样式。
- lineJoin = type设定线条与线条间接合处的样式。
- miterLimit = value限制当两条线相交时交接处最大长度;所谓交接处长度(斜接长度)是指线条交接处内角顶点到外角顶点的长度。
- getLineDash()返回一个包含当前虚线样式,长度为非负偶数的数组。
- setLineDash(segments)设置当前虚线样式。
- lineDashOffset = value设置虚线样式的起始偏移量。
下面我们来介绍这些属性方法:
(1)lineWidth线宽属性
当前前绘线的粗细。属性值必须为正数,默认值是1.0。
function draw_lineWidth()//线宽
{
	var canvas=document.getElementById("canvas");
	if(canvas.getContext)
	{
		var ctx=canvas.getContext('2d');

		for(var i=0;i<10;i++)
		{
			ctx.lineWidth=i+1;
			ctx.beginPath();
			ctx.moveTo(5+i*14,5);
			ctx.lineTo(5+i*14,140);
			ctx.stroke();
		}
    }
}
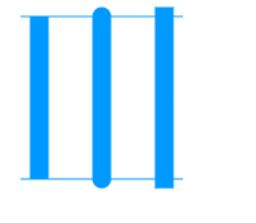
(2)lineCap端点样式
属性 lineCap 的值决定当前线段端点显示样式,取值有三:
- butt 默认方形样式
- round 圆形样式
- square 突出方形样式
function draw_lineCap()//端点样式
{
	var canvas=document.getElementById("canvas");
	var lineCap=["butt","round","square"];
	if(canvas.getContext)
	{
		var ctx=canvas.getContext('2d');

		ctx.strokeStyle="#09f";
		ctx.beginPath();
		ctx.moveTo(10,10);
		ctx.lineTo(140,10);
		ctx.moveTo(10,140);
		ctx.lineTo(140,140);
		ctx.stroke();

		for(var i=0;i<3;i++)
		{
			ctx.lineWidth=15;//线宽
			ctx.lineCap=lineCap[i];//端点样式
			ctx.beginPath();
			ctx.moveTo(25+i*50,10);
			ctx.lineTo(25+i*50,140);
			ctx.stroke();
		}
    }
}
(3)lineJoin连接样式
属性 lineJoin 的值决定当前线段连接处显示样式,取值有三:
- miter 默认方形样式
- round 圆形样式
- bevel 斜角样式
function draw_lineJoin()//连接样式
{
	var canvas=document.getElementById("canvas");

	if(canvas.getContext)
	{
		var ctx=canvas.getContext('2d');
		var lineJoin=["round","bevel","miter"];

		for(var i=0;i<3;i++)
		{
			ctx.lineWidth=15;//线宽
			ctx.lineJoin=lineJoin[i];//链接样式
			ctx.beginPath();
			ctx.moveTo(10,50+50*i);
			ctx.lineTo(60,50*i+100);
			ctx.lineTo(110,50*i+50);5
			ctx.stroke();
		}
    }
}
(4)虚线setLineDash和lineDashOffset
对于stroke轮廓,我们除了可以给他设置颜色,粗细,端点,连接外,还能设置他的虚实,而虚线的设置主要由两部分组成:
- setLineDash 设置实线与间隙的占比,接受一个数组
- lineDashOffset 设置虚线的起始偏移量
lineDash示例
function draw() {
	var canvas=document.getElementById("canvas");
	var ctx=canvas.getContext('2d');
  ctx.clearRect(0,0, canvas.width, canvas.height);
  ctx.setLineDash([5, 2]);//线段和间隙交替
  ctx.lineDashOffset = -offset;//起始偏移量
  ctx.strokeRect(10,10, 400, 300);
}
function march() {
  offset++;
  if (offset > 16) {
    offset = 0;
  }
  draw();
  setTimeout(march, 20);
}
先设置虚线的样式,然后再用虚线画出矩形,结合递归函数就能社指出动画:

4.渐变Gradients
就好像一般的绘图软件一样,我们可以用线性或者径向的渐变来填充或描边。我们用下面的方法新建一个 canvasGradient 对象,并且赋给图形的 fillStyle 或 strokeStyle 属性。
(1)创建渐变对象:
- createLinearGradient(x1,y1,x2,y2) 线性渐变,(x1,y1)表示渐变的起点,(x2,y2)表示渐变的终点
- createRadialGradient(x1,y1,r1,x2,y2,r2) 圆形渐变,(x1,x2,r1)确定一个起点圆,(x2,y2,r2)确定一个终点圆
- 使用方法:
var linearGradient=ctx.createLinearGradient(0,0,100,100);线性渐变对象
var radialGradient=ctx.createRadialGradient(45,45,0,45,45,30);//圆形渐变对象
(2)给对象上色addColorStop
- gradient.addColorStop(position,color)方法接受两个参数,position在0~1之间,表示渐变时对于模型的相对位置,color则是一个颜色字符串。
- 使用方法:
linearGradient.addColorStop(0.5,"rgb(255,255,0)");//在线性渐变对象的中部设置渐变色为rgb
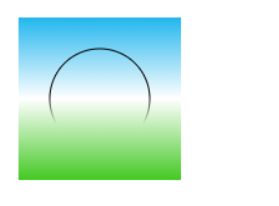
createLinearGradient
function draw_linear() {
  var ctx = document.getElementById('canvas').getContext('2d');

  // Create gradients
  var lingrad = ctx.createLinearGradient(0,0,0,150);
  lingrad.addColorStop(0, '#00ABEB');
  lingrad.addColorStop(0.5, '#fff');
  lingrad.addColorStop(1, '#26C000');

  var lingrad2 = ctx.createLinearGradient(0,50,0,95);
  lingrad2.addColorStop(0.5, '#000');
  lingrad2.addColorStop(1, 'rgba(0,0,0,0)');

  // assign gradients to fill and stroke styles
  ctx.fillStyle = lingrad;//属性值赋给fillStyle
  ctx.strokeStyle = lingrad2;//属性值赋给stroke

  // draw shapes
  ctx.fillRect(10,10,130,130);

  ctx.beginPath();
  ctx.arc(75,75,40,0,2*Math.PI,true);
  ctx.stroke();
}
createRadialGradient
圆形渐变可以制作一个具有3D效果的小球,只需要我们将渐变起点和渐变终点稍微错位,就能达到这样的效果:
function draw_radia()
{
  var ctx=document.getElementById("canvas").getContext('2d');
  var radgrad1=ctx.createRadialGradient(100,100,20,110,115,50);
  radgrad1.addColorStop(0, "#CDCD9A");
  radgrad1.addColorStop(0.9,"#808040");
  radgrad1.addColorStop(1,"rgb(97,97,48,0)");

  var radgrad2=ctx.createRadialGradient(200,100,10,205,108,30);
  radgrad2.addColorStop(0, "#ACD6FF");
  radgrad2.addColorStop(0.8,"#005AB5");
  radgrad2.addColorStop(1,"rgb(0,0,121,0)");

  var radgrad3=ctx.createRadialGradient(200,40,5,204,45,20);
  radgrad3.addColorStop(0, "  #CAFFFF");
  radgrad3.addColorStop(0.85,"#00CACA");
  radgrad3.addColorStop(1,"rgb(0,62,62,0)");

  ctx.fillStyle=radgrad1;
  ctx.beginPath();
  ctx.fillRect(0,0,1000,800);

  ctx.fillStyle=radgrad2;
  ctx.beginPath();
  ctx.fillRect(0,0,1000,800);

  ctx.fillStyle=radgrad3;
  ctx.beginPath();
  ctx.fillRect(0,0,1000,800);

  ctx.fillStyle="rgba(0,0,0,0.2)";
  ctx.fillRect(0,0,1000,800);
}
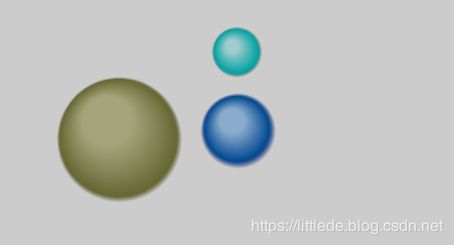
注意,这里的渐变是对于整个canvas对象来说的,所以如果addColorStop的边界1处未设置透明,将会使得整个区域都是渐变色.
5.图案样式 Patterns
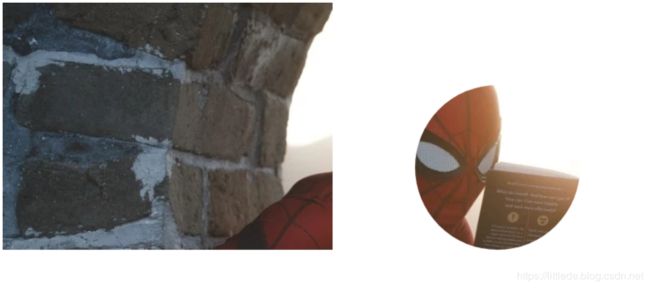
在创建canvas画布时是否可以将图片设置为画布的背景?实际上我们完全可以用CSS的方法设置background-img来实现。在HTML5中的canvas画布也提供了图案样式API,我们首先用img方法获取图片(在使用图片之前要先确认图片加载完毕),然后用createPattern(image, type)方法创建图案对象,再将对象赋值给fillStyle,我们就能用绘图API绘制图形了。
- Image() 创建一个Image()对象
- createPattern(image, type)创建一个图案对象,该方法接受两个参数。Image 可以是一个 Image 对象的引用,或者另一个 canvas 对象。Type 必须是下面的字符串值之一:repeat,repeat-x,repeat-y 和 no-repeat。
createPattern实例:
function draw()
{
  var canvas=document.getElementById("canvas");
  if(canvas.getContext)
  {
    var ctx=canvas.getContext('2d');

    var img=new Image();
    img.src="spiderMan.jpg";
    img.onload=function()
    {
      var ptrn=ctx.createPattern(img,'repeat');
      ctx.fillStyle=ptrn;

      ctx.fillRect(0,0,400,300);

      ctx.beginPath();
      ctx.arc(600,200,100,0,-2*Math.PI,true);
      ctx.fill();
    }
  }
}
6.阴影 Shadows
文字阴影
文字阴影相比已经不足为奇,在CSS3中的text-shadow属性可以设置2D的阴影,在HTML5中canvas也提供了这样的API
- shadowOffsetX = float shadowOffsetX 和 shadowOffsetY 用来设定阴影在 X 和 Y 轴的延伸距离,它们是不受变换矩阵所影响的。负值表示阴影会往上或左延伸,正值则表示会往下或右延伸,它们默认都为 0。
- shadowOffsetY = float shadowOffsetX 和 shadowOffsetY 用来设定阴影在 X 和 Y 轴的延伸距离,它们是不受变换矩阵所影响的。负值表示阴影会往上或左延伸,正值则表示会往下或右延伸,它们默认都为 0。
- shadowBlur = float shadowBlur 用于设定阴影的模糊程度,其数值并不跟像素数量挂钩,也不受变换矩阵的影响,默认为 0。
- shadowColor = color shadowColor 是标准的 CSS 颜色值,用于设定阴影颜色效果,默认是全透明的黑色。
这和CSS3的text-shadow有异曲同工之妙,这里不再赘述
function draw() {
  var ctx = document.getElementById('canvas').getContext('2d');

  ctx.shadowOffsetX = 2;
  ctx.shadowOffsetY = 2;
  ctx.shadowBlur = 2;
  ctx.shadowColor = "rgba(0, 0, 0, 0.5)";

  ctx.font = "20px Times New Roman";
  ctx.fillStyle = "Black";
  ctx.fillText("Sample String", 5, 30);
}
7.Canvas 填充规则
当我们用到 fill(或者 clip和isPointinPath )你可以选择一个填充规则,该填充规则根据某处在路径的外面或者里面来决定该处是否被填充,这对于自己与自己路径相交或者路径被嵌套的时候是有用的。
两个可能的值:
-
“nonzero”: non-zero winding rule, 默认值.
-
“evenodd”: even-odd winding rule.
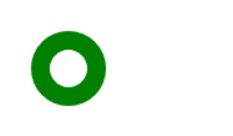
这个例子,我们用填充规则 evenodd
function draw() {
  var ctx = document.getElementById('canvas').getContext('2d');
  ctx.beginPath();
  ctx.arc(50, 50, 30, 0, Math.PI*2, true);
  ctx.arc(50, 50, 15, 0, Math.PI*2, true);
  ctx.fill("evenodd");
}
