微信小程序云开发之初体验
首先安装开发者工具,在微信工具平台里找,稳定版下载微信开发者工具
1.创建项目

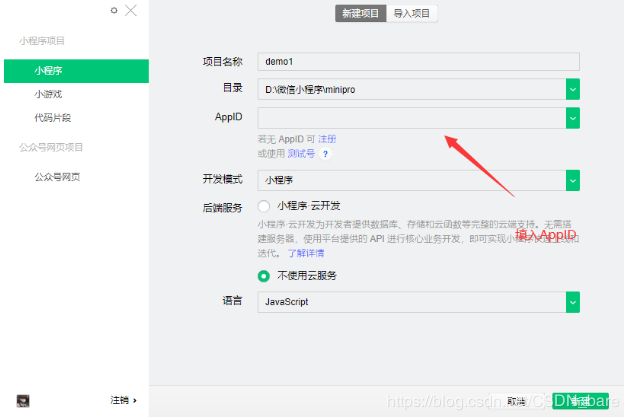
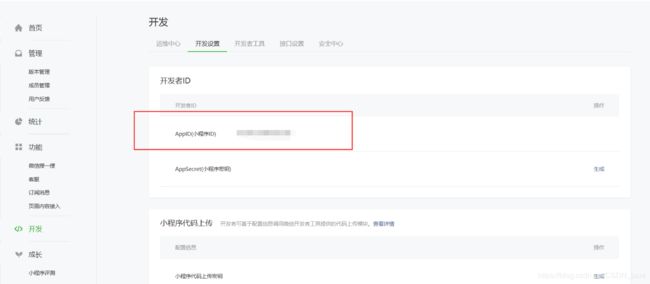
一开始是默认目录,在哪创建项目可以修稿项目名称和目录,填写自己的AppID
如果不填写可以使用测试号,测试号有一些功能无法使用

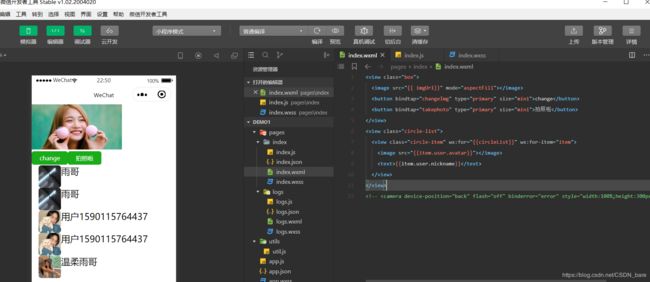
然后进入页面
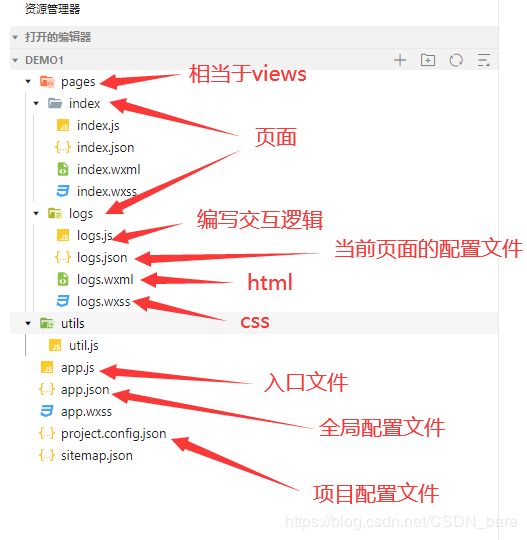
2.项目结构
3.组件使用
组件使用:https://developers.weixin.qq.com/miniprogram/dev/component/
4.引入图片
直接引入图片,展示(在wxml页面引入)
"box">
  "http://t7.baidu.com/it/u=3616242789,1098670747&fm=79&app=86&size=h300&n=0&g=4n&f=jpeg?sec=1591102782&t=28e7af605d3bf1a8d0c2ca7e0ddf42d7">
动态展示 在index.js 写入
data: {
    imgUrl:'http://t7.baidu.com/it/u=378254553,3884800361&fm=79&app=86&size=h300&n=0&g=4n&f=jpeg?sec=1591102634&t=b003d18cab8c4f254b4a2856ab7d2b90">'
  }
在wxml页面展示
{ {imgUrl}}">
这样实现了简单的图片展示,但是图片会失真
scaleToFill 缩放模式,不保持纵横比缩放图片,使图片的宽高完全拉伸至填满 image 元素
图片引入部分组件: https://developers.weixin.qq.com/miniprogram/dev/component/image.html
5.JS交互
给按钮添加点击事件
在js中添加事件
点击切换图片案例
changeImg(){
    this.setData({imgUrl:'http://t8.baidu.com/it/u=3571592872,3353494284&fm=79&app=86&size=h300&n=0&g=4n&f=jpeg?sec=1591102780&t=994672fdea236628b5a7636540cd9b03'})
  }
6.API
拍照
在html页面中加入
"back" flash="off" binderror="error" style="width:100%;height:100%">
在js页面中添加
takePhoto(){
    const cc =wx.createCameraContext()
    cc.takePhoto({
      success(){
        console.log('success')
      }
    })
  }
API详情:https://developers.weixin.qq.com/miniprogram/dev/api/
连接API 数据查看
在js页面中添加
onLoad(){
    wx.request({
      url: 'http://127.0.0.1:3000/cgi/post/getcirclepost',
      success:(res)=>{
        this.setData({circleList:res.data.data})
        console.log(res)
      }
    })
  }
在html页面添加
{ {circleList}}" wx:for-item="item">
{ {item.user.avatar}}">

