介绍一款好用的头像上传插件
首先,这款插件是基于前端框架Bootstrap而制作的,要引入Bootstrap所必需的js 以及css, 还有Jquery
先简单介绍一下工作原理
1.先选取一张图片
2.前端通过js获取剪裁开始点的坐标,以及选取的图片大小
3.通过Ajax异步上传原始图片,以及剪裁的数据
4.后台通过java图片操作剪取图片
5.返回图片保存的路径,在前端显示
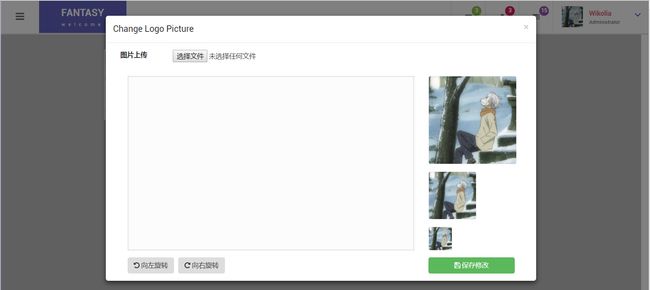
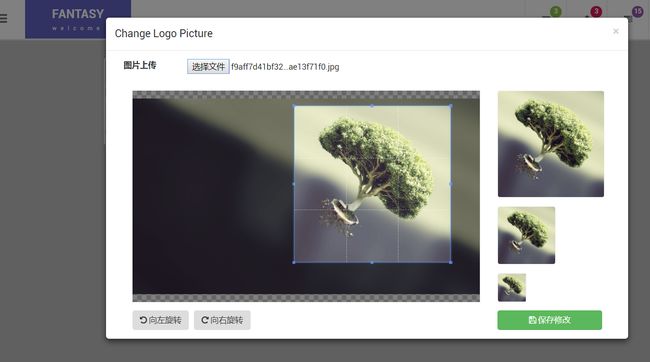
国际惯例,先上几张效果图:
移动选取框获取剪裁数据
点击保存后,后台处理,得到返回的图片地址,显示在前台
nice!
接下来,介绍一下代码:
为了后台方便处理剪裁数据,采用Math.floor()取整
startCropper: function () {
var _this = this;
if (this.active) {
this.$img.cropper('replace', this.url);
} else {
this.$img = $(' ');
this.$avatarWrapper.empty().html(this.$img);
this.$img.cropper({
aspectRatio: 1,
preview: this.$avatarPreview.selector,
strict: false,
crop: function (data) {
var json = [
'{"x":' + Math.floor(data.x),
'"y":' + Math.floor(data.y),
'"height":' + Math.floor(data.height),
'"width":' + Math.floor(data.width),
'"rotate":' + data.rotate + '}'
].join();
_this.$avatarData.val(json);
}
});
this.active = true;
}
},
 把文件和数据封装为FormData对象 一起通过ajax请求传给后台(注意里面的这两句设为false)
processData:false,
contentType:false,
ajaxUpload: function () {
      var url = this.$avatarForm.attr('action'),
          data = new FormData(this.$avatarForm[0]),
          _this = this;

      $.ajax(url, {
        headers: {'X-XSRF-TOKEN': $('meta[name="csrf-token"]').attr('content')},
        type: 'post',
        data: data,
        /*dataType: 'json',*/
        processData: false,
        contentType: false,

        beforeSend: function () {
          _this.submitStart();
        },

        success: function (data) {
          _this.submitDone(data);
        },

        error: function (XMLHttpRequest, textStatus, errorThrown) {
          _this.submitFail(textStatus || errorThrown);
        },

        complete: function () {
          _this.submitEnd();
        }
      });
    },
当然,前端有验证的
isImageFile: function (file) {
      if (file.type) {
        return /^image\/\w+$/.test(file.type);
      } else {
        return /\.(jpg|jpeg|png|gif)$/.test(file);
      }
    },
否则不给上传,并提示信息
submit: function () {
      if (!this.$avatarSrc.val() && !this.$avatarInput.val()) {
        return false;
      }
      var files = this.$avatarInput.prop('files');
      if(!this.isImageFile(files[0])){
    	  return false;
      }
      if (this.support.formData) {
        this.ajaxUpload();
        return false;
      }
    },
这是ajax请求数据
这里是后台的Controller层处理ajax请求,对图片进行裁剪操作,并且返回一个map对象
里面存有 键为 result ,值为裁剪后的图片地址 的一个键值对
@Controller
public class SomeController {
	@Autowired
	private UserService userService;

	@RequestMapping("changeUserPic")
	@ResponseBody
	public Map changeUserPic(HttpServletRequest request,
			@RequestParam("avatar_file") MultipartFile file,
			@RequestParam("avatar_data") String dataStr,HttpSession session) throws IllegalStateException, IOException{

		JSONObject data = JSONObject.fromObject(dataStr);


		int height = (int) data.get("height");
		int width = (int) data.get("width");
		int startX = (int) data.get("x");
		int startY = (int)data.get("y");
		Map map = new HashMap();

		if(!file.isEmpty()&&(height > 0 && width > 0 && startX > 0 && startY > 0)) {
	           //上传文件路径
	           String path = request.getServletContext().getRealPath("/userImageFile/");
	           //上传文件名
	           String filename = file.getOriginalFilename();
	           String fileType = filename.substring(filename.indexOf(".") + 1).toLowerCase();

	           String name = UUID.randomUUID().toString()+ filename.substring(filename.indexOf("."));
	           File filepath = new File(path,name);
	           //判断路径是否存在,如果不存在就创建一个
	           if (!filepath.getParentFile().exists()) {
	               filepath.getParentFile().mkdirs();
	           }
	           //将上传文件保存到一个目标文件当中
	           String imagepath = path + File.separator + name;
	           System.out.println(imagepath);
	           file.transferTo(new File(imagepath));


	           //开始剪裁
	           ImageUtils test = new ImageUtils();
	           test.input = new FileInputStream(imagepath);
	           test.out = imagepath;
	           test.cutImage(fileType,startX, startY, width, height);

	           //更新数据库
	           String picPath = request.getContextPath()+File.separator+"userImageFile"+File.separator+ name;
	           userService.updateUser(session.getAttribute("username").toString(), picPath);
	           session.setAttribute("userPic", picPath);
	   		   map.put("result", picPath);
		}
		//前台做了校验,不能上传空文件
		return map;
	}


}
ajax请求成功后,接收返回的result (我没有返回message), 并且更新前台数据
submitDone: function (data) {
      if ($.isPlainObject(data)) {
        if (data.result) {
          this.url = data.result;
          if (this.support.datauri || this.uploaded) {
            this.uploaded = false;
            this.cropDone();
          } else {
            this.uploaded = true;
            this.$avatarSrc.val(this.url);

            this.startCropper();
          }
          this.$avatarInput.val('');
        } else if (data.message) {
          this.alert(data.message);
        }
      } else {
        this.alert('Failed to response');
      }
    },
这个是对图片的裁剪操作代码
public class ImageUtils {

	public  FileInputStream input = null;
	public  FileOutputStream output = null;
	//输出图片地址
	public  String out = null;


  public  void cutImage(String type,int x,  int y, int width, int height) throws IOException {

      ImageInputStream imageStream = null;
      try {
          String imageType=(null==type||"".equals(type))?"jpg":type;
          Iterator readers = ImageIO.getImageReadersByFormatName(imageType);
          ImageReader reader = readers.next();
          imageStream = ImageIO.createImageInputStream(input);
          reader.setInput(imageStream, true);
          ImageReadParam param = reader.getDefaultReadParam();
          Rectangle rect = new Rectangle(x, y, width, height);
          param.setSourceRegion(rect);
          BufferedImage bi = reader.read(0, param);
          ImageIO.write(bi, imageType, new File(out));
          /*ImageIO.write(bi, imageType, output); */
          /*
           * 假如输出到原图片地址,ImageIO.write(),,第三个参数必须 new File
           * 而不是一个 FileOutputStream对象 ,否则报错
           */
      } finally {
      	if (input != null )
      		input.close() ;
	   if (imageStream != null )
	    	 imageStream.close();

      }
  }
}
对了,关于图像旋转后剪裁是会出问题的,因为后台处理的是未旋转的原图片,想要实现旋转的效果,可以根据ajax传递的参数
rotate的值(90,180,270,),来相应的更改起点坐标,小伙伴们可以自己实现
对json数据的操作,我引用的是这个jar包,pom依赖是:
		    net.sf.json-lib
		    json-lib
		    2.4
		    jdk15
哈哈哈!大功告成
想研究一下代码的小伙伴可以到下面这个地址下载
资源地址


