Nginx安装配置与SpringBoot项目整合
本篇文章将在上篇《Redis安装与SpringBoot项目整合详细教程》(上文链接:https://blog.csdn.net/sp958831205/article/details/88617706 )的基础上安装配置Nginx实现负载均衡,Redis 实现Session共享
文章目录
- Nginx 安装
- Nginx 下载
- Nginx 安装
- 负载均衡配置
- Session共享配置
Nginx 安装
- 安装环境CenOS6.5
- Nginx 1.14.0
Nginx 下载
步骤:
1.创建nginx文件夹 mkdir nginx
2.进入nginx文件夹 cd nginx
3.使用wget命令下载nginx: wget http://nginx.org/download/nginx-1.14.0.tar.gz
(没有wget命令,先使用yum install wget 安装)
[master@slave1 ~]$ mkdir nginx
[master@slave1 ~]$ cd nginx/
[master@slave1 nginx]$ wget http://nginx.org/download/nginx-1.14.0.tar.gz
Nginx 安装
步骤:
解压
[master@slave1 nginx]$ tar -zxvf nginx-1.14.0.tar.gz
[master@slave1 nginx]$ cd nginx-1.14.0
安装
[master@slave1 nginx-1.14.0]$ ./configure
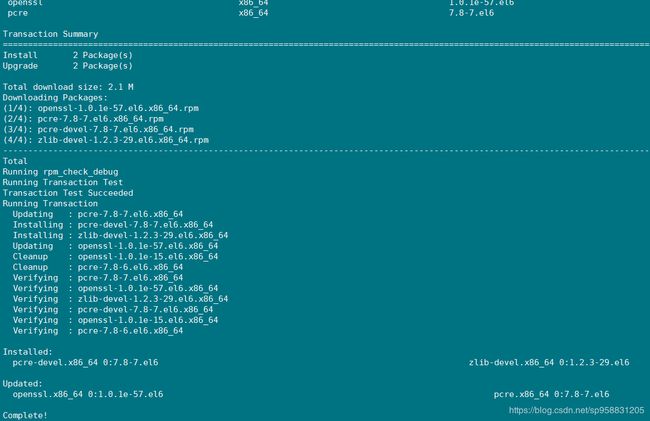
当输入命令出现下面的问题时,需要安装pcre库

使用yum 安装pcre
[master@slave1 nginx-1.14.0]$ yum -y install zlib zlib-devel openssl openssl--devel pcre pcre-devel
[master@slave1 nginx-1.14.0]$ ./configure
[master@slave1 nginx-1.14.0]$ make
[master@slave1 nginx-1.14.0]$ make install

安装完成,进入Nginx 安装目录的sbin目录,启动Nginx
[master@slave1 nginx-1.14.0]$ cd /usr/local/nginx/sbin
启动Nginx
[master@slave1 sbin]$ sudo ./nginx &

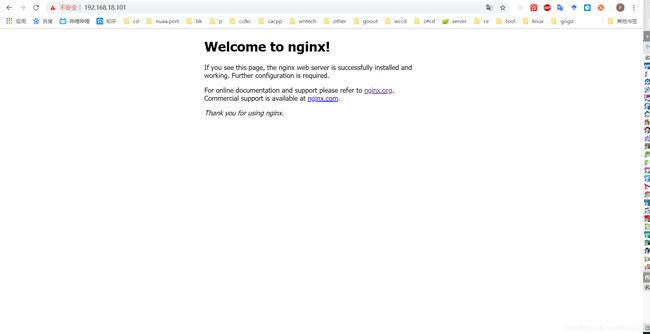
浏览器访问虚拟机80端口,虚拟机IP:192.168.18.101

Nginx启动成功,下面配置Nginx请求代理分发
负载均衡配置
进入Nginx安装目录修改配置文件
vim /usr/local/nginx/conf/nginx.conf
找到http节点,修改如下:
新增upstream,权重设为1,表示将请求平均分配到两个服务server上(两个服务程序后面会分别在端口8080和8081启动)
upstream ffish.com{
        server 192.168.18.101:8080 weight=1;
        server 192.168.18.101:8081 weight=1;
    }
将server的location修改如下
location / {
            proxy_pass http://ffish.com;
            proxy_redirect default;
        }
保存退出,重启Nginx
[master@slave1 sbin]$ sudo ./nginx -s reload
Session共享配置
在上篇文章创建的spring boot项目的application.properties Redis配置不变
# 配置 redis
spring.redis.database=0
spring.redis.host=192.168.18.101 #CenOS IP
spring.redis.port=6379
spring.redis.password=12345      #Redis 登录密码
spring.redis.jedis.pool.max-active=8
spring.redis.jedis.pool.max-idle=8
spring.redis.jedis.pool.max-wait=-1ms
spring.redis.jedis.pool.min-idle=0
pom.xml添加redis-session 依赖
<dependency>
    <groupId>org.springframework.sessiongroupId>
    <artifactId>spring-session-data-redisartifactId>
dependency>
pom.xml 完整的依赖如下
<dependencies>


    <dependency>
        <groupId>org.springframework.bootgroupId>
        <artifactId>spring-boot-starter-thymeleafartifactId>
    dependency>


    <dependency>
        <groupId>org.springframework.bootgroupId>
        <artifactId>spring-boot-starter-data-redisartifactId>
        <exclusions>
            <exclusion>
                <groupId>io.lettucegroupId>
                <artifactId>lettuce-coreartifactId>
            exclusion>
        exclusions>
    dependency>


    <dependency>
        <groupId>redis.clientsgroupId>
        <artifactId>jedisartifactId>
    dependency>

    <dependency>
        <groupId>org.springframework.bootgroupId>
        <artifactId>spring-boot-starter-webartifactId>
    dependency>


    <dependency>
        <groupId>org.springframework.sessiongroupId>
        <artifactId>spring-session-data-redisartifactId>
    dependency>

    <dependency>
        <groupId>org.springframework.bootgroupId>
        <artifactId>spring-boot-starter-testartifactId>
        <scope>testscope>
    dependency>
dependencies>
添加测试Controller
package com.ffish.spring_boot_reids.controller;

import org.springframework.beans.factory.annotation.Value;
import org.springframework.web.bind.annotation.GetMapping;
import org.springframework.web.bind.annotation.RestController;
import javax.servlet.http.HttpSession;

/**
 * @Auther: shup
 * @Date: 2019/3/17 14:53
 * @Description: TODO
 */
@RestController
public class TestSessionController {
    @Value("${server.port")
    String port;
    @GetMapping("/saveMsg")
    public String saveMsg(String msg, HttpSession session){
        session.setAttribute("msg",msg);
        return "请求被端口:"+port+" 的程序处理-->存入session的值 msg:"+session.getAttribute("msg");
    }

    @GetMapping("/getMsg")
    public String getMsg(HttpSession session){
        return "请求被端口:"+port+" 的程序处理-->取出session的值 msg:"+session.getAttribute("msg");
    }
}
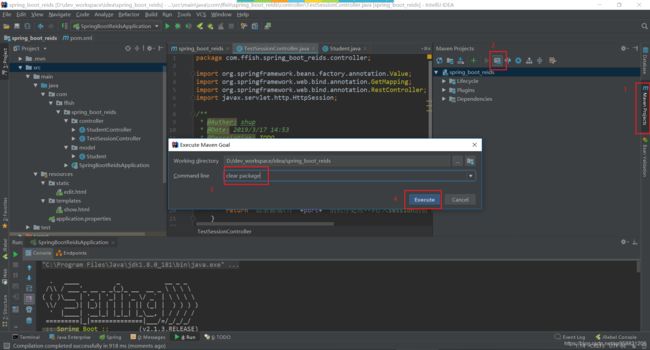
下一步,将项目打成jar包
IDEA 开发工具下:
1.执行clear package命令

2.打开lifecycle,双击install

提示信息

jar包生成在项目目录的target下

3.将jar包拷贝到CenOS虚拟机上
这里我使用xftp软件将jar包复制到虚拟机

4.启动项目
分别在端口8080和8081 启动
[master@slave1 sbin]$ cd /home/master/testjar/
[master@slave1 testjar]$ ls
spring_boot_reids-0.0.1-SNAPSHOT.jar
[master@slave1 testjar]$ nohup java -jar spring_boot_reids-0.0.1-SNAPSHOT.jar --server.port=8080 &
[master@slave1 testjar]$ nohup java -jar spring_boot_reids-0.0.1-SNAPSHOT.jar --server.port=8081 &
执行结果

5.测试Session共享
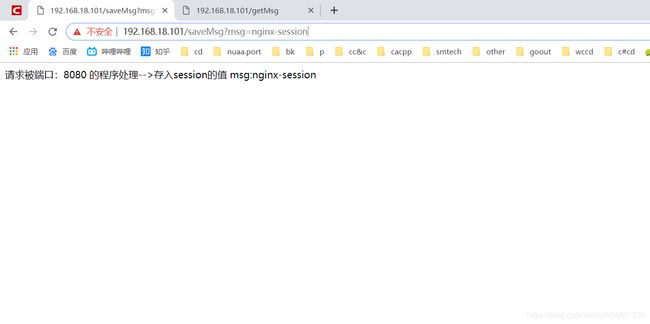
saveMsg接口
请求被转发到8080端口的后台程序,存入session中msg值是nginx-session

getMsg接口
请求被转发到8081端口的后台程序,从session中取到了msg值是nginx-session

当重复调用上面的接口时,处理的端口号会交替变化,也就是说Nginx将请求进行了均匀转发
通过上面简单的测试,分别运行在8080 和 8081端口的服务端程序都拿到了相同的session值
至此完成了简单的Nginx负载均衡配置实现了session的共享。
