springboot+vue项目大型实战(二)Elemen UI深入浅出分页操作
简介
Vue + Element UI
Vue 集成 Element UI
Element UI 后台管理系统主要的标签:
el-container:构建整个⻚⾯框架。
el-aside:构建左侧菜单。
el-menu:左侧菜单内容,常⽤属性:
:default-openeds:默认展开的菜单,通过菜单的 index 值来关联。
:default-active:默认选中的菜单,通过菜单的 index 值来关联。
el-submenu:可展开的菜单,常⽤属性:
index:菜单的下标,⽂本类型,不能是数值类型。
template:对应 el-submenu 的菜单名。
i:设置菜单图标,通过 class 属性实则。
el-icon-messae
el-icon-menu
el-icon-setting
el-menu-item:菜单的⼦节点,不可再展开,常⽤属性:
index:菜单的下标,⽂本类型,不能是数值类型
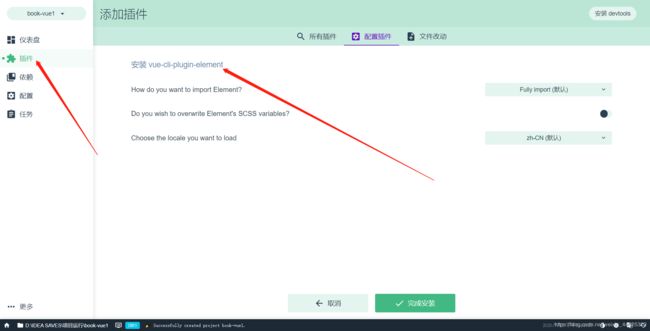
1.安装Element UI (前期步骤与之前相同,可以看一下之前文章)vue ui可视化界面进行创建vue项目安装
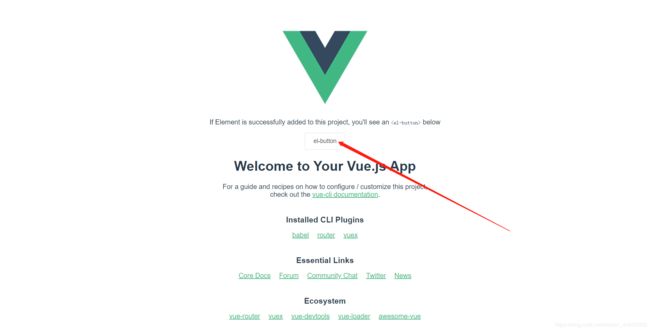
2.IDEA导入,启动(出现这个按钮代表安装成功)
cnpm run serve
3.我们找到Element UI官网(复制代码)
APP.vue复制完后
<template>
  <div id="app">
    <el-container style="height: 500px; border: 1px solid #eee">
      <el-aside width="200px" style="background-color: rgb(238, 241, 246)">
        <el-menu :default-openeds="['1', '3']">
          <el-submenu index="1">
            <template slot="title"><i class="el-icon-message"></i>导航一</template>
            <el-menu-item-group>
              <template slot="title">分组一</template>
              <el-menu-item index="1-1">选项1</el-menu-item>
              <el-menu-item index="1-2">选项2</el-menu-item>
            </el-menu-item-group>
            <el-menu-item-group title="分组2">
              <el-menu-item index="1-3">选项3</el-menu-item>
            </el-menu-item-group>
            <el-submenu index="1-4">
              <template slot="title">选项4</template>
              <el-menu-item index="1-4-1">选项4-1</el-menu-item>
            </el-submenu>
          </el-submenu>
          <el-submenu index="2">
            <template slot="title"><i class="el-icon-menu"></i>导航二</template>
            <el-menu-item-group>
              <template slot="title">分组一</template>
              <el-menu-item index="2-1">选项1</el-menu-item>
              <el-menu-item index="2-2">选项2</el-menu-item>
            </el-menu-item-group>
            <el-menu-item-group title="分组2">
              <el-menu-item index="2-3">选项3</el-menu-item>
            </el-menu-item-group>
            <el-submenu index="2-4">
              <template slot="title">选项4</template>
              <el-menu-item index="2-4-1">选项4-1</el-menu-item>
            </el-submenu>
          </el-submenu>
          <el-submenu index="3">
            <template slot="title"><i class="el-icon-setting"></i>导航三</template>
            <el-menu-item-group>
              <template slot="title">分组一</template>
              <el-menu-item index="3-1">选项1</el-menu-item>
              <el-menu-item index="3-2">选项2</el-menu-item>
            </el-menu-item-group>
            <el-menu-item-group title="分组2">
              <el-menu-item index="3-3">选项3</el-menu-item>
            </el-menu-item-group>
            <el-submenu index="3-4">
              <template slot="title">选项4</template>
              <el-menu-item index="3-4-1">选项4-1</el-menu-item>
            </el-submenu>
          </el-submenu>
        </el-menu>
      </el-aside>

      <el-container>
        <el-header style="text-align: right; font-size: 12px">
          <el-dropdown>
            <i class="el-icon-setting" style="margin-right: 15px"></i>
            <el-dropdown-menu slot="dropdown">
              <el-dropdown-item>查看</el-dropdown-item>
              <el-dropdown-item>新增</el-dropdown-item>
              <el-dropdown-item>删除</el-dropdown-item>
            </el-dropdown-menu>
          </el-dropdown>
          <span>王小虎</span>
        </el-header>

        <el-main>
          <el-table :data="tableData">
            <el-table-column prop="date" label="日期" width="140">
            </el-table-column>
            <el-table-column prop="name" label="姓名" width="120">
            </el-table-column>
            <el-table-column prop="address" label="地址">
            </el-table-column>
          </el-table>
        </el-main>
      </el-container>
    </el-container>
  </div>
</template>

<style>
  .el-header {
    background-color: #B3C0D1;
    color: #333;
    line-height: 60px;
  }

  .el-aside {
    color: #333;
  }
</style>

<script>
  export default {
    data() {
      const item = {
        date: '2016-05-02',
        name: '王小虎',
        address: '上海市普陀区金沙江路 1518 弄'
      };
      return {
        tableData: Array(20).fill(item)
      }
    }
  };
</script>
展示的样子
4.vue add axios增加插件
5.BookManger.vue改为
<template>
    <div>
        <el-table
                :data="tableData"
                border
                style="width: 70%">
            <el-table-column
                    fixed
                    prop="id"
                    label="编号"
                    width="150">
            </el-table-column>
            <el-table-column
                    prop="name"
                    label="图书名"
                    width="120">
            </el-table-column>
            <el-table-column
                    prop="author"
                    label="作者"
                    width="120">
            </el-table-column>
            <el-table-column
                    fixed="right"
                    label="操作"
                    width="100">
                <template slot-scope="scope">
                    <el-button @click="edit(scope.row)" type="text" size="small">修改</el-button>
                    <el-button @click="deleteBook(scope.row)" type="text" size="small">删除</el-button>
                </template>
            </el-table-column>
        </el-table>
    //分页操作
        <el-pagination
                background
                layout="prev, pager, next"
                :page-size="pageSize"
                :total="total"
                @current-change="page">
        </el-pagination>
    </div>
</template>

<script>
    export default {
        methods: {
            deleteBook(row){
                const _this = this
                axios.delete('http://localhost:8181/book/deleteById/'+row.id).then(function(resp){
                    _this.$alert('《'+row.name+'》删除成功!', '消息', {
                        confirmButtonText: '确定',
                        callback: action => {
                            window.location.reload()
                        }
                    })
                })
            },
            edit(row) {
                this.$router.push({
                    path: '/update',
                    query:{
                        id:row.id
                    }
                })
            },
            page(currentPage){
                const _this = this
                axios.get('http://localhost:8181/book/findAll/'+(currentPage-1)+'/6').then(function(resp){
                    console.log(resp)
                    _this.tableData = resp.data.content
                    _this.pageSize = resp.data.size
                    _this.total = resp.data.totalElements
                })
            }
        },

        data() {
            return {
                pageSize:'1',
                total:'11',
                tableData: [{
                    id: 1,
                    name: '解忧杂货店',
                    author: '东野圭吾'
                }, {
                    id: 2,
                    name: '追风筝的人',
                    author: '卡勒德·胡赛尼'
                }, {
                    id: 3,
                    name: '人间失格',
                    author: '太宰治'
                }]
            }
        },

        created() {
            const _this = this
            axios.get('http://localhost:8181/book/findAll/0/6').then(function(resp){
                console.log(resp)
                _this.tableData = resp.data.content
                _this.pageSize = resp.data.size
                _this.total = resp.data.totalElements
            })
        }
    }
</script>
6.BookHandleer增加一个分页操作
package com.xyj.controller;

import com.xyj.entity.Book;
import com.xyj.repository.BookRepository;
import org.hibernate.engine.jdbc.Size;
import org.springframework.beans.factory.annotation.Autowired;
import org.springframework.data.domain.Page;
import org.springframework.data.domain.PageRequest;
import org.springframework.data.domain.Pageable;
import org.springframework.web.bind.annotation.GetMapping;
import org.springframework.web.bind.annotation.PathVariable;
import org.springframework.web.bind.annotation.RequestMapping;
import org.springframework.web.bind.annotation.RestController;

import java.util.List;

/**
 * @author xyj
 * @date 2020/7/12 -15:45
 */
@RestController
@RequestMapping("/book")
public class BookHandleer {
    @Autowired
    private BookRepository bookRepository;

    @GetMapping("/findAll/{page}/{size}")
    public Page<Book> findAll(@PathVariable("page") Integer page,@PathVariable("size") Integer size){
        Pageable pageable = PageRequest.of(page-1,size);
        return bookRepository.findAll(pageable);

    }
}


