openssh及openssl自签证书
openssh:
ssh:secure shell,protocol,22/tcp,安全的远程连接
openssh:ssh协议的开源实现
dropbear:另一个开源实现
ssh协议版本:
v1:基于CRC-32做MAC,不安全:main-in-middle
v2:双方主机协议选择安全的MAC方式
基于DH算法做秘钥交换,基于RAS或DAS算法实现身份认证
两种方式的用户登录认证:
基于password
基于key
openssh:
C/S:
C:ssh,scp,sftp
windowd客户端:
shell,putty,securecrt,sshsecureshellclient
S:sshd
客户端组件:
ssh,配置文件:/etc/ssh/ssh_config
格式:
ssh [user@host] [command]
ssh [-l user] host [command]
-p port:远程服务器监听的端口
基于秘钥的认证:
(1)在客户端生成秘钥对儿
ssh -t rsa [-p ''] [-f "~/.ssh/id_rsa"](2)把公钥传输至远程服务器对应用户的家目录
ssh-copy-id [-i [identify_file]] [suer@machone](3)测试
scp命令:
scp[options] src... dest/
存在两种情形:
pull:scp [options] [user@]host:/path/from/somefile  /path/to/somefile
     将远程文件复制到本机
push:scp [options] /path/from/somefile [user@]host:path/to/somefile
     常用选项:
           -r:递归复制
           -p:保持原文件的属主信息
           -q:静默模式
           -P port:指明remote host的监听端口
sftp命令:
 sftp [user@]host
 sftp>help
服务器端:
sshd,配置文件:/etc/ssh/sshd_config
常用参数:
port 22022
listenaddress ip
permitrootlogin yes
限制可登陆用户的办法:
allowusers user1 user2 ...
allowgroups
ssh服务器的最佳实践:
    1.不要使用默认端口
    2.禁止使用protocol version 1
    3.限制可登陆用户
    4.设定空闲会话超时时长
    5.利用防火墙设置ssh访问策略
    6.仅监听特定IP地址
    7.基于口令认证时,使用强密码策略
          # tr -dc A-Za-z0-9_ < /dev/urandom | head -c 30 | xargs
    8.使用基于密钥的认证
    9.禁止使用空密码
    10.禁止root用户直接登录
    11.限制ssh的访问频率和并发在线数
    12.做好日志,经常分析
ssh协议的领一个实现:dropbear
(1)dropbearkey -t rsa -f /etc/dropbear/dropbear_rsa_host_key -s 2048
    dropbearkey -t dss -f /etc/dropbear/dropbear_dss_host_key
    dropbear -p [ip:] port -F -E
openssl:
三个组件:
openssl:多用途的命令行工具
libcrypto:加密解密库
libssl:ssl协议的实现
 PKI:public key infrastructure
 CA:
 RA:
 CRL:
 证书存取库
 openCA
 openssl:
证书申请及签署步骤:
1.生成申请请求
2.RA核验证
3.CA签署
4.获取证书
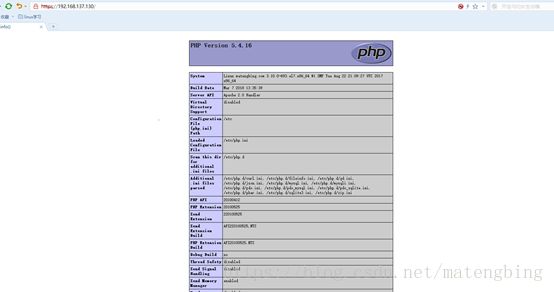
创建私有 CA搭建CA服务器签发CA证书,并使httpd开启https:
用openssl实现是有CA
配置文件/etc/pki/tls/openssl.cnf
命令:
谁给CA发证:自签署证书用openssl实现私有CA:
配置文件:/etc/pki/tls/openssl.cnf
(CA服务器)生成密钥对儿:
# (umask 077; openssl genrsa -out private/cakey.pem 2048)查看公钥:
# openssl rsa -in private/cakey.pem -pubout -text -noout # openssl req -new -x509 -key private/cakey.pem -out cacert.pem -days 3655默认路径在 /etc/pki/CA/private/下
  -new:生成新证书签署请求
  -x509:专用于CA生成自签证书
  -key:生成请求时用到的私钥文件
  -days n:证书有效期限
  -out /path/to /somecertfile:证书的保存路径
 # touch index.txt serial crlnumber
#echo 01 > serial用openssl实现证书申请:
在主机上生成密钥,保存至应用此证书的服务的配置文件目录下, 例如:
 # mkdir /etc/httpd/ssl
 # cd /etc/httpd/ssl
 # (umask 077; openssl genrsa -out httpd.key 1024)
生成证书签署请求:
# openssl req -new -key httpd.key -out httpd.csr将请求文件发往CA服务器:
#scp httpd.csr 192.168.137.128:/tmp/CA签署证书:
签署:
# openssl ca -in /tmp/httpd.csr -out /tmp/httpd.crt -days 3650保存到/etc/httpd/ssl/ httpd.crt
scp /tmp/httpd.crt 192.168.137.130:/etc/httpd/ssl吊销证书:
# openssl ca -revoke /path/to/somefile.crt在文件/etc/httpd/conf.d/ssl.conf 中:
修改
 SSLCertificateFile /etc/httpd/ssl/httpd.crt
SSLCertificateKeyFile /etc/httpd/ssl/httpd.key设置https的根文件和访问计算机名
 DocumentRoot "/var/www/html"
ServerName matengbing.com:443浏览器标记网站为不受信任的网站,是因为签发证书填写的计算机名没有域名映射
