CountDownLatch 实现分析及示例
CountDownLatch是一个同步的辅助类,它可以允许一个或多个线程等待,直到一组在其它线程中的操作执行完成。
一个CountDownLatch会通过一个给定的count数来被初始化。其中await()方法会一直阻塞,直到当前的count被减到0,而这个过程是通过调用countDown()方法来实现的。在await()方法不再阻塞以后,所有等待的线程都会被释放,并且任何await()的子调用都会立刻返回。这是一次性的--count不能被重置。如果你需要一种能重置count的版本,请考虑使用CyclicBarrier。
示例:我们都知道召唤神龙要七个龙珠集齐,下面我们就来模仿一下。
public class CountDownLatchTest {
private volatile static CyclicBarrier cyclicBarrier = new CyclicBarrier(5,()-> System.out.println("it is me"));
private static final int COUNT = 7;
private static final CountDownLatch countDownLatch = new CountDownLatch(COUNT);
public static void main(String[] args) throws InterruptedException {
long start = System.currentTimeMillis();
for (int i = 0; i < COUNT; i++) {
int index = i + 1;
new Thread(() -> {
try {
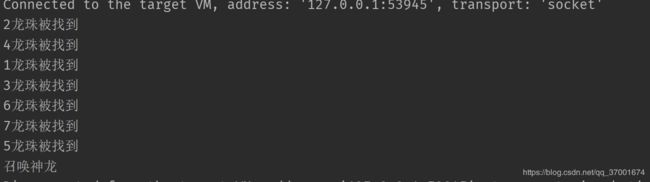
System.out.println(index + "龙珠被找到");
Thread.sleep(5000);
} catch (InterruptedException e) {
e.printStackTrace();
}
countDownLatch.countDown();
}).start();
}
countDownLatch.await();
System.out.println("召唤神龙");
}
}
直到龙珠被全部找到才执行了召唤神龙!在之前一直被await着
源码分析
public CountDownLatch(int count) {
    if (count < 0) throw new IllegalArgumentException("count < 0");
    this.sync = new Sync(count);
}
首先从构造函数出发 初始化状态变量 ,其中sync是一个AQS的子类,构造函数如下
Sync(int count) {
    setState(count);
}
设置状态变量state,其中state是个volatile 用于保证可见性
public void await() throws InterruptedException {
        sync.acquireSharedInterruptibly(1);
    }
这里调用的是其内部类sync的函数,具体实现如下
public final void acquireSharedInterruptibly(int arg)
        throws InterruptedException {
    if (Thread.interrupted())
        throw new InterruptedException();
    if (tryAcquireShared(arg) < 0)
        doAcquireSharedInterruptibly(arg);
}
首先判断是否被终端,终端就抛出异常,然后根据实现类Sync的tryAcquireShared(int)方法和0做比较
protected int tryAcquireShared(int acquires) {
            return (getState() == 0) ? 1 : -1;
        }
state是一个共享变量,代表这到达条件的线程数,比如初始化为5,没一个线程到达条件就-1,所以state!=0将会返回-1,将进入if条件。
 private void doAcquireSharedInterruptibly(int arg)
        throws InterruptedException {
        final Node node = addWaiter(Node.SHARED);
        boolean failed = true;
        try {
            for (;;) {
                final Node p = node.predecessor();
                if (p == head) {
                    int r = tryAcquireShared(arg);
          //退出条件,tryAcquireShared方法返回1,及state到0
                    if (r >= 0) {
                        setHeadAndPropagate(node, r);
                        p.next = null; // help GC
                        failed = false;
                        return;
                    }
                }
                if (shouldParkAfterFailedAcquire(p, node) &&
                    parkAndCheckInterrupt())
                    throw new InterruptedException();
            }
        } finally {
            if (failed)
                cancelAcquire(node);
        }
    }
调用countDown方法
public void countDown() {
        sync.releaseShared(1);
    }
该方法调用abs的releaseShared(int)
   public final boolean releaseShared(int arg) {
        if (tryReleaseShared(arg)) {
            doReleaseShared();
            return true;
        }
        return false;
    }
判断实现类的tryRekeaseShared方法的返回值
     protected boolean tryReleaseShared(int releases) {
            // Decrement count; signal when transition to zero

            for (;;) {
               //获取state的个数
                int c = getState();
             //如果等于0.返回false
                if (c == 0)
                    return false;
                //state-1
                int nextc = c-1;
                if (compareAndSetState(c, nextc))
                    return nextc == 0;
            }
        }
知道state为0返回真,执行后面的唤醒
private void doReleaseShared() {
        for (;;) {
            Node h = head;
            if (h != null && h != tail) {
                int ws = h.waitStatus;
                if (ws == Node.SIGNAL) {
                    if (!compareAndSetWaitStatus(h, Node.SIGNAL, 0))
                        continue;            // loop to recheck cases
                 //唤醒
                    unparkSuccessor(h);
                }
                else if (ws == 0 &&
                         !compareAndSetWaitStatus(h, 0, Node.PROPAGATE))
                    continue;                // loop on failed CAS
            }
            if (h == head)                   // loop if head changed
                break;
        }
    }
private void unparkSuccessor(Node node) {
int ws = node.waitStatus;
if (ws < 0)
compareAndSetWaitStatus(node, ws, 0);
Node s = node.next;
if (s == null || s.waitStatus > 0) {
s = null;
for (Node t = tail; t != null && t != node; t = t.prev)
if (t.waitStatus <= 0)
s = t;
}
if (s != null)
LockSupport.unpark(s.thread);
}对于这个唤醒操作很好理解的,首先取该节点的后节点就行唤醒,如果后节点已被取消,则从最后一个开始往前找,找一个满足添加的节点进行唤醒。
有人肯能会有疑问,要是如果有多个节点只在这进行一次唤醒工作吗?难道只唤醒一个线程就可以了?哈哈别急还记得线程是在哪阻塞的吗 让我们回来前面去看线程被阻塞的地方doAcquireSharedInterruptibly
private void doAcquireSharedInterruptibly(int arg)
    throws InterruptedException {
    final Node node = addWaiter(Node.SHARED);
    boolean failed = true;
    try {
        for (;;) {
            final Node p = node.predecessor();
            if (p == head) {
                int r = tryAcquireShared(arg);
                if (r >= 0) {
                    setHeadAndPropagate(node, r);
                    p.next = null; // help GC
                    failed = false;
                    return;
                }
            }
            if (shouldParkAfterFailedAcquire(p, node) &&
                parkAndCheckInterrupt())                     //我们知道线程是在这里被阻塞了
                throw new InterruptedException();
        }
    } finally {
        if (failed)
            cancelAcquire(node);
    }
线程在这里被阻塞,唤醒后继续执行,由于满足条件,state的状态值为0,函数返回值为1 ,大于0会进入其中我们继续往下看 这一小段
setHeadAndPropagate(node, r); //关键就在这个函数哦
p.next = null; // help GC
failed = false;
return;
private void setHeadAndPropagate(Node node, int propagate) {
Node h = head; // Record old head for check below
setHead(node); //这里重新设置头节点 (已上面 第一次释放锁 h== head 的重复判断相对应)
if (propagate > 0 || h == null || h.waitStatus < 0) {
Node s = node.next;
if (s == null || s.isShared())
doReleaseShared(); //注意这里 会进入这里
}
}
这个函数相信你不陌生吧,就是第一个释放锁所调用的,在这里,被唤醒的线程在调用一次,依赖唤醒后续线程
private void doReleaseShared() {
for (;;) {
Node h = head;
if (h != null && h != tail) {
int ws = h.waitStatus;
if (ws == Node.SIGNAL) {
if (!compareAndSetWaitStatus(h, Node.SIGNAL, 0))
continue; // loop to recheck cases
unparkSuccessor(h);
}
else if (ws == 0 &&
!compareAndSetWaitStatus(h, 0, Node.PROPAGATE))
continue; // loop on failed CAS
}
if (h == head) // loop if head changed
break; //明白这里为什么要加一次判断了吧!!!,被唤醒的线程会在执行该函数
}
}