树莓派3上安装使用NCS2之一:模板成功运行
官网教程:https://docs.openvinotoolkit.org/latest/_docs_install_guides_installing_openvino_raspbian.html
原以为官网的就是最好的,谁知这次是个坑爹的,大部分是对的,缺少一句指令
sed -i “s||$(pwd)/opt/intel/openvino|” /opt/intel/openvino/bin/setupvars.sh 搞得我白经历一天的失败,差点儿放弃。我下载的是l_openvino_toolkit_raspbi_p_2019.1.094.tgz (即下图中的R1,下载链接https://download.01.org/opencv/2019/openvinotoolkit/)为什么没有下载更新的R2,我怕太新了,吃不消!
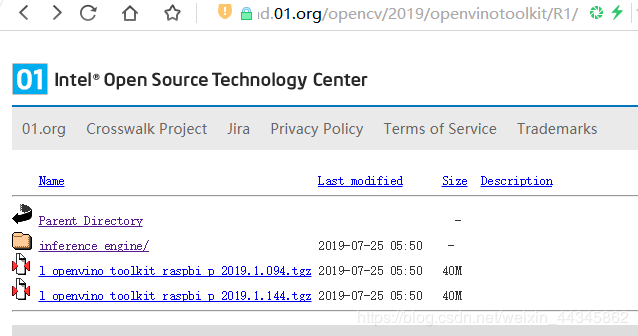
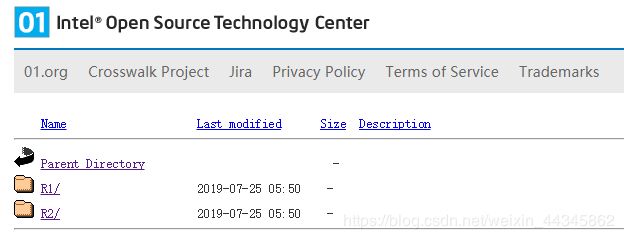 R1展开如下,下面的interence_engine不用下载,里面是OPENCV4.1等,太新了,本人树莓派上已经有了3.4, 所以没用!
Unpack the archive:
cd ~/Downloads/
sudo mkdir -p /opt/intel/openvino
sudo tar -xf l_openvino_toolkit_raspbi_p_.tgz --strip 1 -C /opt/intel/openvino
我已经有了cmake,没有装的按官网用此句安装sudo apt install cmake
Set the Environment Variables
sed -i “s||$(pwd)/opt/intel/openvino|” /opt/intel/openvino/bin/setupvars.sh
source /opt/intel/openvino/bin/setupvars.sh 环境设置单次有效
echo “source /opt/intel/openvino/bin/setupvars.sh” >> ~/.bashrc 环境设置长期有效,打开另一个终端,会出现如下图第一行
[setupvars.sh] OpenVINO environment initialized

Add USB Rules
sudo usermod -a -G users “$(whoami)” (关闭此终端,再打开一个终端,使此设置有效,新的终端刚一打开,没有任何操作的情况下就会有[setupvars.sh] OpenVINO environment initialized显示在第一行,这是Set the Environment Variables有效的表征)
sh /opt/intel/openvino/install_dependencies/install_NCS_udev_rules.sh
然后插入Neural Compute Stick 2,开始编译例子和测试。
Build and Run Object Detection Sample
mkdir build && cd build
make -j2 object_detection_sample_ssd (这句需要一些时间编译,大约1个小时内)


wget --no-check-certificate https://download.01.org/opencv/2019/open_model_zoo/R1/models_bin/face-detection-adas-0001/FP16/face-detection-adas-0001.bin 下载 .bin file with weights
wget --no-check-certificate https://download.01.org/opencv/2019/open_model_zoo/R1/models_bin/face-detection-adas-0001/FP16/face-detection-adas-0001.xml下载 .xml file with the network topology

./armv7l/Release/object_detection_sample_ssd -m face-detection-adas-0001.xml -d MYRIAD -i
./armv7l/Release/object_detection_sample_ssd -m face-detection-adas-0001.xml -d MYRIAD -i /home/pi/Downloads/build/example.jpg


运行后输出一张画了框的识别脸的图片out_0.bmp 就多了一个方框而已,大小竟然5.6M,奶奶的,我原来的example.jpg才133K呀!.
效果如下(注意粉色方框):
以上例子可以用python代码实现,我们是在python下做开发,这里也有提供了Opencv + python的运行例子
新建一个文件夹,先建立一个face_detection.py文件,如下:
import cv2 as cv
#2 Load the model.
net = cv.dnn.readNet(‘face-detection-adas-0001.xml’,
‘face-detection-adas-0001.bin’)
#2 Specify target device.
net.setPreferableTarget(cv.dnn.DNN_TARGET_MYRIAD)
#2 Read an image.
frame = cv.imread(’/home/pi/Downloads/build/example.jpg’)
if frame is None:
raise Exception('Image not found!')
#2 Prepare input blob and perform an inference.
blob = cv.dnn.blobFromImage(frame, size=(672, 384), ddepth=cv.CV_8U)
net.setInput(blob)
out = net.forward()
#2 Draw detected faces on the frame.
for detection in out.reshape(-1, 7):
confidence = float(detection[2])
xmin = int(detection[3] * frame.shape[1])
ymin = int(detection[4] * frame.shape[0])
xmax = int(detection[5] * frame.shape[1])
ymax = int(detection[6] * frame.shape[0])
if confidence > 0.5:
    cv.rectangle(frame, (xmin, ymin), (xmax, ymax), color=(0, 255, 0))
#2 Save the frame to an image file.
cv.imwrite(‘out.png’, frame)
然后执行:python3 openvino_fd_myriad.py
Workflow for Raspberry Pi*
If you want to use your model for inference, the model must be converted to the .bin and .xml Intermediate Representation (IR) files that are used as input by Inference Engine. OpenVINO™ toolkit support on Raspberry Pi only includes the Inference Engine module of the Intel® Distribution of OpenVINO™ toolkit. The Model Optimizer is not supported on this platform. To get the optimized models you can use one of the following options:
Download a set of ready-to-use pre-trained models for the appropriate version of OpenVINO from the Intel® Open Source Technology Center:
Models for the 2019 R1 release of OpenVINO are available at https://download.01.org/opencv/2019/open_model_zoo/R1/.
Models for the 2018 R5 release of OpenVINO are available at https://download.01.org/openvinotoolkit/2018_R5/open_model_zoo/.
For more information on pre-trained models, see Pre-Trained Models Documentation
Convert the model using the Model Optimizer from a full installation of Intel® Distribution of OpenVINO™ toolkit on one of the supported platforms. Installation instructions are available:
Installation Guide for macOS*
Installation Guide for Windows*
Installation Guide for Linux* https://docs.openvinotoolkit.org/latest/_docs_install_guides_installing_openvino_linux.html
For more information about how to use the Model Optimizer, see the Model Optimizer Developer Guid
https://docs.openvinotoolkit.org/latest/_docs_MO_DG_Deep_Learning_Model_Optimizer_DevGuide.html?elq_cid=5649983&erpm_id=8664302