Beetl模板引擎之自定义html标签
开篇唠叨一下个人感言,之前做的项目有使用到 jsp 自定义标签,jsp自定义标签感觉麻烦,现在想找一个简单好用的模板引擎看看自定义标签怎么写,所以百度到了Beetl,逛了一下官网,感觉写法也挺简单的,然后尝试自定义标签,看文档蒙圈啊,都不知道怎么用,进群了,问了一下没人搭理,感觉很无奈都想放弃学习Beetl,觉得文档写的也不咋滴。但还是坚持百度了,逛了码云上的开源项目,终于看到有人自定义标签了正是自己想要的,现在终于领悟了一点,继续使用Beetl吧
说了那么多来看看官方怎么说的吧,使用的是2.7.12版本,下文来自官方文档
2.23. HTML标签
Beetl 也支持HTML tag形式的标签, 区分beetl的html tag 与 标准html tag。如设定HTML_TAG_FLAG=#,则如下html tag将被beetl解析
<#footer style=”simple”/>
<#richeditor id=”rid” path="${ctxPath}/upload" name=”rname”  maxlength=”${maxlength}”> ${html} …其他模板内容   #richdeitor>
<#html:input  id=’aaaa’ />
如对于标签footer,Beetl默认会寻找WebRoot/htmltag/footer.tag(可以通过配置文件修改路径和后缀) ,内容如下:
<% if(style==’simple’){ %>
 请联系我 ${session.user.name}
<% }else{ %>
请联系我 ${session.user.name},phone:${session.user.phone}
<% } %>
如下还包含了自定义html标签一些一些规则
- 可以在自定义标签里引用标签体的内容,标签体可以是普通文本,beetl模板,以及嵌套的自定义标签等。如上<#richeditor 标签体里,可用“tagBody”来引用
- HTML自定义标签 的属性值均为字符串 如<#input value=”123” />,在input.tag文件里 变量value的类型是字符串
- 可以在属性标签里引用beetl变量,如<#input value=”${user.age}” />,此时在input.tag里,value的类型取决于user.age
- 在属性里引用beetl变量,不支持格式化,如<#input value=”${user.date,‘yyyy-MM-dd’ }” />,如果需要格式化,需要在input.tag文件里自行格式化
- 在标签属性里传json变量需要谨慎,因为json包含了"}",容易与占位符混合导致解析出错,因此得使用"\"符号,如<#input value=”${ {age:25} }” />
- html tag 属性名将作为 其对应模板的变量名。
- 默认机制下,全局变量都将传给html tag对应的模板文件,这个跟include一样。当然,这机制也可以改变,对于标签来说,通常是作为一个组件存在,也不一定需要完全传送所有全局变量,而只传送(request,session,这样变量),因此需要重新继承org.beetl.ext.tag.HTMLTagSupportWrapper.并重载callHtmlTag方法。并注册为htmltag标签。具体请参考https://github.com/javamonkey/beetl2.0/blob/master/beetl-core/src/test/java/org/beetl/core/tag/HtmlTagTest.java
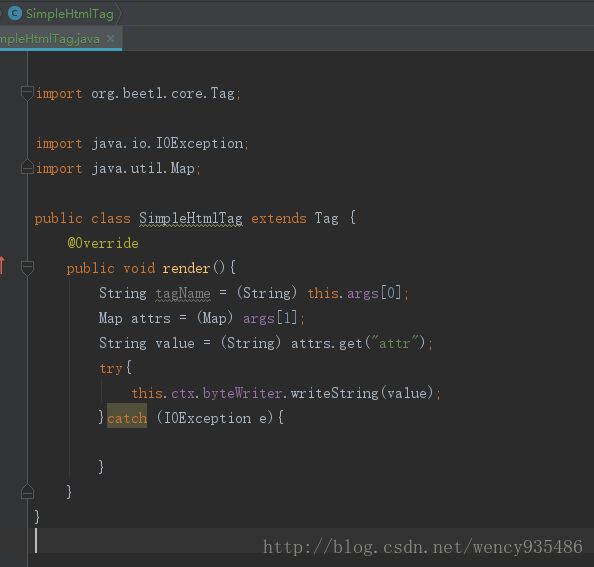
如果采用模板来写html标签功能不够强大,beetl支持写标签函数(参考上一节)来实现html标签,标签函数args[0]表示标签名,这通常没有什么用处,args[1] 则是标签的属性,参数是个map,key是html tag的属性,value是其属性值,如下用java完成的html 标签用于输出属性值
public class SimpleHtmlTag extends Tag{
        @Override
        public void render(){
                String tagName = (String) this.args[0];
                Map attrs = (Map) args[1];
                String value = (String) attrs.get("attr");
                try{
                        this.ctx.byteWriter.writeString(value);
                }catch (IOException e){

                }
        }
}
如果注册gt.registerTag("simpleTag", SimpleHtmlTag.class); 则如下模板输出了attr属性值abc
<#simpleTag attr="abc">#simpleTag>
HTML_TAG_FLAG默认为#用来区别是否是beetl的html tag,你也可以设置成其他符号,比如 "my:",这样,\\ 其实是一个指向table.tag的标签实现
看了上文描述中提到如果注册gt.registerTag("simpleTag", SimpleHtmlTag.class); ,
尝试在注入 BeetlGroupUtilConfiguration 的时候调用 init()方法 beetlGroupUtilConfiguration.init();初始化
然后调用 groupTemplate.registerTag("simpleTag", SimpleHtmlTag.class);进行注册标签,但是访问页面的时候,
总是去htmlTag目录下找simpleTag.tag文件,找不到就报错了,
花了不少时间真不知道怎么实现自定义标签,哎,好无奈啊!还好百度到了开源项目,又对使用beetl的使用增加了信息。
官方所描述的gt.registerTag("simpleTag", SimpleHtmlTag.class);是可以注册自定义标签的
其实报错是因为我踩了一个坑,因为我注入BeetlGroupUtilConfiguration的时候
在@Bean中指定了initMethod = "init",罪魁祸首就是他了,
我注入的 BeetlGroupUtilConfiguration:
@Bean(initMethod = "init")
public BeetlGroupUtilConfiguration getBeetlGroupUtilConfiguration(){ ... }
一但指定了,当你访问页面的时候,
beetl会从tagFactory中根据标签名称获取tagFactory工厂,如果不为空就创建tag,否则查找根目录下
htmltag目录下的后缀为tag的标签文件
在Beetl源码HTMLTagSupportWrapper类中第25行如下 :
public void render() {
    if (this.args.length != 0 && this.args.length <= 2) {
        String child = (String)this.args[0];
        TagFactory tagFactory = null;
        String functionTagName = child.replace(':', '.');
        tagFactory = this.gt.getTagFactory(functionTagName);
        if (tagFactory == null) {
            String path = this.getHtmlTagResourceId(child);
            this.callHtmlTag(path);
        } else {
            this.callTag(tagFactory);
        }

    } else {
        throw new RuntimeException("参数错误,期望child,Map .....");
    }
}
进入正题如何自定义标签:
首先按方法文档给出的实例来建一个 SimpleHtmlTag类并继承Tag (完全把示例SimpleHtmlTag复制过来用)
代码复制到项目中后,在配置文件beetl.yml中加上TAG.simpleTag: cn.codesign.data.SimpleHtmlTag
TAG固定写法
TAG. 前面的 simpleTag 就是你自定义标签的名称然后就是指定类的全限定名了
然后在页面中添加
<#simpleTag attr="abc">#simpleTag>
启动项目访问页面就会输出:abc
原来是这么使用自定义html标签啊,这是一种方法,
如果不在 beetl.yml中添加 TAG.simpleTag: com.czw.beetl.tag.SimpleHtmlTag
还可以根据文档描述那样注册标签
当注入BeetlGroupUtilConfiguration的时候 在 @Bean中不能出现initMethod = "init" 即@Bean(initMethod = "init")
注意获取GroupTemplate前必须先调用init方法,否则获取到的GroupTemplate为 null
@Bean(name = "beetlConfig")
public BeetlGroupUtilConfiguration getBeetlGroupUtilConfiguration() {

	BeetlGroupUtilConfiguration beetlGroupUtilConfiguration = new BeetlGroupUtilConfiguration();
	//获取Spring Boot 的ClassLoader
	ClassLoader loader = Thread.currentThread().getContextClassLoader();
	ResourcePatternResolver patternResolver = ResourcePatternUtils.getResourcePatternResolver(new DefaultResourceLoader());
	try {
		// WebAppResourceLoader 配置root路径是关键
		ClasspathResourceLoader cploder = new ClasspathResourceLoader(SpringbootApplication.class.getClassLoader(),"templates/");
		beetlGroupUtilConfiguration.setResourceLoader(cploder);
	} catch (Exception e) {
		e.printStackTrace();
	}
	//读取配置文件信息
	beetlGroupUtilConfiguration.setConfigFileResource(patternResolver.getResource("classpath:beetl.yml"));
	beetlGroupUtilConfiguration.init();
	GroupTemplate groupTemplate = beetlGroupUtilConfiguration.getGroupTemplate();
	//注册自定义标签
	groupTemplate.registerTag("simpleTag", SimpleHtmlTag.class);
	return beetlGroupUtilConfiguration;
}


