最简单的SpringBoot+Mybatis配置及简单测试
开发工具
本文使用当下比较流行的IntelliJ IDEA开发工具。
新建工程
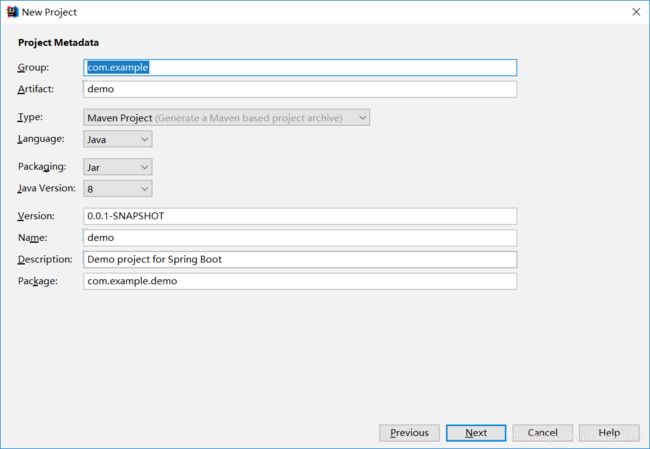
打开IntelliJ IDEA工具选择new project,弹出如下窗口:
 我们选择左侧的Spring Initializr,jdk要求1.8及以上。选择默认的Default下一步:
写demo其实我们可以不改这些信息直接下一步,如果想改名字可以自己修改Group及Artifact,和最下边的package包名,为了省事我就直接下一步了。
 这个页面是选择你工程中需要用到的依赖,因为我们的目标是web项目使用mybatis所以在web模块中勾选Spring web starter,在sql中勾选mysql driver jdbc mybatis f'ramework。然后下一步直到finish即可。接着项目就会下载我们需要的依赖,如果之前没有下过,可能会稍等几分钟。
生成的pom文件
    4.0.0

        org.springframework.boot
        spring-boot-starter-parent
        2.2.2.RELEASE


    com.ming
    asset-management
    0.0.1-SNAPSHOT
    asset-management
    Demo project for Spring Boot


        1.8


            org.springframework.boot
            spring-boot-starter-web


            org.springframework.boot
            spring-boot-starter-test
            test


                    org.junit.vintage
                    junit-vintage-engine


            mysql
            mysql-connector-java


            org.mybatis.spring.boot
            mybatis-spring-boot-starter
            2.1.1


                org.springframework.boot
                spring-boot-maven-plugin
配置mybatis相关信息
创建数据库表中对应的实体类
数据库表结构如下:
对应实体类如下:
public class T_Userinfo {
    private Integer ID;
    private String UserName;
    private String Password;

    public Integer getID() {
        return ID;
    }

    public void setID(Integer ID) {
        this.ID = ID;
    }

    public String getUserName() {
        return UserName;
    }

    public void setUserName(String userName) {
        UserName = userName;
    }

    public String getPassword() {
        return Password;
    }

    public void setPassword(String password) {
        Password = password;
    }

    @Override
    public String toString() {
        return "T_Userinfo{" +
                "ID=" + ID +
                ", UserName='" + UserName + '\'' +
                ", Password='" + Password + '\'' +
                '}';
    }
}
配置Mapper
对应的操作类UserMapper如下:
package com.example.demo.mapper;

import com.example.demo.model.T_Userinfo;
import org.apache.ibatis.annotations.Mapper;

import java.util.List;

@Mapper
@Repository //可以去除其他调用地方画红线问题
public interface UserMapper {
    public List findAll();
} 对应的UserMapper.xml如下,注意该文件放在resource目录下,具体包名位置要和上边的UserMapper对应:
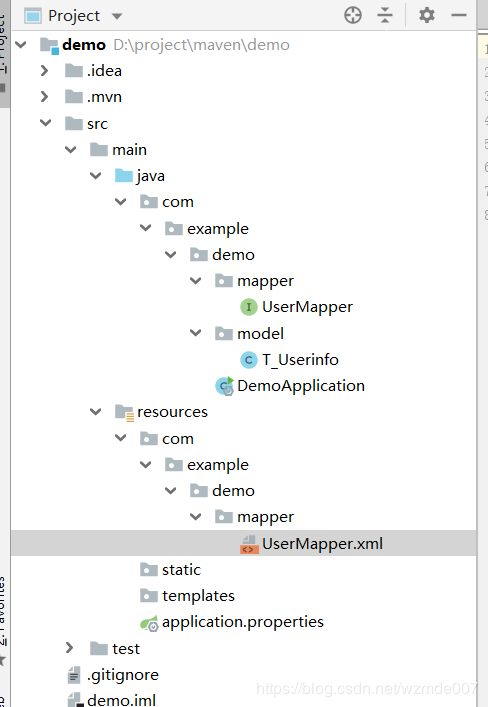
UserMapper.java和UserMapper.xml的对应结构如下:
配置数据库连接
在application.properties中配置
配置内容如下:
#数据库连接信息
spring.datasource.driver-class-name=com.mysql.cj.jdbc.Driver
spring.datasource.url=jdbc:mysql://localhost:3306/test?useUnicode=true&characterEncoding=UTF-8&serverTimezone=UTC
spring.datasource.username=root
spring.datasource.password=123456
新建controller测试
这里为了省事,直接controller调用dao层,正常项目中间应该还有service层来处理业务。controller位置如下:
UserController内容如下:
package com.example.demo.controller;

import com.example.demo.mapper.UserMapper;
import com.example.demo.model.T_Userinfo;
import org.springframework.beans.factory.annotation.Autowired;
import org.springframework.web.bind.annotation.RequestMapping;
import org.springframework.web.bind.annotation.RestController;

import java.util.List;

@RestController
@RequestMapping("/user")
public class UserController {
    @Autowired
    private UserMapper userMapper;
    @RequestMapping("/findUser")
    public List findUser(){
        return userMapper.findAll();
    }
}
这里要注意@Controller注解与@RestController注解的区别。参见https://www.jdon.com/50892 。
就是说当我们做api开发时,@RestController是首选。如果是开发spirngmvc前后端不分离需要用到modelandview的情况就使用@Controller注解。
分页
不使用插件,仅依靠mybatis实现分页的方式:https://www.cnblogs.com/aeolian/p/9229149.html
使用pagehelper 分页插件:https://pagehelper.github.io/docs/howtouse/
springboot集成pagehelperhttps://www.cnblogs.com/xifengxiaoma/p/11027551.html
直接来个大而全的,最牛mybatis插件mybatis-plus:https://mp.baomidou.com/
测试
通过点击右上角的启动按钮,或者去DemoApplication类中启动main方法,来启动项目。
默认地址是localhost:8080,然后加上我们controller的地址http://localhost:8080/user/findUser回车:
就可以看到如下测试数据:
[{"id":18,"password":"111111111","userName":"test2"},{"id":20,"password":"1111111111111","userName":"sdfsdfsd"},{"id":21,"password":"11222","userName":"haha"},{"id":22,"password":"1231232","userName":"sdfs"},{"id":23,"password":"12312322323","userName":"sdfs1"},{"id":24,"password":"123123223232132","userName":"s1"},{"id":25,"password":"1231232232321322","userName":"s12"},{"id":26,"password":"1231232232","userName":"s122"},{"id":27,"password":"88888","userName":"s1223"},{"id":28,"password":"88888223","userName":"s125"},{"id":29,"password":"88882","userName":"s12"},{"id":35,"password":"22222222222222","userName":"211"},{"id":36,"password":"123","userName":"sd"}]大功告成。


