springboot整合jpa
JPA是什么
JPA(java persistence api),它并不是一个框架,而是一组规范。我觉得对于任何一个开发人员来说,理解“规范”这个词应该不在话下。其中,Hibernate就实现了这个规范,而且呢是相当成功的(其实TopLink和OpenJPA也都实现了JPA规范,不过它们被Hinernate的光环笼罩了)。所以呢,当我们说到JPA的时候,好多人首先想到的就是Hibernate。
其实通俗来讲,我们可以认为在jpa的这个规范下,框架使用了这个规范对和数据库的交互做了一些底层的封装,比如我们的sql语句,怎么从数据库查出我们需要的数据呢?其实很多框架都可以做这个事情,我们熟悉的mybatis,那个熟悉的组件,sqlSessionFactory都记得吧,无非就是建立了一个通道,把我们在程序中写的按照框架的规范的sql语句转化成数据库引擎可以解析的sql,这样解释应该很好懂了。
所以大家不要为框架的外表迷惑了,翻开框架底层源码,大小差不多。
下面我们来说是springboot整合jpa的过程,其实整合框架并不难,主要是springboot的版本升级太快,版本的问题带来的就是组件之间的兼容性问题,2.x之后和2.x之前的整合多少有些不太相似的地方,就导致整合时候各种奇葩的问题,后面会为大家列举出来。
我们整体的项目结构是:

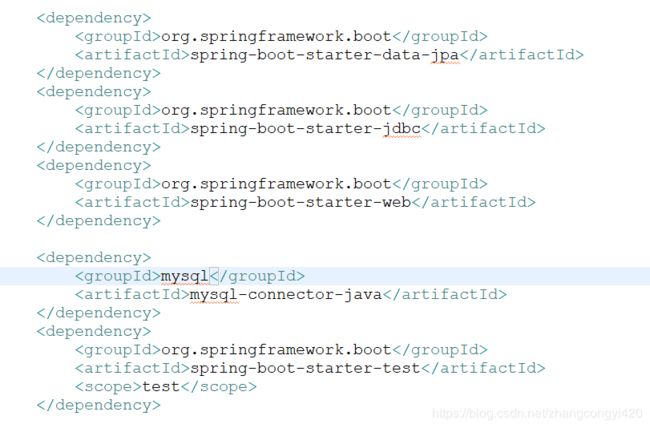
1、首先配置pom依赖文件,
		org.springframework.boot
		spring-boot-starter-parent
		2.0.1.RELEASE


		UTF-8
		UTF-8
		1.8
		3.0.10.RELEASE
		2.1.1
		3.0.4.RELEASE


            org.springframework.boot
            spring-boot-starter-data-jpa


            org.springframework.boot
            spring-boot-starter-jdbc


            org.springframework.boot
            spring-boot-starter-web


            mysql
            mysql-connector-java


            org.springframework.boot
            spring-boot-starter-test
            test


			org.springframework.boot
			spring-boot-starter-thymeleaf


			org.thymeleaf
			thymeleaf
			${thymeleaf.version}


			org.thymeleaf
			thymeleaf-spring4
			3.0.2.RELEASE


			org.springframework.boot
			spring-boot-starter-security


			org.thymeleaf.extras
			thymeleaf-extras-springsecurity4
			${thymeleaf-extras-springsecurity4.version}


			org.springframework.session
			spring-session
			1.3.4.RELEASE


			org.springframework.boot
			spring-boot-starter-data-redis
pom文件可以选择性添加,但是几个主要的依赖不能缺少,
2、接下来是配置文件,这里我使用的是application.properties,根据个人习惯,也可以使用yml,这里我在整合的使用需要使用到spring-session和spring-security的东西,因此后面的spring-session的配置大家可以酌情使用,可以不配置,
server.port=8087

# Mysql
spring.datasource.driver-class-name=com.mysql.jdbc.Driver
spring.datasource.jdbc-url=jdbc:mysql://localhost:3306/xunwu?useUnicode=true&characterEncoding=utf-8&useSSL=false
spring.datasource.username=root
spring.datasource.password=root

#jpa
spring.jpa.hibernate.ddl-auto=validate
spring.jpa.show-sql=true
spring.jpa.hibernate.naming.physical-strategy=org.springframework.boot.orm.jpa.hibernate.SpringPhysicalNamingStrategy
logging.level.org.hibernate.SQL=debug

# session会话存储类型
spring.session.store-type=none

#spring.redis.database=0
#spring.redis.host=127.0.0.1
#spring.redis.port=6379
#spring.redis.pool.min-idle=1
#spring.redis.timeout=3000

# 关闭HTTP基本验证
security.basic.enabled=false
3、这里为了使得项目结构显得更有层次感,我使用了配置bean的形式来管理数据源,也就是springboot比较流行的使用bean形式配置和数据库连接的操作,方便管理,这里我使用了一个jpaConfig的类,代码如下,
package com.congge.config;

import javax.persistence.EntityManagerFactory;
import javax.sql.DataSource;

//import org.springframework.boot.autoconfigure.jdbc.DataSourceBuilder;
import org.springframework.boot.context.properties.ConfigurationProperties;
import org.springframework.boot.jdbc.DataSourceBuilder;
import org.springframework.context.annotation.Bean;
import org.springframework.context.annotation.Configuration;
import org.springframework.data.jpa.repository.config.EnableJpaRepositories;
import org.springframework.orm.jpa.JpaTransactionManager;
import org.springframework.orm.jpa.LocalContainerEntityManagerFactoryBean;
import org.springframework.orm.jpa.vendor.HibernateJpaVendorAdapter;
import org.springframework.transaction.PlatformTransactionManager;
import org.springframework.transaction.annotation.EnableTransactionManagement;

/**
 * congge
 */
@Configuration
@EnableJpaRepositories(basePackages = "com.congge.repository")
@EnableTransactionManagement
public class JPAConfig {

	//加载数据库连接信息
    @Bean
    @ConfigurationProperties(prefix = "spring.datasource")
    public DataSource dataSource() {
        return DataSourceBuilder.create().build();
    }

    //配置jpa连接工厂和实体映射
    @Bean
    public LocalContainerEntityManagerFactoryBean entityManagerFactory() {
        HibernateJpaVendorAdapter japVendor = new HibernateJpaVendorAdapter();
        japVendor.setGenerateDdl(false);
        LocalContainerEntityManagerFactoryBean entityManagerFactory = new LocalContainerEntityManagerFactoryBean();
        entityManagerFactory.setDataSource(dataSource());
        entityManagerFactory.setJpaVendorAdapter(japVendor);
        entityManagerFactory.setPackagesToScan("com.congge.entity");
        return entityManagerFactory;
    }

    //事务管理器
    @Bean
    public PlatformTransactionManager transactionManager(EntityManagerFactory entityManagerFactory) {
        JpaTransactionManager transactionManager = new JpaTransactionManager();
        transactionManager.setEntityManagerFactory(entityManagerFactory);
        return transactionManager;
    }
}
这里面有几个坑,有的同学在整合的时候,由于使用的是2.x之前的版本,这个配置类不要也可以,甚至不用@EnableJpaRepositories(basePackages = “com.congge.repository”) 这个注解都没问题,但我试过,项目怎么都起不来,报错的信息大概就是认为repository 也被纳入到spring框架作为一个bean管理,我这里使用的是2.0.1的版本,为了避免这个坑,就加上了;
4、上面使用了spring-session和spring-security的组件,我在整合启动的时候,发现怎么都不生效,也就是访问自己接口的时候,一直会调到需要验证的页面,找了很多资料,发现配置文件中仅仅有这个配置,根本不生效,也是2.x的版本和之前的版本用法不一致的原因导致,所以加了一个配置类,
security.basic.enabled=false
package com.congge.config;

import org.springframework.context.annotation.Configuration;
import org.springframework.security.config.annotation.web.builders.HttpSecurity;
import org.springframework.security.config.annotation.web.configuration.EnableWebSecurity;
import org.springframework.security.config.annotation.web.configuration.WebSecurityConfigurerAdapter;

/**
 * http验证配置类
 * @author asus
 *
 */

@Configuration
@EnableWebSecurity
public class SecurityConfig extends WebSecurityConfigurerAdapter{

	@Override
	protected void configure(HttpSecurity http) throws Exception {

		http.authorizeRequests().anyRequest().permitAll().and().logout().permitAll();
	}

}
下面我们看看具体的业务代码,为了测试方便,我已经提前建好了测试的库和一张user表,

User实体类,
package com.congge.entity;

import java.util.Date;

import javax.persistence.Column;
import javax.persistence.Entity;
import javax.persistence.GeneratedValue;
import javax.persistence.GenerationType;
import javax.persistence.Id;
import javax.persistence.Table;

/**
 * congge
 */
@Entity
@Table(name = "user")
public class User{
    @Id
    @GeneratedValue(strategy = GenerationType.IDENTITY)
    private Long id;

    private String name;

    private String password;

    private String email;

    @Column(name = "phone_number")
    private String phoneNumber;

    private int status;

    @Column(name = "create_time")
    private Date createTime;

    @Column(name = "last_login_time")
    private Date lastLoginTime;

    @Column(name = "last_update_time")
    private Date lastUpdateTime;

    private String avatar;

    public Long getId() {
        return id;
    }

    public void setId(Long id) {
        this.id = id;
    }

    public String getName() {
        return name;
    }

    public void setName(String name) {
        this.name = name;
    }

    public String getPassword() {
        return password;
    }

    public void setPassword(String password) {
        this.password = password;
    }

    public String getEmail() {
        return email;
    }

    public void setEmail(String email) {
        this.email = email;
    }

    public String getPhoneNumber() {
        return phoneNumber;
    }

    public void setPhoneNumber(String phoneNumber) {
        this.phoneNumber = phoneNumber;
    }

    public int getStatus() {
        return status;
    }

    public void setStatus(int status) {
        this.status = status;
    }

    public Date getCreateTime() {
        return createTime;
    }

    public void setCreateTime(Date createTime) {
        this.createTime = createTime;
    }

    public Date getLastLoginTime() {
        return lastLoginTime;
    }

    public void setLastLoginTime(Date lastLoginTime) {
        this.lastLoginTime = lastLoginTime;
    }

    public Date getLastUpdateTime() {
        return lastUpdateTime;
    }

    public void setLastUpdateTime(Date lastUpdateTime) {
        this.lastUpdateTime = lastUpdateTime;
    }

    public String getAvatar() {
        return avatar;
    }

    public void setAvatar(String avatar) {
        this.avatar = avatar;
    }
}
UserRepository,
package com.congge.repository;

import org.springframework.data.repository.CrudRepository;

import com.congge.entity.User;


/**
 * congge
 */
public interface UserRepository extends CrudRepository {

    User findByName(String userName);

    User findUserByPhoneNumber(String telephone);

}
接口和实现类,
UserService:
package com.congge.service;

import com.congge.entity.User;

public interface UserService {

	User findByName(String userName);

    User findUserByPhoneNumber(String telephone);
}
UserServiceImpl:
package com.congge.service.impl;

import org.springframework.beans.factory.annotation.Autowired;
import org.springframework.stereotype.Service;

import com.congge.entity.User;
import com.congge.repository.UserRepository;
import com.congge.service.UserService;

@Service("userService")
public class UserServiceImpl implements UserService{

	@Autowired
	private UserRepository userRepository;

	@Override
	public User findByName(String userName) {
		return userRepository.findByName(userName);
	}

	@Override
	public User findUserByPhoneNumber(String telephone) {
		return null;
	}

}
最后写一个测试的UserController,
package com.congge.controller;

import org.springframework.beans.factory.annotation.Autowired;
import org.springframework.stereotype.Controller;
import org.springframework.web.bind.annotation.RequestMapping;
import org.springframework.web.bind.annotation.ResponseBody;

import com.congge.entity.User;
import com.congge.service.impl.UserServiceImpl;

@Controller
public class UserController {

	@Autowired
	private UserServiceImpl userService;

	@RequestMapping("/getUserByName")
	@ResponseBody
	public User getUserByName(String name){
		return userService.findByName(name);
	}


}
main函数:
package com.congge;

import org.springframework.boot.SpringApplication;
import org.springframework.boot.autoconfigure.SpringBootApplication;
import org.springframework.boot.autoconfigure.jdbc.DataSourceAutoConfiguration;

@SpringBootApplication(exclude={DataSourceAutoConfiguration.class})
public class App {

	public static void main(String[] args) {
		SpringApplication.run(App.class, args);
	}

}
运行main函数,我们在浏览器上输入:http://localhost:8087/getUserByName?name=waliwali

可以看到已经成功获取到数据库数据,说明我们的框架整合成功,需要整合的伙伴们可以提供下参考,最后感谢大家观看!!