吐槽两句:
本来想用科大讯飞来做语音朗读的,但是看了一下离线语音合成貌似要收费......作为一个新产品肯定是给不起了。所以我用原生API实现了这个功能,效果还不错。实现思路主要分为三块,文字转语音,UI变化,后台播放等配置。
文字转语音
第一步,导入AVFoundation.framework.
简单讲一下我们要用到的类和方法。
AVSpeechSynthesizer //控制整个阅读过程
 //阅读状态,是否正在阅读,暂停阅读时这里依然是YES
@property(nonatomic, readonly, getter=isSpeaking) BOOL speaking;
//暂定状态,当前阅读是否暂停
@property(nonatomic, readonly, getter=isPaused) BOOL paused;
//停止阅读,停止后speaking = NO
- (BOOL)stopSpeakingAtBoundary:(AVSpeechBoundary)boundary;
//暂停阅读,暂停后paused = YES
- (BOOL)pauseSpeakingAtBoundary:(AVSpeechBoundary)boundary;
//继续阅读,paused = NO;
- (BOOL)continueSpeaking;

//代理方法
@protocol AVSpeechSynthesizerDelegate
//开始阅读
- (void)speechSynthesizer:(AVSpeechSynthesizer *)synthesizer didStartSpeechUtterance:(AVSpeechUtterance *)utterance;
//完成阅读,正常读完
- (void)speechSynthesizer:(AVSpeechSynthesizer *)synthesizer didFinishSpeechUtterance:(AVSpeechUtterance *)utterance;
//暂停阅读
- (void)speechSynthesizer:(AVSpeechSynthesizer *)synthesizer didPauseSpeechUtterance:(AVSpeechUtterance *)utterance;
//继续阅读
- (void)speechSynthesizer:(AVSpeechSynthesizer *)synthesizer didContinueSpeechUtterance:(AVSpeechUtterance *)utterance;
//阅读被打断或取消
- (void)speechSynthesizer:(AVSpeechSynthesizer *)synthesizer didCancelSpeechUtterance:(AVSpeechUtterance *)utterance;
/*
* 即将阅读到的内容
* characterRange : 要读的字的位置,这里可能是字或者词语,所以长度一般是1-3
* utterance:要读的句子,依然是设置要读的内容而不是单个的文字或词语。
*/
- (void)speechSynthesizer:(AVSpeechSynthesizer *)synthesizer willSpeakRangeOfSpeechString:(NSRange)characterRange utterance:(AVSpeechUtterance *)utterance;

AVSpeechUtterance //提供阅读的内容,这里只写几个常用的方法和属性
//用string初始化内容。
+ (instancetype)speechUtteranceWithString:(NSString *)string;
@property(nonatomic, readonly) NSString *speechString;

@property(nonatomic) float rate;            //语速,
@property(nonatomic) float pitchMultiplier;  //  声音高度。[0.5 - 2] Default = 1

@property(nonatomic) NSTimeInterval preUtteranceDelay;//间隔时间,读完一句可以停久一点

AVSpeechSynthesisVoice //提供阅读的声音
//初始化一个声音,languageCode可以填@"zh-CN" 代表普通话,还有粤语,台湾话,各国语言。
+ (nullable AVSpeechSynthesisVoice *)voiceWithLanguage:(nullable NSString *)languageCode
第二步,实现文字转语音相关代码,这里我是写在一个单例里面。方便全局控制。特别注意的是设置暂停,停止时需要传参数AVSpeechBoundaryImmediate或者AVSpeechBoundaryWord,前者是立刻执行,后者是读完一个字再执行。这里在实际使用上差别还是蛮大的,建议选择前者可以避免一些奇奇怪怪的错误。
//file.h里面
@protocol SpeechManagerDelegate

@optional
- (void)didStartSpeechUtterance:(AVSpeechUtterance*)utterance;
- (void)didFinishSpeechUtterance:(AVSpeechUtterance*)utterance;
- (void)didPauseSpeechUtterance:(AVSpeechUtterance*)utterance;
- (void)didCancelSpeechUtterance:(AVSpeechUtterance*)utterance;
- (void)willSpeakRangeOfSpeechString:(NSRange)characterRange utterance:(AVSpeechUtterance *)utterance;

- (void)needRepeatSpeech:(AVSpeechUtterance *)utterance;
@end

// file.m里面
@interface SpeechManager()

@property (nonatomic, strong) AVSpeechSynthesizer *avSpeech;
@property (nonatomic, strong) AVSpeechUtterance *speechUtt;
@end

- (void)setSpeechContent:(NSString *)content {
    AVSpeechUtterance *speechUtt = [AVSpeechUtterance speechUtteranceWithString:content];
    CGFloat value = [LZUtils fetchSpeechSpeed];
    speechUtt.rate = [self getSpeechSpeedWith:value];
    AVSpeechSynthesisVoice *voice = [AVSpeechSynthesisVoice voiceWithLanguage:@"zh-CN"];
    speechUtt.voice = voice;
    self.speechUtt = speechUtt;
}

- (void)beginSpeech {
    //这里需要注意一下,一个avspeech对象只能播放一次,同一个对象中途不能重新播放。
    AVSpeechSynthesizer *avSpeech = [[AVSpeechSynthesizer alloc] init];
    avSpeech.delegate = self;
    [avSpeech speakUtterance:self.speechUtt];
    self.avSpeech = avSpeech;
}

- (void)pauseSpeech {
    [self.avSpeech pauseSpeakingAtBoundary:AVSpeechBoundaryImmediate];
}

- (void)continueSpeech {
    if(self.avSpeech.isPaused) {
        [self.avSpeech continueSpeaking];
        [NSThread sleepForTimeInterval:0.25f];
    }
}

- (void)endSpeech {
    if(self.avSpeech.isSpeaking) {
        [self.avSpeech stopSpeakingAtBoundary:AVSpeechBoundaryImmediate];
        [NSThread sleepForTimeInterval:0.25f];
    }
}

//代理主要是返回给controller,用来和UI交互
#pragma mark - AVSpeechSynthesizerDelegate;
- (void)speechSynthesizer:(AVSpeechSynthesizer*)synthesizer didStartSpeechUtterance:(AVSpeechUtterance*)utterance{
    NSLog(@"---开始播放");
    self.nRepeat = NO;
    if(self.delegate && [self.delegate respondsToSelector:@selector(didStartSpeechUtterance:)]) {
        [self.delegate didStartSpeechUtterance:utterance];
    }
}

- (void)speechSynthesizer:(AVSpeechSynthesizer*)synthesizer didFinishSpeechUtterance:(AVSpeechUtterance*)utterance{
    NSLog(@"---完成播放");
    if(self.delegate && [self.delegate respondsToSelector:@selector(didFinishSpeechUtterance:)]) {
        [self.delegate didFinishSpeechUtterance:utterance];
    }
}

- (void)speechSynthesizer:(AVSpeechSynthesizer*)synthesizer didPauseSpeechUtterance:(AVSpeechUtterance*)utterance{
    NSLog(@"---播放中止");
    if(self.delegate && [self.delegate respondsToSelector:@selector(didPauseSpeechUtterance:)]) {
        [self.delegate didPauseSpeechUtterance:utterance];
    }
}

- (void)speechSynthesizer:(AVSpeechSynthesizer*)synthesizer didContinueSpeechUtterance:(AVSpeechUtterance*)utterance{
    NSLog(@"---恢复播放");

}

- (void)speechSynthesizer:(AVSpeechSynthesizer*)synthesizer didCancelSpeechUtterance:(AVSpeechUtterance*)utterance{
    NSLog(@"---播放取消");
    if(self.delegate && [self.delegate respondsToSelector:@selector(didCancelSpeechUtterance:)]) {
        [self.delegate didCancelSpeechUtterance:utterance];
    }
}

- (void)speechSynthesizer:(AVSpeechSynthesizer *)synthesizer willSpeakRangeOfSpeechString:(NSRange)characterRange utterance:(AVSpeechUtterance *)utterance {
    if(self.delegate && [self.delegate respondsToSelector:@selector(willSpeakRangeOfSpeechString:utterance:)]) {
        [self.delegate willSpeakRangeOfSpeechString:characterRange utterance:utterance];
    }
}
有了这个单例,你就可以把文字传进来,通过beginSpeech,pauseSpeech,continueSpeech,endSpeech来控制语音播放了。
第三步,处理UI展示。
在语音播放的时候,通常界面上会将当前播放的语句添加背景色展示给用户。先说一下如何给label上的文字添加背景色。
如果你是给普通的label设置了富文本,你可以直接给富文本添加属性。
//先移除range范围的背景色
[mString removeAttribute:(NSString *)NSBackgroundColorAttributeName range:range];
//给range范围添加背景色
[mString addAttribute:(NSString*)NSBackgroundColorAttributeName value:[UIColor redColor] range:range];
如果你是用coretext实现的UI,很遗憾NSBackgroundColorAttributeName并不能兼容,(我测试了一下在iOS10是可以的,但10以下就不行了)为了兼容建议使用YYLabel,可以使用YYTextBorder类设置背景颜色,非常方便。
NSMutableAttributedString *muattString = [NSMutableAttributedString new];
    YYTextBorder *yyborder = [[YYTextBorder alloc] init];
    yyborder.fillColor =  [UIColor colorWithHexString:@"#b0cbf4"];
    yyborder.cornerRadius = 0; // a huge value
    yyborder.lineJoin = kCGLineJoinBevel;
    yyborder.insets = UIEdgeInsetsMake(-1, -1, -1, -1);
    [muattString yy_setTextBackgroundBorder:yyborder range:range];
进入正题,如何让UI跟随语音变化呢,我们需要用到之前的那几个回调。我的实现思路是,将一整章内容切割成很多份,放进一个类似队列的数据结构里,每一次播放其中一段,播放完毕后切换到下一段。
- (void)findVoiceContents:(NSString *)content {
    self.voiceArr = [NSMutableArray arrayWithArray:[content componentsSeparatedByString:@"\n"]] ;
}
//先进先出,出去后移除数组元素。
- (NSString *)popVoickContent {
    if(self.voiceArr.count == 0) {
        return nil;
    }
    NSString *string = [self.voiceArr firstObject];
    [self.voiceArr removeObjectAtIndex:0];
    return string;
}
接下来在代理里处理分段播放内容
- (void)didStartSpeechUtterance:(AVSpeechUtterance *)utterance {
    //由于某些页开头并不是新的一段,这里计算一下当前阅读内容是否含有段首。
    NSInteger loc = [utterance.speechString hasPrefix:@"  "] ? 2 : 0;
    NSInteger len = [utterance.speechString hasPrefix:@"  "] ? utterance.speechString.length - 2 : utterance.speechString.length;

    //BookTextController是一个文本内容控制器,我的Label是加在这个控制器里的,你也可以直接在当前控制器添加label等控件。
    BookTextController *textController = (BookTextController *)self.currentViewController;
    [textController addTextBackgroudColorWhthRange:NSMakeRange(self.voiceOffset + loc, len)];
//这个偏移量定位当前章节阅读的位置,初始值为0,每一次开始阅读后都要给这个偏移量+当前阅读内容的长度。
    self.voiceOffset += utterance.speechString.length + 1;
}

- (void)didFinishSpeechUtterance:(AVSpeechUtterance *)utterance {
    NSString *content = [self popVoickContent];
    if(content == nil) {
        //下一章 ,将章节偏移量置为0
        self.voiceOffset = 0;
        //清除当前文本控制器上已显示的文字背景
        LZBookTextController *textController = (LZBookTextController *)self.currentViewController;
        [textController clearAllTextBackgroudColor];

        //获取下一章的内容,这里必须是成功获取才能继续执行阅读。这里可能是异步也可能是同步的。
        @weakify(self)
        [self resetContextCompletion:^(BOOL success) {
            @strongify(self)
            if(success) {
                if(self.speechManager.isSpeech) {
                    [self findVoiceContentString];
                    NSString *content = [self popVoickContent];
                    [self.speechManager setSpeechContent:content];
                    [self.speechManagerbeginSpeech];
                   //锁屏后显示播放器内容。
                    if([UIApplication sharedApplication].applicationState == UIApplicationStateBackground) {
                        [self.voiceMgr setLockScreenNowPlayingInfo];
                    }
                }
            }
            else {
                //获取章节失败则停止播放。
                [MBProgressHUD showError:@"已停止播放"];
                self.speechManager.isSpeech = NO;
                [self.speechController.view removeFromSuperview];
                [self.speechController removeFromParentViewController];
                [self.voiceMgr setAudioSessionActive:NO];
            }
        }];
    }
    else {
        if(self.voiceMgr.isSpeech) {
            //重新设置播放内容,再次播放
            [self.voiceMgr setSpeechContent:content];
            [self.voiceMgr beginSpeech];
        }
    }
}
到这里,切换章节继续播放就完成了,接下来是处理同一章节里,翻页的继续播放。我希望的用户体验是当一页内容读到最后一个字的时候,界面自动变为下一页,并且顶部的文字显示阅读背景,且跟随语音变化。
处理方案是在
- (void)speechSynthesizer:(AVSpeechSynthesizer *)synthesizer willSpeakRangeOfSpeechString:(NSRange)characterRange utterance:(AVSpeechUtterance *)utterance
代理回调里处理。还是回到之前的controller里。
- (void)willSpeakRangeOfSpeechString:(NSRange)characterRange utterance:(AVSpeechUtterance *)utterance {
    NSInteger diff = 0;
    LZBookTextController *textController = (LZBookTextController *)self.currentViewController;
    //readerPager是当前页的属性,pageRange是当前页在章节内容里的范围。
    //这个diff表示当前阅读的句子的位置是否已大于当前页的最大位置。
    //如果即将读的句子已经比当前页码的最大位置更大,则说明需要翻页了
    diff = self.voiceOffset - textController.readerPager.pageRange.length;
    if(diff >= 0) {
         //这里进行进一步的检测,因为有些段落很长,我们希望读到最后一个字再翻页。
        if(utterance.speechString.length - diff  <= characterRange.location + characterRange.length) {
            if(self.voiceArr.count == 0) {
                //这里处理和上面切章的代理冲突,没有更多内容则不执行翻页操作
                return ;
            }
            if([self.voiceArr.firstObject isEqualToString:@""]) {
                [self.voiceArr removeObjectAtIndex:0];
                return;
            }
            //翻页
            @weakify(self)
            [self resetContextCompletion:^(BOOL success) {
                @strongify(self)
                if(success) {
                    LZBookTextController *textController1 = (LZBookTextController *)self.currentViewController;
                    [textController1 addTextBackgroudColorWhthRange:NSMakeRange(0, diff)];
                    //翻页完,更新阅读的偏移值
                    self.voiceOffset = diff;
                }
            }];
        }
    }
}
基本的动作已经处理得差不多了,其实里面还有一些细节要处理,这里只是做一个参考哈。
第四步,后台播放
这个东西网上的资料就很多了,我稍微介绍一下大致流程。
1.开启后台服务
2.注册播放
//在APPdelegate回调里实现
- (void)applicationWillResignActive:(UIApplication *)application {
    if([SpeechManager sharedInstance].isSpeech) {
        //允许应用程序接收远程控制
        [[SpeechManager sharedInstance] setAudioSessionActive:YES];
        [[UIApplication sharedApplication] beginReceivingRemoteControlEvents];
        [[SpeechManager sharedInstance] setLockScreenNowPlayingInfo];
    }
}

//这个代码如果只卸载APPdelegate里,静音的情况下就播放不出来了,所以我开始播放的时候也调用了
- (void)setAudioSessionActive:(BOOL)active {
    AVAudioSession *session = [AVAudioSession sharedInstance];
    [session setCategory:AVAudioSessionCategoryPlayback error:nil];
    [session setActive:active error:nil];
}
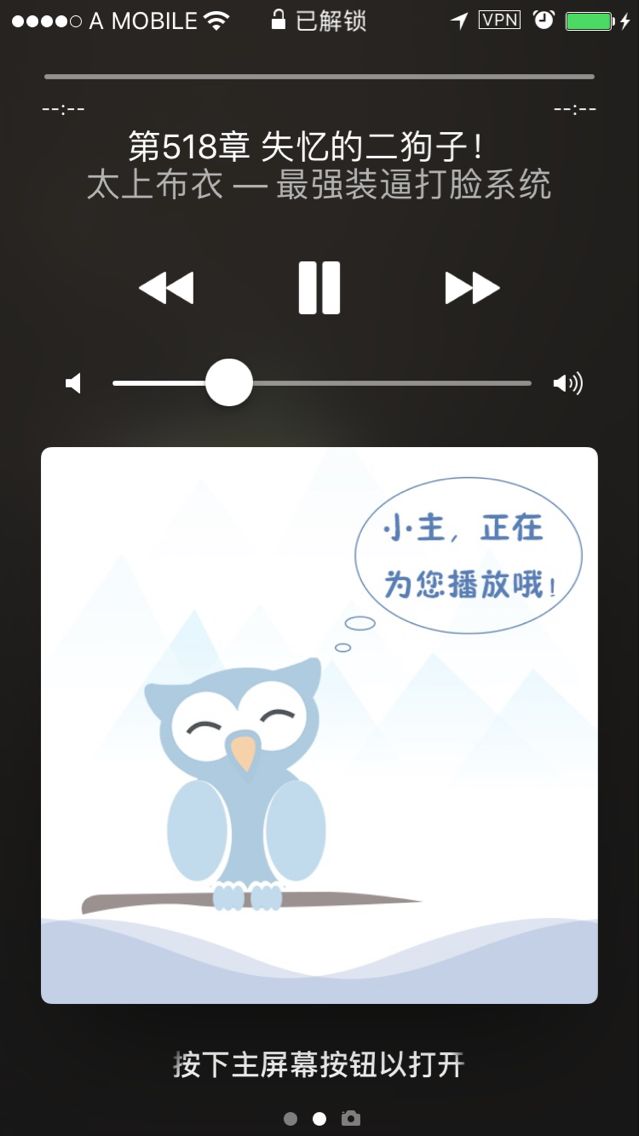
3.设置锁屏界面播放器内容
先引入MediaPlayer.framework
然后设置具体内容
- (void)setLockScreenNowPlayingInfo
{
    //更新锁屏时的歌曲信息
    if (NSClassFromString(@"MPNowPlayingInfoCenter")) {
        NSMutableDictionary *dict = [[NSMutableDictionary alloc] init];

        [dict setObject:self.chapterName forKey:MPMediaItemPropertyTitle];
        [dict setObject:self.author forKey:MPMediaItemPropertyArtist];
        [dict setObject:self.bookName forKey:MPMediaItemPropertyAlbumTitle];

        UIImage *newImage = self.coverImage;
        [dict setObject:[[MPMediaItemArtwork alloc] initWithImage:newImage]
                 forKey:MPMediaItemPropertyArtwork];

        [[MPNowPlayingInfoCenter defaultCenter] setNowPlayingInfo:dict];
    }
}
这样你锁屏后,不解锁就可以看到正在阅读的内容了
第五步 处理打断。
这里说两种情况:一种是其他APP及电话造成的播放打断,另一种是插拔耳机。
1.被其他APP或电话打断,最新的做法是用通知中心实现。
[[NSNotificationCenter defaultCenter] addObserver:self selector:@selector(audioSessionInterruptionNotification:) name:AVAudioSessionInterruptionNotification object:nil];

- (void)audioSessionInterruptionNotification:(NSNotification *)notification{
    /*
     监听到的中断事件通知,AVAudioSessionInterruptionOptionKey

     typedef NS_ENUM(NSUInteger, AVAudioSessionInterruptionType)
     {
     AVAudioSessionInterruptionTypeBegan = 1, 中断开始
     AVAudioSessionInterruptionTypeEnded = 0,  中断结束
     }
     */
//    int type = [notification.userInfo[AVAudioSessionInterruptionOptionKey] intValue];
//    switch (type) {
//        case AVAudioSessionInterruptionTypeBegan: // 被打断
//        {
//           暂停播放
//        }
//            break;
//        case AVAudioSessionInterruptionTypeEnded: // 中断结束
//        {
//           继续播放
//        }
//            break;
//        default:
//            break;
//    }
}
2.插拔耳机时的操作。同样添加通知。
[[NSNotificationCenter defaultCenter] addObserver:self selector:@selector(audioSessionRouteChangeNotification:) name:AVAudioSessionRouteChangeNotification object:[AVAudioSession sharedInstance]];

- (void)audioSessionRouteChangeNotification:(NSNotification *)notification{
    NSDictionary *dic=notification.userInfo;
    int changeReason= [dic[AVAudioSessionRouteChangeReasonKey] intValue];
    //等于AVAudioSessionRouteChangeReasonOldDeviceUnavailable表示旧输出不可用
    if (changeReason==AVAudioSessionRouteChangeReasonOldDeviceUnavailable) {
        AVAudioSessionRouteDescription *routeDescription=dic[AVAudioSessionRouteChangePreviousRouteKey];
        AVAudioSessionPortDescription *portDescription= [routeDescription.outputs firstObject];
        //原设备为耳机则暂停
        if ([portDescription.portType isEqualToString:@"Headphones"]) {
            [self.toolBar pauseSpeechAction];
        }
    }
}
关于处理打断,网上的资料很多,但我试了一下这样写效果最好。当然大家也可以尝试其他的方式。
总结
系统提供的API非常简单,我觉得难点还是在UI和语音之间的同步,我也是第一次做这个之前没有找到合适的demo,希望这篇文章可以帮到大家。当然我的实现思路不知道我也不知道好不好,如果有问题或其他的方案希望可以分享给我一起交流。


