Qt5:opencv摄像头播放视频
完整代码
GitHub下载:Qt+opencv摄像头播放视频
CSDN下载:https://download.csdn.net/download/mars_xiaolei/11015580
前期准备
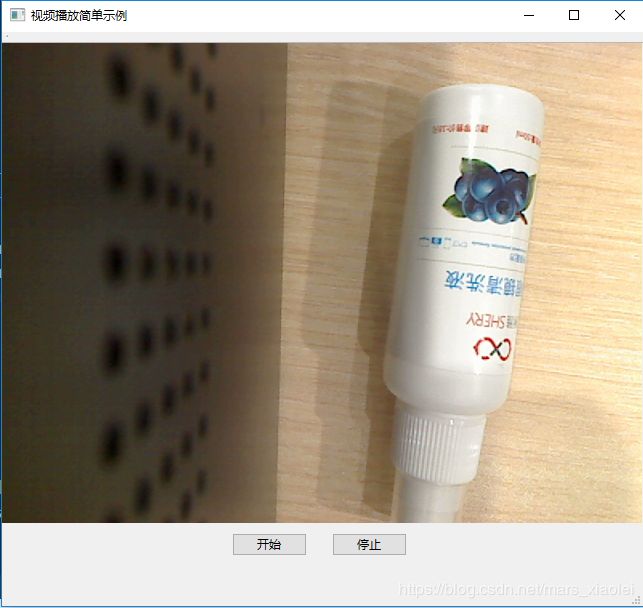
我们的目的是将摄像头采集到的视频显示在Qt界面窗口上,而不是imshow到OpenCV自己的窗口上。在编写代码之前,需要先在Qt上配置OpenCV,如果没有配置,请先把OpenCV配置好;如果已配置,直接跳过。
Qt上配置OpenCV链接:https://blog.csdn.net/mars_xiaolei/article/details/83246358
OpenCV播放视频简单示例
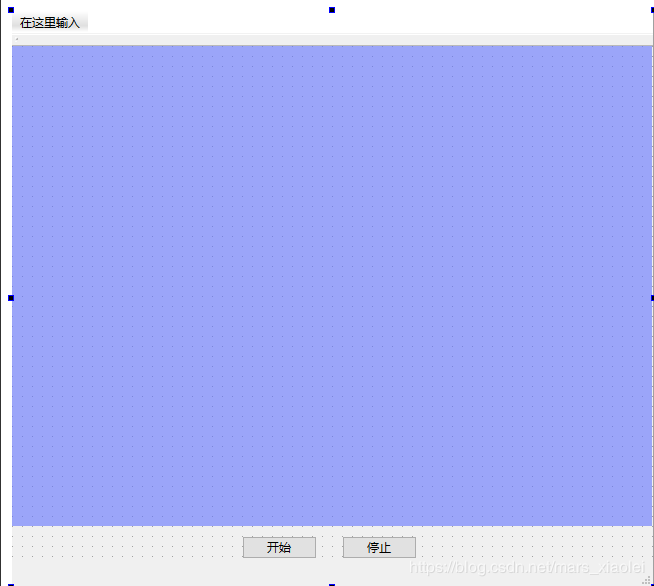
1、打开Qt,新建一个Qt Widgets Application项目,添加1个label控件和2个pushButton按钮,修改pushButton按钮的名字为“开始”和“停止”,控件对象名未进行修改。
2、由于使用到了OpenCV,因此需要在pro项目配置文件里添加OpenCV的附加头文件包含路径,根据自己配置的OpenCV进行修改,大致内容如下:
# 附加头文件包含,一般要编译链接第三方库时配置include目录
# 注意:1、可以用绝对路径或相对路径 2、相对路径中的./可以省略 3、路径中不允许出现空格
INCLUDEPATH += D:/OpenCV342/opencv/build/include

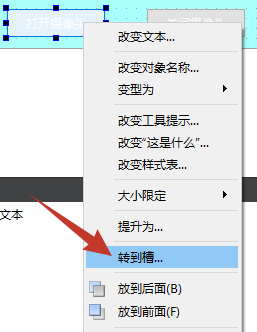
LIBS += D:\OpenCV342\QtOpenCV\install\x86\mingw\lib\libopencv_*.a3、接下来要添加“信号槽”,分别选中两个push button,右键选择转到槽...,然后选择clicked(),系统会自动创建控件单击响应函数。
4、也可以手动进行添加 “信号槽”,一共需要三步:(1)头问价添加slots槽函数声明(2)源文件添加槽函数定义(3)源文件添加信号槽连接,大致内容如下:
//槽函数声明
private slots:
    void ReadFrame();
    void OpenCameraClicked();
    void CloseCameraClicked();
void MainWindow::ReadFrame()
{
//获取图像帧
capture>>frame;
/*
//将抓取到的帧,转换为QImage格式,QImage::Format_RGB888使用24位RGB格式(8-8-8)存储图像
//此时没有使用rgbSwapped()交换所有像素的红色和蓝色分量的值,底色偏蓝
QImage image = QImage((const uchar*)frame.data,frame.cols, frame.rows,QImage::Format_RGB888);
//将图片显示到label上
ui->label->setPixmap(QPixmap::fromImage(image));
*/
//将视频显示到label上
QImage image = QImage((const uchar*)frame.data,frame.cols,frame.rows,QImage::Format_RGB888).rgbSwapped();
ui->label->setPixmap(QPixmap::fromImage(image));
}
//打开摄像头
void MainWindow::OpenCameraClicked()
{
capture.open(0);//打开摄像头
timer->start(25);//开启定时器,一次25ms
}
//关闭摄像头
void MainWindow::CloseCameraClicked()
{
timer->stop();//关闭定时器
capture.release();//释放图像
}connect(timer,SIGNAL(timeout()),this,SLOT(ReadFrame()));
connect(ui->pushButton, SIGNAL(clicked()), this, SLOT(OpenCameraClicked()));//打开摄像头
connect(ui->pushButton_2, SIGNAL(clicked()), this, SLOT(CloseCameraClicked()));//打开摄像头5、下面分别是pro文件、mainwindow.h、mainwindow.cpp的代码
pro文件
#-------------------------------------------------
#
# Project created by QtCreator 2019-03-12T15:46:40
#
#-------------------------------------------------
QT += core gui
greaterThan(QT_MAJOR_VERSION, 4): QT += widgets
TARGET = PlayVideoTest
TEMPLATE = app
# The following define makes your compiler emit warnings if you use
# any feature of Qt which has been marked as deprecated (the exact warnings
# depend on your compiler). Please consult the documentation of the
# deprecated API in order to know how to port your code away from it.
DEFINES += QT_DEPRECATED_WARNINGS
# You can also make your code fail to compile if you use deprecated APIs.
# In order to do so, uncomment the following line.
# You can also select to disable deprecated APIs only up to a certain version of Qt.
#DEFINES += QT_DISABLE_DEPRECATED_BEFORE=0x060000 # disables all the APIs deprecated before Qt 6.0.0
SOURCES += \
main.cpp \
mainwindow.cpp
HEADERS += \
mainwindow.h
FORMS += \
mainwindow.ui
# 附加头文件包含,一般要编译链接第三方库时配置include目录
# 注意:1、可以用绝对路径或相对路径 2、相对路径中的./可以省略 3、路径中不允许出现空格
INCLUDEPATH += D:/OpenCV342/opencv/build/include
LIBS += D:\OpenCV342\QtOpenCV\install\x86\mingw\lib\libopencv_*.amainwindow.h
#ifndef MAINWINDOW_H
#define MAINWINDOW_H
#include
#include "QTimer"
#include "QImage"
#include "opencv2/opencv.hpp"
using namespace cv;
namespace Ui {
class MainWindow;
}
class MainWindow : public QMainWindow
{
Q_OBJECT
public:
explicit MainWindow(QWidget *parent = 0);
~MainWindow();
private slots:
void ReadFrame();
void OpenCameraClicked();
void CloseCameraClicked();
private:
Ui::MainWindow *ui;
VideoCapture capture;
QTimer *timer;
Mat frame;
};
#endif // MAINWINDOW_H mainwindow.cpp
#include "mainwindow.h"
#include "ui_mainwindow.h"
MainWindow::MainWindow(QWidget *parent) :
QMainWindow(parent),
ui(new Ui::MainWindow)
{
ui->setupUi(this);
setWindowTitle("视频播放简单示例");
timer=new QTimer(this);
connect(timer,SIGNAL(timeout()),this,SLOT(ReadFrame()));
connect(ui->pushButton, SIGNAL(clicked()), this, SLOT(OpenCameraClicked()));//打开摄像头
connect(ui->pushButton_2, SIGNAL(clicked()), this, SLOT(CloseCameraClicked()));//打开摄像头
}
MainWindow::~MainWindow()
{
delete ui;
}
void MainWindow::ReadFrame()
{
    //获取图像帧
    capture>>frame;
    /*
    //将抓取到的帧,转换为QImage格式,QImage::Format_RGB888使用24位RGB格式(8-8-8)存储图像
    //此时没有使用rgbSwapped()交换所有像素的红色和蓝色分量的值,底色偏蓝
    QImage image = QImage((const uchar*)frame.data,frame.cols, frame.rows,QImage::Format_RGB888);
    //将图片显示到label上
    ui->label->setPixmap(QPixmap::fromImage(image));
    */

    //将视频显示到label上
    QImage image = QImage((const uchar*)frame.data,frame.cols,frame.rows,QImage::Format_RGB888).rgbSwapped();
    ui->label->setPixmap(QPixmap::fromImage(image));
}

//打开摄像头
void MainWindow::OpenCameraClicked()
{
    capture.open(0);//打开摄像头
    timer->start(25);//开启定时器,一次25ms
}

//关闭摄像头
void MainWindow::CloseCameraClicked()
{
    timer->stop();//关闭定时器
    capture.release();//释放图像
}

