spring boot2.0整合富文本编辑器Ueditor
最近在弄个人博客,初步已经做出来了 www.qiangutime.cn,欢迎大家参观(很多界面没画)
个人博客需要使用到富文本编辑器,当时在markdown和ueditor两者间选择,但是由于外观问题,就否决了markdown,进了ueditor的坑,弄了好几天。
好吧,直接开始介绍我的过程。
首先工具
1.spring boot2.1.0
2.ueditor
pom引入ueditor依赖的包
			org.json
			json


			commons-fileupload
			commons-fileupload
			1.3.2


			commons-codec
			commons-codec
			1.9
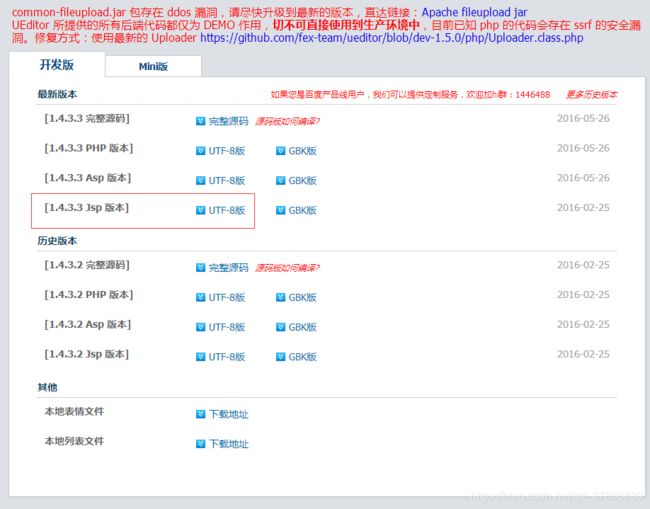
这里要指明一下ueditor的版本 1.4.3.3 ,去官网就可以下载,如图所示。
然后由于一系列的原因,也在网上查阅了很多大佬的资料,采用的修改源码,进而整合ueditor。
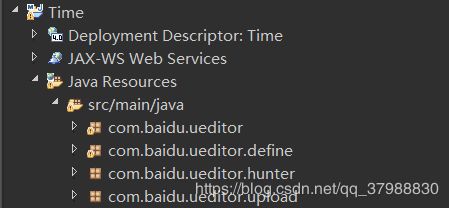
一、首先将源码和ueditor下载,并且整合到项目中。
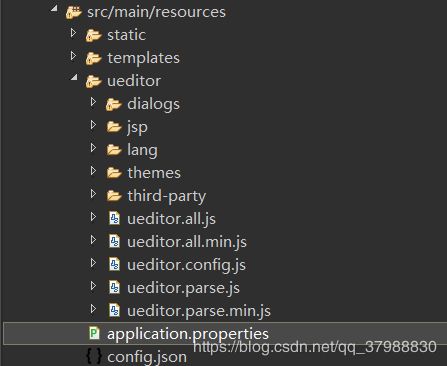
这里需要将ueditor的jsp目录中config.json放在同级目录,将Index.html复制到templates目录下,
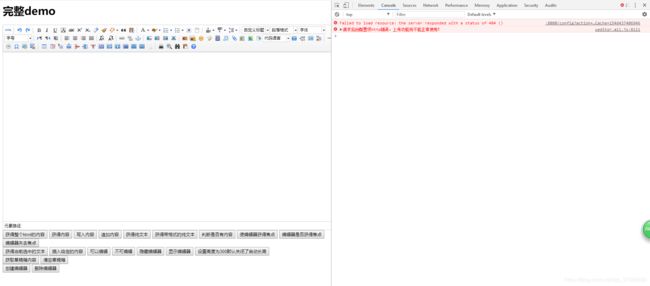
然后浏览界面,写UeditorController类,跳转页面
    @RequestMapping("/")
    private String showPage(){
        return "index";
    }
在页面输入localhost:8080,即可看到界面,按F12得到 请求后台配置项http错误,上传功能将不能正常使用!
二、配置ueditor
1.在UeditorController中写config.json映射方法
@Controller
public class UEditorController {


    @RequestMapping("/")
    private String showPage(){
        return "index";
    }

    @RequestMapping(value="/config")
    public void config(HttpServletRequest request, HttpServletResponse response) {
        response.setContentType("application/json");
        String rootPath = request.getSession().getServletContext().getRealPath("/");
        try {
            String exec = new ActionEnter(request, rootPath).exec();
            PrintWriter writer = response.getWriter();
            writer.write(exec);
            writer.flush();
            writer.close();
        } catch (IOException e) {
            e.printStackTrace();
        }

    }
}
2.配置config.ueditor.js的ServerUrl
        //为编辑器实例添加一个路径,这个不能被注释
        UEDITOR_HOME_URL: URL

        // 服务器统一请求接口路径
        , serverUrl: URL + "config"
3.修改BinaryUploader 类,解决其无法获得带字节流的request的问题
打开com.baidu.ueditor.upload.BinaryUploader.java,修改为:
public class BinaryUploader {

    public static final State save(HttpServletRequest request,
            Map conf) {
        // FileItemStream fileStream = null;
        // boolean isAjaxUpload = request.getHeader( "X_Requested_With" ) != null;

        if (!ServletFileUpload.isMultipartContent(request)) {
            return new BaseState(false, AppInfo.NOT_MULTIPART_CONTENT);
        }

        // ServletFileUpload upload = new ServletFileUpload(
            //  new DiskFileItemFactory());
        //
        // if ( isAjaxUpload ) {
        //     upload.setHeaderEncoding( "UTF-8" );
        // }

        try {
            // FileItemIterator iterator = upload.getItemIterator(request);
            //
            // while (iterator.hasNext()) {
            //  fileStream = iterator.next();
            //
            //  if (!fileStream.isFormField())
            //      break;
            //  fileStream = null;
            // }
            //
            // if (fileStream == null) {
            //  return new BaseState(false, AppInfo.NOTFOUND_UPLOAD_DATA);
            // }
            MultipartHttpServletRequest multipartRequest = (MultipartHttpServletRequest) request;
            MultipartFile multipartFile = multipartRequest.getFile(conf.get("fieldName").toString());
            if(multipartFile==null){
                return new BaseState(false, AppInfo.NOTFOUND_UPLOAD_DATA);
            }

            String savePath = (String) conf.get("savePath");
            //String originFileName = fileStream.getName();
            String originFileName = multipartFile.getOriginalFilename();
            String suffix = FileType.getSuffixByFilename(originFileName);

            originFileName = originFileName.substring(0,
                    originFileName.length() - suffix.length());
            savePath = savePath + suffix;

            long maxSize = ((Long) conf.get("maxSize")).longValue();

            if (!validType(suffix, (String[]) conf.get("allowFiles"))) {
                return new BaseState(false, AppInfo.NOT_ALLOW_FILE_TYPE);
            }

            savePath = PathFormat.parse(savePath, originFileName);

            String physicalPath = (String) conf.get("rootPath") + savePath;

            //InputStream is = fileStream.openStream();
            InputStream is = multipartFile.getInputStream();
            State storageState = StorageManager.saveFileByInputStream(is,
                    physicalPath, maxSize);
            is.close();

            if (storageState.isSuccess()) {
                storageState.putInfo("url", PathFormat.format(savePath));
                storageState.putInfo("type", suffix);
                storageState.putInfo("original", originFileName + suffix);
            }

            return storageState;
        // } catch (FileUploadException e) {
        //  return new BaseState(false, AppInfo.PARSE_REQUEST_ERROR);
        } catch (IOException e) {
        }
        return new BaseState(false, AppInfo.IO_ERROR);
    }

    private static boolean validType(String type, String[] allowTypes) {
        List list = Arrays.asList(allowTypes);

        return list.contains(type);
    }
}
3.修改图片上传路径,配置虚拟路径
上传图片存储,我尝试了两种方法,1.上传虚拟路径 2.上传七牛云。
将图片上传后返回外链给ueditor编辑器.
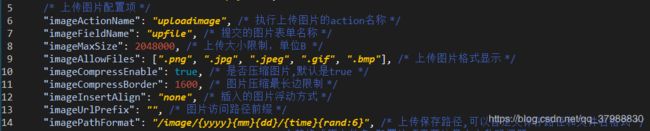 这里大家可以看到imageActionName 上传的方法名称,和imagefieldName上传的图片名称。
那么接下来配置将图片上传至后台
在index.html界面,这段代码的意思就是当执行action为uploadimage时,执行后台名为image方法,并且返回外链,也就是图片的src,当然这个链接需要你自己定义返回值,保证链接有效并且页面能够访问,当然多图上传和其它文件类型上传都是一样的。
如何上传图片至虚拟路径,要注意这里的upfile要与config.json中的上传图片相同,
/**
	 * @author qiangu
	 * @Date 2018年12月25日
	 * Describe:Ueditor上传图片至服务器返回外链
	 */
    @PostMapping("/image")
    @ResponseBody
    public String uploadImgQiniu(@RequestParam("upfile")MultipartFile upfile) throws IOException {
    	ObjectMapper mapper = new ObjectMapper();
		HashMap configs = new HashMap();
    	if(!upfile.isEmpty()) {
            String fileName = upfile.getOriginalFilename();
            String filePath = "C:/Users/ASUS/Desktop/file/";
            fileName = filePath+fileName;
            File dest = new File(fileName);
            if(!dest.getParentFile().exists()){
                dest.getParentFile().mkdir();
            }
            try {
                upfile.transferTo(dest);
            } catch (IOException e) {
                e.printStackTrace();
            }
    		configs.put("state", "SUCCESS");
            //这里的/img为虚拟路径,参考我的第一篇博客
    		configs.put("url", "/img/"+upfile.getOriginalFilename());
    		configs.put("title", upfile.getName());
    		configs.put("original", upfile.getOriginalFilename());
    	}else {
    		configs.put("state", "FAUIL");
    		configs.put("url", null);
    		configs.put("title", null);
    		configs.put("original", null);
    	}
		return mapper.writeValueAsString(configs);
    }
接下来看下效果,
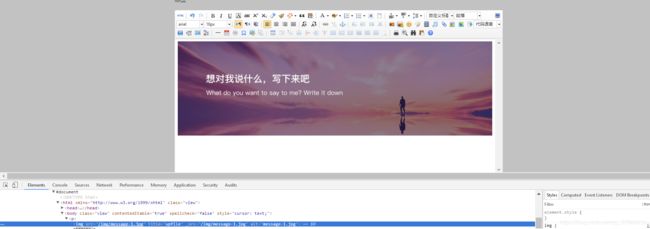
此时图片路径为/img/message-1.jpg,成功。
本文参考了https://www.jianshu.com/p/231e83c13610
如有侵权,请联系本人,将立即删除。