5、Spring Boot——自定义Starter
通过前面几篇,大家都知道,引入Thymeleaf依赖、Freemarker依赖等就可以直接使用,该配的东西都自动配好了,那么这是为什么呢?其实这都依赖于Spring Boot的自动化配置,那么现在我们自己来写一个自动化配置(starter)
1、创建Starter并安装到本地仓库
首先创建一个Maven工程,因为普通的Spring Boot是打成jar包,Maven工程也可以打成jar包,依赖的自动化配置(-Thymeleaf,-Freemarker等)也是一个jar。但是Spring Boot的jar和Maven的jar,它们的格式是不一样的,虽然都叫jar包,但他们里面的结构是不一样的,所以导致这两个jar的用法也有差异,这也是为什么Spring Boot的jar可以直接执行,而Maven的就不可以。
创建好Maven工程后加入自动化配置的依赖
            org.springframework.boot
            spring-boot-autoconfigure
            2.1.5.RELEASE
然后创建一个HelloProperties类,用于接收application.properties中注入的值
//类型安全属性注入加一个前缀,也就是一会儿访问的时候要hello.say、hello.name
@ConfigurationProperties(prefix = "hello")
public class HelloProperties {
    public static final String SAY = "hello";
    public static final String NAME = "sp";

    //默认值
    private String say=SAY;

    private String name=NAME;

    public String getSay() {
        return say;
    }

    public void setSay(String say) {
        this.say = say;
    }

    public String getName() {
        return name;
    }

    public void setName(String name) {
        this.name = name;
    }
}
然后再定义一个HelloService类
//HelloService就是要调用的配置好的方法
public class HelloService {
    //name和say现在是没有值的,到时候会从HelloProperties中注入进来
    private String name;

    private String say;

    public String say(){
        return say+" "+name+"!";
    }
    public String getName() {
        return name;
    }

    public void setName(String name) {
        this.name = name;
    }

    public String getSay() {
        return say;
    }

    public void setSay(String say) {
        this.say = say;
    }
}
定义HelloService的自动配置类HelloServiceAutoConfiguration
@Configuration
@EnableConfigurationProperties(HelloProperties.class)
//当有HelloService的时候,这个自动化配置类就会生效
@ConditionalOnClass(HelloService.class)
public class HelloServiceAutoConfiguration {
    @Autowired
    HelloProperties helloProperties;
    @Bean
    HelloService helloService(){
        HelloService helloService =new HelloService();
        //把在HelloProperties中定义好的东西赋值给HelloService属性
        helloService.setName(helloProperties.getName());
        helloService.setSay(helloProperties.getSay());
        return helloService;
    }
}
在resources目录下创建一个MTTA-INF文件夹,然后在文件夹中创建一个名为spring.fatories的文件指定我们自动化配置类的路径:
org.springframework.boot.autoconfigure.EnableAutoConfiguration=com.sxt.HelloServiceAutoConfiguration
然后通过install安装

然后创建一个Spring Boot项目,创建成功后加入我们自定义的Starter依赖
            com.sxt
            starter
            1.0-SNAPSHOT
在单元测试中注入HelloService实例来使用:
@RunWith(SpringRunner.class)
@SpringBootTest
public class TestmystarterApplicationTests {
 @Autowired
    HelloService helloService;
    @Test
    public void contextLoads() {
        System.out.println(helloService.say());
    }

}
 也可以在application.properties中配置HolleProperties中的属性值
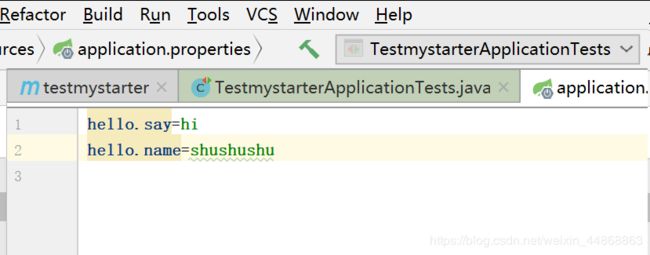
在这里配置了属性就按照配置的来,如果没有配置,就按照默认的来。Spring Boot中的Starter也是这样
