react native 开发APP(四)页面导航, Tabbar, Navigation
react native 页面跳转,Tabbar,Navigation
官网 https://reactnative.cn/
项目下载地址:https://github.com/hebiao6446/DemoProject
陆续更新中。。。
1.先看效果,找一个演示的炮灰
我们至少可以看到两点
1) 目前大部分市场上的APP都是这种结构Tabbar栏+导航栏
2) 从闪屏页面(广告业)到进入APP并不是页面跳转,更多的是有点像场景切换的一个过程
带着这个严肃的问题我们来搞一搞我们的代码
2.react native 的Tabbar 和Navigation
a.react native 创建BottomTabbar
UITabbarController 是iOS系统自带的组件,这个对于每个iOS开发者来说应该是比较熟悉的,但是在 react native里面其实系统也提供了类似的东西
https://github.com/react-navigation/tabs
https://github.com/react-navigation/react-navigation
一个是管理BottomTabbar, 一个是管理导航的
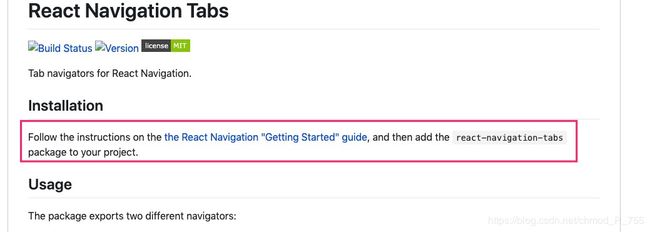
这里有一段话 , 请注意下

点进去,我们发现了这个东西
https://reactnavigation.org/docs/getting-started/

也就是你最好先安装这些东西再安装BottomTabbar
yarn add react-native-reanimated react-native-gesture-handler react-native-screens react-native-safe-area-context @react-native-community/masked-view
执行完上面的命令以后
再执行 下面两条命
yarn add react-navigation
yarn add react-navigation-tabs

安装完成以后别忘记进入ios目录 cocopad install下
$ cd ios/
$ pod install
github其实已经给出了, 但是并非拿来主义的给出,那么这个时候就可以使用BottomTabbar 这个东西了 。。。。
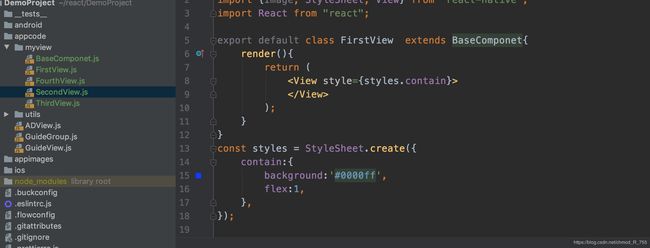
但是这个东西我们的理解就是一个控制器,控制器是需要页面来支持的。。 我们来搞四个页面

import BaseComponet from "./BaseComponet";
import {Image, StyleSheet, View} from "react-native";
import React from "react";

export default class FirstView  extends BaseComponet{
    render(){
        return (


        );
    }
}
const styles = StyleSheet.create({
    contain:{
        background:'#0000ff',
        flex:1,
    },
});
import {Image, Text, View, StyleSheet, DeviceEventEmitter} from "react-native";
import React from "react";
import {createBottomTabNavigator} from "react-navigation-tabs";
import HbColor from "../utils/HbColor";
import HbImages from "../utils/HbImages";
import FirstView from "./FirstView";
import SecondView from "./SecondView";
import ThirdView from "./ThirdView";
import FourthView from "./FourthView";
const RootTabbar = createBottomTabNavigator(
{
First:{
screen:FirstView,
navigationOptions:{
tabBarLabel:'一',
tabBarIcon: ({ tintColor, focused }) => {
return
{routeName}-Icon
);
},
tabBarLabel:({focused, tintColor})=>{
const { routeName } = navigation.state; // 选项卡名称
console.log(focused); // 是否处于活动状态,是为true
console.log(tintColor); // 状态颜色值
return(
{routeName}-Label
);
}
})
}
);
const TabbarStyles = StyleSheet.create({
tabbarSelect:{
tintColor: HbColor.COLOR_DEF,
height:'70%',
resizeMode:'contain',
},
tabbleUnselect:{
tintColor: HbColor.COLOR_abaaaa,
height:'70%',
resizeMode:'contain',
}
})
export default RootTabbar;
然,这个并没有完成,也就是我们现实是把底部的Tabbar和页面关联在一起了,那么新的问题来了, 怎么让react native知道这东西是项目的入口了 ?? 这个时候我们需要把之前的广告也和引导页关联起来
刚刚上面我们用到了一个函数
createBottomTabNavigator
这个东西可以理解为创建底部的Tabbar切换栏, 那么如何将这个东西告诉react native了 ?这里面就涉及到另外一个函数
createSwitchNavigator
可以理解为控制器切换函数, 会默认一个控制器 ,这个就跟之前的广告也有关系了 。。。 贴代码
const navi = createSwitchNavigator({
    //所有切换控制器列表
    Launch:ADView,
    Tabbar:{
        screen:RootTabbar,
    },
},{
    //默认的控制器名称
    initialRouteName:'Tabbar',
});
const  App = createAppContainer(navi);
export default App;
import React, {Component} from 'react';
import {View, StyleSheet, Text} from 'react-native';
import GuideGroup from './appcode/GuideGroup';
import ADView from "./appcode/ADView";
import RootTabbar from "./appcode/myview/ARootTabbar";

import {createAppContainer,createSwitchNavigator} from 'react-navigation'
/*
class App extends Component{
  render() {
    return (


  )
  }
}
const styles = StyleSheet.create({
  view1:{
    flex:1,
    justifyContent:'center',
  }
});
export default App;
*/
const navi = createSwitchNavigator({
    //所有切换控制器列表
    Launch:ADView,
    Tabbar:{
        screen:RootTabbar,
    },
},{
    //默认的控制器
    initialRouteName:'Tabbar',
});
const  App = createAppContainer(navi);
export default App;
这是首页代码,有图有代码基本上就没什么了吧 。。。
项目下载地址:https://github.com/hebiao6446/DemoProject
陆续更新中。。。
`b.react native 创建导航条

意味着啥了 ??? 意味着页面不能跳转,这个就麻烦了。。。不能跳转页面还搞个锤子了。。。 也就是我们需给页面加入导航条
地址先奉上,然后就是下载按钮插件了。 。。
https://reactnavigation.org/docs/stack-navigator/
yarn add react-navigation-stack @react-native-community/masked-view
安装上面的导航器 ,然后稍稍修改下代码
import BaseComponet from "./BaseComponet";
import {Image, StyleSheet, View} from "react-native";
import React from "react";
import {createStackNavigator} from "react-navigation-stack";
import HbColor from "../utils/HbColor";
class FirstView  extends BaseComponet{
    render(){
        return (


        );
    }
}
const styles = StyleSheet.create({
    contain:{
        backgroundColor:'#ff000022',
        flex:1,
    },
});
const FirstNavi = createStackNavigator({
    First: {
        screen: FirstView,
        navigationOptions: {
            title: '第一页',
            headerStyle: {
                backgroundColor: HbColor.COLOR_e85b53,
            },
            headerTintColor: '#ffffff',
        },
    },
}, {
    navigationOptions: ({
                            navigation
                        }) => ({
                        // 二级页面隐藏Tabbar
        tabBarVisible: navigation.state.index > 0 ? false : true,
    })
});
export default FirstNavi;
四个页面都需要改成这个样的, 也就是需要在外面包装一层
createStackNavigator这东西
import {Image, Text, View, StyleSheet, DeviceEventEmitter} from "react-native";
import React from "react";
import {createBottomTabNavigator} from "react-navigation-tabs"
import HbColor from "../utils/HbColor";
import HbImages from "../utils/HbImages";
// import FirstView from "./FirstView";
// import SecondView from "./SecondView";
// import ThirdView from "./ThirdView";
// import FourthView from "./FourthView";
import FirstNavi from "./FirstView";
import SecondNavi from "./SecondView";
import ThirdNavi from "./ThirdView";
import FourthNavi from "./FourthView";
const RootTabbar = createBottomTabNavigator(
{
First:{
screen:FirstNavi,
navigationOptions:{
tabBarLabel:'一',
tabBarIcon: ({ tintColor, focused }) => {
return
{routeName}-Icon
);
},
tabBarLabel:({focused, tintColor})=>{
const { routeName } = navigation.state; // 选项卡名称
console.log(focused); // 是否处于活动状态,是为true
console.log(tintColor); // 状态颜色值
return(
{routeName}-Label
);
}
})
}
);
const TabbarStyles = StyleSheet.create({
tabbarSelect:{
tintColor: HbColor.COLOR_DEF,
height:'70%',
resizeMode:'contain',
},
tabbleUnselect:{
tintColor: HbColor.COLOR_abaaaa,
height:'70%',
resizeMode:'contain',
}
})
export default RootTabbar;
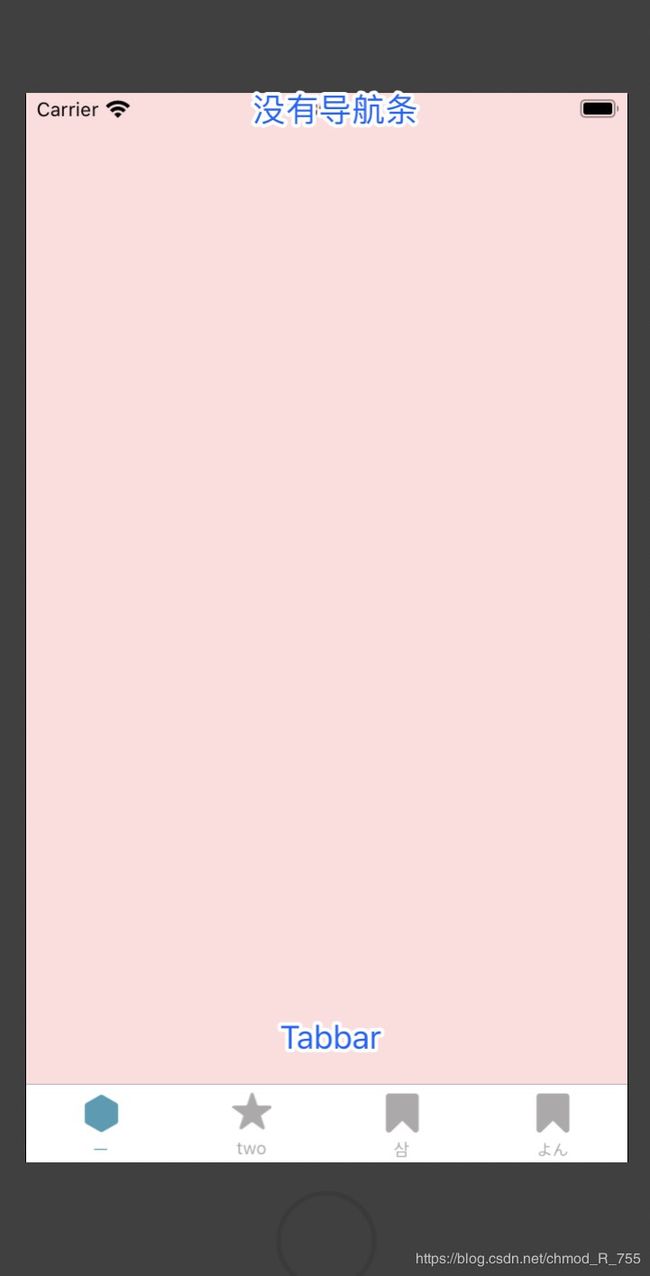
最后就是上效果了。。。。
3.react native 的从引导页(广告页)进入APP
这个问题我们先回到原始的开发中 ,原生的开发,从广告页面或者引导页面进入APP正题的话
1) Android的引导页是一个Activity,进入APP正题以后直接finish
2)iOS的引导页很多人会在Window上铺一个图层,进入APP正题后隐藏图层
react native咋搞得了 ? 我之所以写react native系列的APP开发,是因为我在接手别人的react(不是react native)项目的时候往手机APP开发方向稍微有点研究,就一个广告页面跳转到APP正题 大部分写的文章纯瞎几把搞 , 不告诉你版本,不告你你 相关链接。。那么我只有自己抽空写一写相关的文章了 。
react native提供类似一个控控制器切换器的东西
const navi = createSwitchNavigator({
    //所有切换控制器列表
    Launch:ADView,
    Tabbar:{
        screen:RootTabbar,
    },
},{
    //默认的控制器
    initialRouteName:'Launch',
});
const  App = createAppContainer(navi);
export default App;
也就是我们在ADView这个页面是需要触发切换到Tabbar页面的 ,
这个ADView页面就是广告也或者引导页面,我们来把这个页面规划下
import React, {Component} from 'react';
import {
SafeAreaView,
StyleSheet,
StatusBar, DeviceEventEmitter,
} from 'react-native';
import ADView from "./ADView";
import GuideGroup from "./GuideGroup";
import ADUtil from "./utils/ADUtil";
class LaunchView extends Component{
constructor(pros){
super(pros);
this.state={
isFirstLoad:true,
};
this.onEnterHome = this.onEnterHome.bind(this);
}
onEnterHome(){
        const {navigate} = this.props.navigation;
        navigate('Tabbar');
    }
render(){
let mView = this.state.isFirstLoad ?
{mView}
);
}
componentDidMount(): void {
ADUtil.ftStart().then((res)=>{
if (res == 'false'){
this.setState({
isFirstLoad:false,
})
}
}).catch((e)=>{
});
}
}
const styles = StyleSheet.create({
container:{
flex:1,
},
});
export default LaunchView;
LaunchView这个页面其实包含两个部分,第一次启动APP的引导页面和广告页面,上篇文章说到,引导页面和广告页面是互斥的,所以说我们可以把两个页面合在一起。我们来看下效果图
警告⚠️我们就忽略了。。
这里有个重点, 也就是从广告页面跳转到 Tabbar页面
onEnterHome(){
const {navigate} = this.props.navigation;
navigate('Tabbar');
}
这个方法我们注意到一个Tabbar是我们前面自定义的一个名称
const navi = createSwitchNavigator({
    //所有切换控制器列表
    Launch:LaunchView,
    Tabbar:{
        screen:RootTabbar,
    },
},{
    //默认的控制器
    initialRouteName:'Launch',
});
const  App = createAppContainer(navi);
export default App;
那么现在这个函数的功能我们就一目了然了, createSwitchNavigator这东西创建了两个控制器,一个是引导页(广告页面),一个是Tabbar 。引导页(广告页面)可以通过点击进入Tabbar页面,也可以倒计时读秒进入。
项目下载地址:https://github.com/hebiao6446/DemoProject
陆续更新中。。。


