build blog using VPS+CentOS+Aapanel+Typecho for newbie
first of all
As a part of my genius hour project, I decide to set up a blog by myself. Different from the blogs set up by sign up in blog website. This blog I set up has its own top level domain and standalone server in USA. Although the code is from open source website, I will use php language to make my blog
more personalize by adding codes.
It really took me a while to work out how it works, and this article is a technology blog for people who want to set up their blog in shortest time.
Here is my blog URL, welcome for visiting! artemisli.top and if you have any problems visiting my website, please contact me!
Here is the tutorial
if you are a newbie, you should have a look at the definition of the professionalism
VPS
A virtual private server (VPS) is a virtual machine sold as a service by an Internet hosting service. The virtual dedicated server (VDS) has also a similar meaning.
A VPS runs its own copy of an operating system (OS), and customers may have superuser-level access to that operating system instance, so they can install almost any software that runs on that OS. For many purposes they are functionally equivalent to a dedicated physical server, and being software-defined, are able to be much more easily created and configured. They are priced much lower than an equivalent physical server. However, as they share the underlying physical hardware with other VPSes, performance may be lower, depending on the workload of any other executing virtual machines.
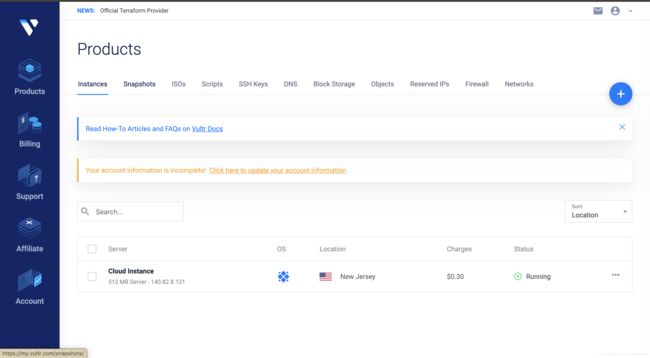
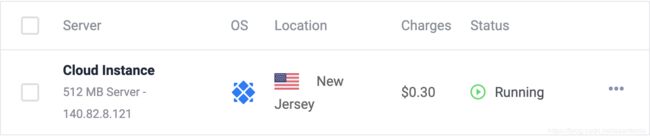
The VPS I use
- after creating a account in vultr.com, click the blue bottom “+”
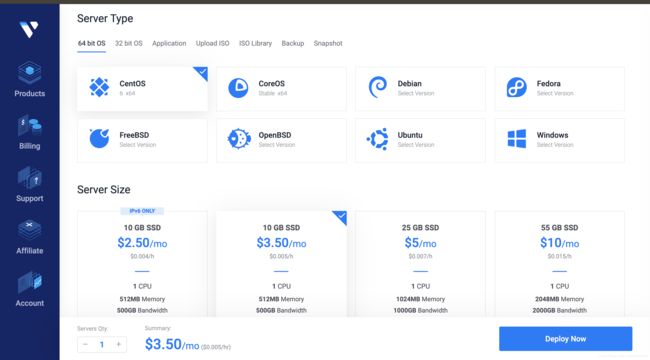
- choose the VPS as following(this is the most effective selection!!)
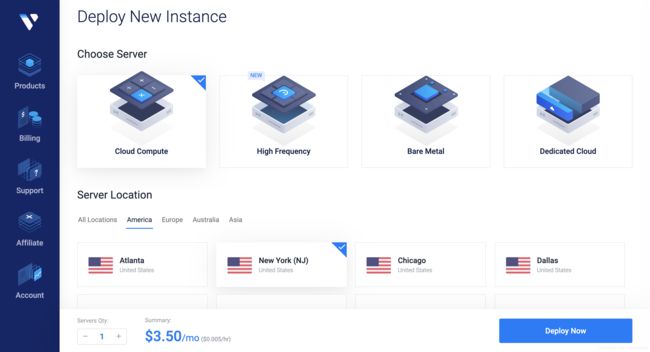
- click the deploy Now and pay the bill (you can use wechat, credit card, bitcon and alipay)
- now, you have a VPS!!!
now, you need to have a top domain
Top Domain
A top-level domain (TLD) is one of the domains at the highest level in the hierarchical Domain Name System of the Internet.[10] The top-level domain names are installed in the root zone of the name space. For all domains in lower levels, it is the last part of the domain name, that is, the last label of a fully qualified domain name. For example, in the domain name www.example.com, the top-level domain is com. Responsibility for management of most top-level domains is delegated to specific organizations by the Internet Corporation for Assigned Names and Numbers (ICANN), which operates the Internet Assigned Numbers Authority (IANA), and is in charge of maintaining the DNS root zone.
the top domain I bought is from a Chinese website, and you can buy a top domain for only 1¥ at the first year, although the price for the other year is high.
- choose the domain you like
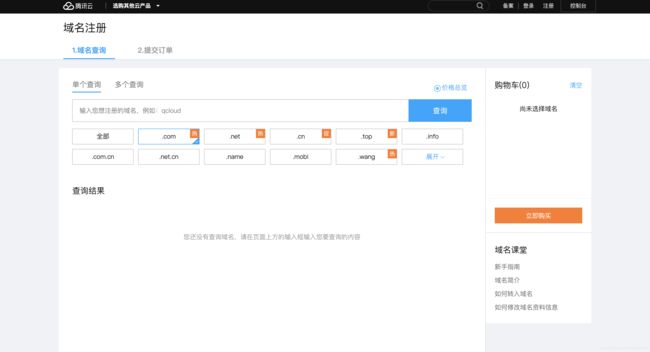
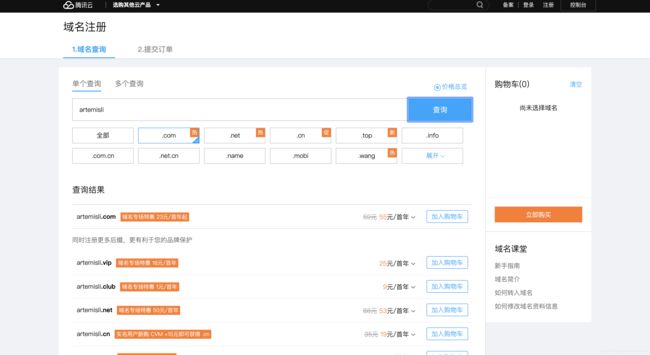
- buy it!!!

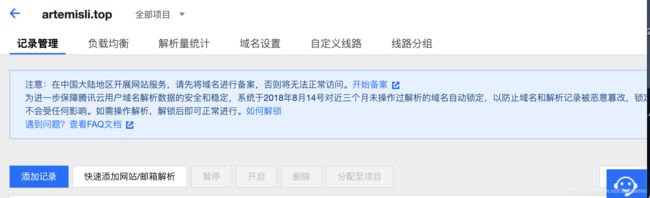
- enter https://console.cloud.tencent.com/cns and lick the “解析”

- lick the “快速添加网站/邮箱解析”, and enter your IP
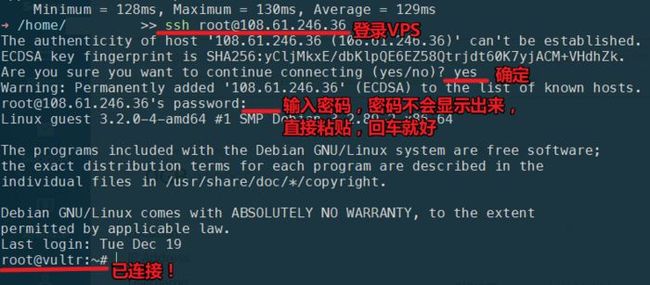
SSH
Secure Shell (SSH) is a cryptographic network protocol for operating network services securely over an unsecured network.[1] Typical applications include remote command-line, login, and remote command execution, but any network service can be secured with SSH.
== we need to connect our computer with the VPS we buy==
Mac/Linux:
my computer is MacOs, so, I’ll show the steps of Mac here
- enter the terminal(ip is the IP of the VPS)
ssh root@ip
- download the aapenal
yum install -y wget && wget -O install.sh http://download.bt.cn/install/install.sh && sh install.sh
-
then, the link to your panel and your username, password will show
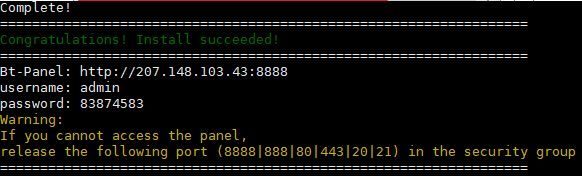
this panel can has one-click configuration to set up LAMP/LNMP, website, database, FTP, SSL, easy to manage servers through the web. -
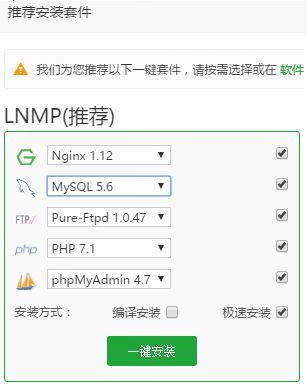
get into the link and log in. changePHP to PHP7.1 to fit the version of the code and click the “一键安装”
-
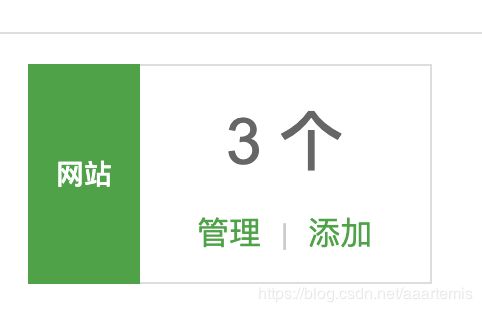
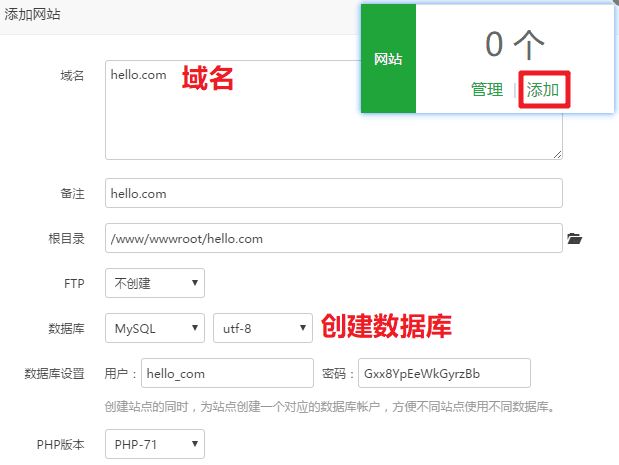
click the “增加”, and build your website and database
A database is an organized collection of data, generally stored and accessed electronically from a computer system. Where databases are more complex they are often developed using formal design and modeling techniques.
upload the code
- go to typecho, and download the code
- back to your panel
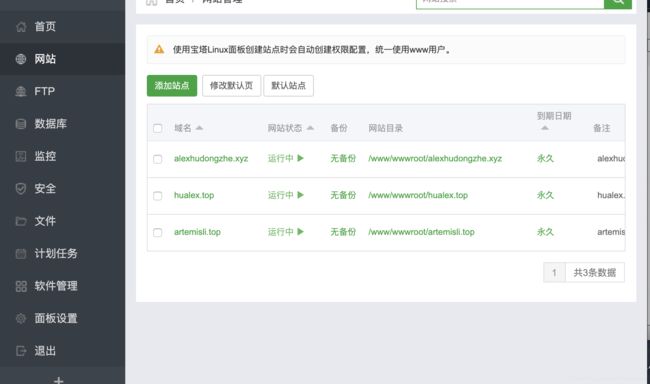
- click the “网站目录”, and upload the code(as GIF below)
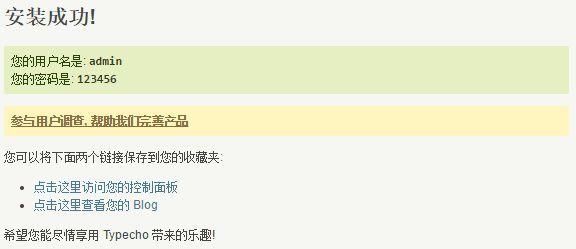
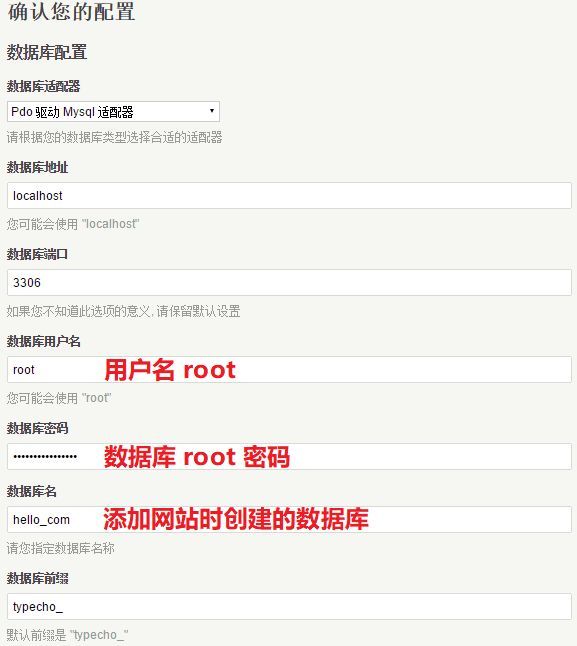
- go to yourwebsite.com/install.php, and fill in the form (The “数据库名” is the name of the database you set up)
so
your website is finish building!!!
remember to write down the passward!!