自定义View-绘图基础之Path
学习导航
第一节:http://blog.csdn.net/bobo8945510/article/details/53197727 —自定义View—自定义属性及引用
第二节:http://blog.csdn.net/bobo8945510/article/details/53203233 自定义view02—图形绘制
第四节:http://blog.csdn.net/bobo8945510/article/details/53256863 Android实现手写板和涂鸦
第五节:http://blog.csdn.net/bobo8945510/article/details/53257232 环形进度条
第六章:http://blog.csdn.net/bobo8945510/article/details/53374319 自定义折线图
使用Path绘制线
path类是一个非常有用的类,他可以预先在view上讲N个点连成一条“路径”,然后调用Canvas的drawPath(path,paint)即可沿着路径绘制图形,并且Android还为路径提供了pathEffect来绘制效果,pathEffect包含了如下子类
-ComposePathEffect
-ComnerPathEffect
-DashPathEffect
-DiscretePathEffect
-PathDashPathEffect
-SunPathEffect
一、我们这里绘制了7条线来分别介绍上面的几种子类都有什么用,代码如下
运行效果

package tester.ermu.com.canvasdemo;

import android.content.Context;
import android.graphics.Canvas;
import android.graphics.Color;
import android.graphics.ComposePathEffect;
import android.graphics.CornerPathEffect;
import android.graphics.DashPathEffect;
import android.graphics.DiscretePathEffect;
import android.graphics.Paint;
import android.graphics.Path;
import android.graphics.PathDashPathEffect;
import android.graphics.PathEffect;
import android.graphics.SumPathEffect;
import android.util.AttributeSet;
import android.view.View;

/**
 * Created by ENZ on 2016/11/17.
 */

public class PathText extends View {
    private float phase;
    //线条的集合,
    PathEffect[] effects = new PathEffect[7];
    int[] colors;
    private Paint paint;
    Path path;

    public PathText(Context context, AttributeSet attrs) {
        super(context, attrs);
//----------------------第一步-------------------------------
        //创建一个画笔对象,设置画笔类型和画笔的大小
        paint = new Paint();
        paint.setStyle(Paint.Style.STROKE);
        paint.setStrokeWidth(8);
//------------------------第二步-----------------------------
        /*
        创建一个Path对象
        * 起始点为moveTo(0, 0)
        * */
        path = new Path();
        path.moveTo(0, 0);
//--------------------------第三步---------------------------
          /*
        * /生成50个点,随机生成它们的Y坐标,并将它们连成一条Path
        * */
        for (int i = 1; i <= 50; i++)
        {
            path.lineTo(i * 20, (float) Math.random() *100);
        }

        // 初始化7个颜色
        colors = new int[] { Color.BLACK, Color.BLUE, Color.CYAN,
                Color.GREEN, Color.MAGENTA, Color.RED, Color.GRAY };
    }

    public PathText(Context context){
        super(context);
    }
//-------------------------第四步----------------------------
    @Override
    protected void onDraw(Canvas canvas){
        // 将背景填充成白色
        canvas.drawColor(Color.WHITE);
// ---------------------------------------------------

        //第一条线,什么效果都不加
         /*
        * 效果:无
        * */
        effects[0] = null;

// ---------------------------------------------------
         /*第二条线
        * 使用CornerPathEffect路径效果
        * 效果:拐角平滑,平滑度为10
        * */
        effects[1] = new CornerPathEffect(10);

// ---------------------------------------------------
        /*第三条线
        * 初始化DiscretePathEffect,使得在原来路径的基础上发生打散效果。
        * 通过构造DiscretePathEffect(float segmentLength,float deviation)
        * segmentLength指定最大的段长,deviation指定偏离量。
        * */
        effects[2] = new DiscretePathEffect(1.0f, 5.0f);

// ---------------------------------------------------

        /*第四条线
        * 初始化DashPathEffect
        * 这个类的作用就是将Path的线段虚线化。
        * 构造函数为DashPathEffect(float[] intervals, float offset)
        * 其中intervals为虚线的ON和OFF数组,该数组的length必须大于等于2,phase为绘制时的偏移量。
        * */
        effects[3] = new DashPathEffect(new float[] { 20, 10, 5, 10 },phase);

// ---------------------------------------------------

        /*第五条线
        * 使用Path图形来填充当前的路径
        * 构造函数为PathDashPathEffect (Path shape, float advance, float phase,PathDashPathEffect.Stylestyle)。
        * shape则是指填充图形,advance指每个图形间的间距,phase为绘制时的偏移量,
        *
        * style为该类自由的枚举值,有三种情况:Style.ROTATE、Style.MORPH和
        * ROTATE的情况下,线段连接处的图形转换以旋转到与下一段移动方向相一致的角度进行旋转,
        * MORPH时图形会以发生拉伸或压缩等变形的情况与下一段相连接,
        * TRANSLATE时,图形会以位置平移的方式与下一段相连接。
        * */
        Path p = new Path();
        p.addRect(0, 0, 8, 8, Path.Direction.CCW);
        effects[4] = new PathDashPathEffect(p, 12, phase,PathDashPathEffect.Style.ROTATE);

// ---------------------------------------------------
        /*第六条线
        * 这个类需要两个PathEffect参数来构造一个实例
        *  ComposePathEffect (PathEffect outerpe,PathEffect innerpe)表现时
        *  会首先将innerpe表现出来,然后再在innerpe的基础上去增加outerpe的效果。
        *
        *  下面我就是用了effects[2], effects[4]
        * */
        // 初始化ComposePathEffect
        effects[5] = new ComposePathEffect(effects[2], effects[4]);

// ---------------------------------------------------
        /*第七条线
        * 这个类也需要两个PathEffect作为参数SumPathEffect(PathEffect first,PathEffect second),
        *   但与ComposePathEffect不同的是,在表现时,会分别对两个参数的效果各自独立进行表现,然后将两个效果简单的重叠在一起显示出来。
        * */
        effects[6] = new SumPathEffect(effects[4], effects[3]);

// ---------------------------------------------------
        // 将画布移动到(8、8)处开始绘制
        canvas.translate(16, 100);
        // 依次使用7种不同路径效果、7种不同的颜色来绘制路径

        for (int i = 0; i < effects.length; i++){
            paint.setPathEffect(effects[i]);
            paint.setColor(colors[i]);
            canvas.drawPath(path, paint);
            canvas.translate(0, 160);
        }
        // 改变phase值,形成动画效果

// ---------------------------------------------------
        /*
        * 使用重新绘制方法invalidate();,偏移量加一,形成运行效果
        * */
        phase += 1;
        invalidate();
    }
}
二、不难看出其中每条线的属性和样式不一样,我在上面有 了很详细的讲解。这里就不在介绍没个子类的属性了,代码很简单,步骤如下:
1、创建一个类继承view
2、定义一个线集合,用来添加我们绘制的7跳线,通过一个for循环依次绘制
3、上面代码中,在注释中前四步是准备工作,创建画笔、设置画布颜色、设定转折点的数量及每条线的颜色
4、引用子类对象 ,来为每条线添加不同的属性。
5、进行绘制,并且设置偏移量加1,并且设置重绘方法,实现一个动画效果
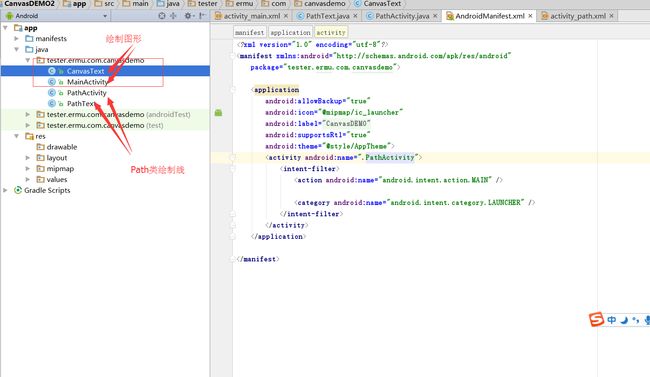
代码结构视图
三、xxxTo()方法绘制(本章延伸知识)
一、直线绘制
- 1.1 lineTo(float x, float y)
@Override
    protected void onDraw(Canvas canvas) {
        super.onDraw(canvas);
        mPaint.setColor(Color.RED);
        mPaint.setStyle(Paint.Style.STROKE);
        mPaint.setStrokeWidth(5);

        // 实例化路径
        mPath = new Path();
        // 连接路径到点[100,100]
        mPath.lineTo(100, 100);
        // 绘制路径
        canvas.drawPath(mPath, mPaint);
    }
- 多次调用lineTo方法来绘制
    @Override
    protected void onDraw(Canvas canvas) {
        super.onDraw(canvas);
        mPaint.setColor(Color.RED);
        mPaint.setStyle(Paint.Style.STROKE);
        mPaint.setStrokeWidth(5);

        // 实例化路径
        mPath = new Path();
        mPath.moveTo(100, 100);
        // 连接路径到点
        mPath.lineTo(300, 100);
        mPath.lineTo(400, 200);
        mPath.lineTo(200, 200);
        // 绘制路径
        canvas.drawPath(mPath, mPaint);
    }
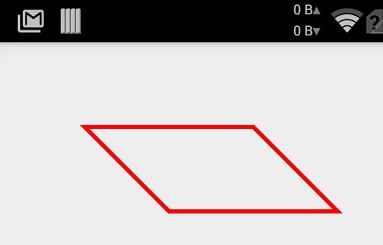
- 1.2 moveTo(float x, float y) +close()方法闭合曲线
     @Override
    protected void onDraw(Canvas canvas) {
        super.onDraw(canvas);
        mPaint.setColor(Color.RED);
        mPaint.setStyle(Paint.Style.STROKE);
        mPaint.setStrokeWidth(5);

        // 实例化路径
        mPath = new Path();
        mPath.moveTo(100, 100);
        // 连接路径到点
        mPath.lineTo(300, 100);
        mPath.lineTo(400, 200);
        mPath.lineTo(200, 200);
        // 闭合曲线
        mPath.close();
        // 绘制路径
        canvas.drawPath(mPath, mPaint);
    }
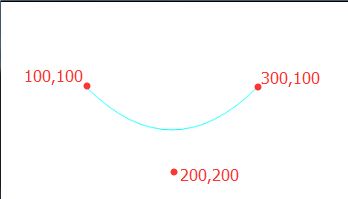
二、画贝赛尔曲线
- quadTo(float x1, float y1, float x2, float y2)
 @Override
    protected void onDraw(Canvas canvas) {
        super.onDraw(canvas);
        mPaint.setColor(Color.RED);
        mPaint.setStyle(Paint.Style.STROKE);
        mPaint.setStrokeWidth(5);

        // 实例化路径
        mPath = new Path();
        // 移动起点至[100,100]
        mPath.moveTo(100, 100);

        // 连接路径到点
        mPath.quadTo(200, 200, 300, 100);
        canvas.drawPath(mPath, mPaint);
    }
- 2.3 cubicTo(float x1, float y1, float x2, float y2, float x3, float y3)
  @Override
    protected void onDraw(Canvas canvas) {
        super.onDraw(canvas);
        mPaint.setColor(Color.RED);
        mPaint.setStyle(Paint.Style.STROKE);
        mPaint.setStrokeWidth(5);

        // 实例化路径
        mPath = new Path();
        // 移动起点至[100,100]
        mPath.moveTo(100, 100);

        // 连接路径到点
        mPath.cubicTo(200, 200, 300, 0, 400, 100);
        canvas.drawPath(mPath, mPaint);
    }

三、画弧线
- arcTo (RectF oval, float startAngle, float sweepAngle) 是一个画弧线的方法,其实说白了就是从圆或椭圆上截取一部分而已。
 @Override
    protected void onDraw(Canvas canvas) {
        super.onDraw(canvas);
        mPaint.setColor(Color.RED);
        mPaint.setStyle(Paint.Style.STROKE);
        mPaint.setStrokeWidth(5);

        // 实例化路径
        mPath = new Path();
        // 移动起点至[100,100]
        mPath.moveTo(100, 100);
        // 连接路径到点
        RectF oval = new RectF(100, 100, 200, 200);
        mPath.arcTo(oval, 0, 90);
        canvas.drawPath(mPath, mPaint);
    }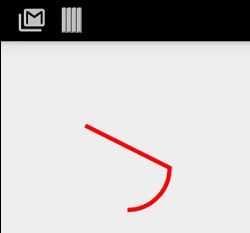
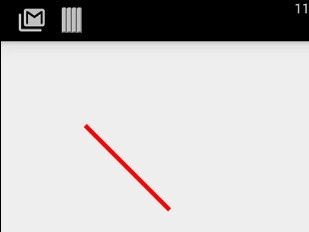
- arcTo (RectF oval, float startAngle, float sweepAngle, boolean forceMoveTo) 它会强制起点为绘制的起始点,而不是画布的左上角。我们来看看效果:
 @Override
    protected void onDraw(Canvas canvas) {
        super.onDraw(canvas);
        mPaint.setColor(Color.RED);
        mPaint.setStyle(Paint.Style.STROKE);
        mPaint.setStrokeWidth(5);

        // 实例化路径
        mPath = new Path();
        // 移动起点至[100,100]
        mPath.moveTo(100, 100);
        // 连接路径到点
        RectF oval = new RectF(100, 100, 200, 200);
        mPath.arcTo(oval, 0, 90,true);
        canvas.drawPath(mPath, mPaint);
    }
四、Path中除了上面介绍的几个XXXTo方法外还有一套rXXXTo方法:
rCubicTo(float x1, float y1, float x2, float y2, float x3, float y3)
rLineTo(float dx, float dy)
rMoveTo(float dx, float dy)
rQuadTo(float dx1, float dy1, float dx2, float dy2)
五、rXXXTo()方法和XXXTo()的区别
例如: 起点(100,100)到终点(200,200)
XXXTo绘制的距离就是,这里的move和lineTo的坐标都是对于画布左上角(0,0)来说。100到200的距离,绘制的总长度为00到200,也就是200距离
而rXXXTo绘制的距离就是相对于100起点,再绘制200的距离。绘制的总长度就是300
- 我们写一个例子
    @Override
    protected void onDraw(Canvas canvas) {
        super.onDraw(canvas);
        mPaint.setColor(Color.RED);
        mPaint.setStyle(Paint.Style.STROKE);
        mPaint.setStrokeWidth(5);

        // 实例化路径
        mPath = new Path();
        // 移动点至[100,100]
        mPath.moveTo(100, 100);

        // 连接路径到点
        mPath.lineTo(200, 200);
        canvas.drawPath(mPath, mPaint);
    }
这里的move和lineTo的坐标都是对于画布左上角(0,0)来说的,是一个绝对坐标。而我们换为mPath.rLineTo(200, 200); 后呢?

是不是感觉线段长了很多,因为这里的(200,200)是相对于开始点(100,100)来说的,是相对坐标。如果换算成绝对坐标就是绘制一条(100,100)到(300,300)之间的线段。其实,这个前缀“r”也就是relative(相对)的简写!
六、addXXX方法
XXXTo方法可以连接Path中的曲线,而Path提供的另一系列addXXX方法则可以让我们直接往Path中添加一些曲线,比如
- addArc(RectF oval, float startAngle, float sweepAngle) : 它允许我们将一段弧形添加至Path,注意这里我用到了“添加”这个词汇,也就是说,通过addXXX方法添加到Path中的曲线是不会和上一次的曲线进行连接的:
  @Override
    protected void onDraw(Canvas canvas) {
        super.onDraw(canvas);
        mPaint.setColor(Color.RED);
        mPaint.setStyle(Paint.Style.STROKE);
        mPaint.setStrokeWidth(5);

        // 实例化路径
        mPath = new Path();
        // 移动点至[100,100]
        mPath.moveTo(100, 100);

        // 连接路径到点
        mPath.lineTo(200, 200);
        // 添加一条弧线到Path中
        RectF oval = new RectF(100, 100, 300, 400);
        mPath.addArc(oval, 0, 90);

        canvas.drawPath(mPath, mPaint);
    }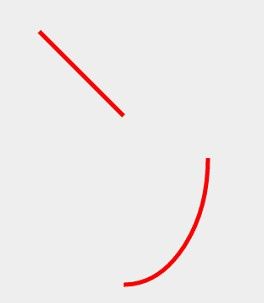
如图和代码所示,虽然我们先绘制了由[100,100]到[200,200]的线段,但是在我们往Path中添加了一条弧线后该弧线并没与线段连接。
除了addArc,Path还提供了一系列的add方法:
addCircle(float x, float y, float radius, Path.Direction dir)
addOval(float left, float top, float right, float bottom, Path.Direction dir)
addRect(float left, float top, float right, float bottom, Path.Direction dir)
addRoundRect(float left, float top, float right, float bottom, float rx, float ry, Path.Direction dir)
这些方法和addArc有很明显的区别,就是多了一个Path.Direction参数,其他呢都大同小异,除此之外不知道大家还发现没有,addArc是往Path中添加一段弧,说白了就是一条开放的曲线,而上述几种方法都是一个具体的图形,或者说是一条闭合的曲线,Path.Direction的意思就是标识这些闭合曲线的闭合方向。Path.Direction只有两个常量值CCW和CW分别表示逆时针方向闭合和顺时针方向闭合。
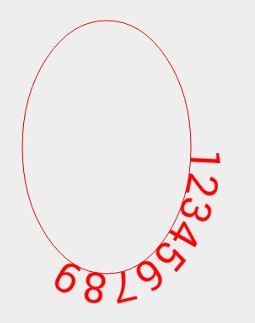
- 例如顺时针方向闭合
@Override
    protected void onDraw(Canvas canvas) {
        super.onDraw(canvas);
        mPaint.setColor(Color.RED);
        mPaint.setStyle(Paint.Style.STROKE);

        // 实例化路径
        mPath = new Path();
        // 移动起点至[100,100]
        mPath.moveTo(100, 100);

        // 添加一条弧线到Path中
        RectF oval = new RectF(100, 100, 300, 400);
        mPath.addOval(oval, Path.Direction.CW);

        canvas.drawPath(mPath, mPaint);

        mPaint.setTextSize(50);
        // 绘制路径上的文字
        canvas.drawTextOnPath("123456789", mPath, 0, 0, mPaint);
    }
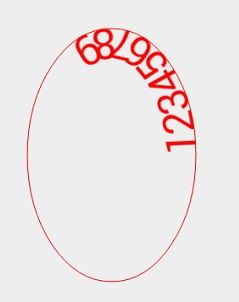
如果我们换作:mPath.addOval(oval, Path.Direction.CCW);
- 逆时针封闭
demo地址:http://download.csdn.net/detail/bobo8945510/9686609(不包含延伸代码)
感谢作者: developer_Kale
上面代码是借鉴他的文章http://www.cnblogs.com/tianzhijiexian/p/4301113.html