第一行代码学习总结(第三章)
UI开发的点点滴滴
常用控件的使用方法:
TextView
他主要是用于在界面上显示一段文本信息
<LinearLayout xmlns:android="http://schemas.android.com/apk/res/android"
xmlns:tools="http://schemas.android.com/tools"
android:layout_width="match_parent"
android:layout_height="match_parent"
tools:context=".MainActivity">
Button
button就是按钮,它是程序用于和用户交互的一个重要控件。
注意:
系统会将按钮上的英文信息自动转换为大写。
如果这不是你想要的可以修改代码:
android:textAllCaps="false"
接下来我们需要为按钮注册一个监听器
匿名内部类的写法:
protected void onCreate(Bundle savedInstanceState) {
        super.onCreate(savedInstanceState);
        setContentView(R.layout.first_layout);

        Button button1 = (Button) findViewById(R.id.button_1);
        button1.setOnClickListener(new View.OnClickListener(){
            @Override
            public void onClick(View v) {
               //在此处添加自定义逻辑
        });

    }
实现接口的写法:
 @Override
    protected void onCreate(Bundle savedInstanceState) {
        super.onCreate(savedInstanceState);
        setContentView(R.layout.first_layout);

        Button button1 = (Button) findViewById(R.id.button_1);
        button1.setOnClickListener(this);
    }
    @Override
    public void onClick(View v) {
        switch (v.getId()) {
            case R.id.button_1:
                //在此处添加逻辑
            default:
                break;
        }
    }
EditText
他允许用户在控件里输入和编辑内容,并可以在程序中对内容进行处理。
现在我们为按钮添加监听事件:
在onCreate()中获取了EditText对象。
然后在onClick()方法中进行了调用。
但是我没用使用成功。
我的代码如下:
@Override
protected void onCreate(Bundle savedInstanceState) {
    super.onCreate(savedInstanceState);
    setContentView(R.layout.first_layout);

    Button button1 = (Button) findViewById(R.id.button_1);
    button1.setOnClickListener(this);
}
@Override
public void onClick(View v) {
    switch (v.getId()) {
        case R.id.button_1:
            EditText editText = (EditText) findViewById(R.id.edit_text);
            String string = editText.getText().toString();
            Toast.makeText(this, string, Toast.LENGTH_SHORT).show();
            break;
        default:
            break;
    }
}
先用findViewById()方法可以获取对象实例,然后调用EditText的getText()方法获取EditText中的文本信息。
ImageView
<ImageView
    android:id="@+id/image_view"
    android:layout_width="wrap_content"
    android:layout_height="wrap_content"
    android:src="@drawable/image1"
    />
setImageResource()方法可以设置图片的源路经。
和之前一样,都需要先通过findViewById()方法获取对象(ImageView)。
ProgressBar
<ProgressBar
    android:id="@+id/progress_bar"
    android:layout_width="match_parent"
    android:layout_height="wrap_content" />
这是一个旋转的进度条,表示我们正在加载一些数据。
ProgressDialog
ProgressDialog progressDialog = new ProgressDialog(FirstActivity.this);
progressDialog.setTitle("加载有点慢");
progressDialog.setMessage("请稍后...");
progressDialog.setCancelable(true);
progressDialog.show();
用Animation-list实现逐帧动画
先上图片素材,素材放到res/drawable目录下:
在res目录下drawable中创建amin_pgbar.xml的资源文件:
代码如下:
<animation-list xmlns:android="http://schemas.android.com/apk/res/android" android:oneshot="true" >

    <item
        android:drawable="@drawable/loading_01"
        android:duration="200"/>
    <item
        android:drawable="@drawable/loading_02"
        android:duration="200"/>
    <item
        android:drawable="@drawable/loading_03"
        android:duration="200"/>
    <item
        android:drawable="@drawable/loading_04"
        android:duration="200"/>
    <item
        android:drawable="@drawable/loading_05"
        android:duration="200"/>
    <item
        android:drawable="@drawable/loading_06"
        android:duration="200"/>
    <item
        android:drawable="@drawable/loading_07"
        android:duration="200"/>
    <item
        android:drawable="@drawable/loading_08"
        android:duration="200"/>
    <item
        android:drawable="@drawable/loading_09"
        android:duration="200"/>
    <item
        android:drawable="@drawable/loading_10"
        android:duration="200"/>
    <item
        android:drawable="@drawable/loading_11"
        android:duration="200"/>
    <item
        android:drawable="@drawable/loading_12"
        android:duration="200"/>
animation-list>
通过ImageView标签在布局文件中进行调用:
<ImageView
    android:id="@+id/pargress_bar"
    android:layout_width="wrap_content"
    android:layout_height="wrap_content"
    android:src="@drawable/amin_pgbar"
    />

<TextView
        android:layout_width="wrap_content"
        android:layout_height="wrap_content"
        android:text="数据加载中..."
        android:layout_gravity="center"
        android:textColor="@android:color/darker_gray"/>
//使用TextView加入文字
在活动文件中添加代码,实现自动加载,添加在onCreate()方法中:
ImageView animationIV = (ImageView)findViewById(R.id.pargress_bar);
animationIV.setImageResource(R.drawable.amin_pgbar);

AnimationDrawable animationDrawable = (AnimationDrawable) animationIV.getDrawable();
animationDrawable.start();
AlertDialog对话框:
此代码复用性较差,仅限用于示范
AlertDialog.Builder dialog = new AlertDialog.Builder(FirstActivity.this);
    dialog.setTitle("确定要退出吗?");
    dialog.setMessage("还有好多功能呢!去探索?");
    dialog.setCancelable(true);//设置是否通过返回键取消对话框

    //设置点击“是”按钮之后的点击事件
    dialog.setPositiveButton("是", new DialogInterface.OnClickListener() {
        @Override
        public void onClick(DialogInterface dialogInterface, int i) {
            Toast.makeText(FirstActivity.this, "取消退出", Toast.LENGTH_SHORT).show();
        }
    });

    //设置点击“否”按钮之后的点击事件
    dialog.setNegativeButton("否", new DialogInterface.OnClickListener() {
        @Override
        public void onClick(DialogInterface dialogInterface, int i) {
            finish();
            }
    });
	//显示出对话框
    dialog.show();
复用性较强的代码:
当我们需要提高代码复用性的时候,就需要对代码进行封装。
思路:创建一个java类,将代码写入该类中。
通过创建对象进行调用该类方法。
Function demo = new Function(活动名);
demo.alertDialog();
package com.example.activitytest;

import android.app.Activity;
import android.app.AlertDialog;
import android.content.DialogInterface;
import android.widget.Toast;


//这是个退出的确认对话框
public class Function {
    public static Activity activity;

    public Function(Activity activity){this.activity=activity;}
    public static void alertDialog(){
        AlertDialog.Builder dialog = new AlertDialog.Builder(activity);
        dialog.setTitle("确定退出");
        dialog.setMessage("还有好多功能呢!去探索?");
        dialog.setCancelable(true);

        //设置点击“是”按钮之后的点击事件
        dialog.setPositiveButton("是", new DialogInterface.OnClickListener() {
            @Override
            public void onClick(DialogInterface dialogInterface, int i) {
                Toast.makeText(activity, "取消退出", Toast.LENGTH_SHORT).show();
            }
        });

        //设置点击“否”按钮之后的点击事件
        dialog.setNegativeButton("否", new DialogInterface.OnClickListener() {
            @Override
            public void onClick(DialogInterface dialogInterface, int i) {
               ActivityCollection.finishAll();
            }
        });
        dialog.show();

    }
    }
ProgressDialog对话框:
ProgressDialog progressDialog = new ProgressDialog(FirstActivity.this);
progressDialog.setTitle("加载有点慢");
progressDialog.setMessage("请稍后...");
progressDialog.setCancelable(true);
progressDialog.show();
线性布局:
    <EditText
        android:layout_width="0dp"
        android:layout_height="wrap_content"
        android:layout_weight="1"/>//用于指定宽度比例,如果Button也设置为1,则EditText与Button各占总宽度的一半(将两者的值加在一起,按照比率分配大小)

    <Button
        android:id="@+id/button_2"
        android:layout_width="wrap_content"
        android:layout_height="wrap_content"
        android:text="再点我一哈"
        />

LinearLayout>
利用style文件可以自定义Theme(主题)默认的在程序启动时会先显示一张白色背景
消除白色背景的代码:
<item name="android:windowIsTranslucent">trueitem>//消除启动时的白色背景
相对布局:
帧布局:
百分比布局:
自定义控件(自定义标题栏)
1,创建title.xml布局文件
<LinearLayout xmlns:android="http://schemas.android.com/apk/res/android"
    android:orientation="horizontal"
    android:layout_width="match_parent"
    android:layout_height="70dp"
    android:background="@drawable/titlebg">

    <Button
        android:id="@+id/title_back"
        android:layout_width="wrap_content"
        android:layout_height="wrap_content"
        android:layout_gravity="center"
        android:layout_margin="5dp"
        android:text="返回"
        android:textColor="#fff"
        />

        <TextView
            android:id="@+id/title_text"
            android:layout_width="0dp"
            android:layout_height="wrap_content"
            android:layout_gravity="center"
            android:layout_weight="1"
            android:gravity="center"
            android:text="作业"
            android:textColor="#fff"
            android:textSize="24sp"
            android:background="@drawable/titlebg"
            />


    <Button
        android:id="@+id/title_edit"
        android:layout_width="wrap_content"
        android:layout_height="wrap_content"
        android:layout_gravity="center"
        android:layout_margin="5dp"
        android:text="编辑"
        android:textColor="#fff"
        />
LinearLayout>
2,隐藏系统自定义的ActionBar
ActionBar actionBar = getSupportActionBar();
if (actionBar !=null )
    actionBar.hide();
3,使用include引入自定义控件
<include layout="@layout/title" />
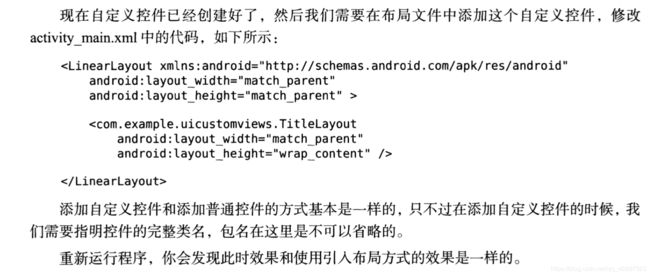
4,新建TitleLayout继承自LinearLayout,让它成为我们的自定义标题栏控件
package com.example.activitytest;

import android.content.Context;
import android.util.AttributeSet;
import android.view.LayoutInflater;
import android.widget.LinearLayout;

public class TitleLayout extends LinearLayout {
    public TitleLayout(Context context,AttributeSet attrs){
        super(context,attrs);
        LayoutInflater.from(context).inflate(R.layout.title,this);
    }
}
ListView的简单用法
首先在布局文件中添加ListView控件
<ListView
    android:id="@+id/list_view"
    android:layout_width="match_parent"
    android:layout_height="match_parent"/>


