elk
一.elk是什么?
ELK是三个开源软件的缩写,分别表示:Elasticsearch , Logstash, Kibana , 它们都是开源软件。新增了一个FileBeat,它是一个轻量级的日志收集处理工具(Agent),Filebeat占用资源少,适合于在各个服务器上搜集日志后传输给Logstash,官方也推荐此工具。
Elasticsearch是个开源分布式搜索引擎,提供搜集、分析、存储数据三大功能。它的特点有:分布式,零配置,自动发现,索引自动分片,索引副本机制,restful风格接口,多数据源,自动搜索负载等。
Logstash 主要是用来日志的搜集、分析、过滤日志的工具,支持大量的数据获取方式。一般工作方式为c/s架构,client端安装在需要收集日志的主机上,server端负责将收到的各节点日志进行过滤、修改等操作在一并发往elasticsearch上去。
Kibana 也是一个开源和免费的工具,Kibana可以为 Logstash 和 ElasticSearch 提供的日志分析友好的 Web 界面,可以帮助汇总、分析和搜索重要数据日志。
原理什么的一搜一大把,先来干货,后边再来原理,这样比较容易直观的理解elk工作原理:
官网:http://www.elastic.co/
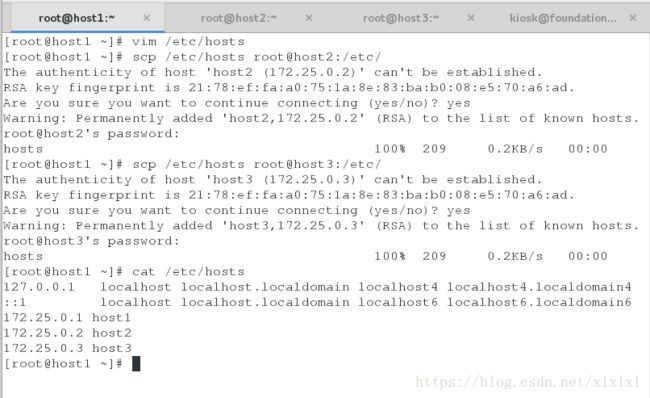
二.环境准备三台主机:
172.25.0.1 host1
172.25.0.2 host2
172.25.0.3 host3
关闭火墙,selinux。
三.先安装elk中的e,需要java环境,这里直接安装rpm包,
1.安装包再/root/elk目录中,所以
[root@host1 elk]# yum install elasticsearch-2.3.3.rpm jdk-8u121-linux-x64.rpm -y2.编辑配置文件
[root@host1 elk]# cd
[root@host1 ~]# vim /etc/elasticsearch/elasticsearch.yml
 17 cluster.name: my-elk  ##elk集群名称,随意。注意顶格,冒号后空一格,下同
 23 node.name: host1      ##节点1名称,注意解析问题
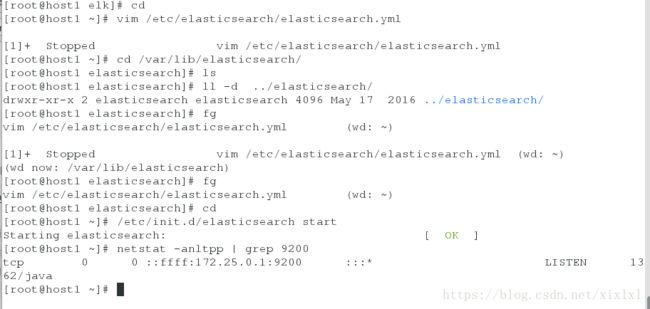
 33 path.data: /var/lib/elasticsearch/  ##数据存储路径,当然可以自定义,如下图,elasticsearch用户自动创建,不用手动创建
 43 bootstrap.mlockall: true    ##锁定内存
 54 network.host: 172.25.0.1    ##本节点ip
 58 http.port: 9200             ##apache端口
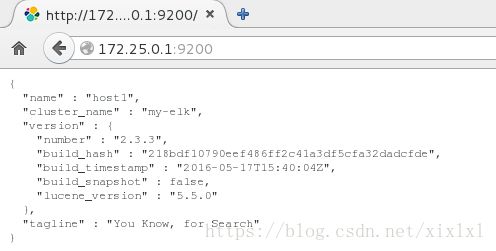
[root@host1 ~]# /etc/init.d/elasticsearch start ##启动服务 [root@host1 ~]# netstat -anltpp | grep 9200http://172.25.0.1:9200需要加载个模块
假如你的主机可以上网,直接下载安装,注意工作目录,很重要
[root@host1 elk]# cd /usr/share/elasticsearch/bin/
[root@host1 bin]# ./plugin install mobz/elasticsearch-head
*这里我们已经下载好了,使用本地安装
[root@host1 bin]# pwd
/usr/share/elasticsearch/bin
[root@host1 bin]# ./plugin install file:/root/elk/elasticsearch-head-master.zip![]()
浏览器访问
http://172.25.0.1:9200/_plugin/head/
点击Any Request [+];输入/index/demo;POST 提交key-value;如下图


完成后,点击Request
提交后,点击Browser,最右边Refresh,刷新
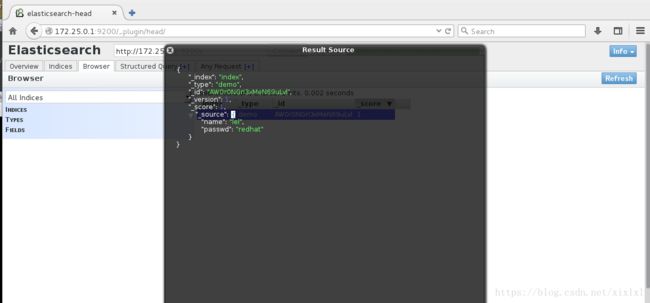
四.再添加一个数据节点host2
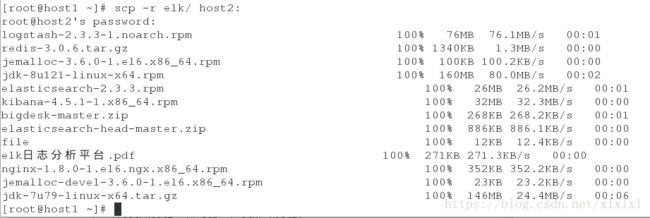
把包传过去
[root@host1 ~]# scp -r elk/ host2:host2安装elasticsearch
[root@host2 elk]# yum install elasticsearch-2.3.3.rpm jdk-8u121-linux-x64.rpm -y编辑host1配置文件
[root@host1 ~]# vim /etc/elasticsearch/elasticsearch.yml
cluster.name: my-elk
node.name: host1
path.data: /var/lib/elasticsearch/
bootstrap.mlockall: true
network.host: 172.25.0.1
http.port: 9200
##上边的参数之前配置过,下边的这个是新添加的,指定集群主机
discovery.zen.ping.unicast.hosts: ["host1", "host2"]
再来编辑host2主配主文件
[root@host2 elk]# vim /etc/elasticsearch/elasticsearch.yml
17 cluster.name: my-elk   ##和host1集群名称必须一样
23 node.name: host2
33 path.data: /var/lib/elasticsearch/
43 bootstrap.mlockall: true
54 network.host: 172.25.0.2
58 http.port: 9200
68 discovery.zen.ping.unicast.hosts: ["host1", "host2"]
完成后重启两台主机elasticsearch服务
[root@host2 elk]# /etc/init.d/elasticsearch restart
[root@host1 ~]# /etc/init.d/elasticsearch restart
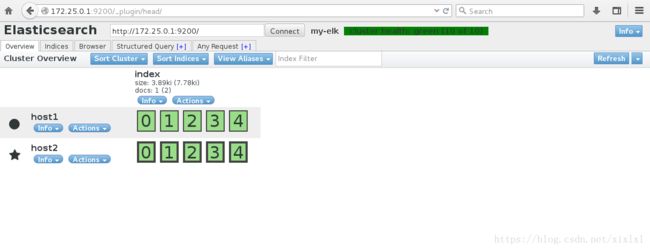
浏览器再次查看,主为host2,五角星表识,此时,host2充当了数据节点的角色
http://172.25.0.1:9200/_plugin/head/添加host3
[root@host3 elk]# yum install elasticsearch-2.3.3.rpm jdk-8u121-linux-x64.rpm -y编辑host3配置文件
[root@host3 ~]# vim /etc/elasticsearch/elasticsearch.yml
17 cluster.name: my-elk
23 node.name: host3
24 node.master: false      ##表示host3本节点不充当,精选master角色
25 node.data: true         ##表示host3节点充当数据节点
35 path.data: /var/lib/elasticsearch
45 bootstrap.mlockall: true
56 network.host: 172.25.0.3
60 http.port: 9200
70 discovery.zen.ping.unicast.hosts: ["host1", "host2", "host3"]
同样设置host2和host1配置文件
17 cluster.name: my-elk
23 node.name: host2
24 node.master: false   ##不做master节点
25 node.data: true      ##只做数据节点
35 path.data: /var/lib/elasticsearch
45 bootstrap.mlockall: true
56 network.host: 172.25.0.2
60 http.port: 9200
70 discovery.zen.ping.unicast.hosts: ["host1", "host2" ,"host3"]
host1配置文件**
[root@host1 ~]# vim /etc/elasticsearch/elasticsearch.yml
17 cluster.name: my-elk
23 node.name: host1
24 node.master: true    ##做master角色
25 node.data: false     ##不做数据节点
35 path.data: /var/lib/elasticsearch/
45 bootstrap.mlockall: true
56 network.host: 172.25.0.1
60 http.port: 9200
70 discovery.zen.ping.unicast.hosts: ["host1", "host2", "host3"]
完成后重启三台主机
[root@host1 ~]# /etc/init.d/elasticsearch restart
[root@host2 ~]# /etc/init.d/elasticsearch restart
[root@host3 ~]# /etc/init.d/elasticsearch restart
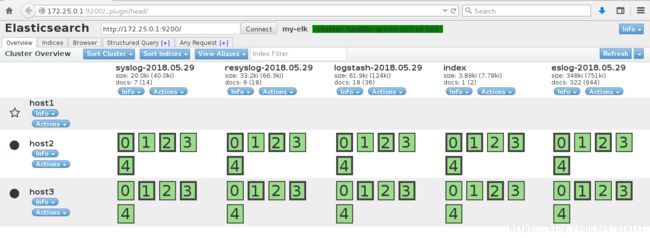
浏览器查看,注意三种状态;红色不可用,黄色数据未完全同步集群各结点,绿色正常
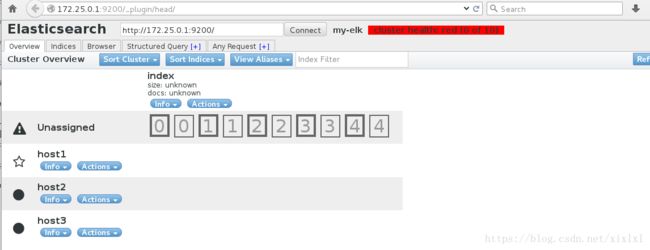


主节点为host1
api,下边的命令我记不住,更多的api参考官网
https://www.elastic.co/guide/en/elasticsearch/guide/current/_cat_api.html
https://www.elastic.co/guide/cn/elasticsearch/guide/current/running-elasticsearch.html
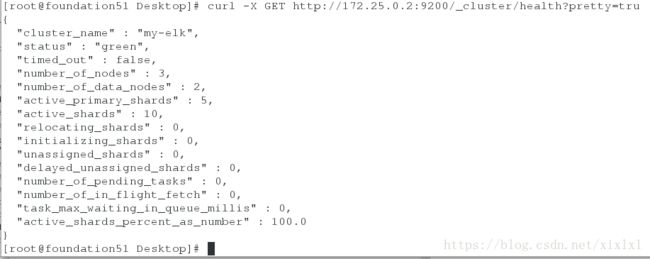
查看集群状态
[root@foundation51 Desktop]# curl -X GET http://172.25.0.2:9200/_cluster/health?pretty=tru
{
  "cluster_name" : "my-elk",
  "status" : "green",
  "timed_out" : false,
  "number_of_nodes" : 3,
  "number_of_data_nodes" : 2,
  "active_primary_shards" : 5,
  "active_shards" : 10,
  "relocating_shards" : 0,
  "initializing_shards" : 0,
  "unassigned_shards" : 0,
  "delayed_unassigned_shards" : 0,
  "number_of_pending_tasks" : 0,
  "number_of_in_flight_fetch" : 0,
  "task_max_waiting_in_queue_millis" : 0,
  "active_shards_percent_as_number" : 100.0
}
[root@foundation51 Desktop]# curl  -X GET http://172.25.0.1:9200/_cat/plugins
host1 head master s /_plugin/head/[root@foundation51 Desktop]# curl -X GET http://172.25.0.3:9200/_cat/nodes
172.25.0.2 172.25.0.2 5 93 0.00 d - host2
172.25.0.1 172.25.0.1 11 90 0.06 - * host1 ##matser节点
172.25.0.3 172.25.0.3 5 94 0.00 d - host3 查看是否启用集群成功
[root@foundation51 Desktop]# curl 'http://172.25.0.1:9200/?pretty'
{
  "name" : "host1",
  "cluster_name" : "my-elk",
  "version" : {
    "number" : "2.3.3",
    "build_hash" : "218bdf10790eef486ff2c41a3df5cfa32dadcfde",
    "build_timestamp" : "2016-05-17T15:40:04Z",
    "build_snapshot" : false,
    "lucene_version" : "5.5.0"
  },
  "tagline" : "You Know, for Search"
}
五.日志的输出
[root@host1 ~]# cd elk/
[root@host1 elk]# yum install logstash-2.3.3-1.noarch.rpm -y
尝试日志输出
[root@host1 logstash]# pwd
/opt/logstash
[root@host1 logstash]# bin/logstash -e 'input { stdin {} } output { stdout {} }'
Settings: Default pipeline workers: 2
Pipeline main started
hello world
2018-05-29T13:59:20.497Z host1 hello world
lierlong
2018-05-29T13:59:26.547Z host1 lierlong
ctrl + c 终止程序后,格式化输出
[root@host1 logstash]# bin/logstash -e 'input { stdin {} } output { stdout { codec => rubydebug} }'
Settings: Default pipeline workers: 2
Pipeline main started
hello
{
       "message" => "hello",
      "@version" => "1",
    "@timestamp" => "2018-05-29T14:01:10.966Z",
          "host" => "host1"
}
lierlong
{
       "message" => "lierlong",
      "@version" => "1",
    "@timestamp" => "2018-05-29T14:01:14.978Z",
          "host" => "host1"
}
参考官网https://www.elastic.co/guide/en/logstash/2.3/output-plugins.html
下边这条命令貌似有问题,欢迎留言
[root@host1 logstash]# bin/logstash -e 'input { stdin {} } output { stdout { hosts => ["172.25.0.1"] index => "logstash-%{+YYYY.MM.dd}"} }'
下边这种输出不会出现在终端,浏览器查看
[root@host1 logstash]# bin/logstash -e 'input { stdin { } } output { elasticsearch  { hosts => ["172.25.0.1"] index => "logstash-%{+YYYY.MM.dd}"} }'
Settings: Default pipeline workers: 2
Pipeline main started
hello
lierlong
六.很显然这种方式太麻烦了,我们写入文件
在/etc/logstash/conf.d/下编写*.conf文件
[root@host1 ~]# cd /etc/logstash/conf.d/
[root@host1 conf.d]# ls
[root@host1 conf.d]#
[root@host1 conf.d]# vim es.conf
input {
        stdin{}
}

output{
        stdout{
        codec => rubydebug
        }

        elasticsearch {
        hosts => ["172.25.0.1"]
        index => "logstash-%{+YYYY.MM.dd}"
        }
}

[root@host1 conf.d]# /opt/logstash/bin/logstash -f es.conf
Settings: Default pipeline workers: 2
Pipeline main started
嗨,老哥
{
       "message" => "嗨,老哥",
      "@version" => "1",
    "@timestamp" => "2018-05-29T14:33:02.643Z",
          "host" => "host1"
}
七.输出到指定文件
[root@host1 conf.d]# vim es_1.conf
input {
    stdin {}
}

output {

    file {
    path => "/tmp/log.txt"
    codec => line { format => "custom format: %{message}"}
    }
    elasticsearch {
    hosts => ["172.25.0.2"]
    index => "logstash-%{+YYYY.MM.dd}"
    }
}
[root@host1 conf.d]# /opt/logstash/bin/logstash -f es_1.conf
Settings: Default pipeline workers: 2
Pipeline main started
rhc
linux
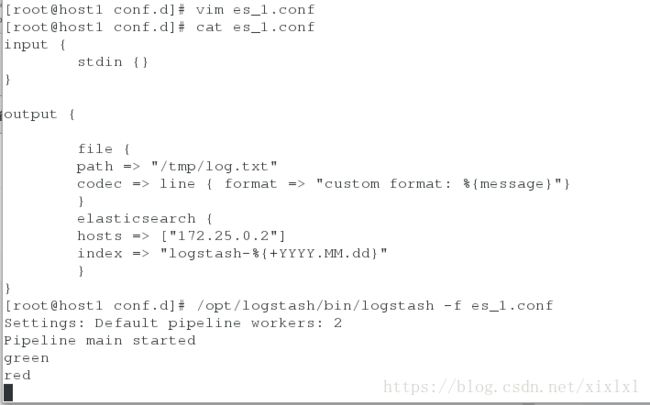
ctrl + z打入后台,或者重开一个shell链接host1
去/tmp/log.txt查看下,写入了,会发现多了两行,因为之前代码写错了,message没有s
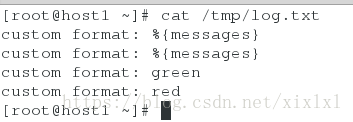
错误的哪个操作
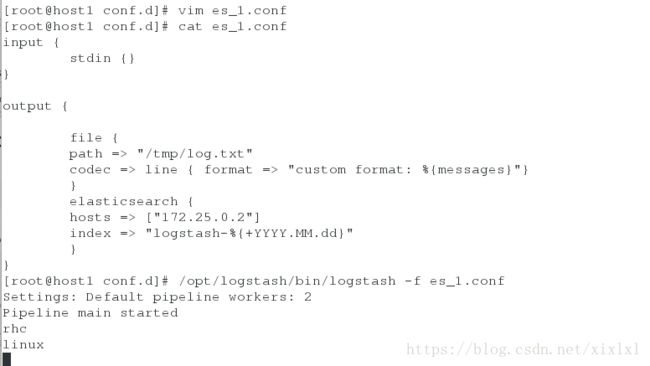
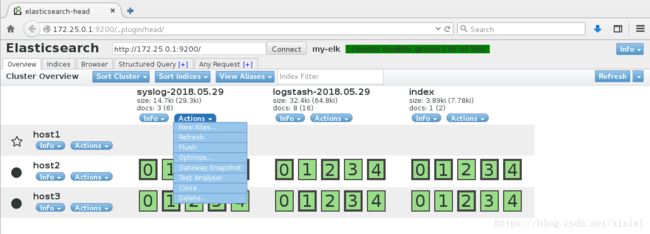
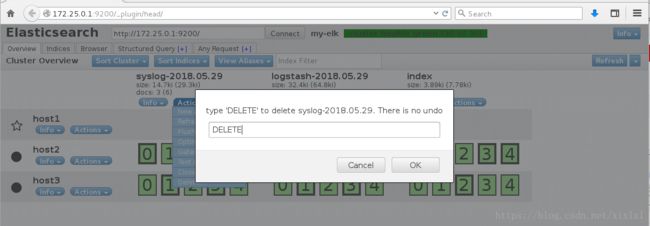
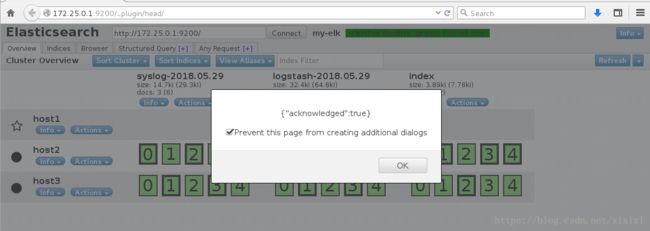
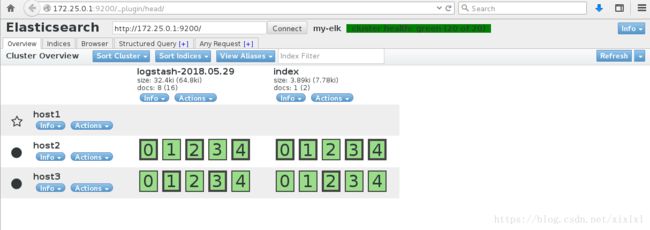
浏览器再次查看,之前rhc和linux内容被写进去了

八.从日志文件写入
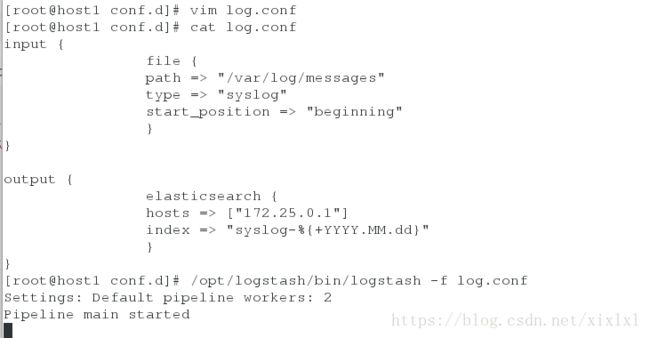
[root@host1 conf.d]# vim log.conf
[root@host1 conf.d]# cat log.conf
input {
        file {
        path => "/var/log/messages"
        type => "syslog"
        start_position => "beginning"
        }
}

output {
        elasticsearch {
        hosts => ["172.25.0.1"]
        index => "syslog-%{+YYYY.MM.dd}"
        }
}
[root@host1 conf.d]# chmod 644 /var/log/messages
[root@host1 conf.d]# /opt/logstash/bin/logstash -f log.conf
Settings: Default pipeline workers: 2
Pipeline main started
ctrl + z[root@host1 ~]# logger test
[root@host1 ~]# logger test九.完一日志被删除
[root@host1 conf.d]# /opt/logstash/bin/logstash -f log.conf
Settings: Default pipeline workers: 2
Pipeline main started
ctrl + z
[root@host1 ~]# logger heelo
恢复:
[root@host1 conf.d]# cd
[root@host1 ~]# l.
.              .bash_logout   .cshrc                                     .ssh
..             .bash_profile  .oracle_jre_usage                          .tcshrc
.bash_history  .bashrc        .sincedb_452905a167cf4509fd08acb964fdb20c  .viminfo
[root@host1 ~]# cat .sincedb_452905a167cf4509fd08acb964fdb20c
531104 0 64768 549     ##第一串数字表示日志来源node,最后一个表示写到那个node了
[root@host1 ~]# ls -i /var/log/messages
531104 /var/log/messages
删除这个隐藏文件,重新读取
[root@host1 ~]# fg
/opt/logstash/bin/logstash -f log.conf  (wd: /etc/logstash/conf.d)
^CSIGINT received. Shutting down the agent. {:level=>:warn}
stopping pipeline {:id=>"main"}
Pipeline main has been shutdown
[root@host1 ~]# rm -fr .sincedb_452905a167cf4509fd08acb964fdb20c
[root@host1 ~]# /opt/logstash/bin/logstash -f /etc/logstash/conf.d/log.conf
Settings: Default pipeline workers: 2
Pipeline main started十.收集其他主机日志
日志同步
[root@host2 elk]# vim /etc/rsyslog.conf
*.*     @172.25.0.1:514       ##最后一行写这个,tcp传输
[root@host2 elk]# /etc/init.d/rsyslog restart
host1写文件
[root@host1 conf.d]# vim rsyslog.conf
[root@host1 conf.d]# cat rsyslog.conf
input {
    syslog {
    type => "rsyslog"
    port => 514
    }
}

output {

    elasticsearch {
    hosts => ["172.25.0.1"]
    index => "resyslog-%{+YYYY.MM.dd}"
    }
}
[root@host1 conf.d]# /opt/logstash/bin/logstash -f rsyslog.conf
Settings: Default pipeline workers: 2
Pipeline main started
^Z
[2]+  Stopped                 /opt/logstash/bin/logstash -f rsyslog.conf
[root@host1 conf.d]# netstat -anlp  | grep 514
tcp 0 0 :::514 :::* LISTEN 3336/java [root@host2 elk]# > /var/log/messages
[root@host2 elk]# yum install lsof -y &>/dev/null
[root@host2 elk]# yum remove lsof -y &>/dev/null
[root@host2 elk]# yum install lsof -y &>/dev/null
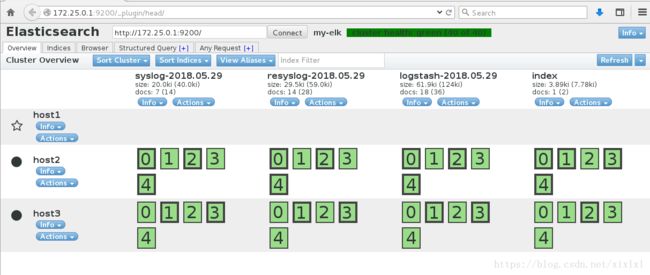
[root@host2 elk]# cat /var/log/messages
May 29 23:40:52 host2 yum[1686]: Installed: lsof-4.82-4.el6.x86_64
May 29 23:41:57 host2 yum[1687]: Erased: lsof
May 29 23:42:03 host2 yum[1688]: Installed: lsof-4.82-4.el6.x86_64
十一.多行日志的采集
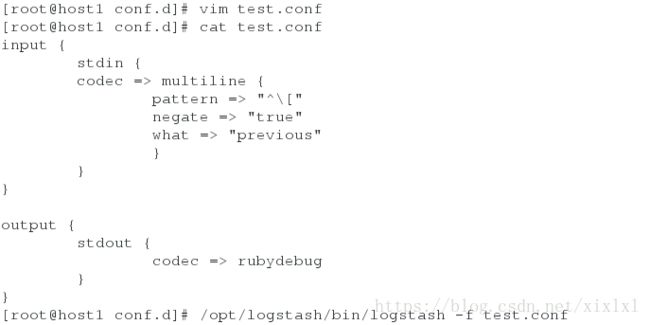
终端测试下
[root@host1 conf.d]# vim test.conf
[root@host1 conf.d]# cat test.conf
input {
        stdin {
        codec => multiline {
                pattern => "^\["
                negate => "true"
                what => "previous"
                }
        }
}

output {
        stdout {
                codec => rubydebug
        }
}
[root@host1 conf.d]# /opt/logstash/bin/logstash -f test.conf
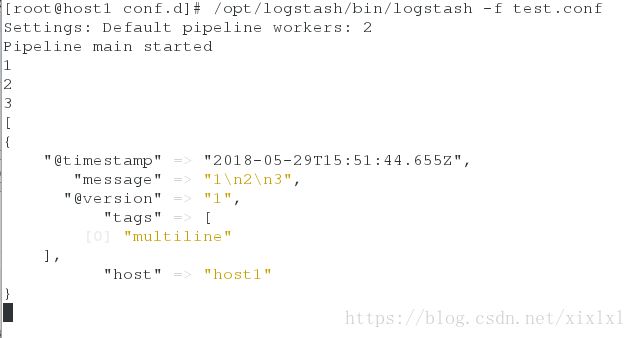
Settings: Default pipeline workers: 2
Pipeline main started
1
2
3
[
{
    "@timestamp" => "2018-05-29T15:51:44.655Z",
       "message" => "1\n2\n3",
      "@version" => "1",
          "tags" => [
        [0] "multiline"
    ],
          "host" => "host1"
}[root@host1 conf.d]# cd /var/log/elasticsearch/
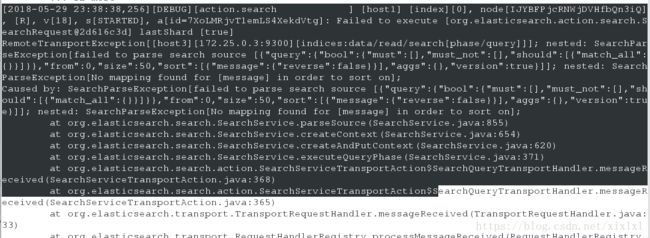
[root@host1 elasticsearch]# cat my-elk.log ##就不摘抄了,由多行日志信息存在
[root@host1 conf.d]# vim line.conf
[root@host1 conf.d]# cat line.conf
input {
    file {
    path => "/var/log/elasticsearch/my-elk.log"
    type => "eslog"
    start_position => "beginning"
    }

}

filter {
    multiline {
        pattern => "^\["
        negate => "true"
        what => "previous"
    }
}
output {

    elasticsearch {
    hosts => ["172.25.0.1"]
    index => "eslog-%{+YYYY.MM.dd}"
    }
}
[root@host1 conf.d]# /opt/logstash/bin/logstash -f line.conf
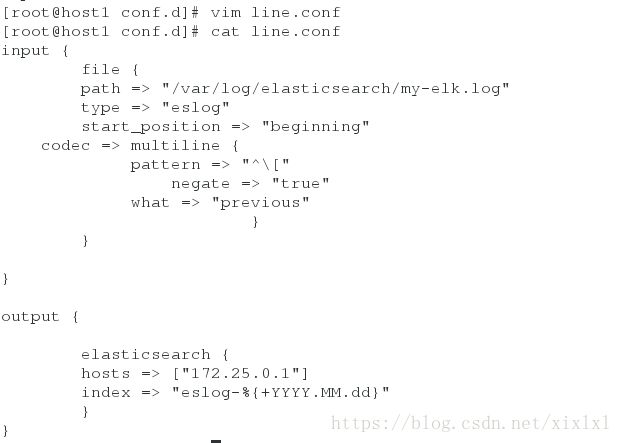
...当然这种格式也可以
input {
    file {
    path => "/var/log/elasticsearch/my-elk.log"
    type => "eslog"
    start_position => "beginning"
    codec => multiline {
             pattern => "^\["
             negate => "true"
             what => "previous"
             }
    }

}

output {

    elasticsearch {
    hosts => ["172.25.0.1"]
    index => "eslog-%{+YYYY.MM.dd}"
    }
}