SpringBoot搭建SSM整合Redis缓存数据(菜鸟学习)
前言
自学多时,写一个demo做个总结。
从建项目开始,比较简单的实现springboot+redis缓存,供初学者参考,更快的理解redis缓存。
环境
win10
Idea2018.1.2x64
jdk1.8.0_131
mysql5.7.21
Redis3.2.100
RedisDesktopManager0.8.8.384(redis桌面管理工具)
mysql,redis都是用本地环境
第一步:搭建ssm框架连接mysql
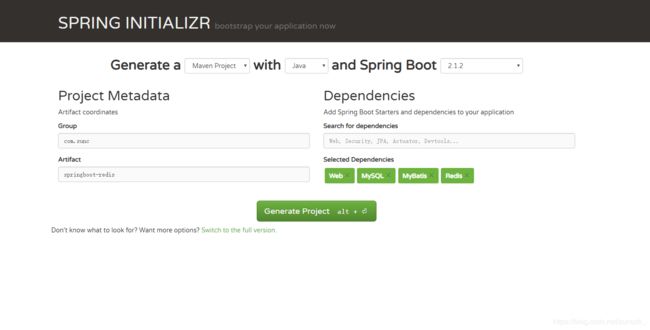
新建项目
https://start.spring.io/

将项目导入idea
项目结构
pojo类
这东西到底叫pojo,bean,domain,entity还是vo,我也分不清反正就是实体类
要实现toString方法
package com.sunc.springbootredis.pojo;

public class Hello {
    private Integer id;
    private String text;

    @Override
    public String toString() {
        return "Hello{" +
                "id=" + id +
                ", text='" + text + '\'' +
                '}';
    }

    public Integer getId() {
        return id;
    }

    public void setId(Integer id) {
        this.id = id;
    }

    public String getText() {
        return text;
    }

    public void setText(String text) {
        this.text = text;
    }
}
service类
package com.sunc.springbootredis.service;

import com.sunc.springbootredis.pojo.Hello;

public interface HelloService {
    public Hello sayHello(Hello hello);
}
service实现类
package com.sunc.springbootredis.service.Impl;

import com.sunc.springbootredis.mapper.HelloMapper;
import com.sunc.springbootredis.pojo.Hello;
import com.sunc.springbootredis.service.HelloService;
import org.springframework.beans.factory.annotation.Autowired;
import org.springframework.stereotype.Service;

@Service
public class HelloServiceImpl implements HelloService {
    @Autowired
    private HelloMapper helloMapper;

    @Override
    public Hello sayHello(Hello hello) {
        return helloMapper.sayHello(hello);
    }
}
mapper
package com.sunc.springbootredis.mapper;

import com.sunc.springbootredis.pojo.Hello;
import org.apache.ibatis.annotations.Mapper;
import org.apache.ibatis.annotations.Select;

@Mapper
public interface HelloMapper {

    @Select("SELECT * FROM hello WHERE id = #{id}")
    public Hello sayHello(Hello hello);
}
controller
package com.sunc.springbootredis.controller;

import com.sunc.springbootredis.pojo.Hello;
import com.sunc.springbootredis.service.HelloService;
import org.springframework.beans.factory.annotation.Autowired;
import org.springframework.web.bind.annotation.RequestMapping;
import org.springframework.web.bind.annotation.RestController;

@RestController
@RequestMapping("/hello")
public class HelloController {
    @Autowired
    private HelloService helloService;

    @RequestMapping("/sayHello")
    public Hello sayHello(){
        Hello hello = new Hello();
        hello.setId(1);
        return helloService.sayHello(hello);
    }
}
Application.properties配置
这里添加debug,方便看mapper中执行sql情况
spring.datasource.url=jdbc:mysql://localhost:3306/sunc?Unicode=true&characterEncoding=UTF8&serverTimezone=UTC
spring.datasource.username=root
spring.datasource.password=123321

logging.level.com.sunc.springbootredis.mapper=debug
spring.redis.host=localhost
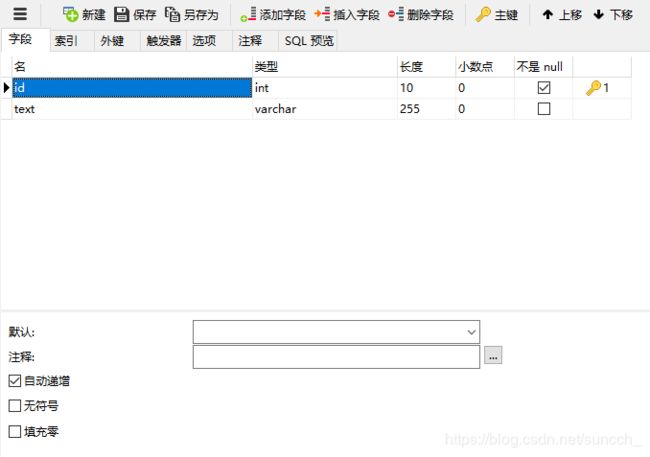
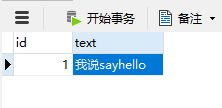
建表并添加数据
如果使用mapper.xml写SQL
启动类加注解
@MapperScan("com.suncspringbootredis.mapper")
配置文件扫描静态文件)
(注意:mapper.xml放在resources静态文件夹下)
mybatis.mapper-locations=classpath:mapper/*.xml
请求controller
浏览器中请求controller可以看到返回数据,说明已经连接成功
http://localhost:8080/hello/sayHello
![]()
连续请求两次,log显示查询两次mysql。框架搭建成功

第二步:整合redis
pojo实体类实现Serializable
public class Hello implements Serializable{
启动类新增注解@EnableCaching
package com.sunc.springbootredis;

import org.mybatis.spring.annotation.MapperScan;
import org.springframework.boot.SpringApplication;
import org.springframework.boot.autoconfigure.SpringBootApplication;
import org.springframework.cache.annotation.EnableCaching;

@SpringBootApplication
@MapperScan("com.suncspringbootredis.mapper")
@EnableCaching
public class SpringbootRedisApplication {

	public static void main(String[] args) {
		SpringApplication.run(SpringbootRedisApplication.class, args);
	}
}
Service实现类新增注解@Cacheable(cacheNames = {“hello”})
@Service
public class HelloServiceImpl implements HelloService {
    @Autowired
    private HelloMapper helloMapper;

    @Cacheable(cacheNames = {"hello"})
    @Override
    public Hello sayHello(Hello hello) {
        return helloMapper.sayHello(hello);
    }
}
这时连续请求两次controller

可以看到Log日志只打印一次sql,说明第二次是从redis缓存中查询的,并没有请求mysql
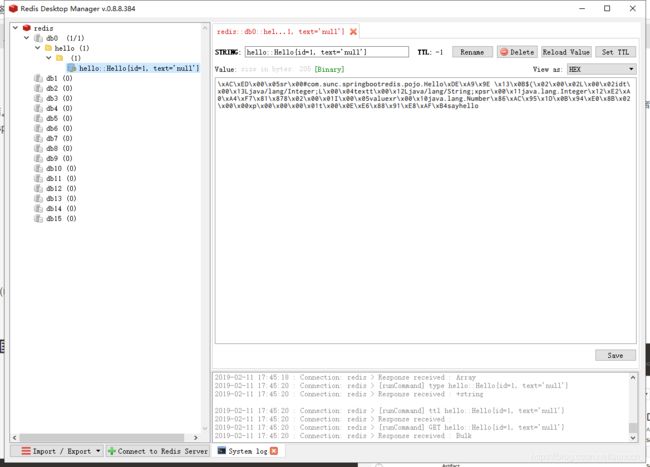
查看RedisDesktopManager可以发现redis已经有hello了

这里text为啥是null我也不知道了,反正是好用了
成功
但是数据看出并没有做序列化,使用的是jdk自带的序列化。后续学习序列化
如有偏颇敬请斧正,本厮邮箱:[email protected]


