部署智能合约的步骤为:
- 启动一个以太坊节点 (例如geth或者testrpc)。
- 使用solc编译智能合约。 => 获得二进制代码。
- 将编译好的合约部署到网络。(这一步会消耗以太币,还需要使用你的节点的默认地址或者指定地址来给合约签名。) => 获得合约的区块链地址和ABI(合约接口的JSON表示,包括变量,事件和可以调用的方法)。(译注:作者在这里把ABI与合约接口弄混了。ABI是合约接口的二进制表示。)
- 用web3.js提供的JavaScript API来调用合约。
Brew MacOS包管理器
/usr/bin/ruby -e "$(curl -fsSL https://raw.githubusercontent.com/Homebrew/install/master/install)"
安装go的环境
brew install go
安装 geth
npm install -g solc
Solidity以太坊智能合约语言
brew install solidity
geth console会启动节点,geth attach是通过rpc或者ipc和已经启动的节点进行交互。所以二者的使用区别还是挺大的,在geth console里面可以使用所有模块的api,但是geth attach只能使用已经打开的模块的api,如果节点没有打开rpc geth attach甚至都不能连接上节点
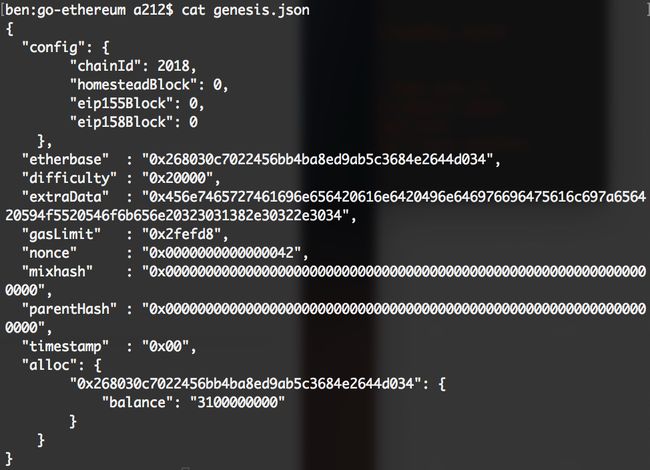
修改创世Genesis.json
1,启动一个以太坊节点
1,geth --datadir "./" --nodiscover console
2,user1 = eth.accounts[0]
"0xa4aa2105cc3e6b6a83faaaf72782d1e9a68e90ca"
> eth.getBalance(user1)
1.156e+21
> user2 = eth.accounts[1]
"0x33481f6d7b7f4ff430397913af1eaf582f3f4391"
> eth.getBalance(user2)
4000000000000000000
2,智能合约代码:
contract Multiply7 {
   event Print(uint);
   function multiply(uint input) returns (uint) {
      Print(input * 7);
      return input * 7;
   }
}
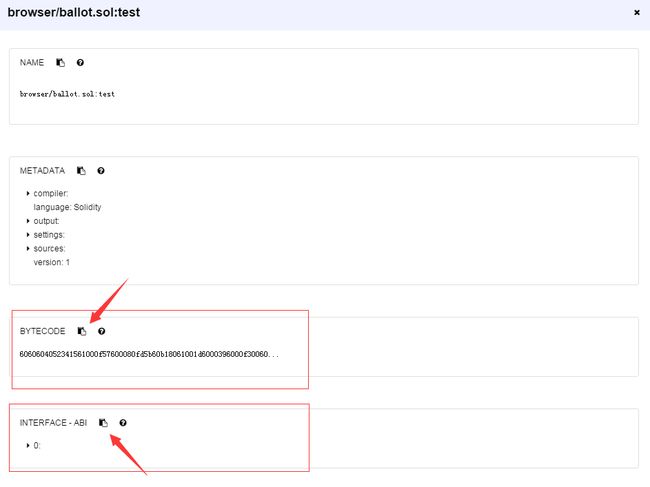
3,获得abiDefinition和bytecode,
通过https://remix.ethereum.org编译智能合约或者solc编译
我们先把合约代码压缩为一行.新建一个ssh session, 切换到geth用户环境su - geth, 然后输入:cat contracts/Token.sol | tr '\n' 空格'空格 '.
转义成字符串
http://www.bejson.com
abi=[{"constant":false,"inputs":[{"name":"a","type":"uint256"}],"name":"multiply","outputs":[{"name":"d","type":"uint256"}],"payable":false,"stateMutability":"nonpayable","type":"function"}]
4,看黑板:字节码前加0x
bytecode="0x6060604052341561000f57600080fd5b60b18061001d6000396000f300606060405260043610603f576000357c0100000000000000000000000000000000000000000000000000000000900463ffffffff168063c6888fa1146044575b600080fd5b3415604e57600080fd5b606260048080359060200190919050506078565b6040518082815260200191505060405180910390f35b60006007820290509190505600a165627a7a72305820e8baa72a4bd1ffe2e8fa51812e8d65fc7b145baf48382c4ae5039510fd35a6ff0029"
5,通过abiDefinition和bytecode实例化创建合约
var contract = eth.contract(abi);
var initializer = {from:web3.eth.accounts[0],data:bytecode,gas:300000};
personal.unlockAccount(user1,"jianghua")
var token = contract.new(initializer)
INFO [03-03|17:25:44] Submitted contract creation fullhash=0x7e1bd79681ee748b1057f123a9951652e67232c2624631a5531edb0bb629e88b contract=0x1BeEf17Dac85D369d41A9891276D58fC8F877A24
6,需要通过挖矿这一步骤,对合约地址进行确认
miner.start(4)
admin.sleepBlocks(2)
miner.stop()
到此为止,合约的布署已布署到了区块链上。
7,通过合约地址,实例化自己的合约,并进行调用
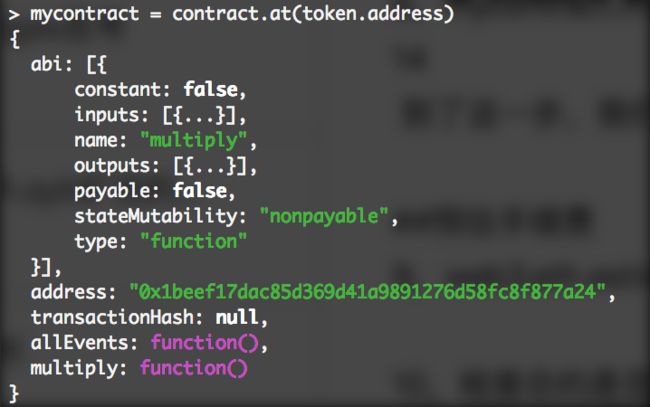
mycontract = contract.at(token.address)
{
abi: [{
constant: false,
inputs: [{...}],
name: "multiply",
outputs: [{...}],
payable: false,
stateMutability: "nonpayable",
type: "function"
}],
address: "0x1beef17dac85d369d41a9891276d58fc8f877a24",
transactionHash: null,
allEvents: function(),
multiply: function()
}
8,到这里,合约的布署与调用完成
mycontract.multiply.call(2)
到了这一步,我们可以得到自己合约的返回值14
9,预估手续费
web3.eth.estimateGas({data:bytecode})
10,检查合约是否部署成功
eth.getCode("0x1beef17dac85d369d41a9891276d58fc8f877a24")
"0x606060405260043610603f576000357c0100000000000000000000000000000000000000000000000000000000900463ffffffff168063c6888fa1146044575b600080fd5b3415604e57600080fd5b606260048080359060200190919050506078565b6040518082815260200191505060405180910390f35b60006007820290509190505600a165627a7a72305820e8baa72a4bd1ffe2e8fa51812e8d65fc7b145baf48382c4ae5039510fd35a6ff0029"
11,验证区块的内容
eth.getBlock(2550)
{
difficulty: 314416,
extraData: "0xd783010802846765746886676f312e31308664617277696e",
gasLimit: 4712388,
gasUsed: 99930,
hash: "0x57ca73b779ae13c542f0421fc81a272fc6ce938aab1951b412f8813b6dc5bc8e",
logsBloom: "0x00000000000000000000000000000000000000000000000000000000000000000000000000000000000000000000000000000000000000000000000000000000000000000000000000000000000000000000000000000000000000000000000000000000000000000000000000000000000000000000000000000000000000000000000000000000000000000000000000000000000000000000000000000000000000000000000000000000000000000000000000000000000000000000000000000000000000000000000000000000000000000000000000000000000000000000000000000000000000000000000000000000000000000000000000000000",
miner: "0xa4aa2105cc3e6b6a83faaaf72782d1e9a68e90ca",
mixHash: "0xecee4f13a617954c9bfe19e14bdf00c6b0d006d16e19e7474faa8de49eb74bf9",
nonce: "0x39f04fd757c3fab6",
number: 2550,
parentHash: "0xcdfb7e8f78f86e942acfe5a9a1f1ef3637a77cd96ebf35f28e6880e40e94fa0c",
receiptsRoot: "0xea304d377e8d7db719679ecfb3900e0b6c18469512ac3ba1c74c754e54f73d9e",
sha3Uncles: "0x1dcc4de8dec75d7aab85b567b6ccd41ad312451b948a7413f0a142fd40d49347",
size: 830,
stateRoot: "0x69c10e0e14757623f279f8df6564659f1ac4cf25ab2ec559acedb964315804f7",
timestamp: 1520069708,
totalDifficulty: 589085710,
transactions: ["0x7e1bd79681ee748b1057f123a9951652e67232c2624631a5531edb0bb629e88b"],
transactionsRoot: "0xba26a1e628172e65320c9d9474148763c03bd16513fc63b425f781537d542aa9",
uncles: []
}
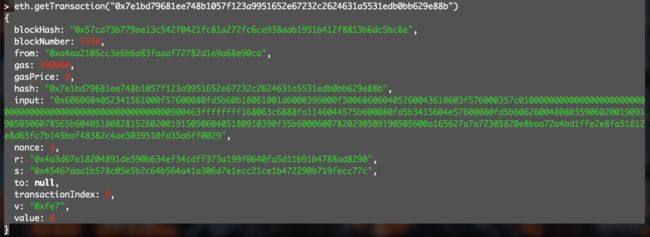
12,验证交易信息
eth.getTransaction("0x7e1bd79681ee748b1057f123a9951652e67232c2624631a5531edb0bb629e88b")
{
blockHash: "0x57ca73b779ae13c542f0421fc81a272fc6ce938aab1951b412f8813b6dc5bc8e",
blockNumber: 2550,
from: "0xa4aa2105cc3e6b6a83faaaf72782d1e9a68e90ca",
gas: 300000,
gasPrice: 0,
hash: "0x7e1bd79681ee748b1057f123a9951652e67232c2624631a5531edb0bb629e88b",
input: "0x6060604052341561000f57600080fd5b60b18061001d6000396000f300606060405260043610603f576000357c0100000000000000000000000000000000000000000000000000000000900463ffffffff168063c6888fa1146044575b600080fd5b3415604e57600080fd5b606260048080359060200190919050506078565b6040518082815260200191505060405180910390f35b60006007820290509190505600a165627a7a72305820e8baa72a4bd1ffe2e8fa51812e8d65fc7b145baf48382c4ae5039510fd35a6ff0029",
nonce: 4,
r: "0x4a3d67e18204891de590b634ef34cdff373a199f0640fa5d11b91b4788ad8290",
s: "0x45467daa1b578c05e5b2c64b564a41a306d7e1ecc21ce1b472290b719fecc77c",
to: null,
transactionIndex: 0,
v: "0xfe7",
value: 0
}
合约的布署与调用验证无误,大功告成!


