手把手教你做人脸识别和关键点检测(基于tensorflow和opencv)
人脸识别和关键点检测(二)
步骤
这篇博客虽然涉及的是看起来很前沿的人工智能,但对于我们初学者来说,入门并没有想象中的那么困难。这篇文章就是给有一定python基础(或者有其他编程语言基础)的同学,介绍一个对于深度学习(CNN模型)在计算机视觉方面的简单应用:
- 前期准备 包括需要引用的库的安装、使用,以及下载人脸数据等;
- 人脸检测 通过调用opencv预训练的模型实现视频(或摄像头实时)人脸检测;
- 搭建训练框架 基于tensorflow搭建CNN模型,实现对人脸关键点的检测;
- 保存和调用模型 保存和调用训练好的模型,并应用在人脸识别中;
回顾:
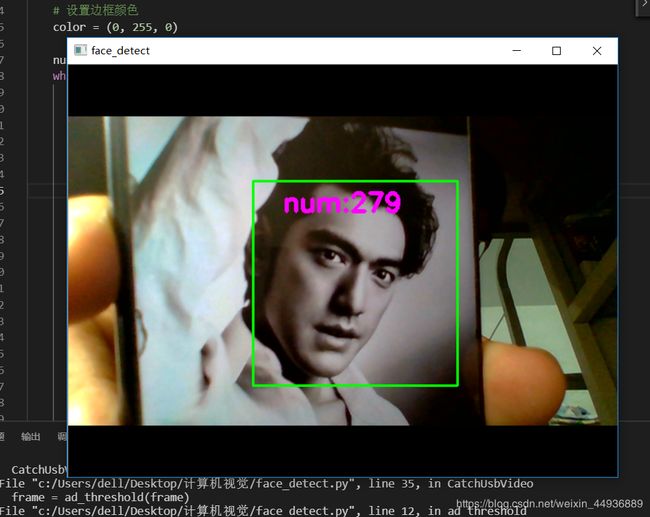
我们上一篇博客已经完成了前两个步骤,如果没有bug的话,效果应该是这样的~

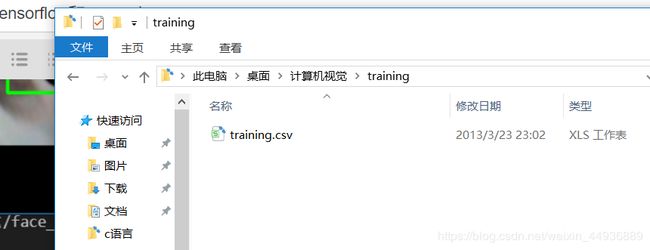
接下来就是我们的重头戏——搭建框架和训练模型。模型需要下载我们的数据集,再次贴上文件的地址:https://www.kaggle.com/c/facial-keypoints-detection,下载结束后解压到我们当前文件夹,分别把training.csv和test.csv放到对应的training和test文件夹下。

搭建训练框架:
接下来我们要编写一个基于tensorflow的CNN模型,对于不熟悉tensorflow的同学不要担心。我们这次只是从应用入手,深入浅出地了解深度学习。
代码如下:
import matplotlib.pyplot as plt
import os
import tensorflow as tf
import pandas as pd
import numpy as np

def input_data(train=True):
    # 获取训练集和测试集
    file_name = train_csv if train else test_csv

    df = pd.read_csv(file_name)
    cols = df.columns[:-1]
    df = df.dropna()  # 丢弃有缺失数据的样本
    df['Image'] = df['Image'].apply(
           lambda img: np.fromstring(img, sep=' ')/255.0) # 归一化输入的数据
    X = np.vstack(df['Image'])
    X = X.reshape((-1, 96, 96, 1))
    if train:
        y = df[cols].values / 96.0  # 将坐标缩放到0,1区间,加速收敛
    else:
        y = None
    print(df.describe())
    return X,y

train_csv = './training/training.csv'
test_csv = './test/test.csv'
valid_size = 100  # 验证集大小
train_epoches = 200 # 循环训练次数
batch_size = 64 # mini-batch的大小
learning_rate = 1e-3 # 学习率

def weights_variable(shape, namew='w'):
    # 初始化权重
    initial = tf.truncated_normal(shape=shape, stddev=0.1)
    return tf.Variable(initial, name=namew)
def biases_variable(shape, nameb='b'):
    # 初始化偏置
    initial = tf.constant(0.1, shape=shape)
    return tf.Variable(initial, name=nameb)

def conv2d(x, W):
    # 定义2维卷积操作
    return tf.nn.conv2d(x, W, strides=[1, 1, 1, 1],padding='VALID')

def max_pool2x2(x):
    # 定义一个2*2的池化层
    return tf.nn.max_pool(x, ksize=[1, 2, 2, 1], strides=[1, 2, 2, 1], padding='SAME')

def CNN_Net(x, W, B):
    # 定义一个三层CNN模型
    h_conv1 = tf.nn.relu(conv2d(x, W['w_conv1'])+B['b_conv1'])
    h_pool1 = max_pool2x2(h_conv1)

    h_conv2 = tf.nn.relu(conv2d(h_pool1, W['w_conv2'])+B['b_conv2'])
    h_pool2 = max_pool2x2(h_conv2)

    h_conv3 = tf.nn.relu(conv2d(h_pool2, W['w_conv3'])+B['b_conv3'])
    h_pool3 = max_pool2x2(h_conv3)

    h_pool3_flat = tf.reshape(h_pool3, [-1, 11*11*128])
    h_fc1 = tf.nn.relu(tf.matmul(h_pool3_flat, W['w_fc1'])+B['b_fc1']) # 定义全连接层

    h_fc2 = tf.nn.relu(tf.matmul(h_fc1, W['w_fc2'])+B['b_fc2'])
    h_fc2_drop = tf.nn.dropout(h_fc2, keep_prob=keep_prob) # 通过drop_out防止过拟合

    return h_fc2_drop

# 分别定义不同层的权重和偏置,保存在字典中
W = {
    'w_conv1': weights_variable(shape=[3, 3, 1, 32], namew='w1'),
    'w_conv2': weights_variable(shape=[2, 2, 32, 64], namew='w2'),
    'w_conv3': weights_variable(shape=[2, 2, 64, 128], namew='w3'),
    'w_fc1': weights_variable(shape=[11*11*128, 500], namew='wf1'),
    'w_fc2': weights_variable(shape=[500, 500], namew='wf2'),
    'w_fc3': weights_variable(shape=[500, 30], namew='wf3'),}

B = {
    'b_conv1': biases_variable(shape=[32], nameb='b1'),
    'b_conv2': biases_variable(shape=[64], nameb='b2'),
    'b_conv3': biases_variable(shape=[128], nameb='b3'),
    'b_fc1': biases_variable(shape=[500], nameb='bf1'),
    'b_fc2': biases_variable(shape=[500], nameb='bf2'),
    'b_fc3': biases_variable(shape=[30], nameb='bf3')
}

# 创建模型保存的文件夹
if not os.path.exists('ckpt_model'):
    os.makedirs('ckpt_model')
# 声明张量
x_ = tf.placeholder(tf.float32, shape=[None, 96, 96, 1], name='input') # x是我们输入的图片矩阵,大小为96*96
y_ = tf.placeholder(tf.float32, shape=[None, 30], name='y') # y是训练集中关键点的标签,用于训练中的梯度下降
keep_prob = tf.placeholder(tf.float32, name='keep_prob')

h_fc2_drop = CNN_Net(x_, W, B)

# 在输出层进行+0.0操作,命名输出
y_conv = tf.add(
        tf.matmul(h_fc2_drop, W['w_fc3'])+B['b_fc3'], 0.0, name='output')
# 用output命名输出结果(关键点的坐标)

# 定义损失函数
loss = tf.sqrt(tf.reduce_mean(tf.square(y_-y_conv)))
train_step = tf.train.AdamOptimizer(learning_rate=learning_rate).minimize(loss)

init = tf.initialize_all_variables() # 用于初始化变量
saver = tf.train.Saver() # 用于保存模型
loss_list = []
with tf.Session() as sess:
    sess.run(init) # 初始化变量
    X, y = input_data()
    # 拆分训练集,便于后续进行交叉验证
    X_valid, y_valid = X[:valid_size], y[:valid_size]
    X_train, y_train = X[valid_size:], y[valid_size:]

    TRAIN_SIZE = X_train.shape[0] # 获取数据集的大小
    train_index = list(range(TRAIN_SIZE))
    X_train, y_train = X_train[train_index], y_train[train_index]

    for epoch in range(train_epoches):
        np.random.shuffle(train_index) # 打乱顺序,便于训练
        X_train, y_train = X_train[train_index], y_train[train_index] # 获取mini-batch
        for j in range(0, TRAIN_SIZE, batch_size):
            # 训练模型,每次训练取batch_size张图片进行训练
            sess.run(train_step, feed_dict={
                     x_: X_train[j:j+batch_size], y_: y_train[j:j+batch_size], keep_prob: 0.7})

        # 计算损失率
        loss_rate = sess.run(
            loss, feed_dict={x_: X_valid, y_: y_valid, keep_prob: 1.0})
        loss_list.append(loss_rate)
        print("epoch:{0} loss:{1}".format(epoch, loss_rate*96.0))

    saver.save(sess, 'ckpt_model/model.ckpt') # 保存模型

# 绘制损失率变化曲线
plt.plot(loss_list, 'k-', label='Loss', color='blue')
plt.title('LOSS_RATE')
plt.xlabel('Generation')
plt.ylabel('Loss')
plt.legend(loc='lower right')
plt.show()
训练结果:
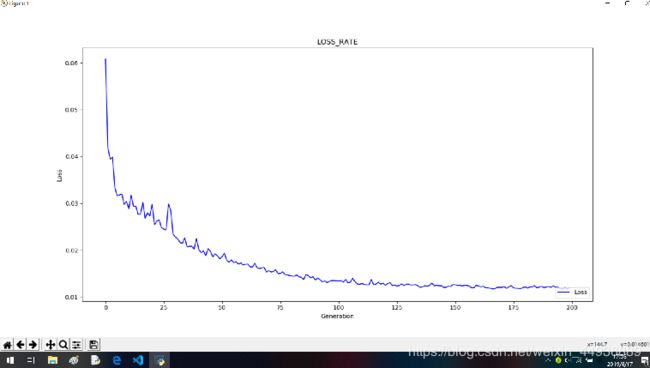
训练时间大概是1小时左右,如果不求精确度的话,可以把train_epoches调小一点。因为我们可以看到大概 100 epoch左右loss就已经收敛了,所以调到120左右也是合理的。
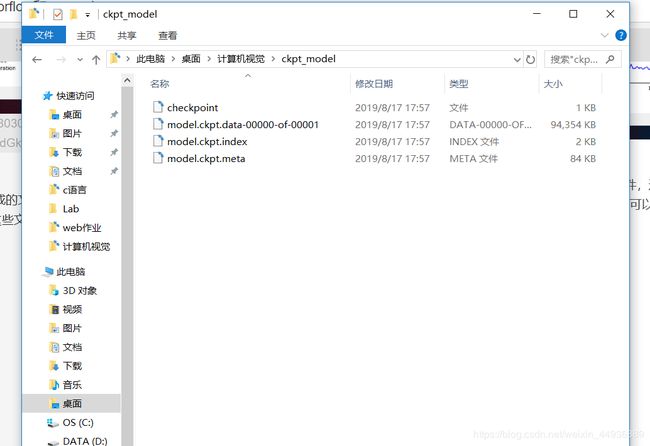
训练结束后,我们在ckpt_model文件夹可以看到生成的文件,这些文件保存了我们训练模型的计算图。以后我们进行识别或者继续训练,只需要加载这些文件,就可以读取到我们的训练过的模型。

进度~
- 前期准备
- 人脸检测程序
- 搭建和训练关键点识别框架
- 保存和调用模型
后记:
到现在为止,我们已经完成了最重要的部分——训练模型,在最后一篇中我们会讲解如何调用我们训练好的模型,以及如何把我们摄像头检测到的face传入我们调用的计算图中~
