基于DOTS的UI解决方案
自从在GDC 2019上,Unity分享了名为“连接DOTS:Unity面向数据技术栈”的技术演讲,关于DOTS的讨论和应用一直在业内备受关注。前段时间我们连载的“Unity手游实战”系列中,也有对于DOTS的相关论述。
本文要给大家介绍的是supron在社区中与大家分享的高性能UI解决方案:Pure DOTS UI System[3]。
The current Unity UI solution is very powerful but struggles with performance (especially with many objects instantiation). DOTS seems like a great solution to this problem.
DOTS UI开源库:https://lab.uwa4d.com/lab/5d3a18365b9dec79de05d348
一、功能
DOTS UI System可以将Unity的UI系统UGUI的组件转化映射成Entity,利用ECS、JobSystem、Burst的性能优势,明显提升UI运行效率。除此之外,在网格重建部分还使用到了2019.3的新特性:Advanved Mesh API[5],可以直接写入Mesh数据,运行效率更快。
目前DOTS UI的版本为0.3.0,功能还是非常不完善的。目前已支持的主要功能如下:
Canvas Render mode:
- Screen space camera
- Screen space overlay
Canvas Scaling mode:
- Constant pixel size
- Constant physical size
Controls:
- Image
- TextMeshProUGUI (SDF fonts, not all features are supported)
- TMP_InputField (very simple implementation)
- Selectable
- Button
- RectMask2D
- CanvasScaler
- ScrollRect
Input events:
- Down
- Up
- Click
- Enter
- Exit
- Selected
- Deselected
- BeginDrag
- Drag
- EndDrag
- Drop
- Button click
- InputField OnEndEdit
- InputField OnReturn
二、使用
在开源库中下载资源后,将com.dotsui.core和com.dotsui.hybrid两个资源包复制到项目工程(Unity 2019.3.0a8以上)的Packages路径下进行导入,则Unity会自动导入其依赖的Entities、Jobs等Package。
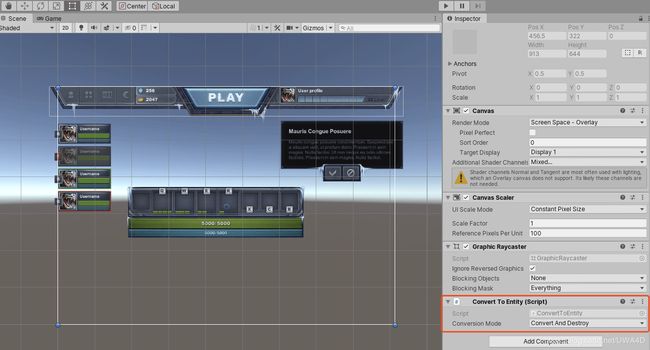
打开一个UI预制体,在Canvas节点挂上ConvertToEntity[6]脚本,表示需要将这个UI转换成Entity。默认选择的Conversion Mode为Convert And Destroy,即替换为Entity之后会把原有的UGUI组件销毁。
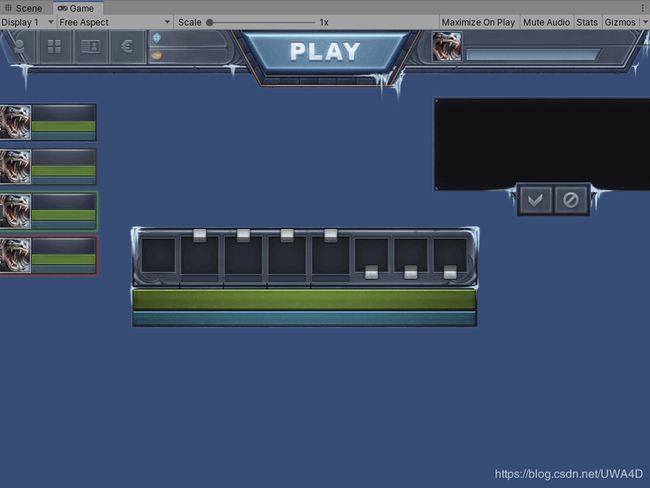
运行一下,即可看到运行时生效的效果。
由于测试的Prefab中的Text不是使用TextMeshPro做的,所以没有成功转换,但这并不影响其它组件的正常运行。
多做几次测试之后,还会发现RectTransform的Rotation和Scale属性没有被正确显示。这是因为作者在第一个版本中简化了很多属性,其类定义如下:
public struct RectTransform : IComponentData
{
    public float2 AnchorMin;
    public float2 AnchorMax;
    public float2 Position;
    public float2 SizeDelta;
    public float2 Pivot;
}
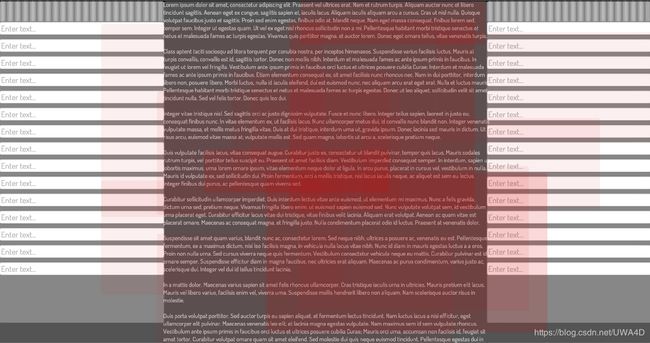
作者还在工程中提供了Sample示例,展示了目前支持的几种效果。
如果需要使用脚本控制UI变化,也要用ECS的方式来编写。可以参考Sample中的简单例子(如:FpsCounter、FPSSystem)进行改写。
三、实现
1、Conversion
Conversion的部分相对比较简单,核心在于将Canvas、Image等组件转换为Enity。
以上文提到的RectTransfrom为例,其Convert函数的代码如下:
private void Convert(RectTransform transform)
{
    var entity = GetPrimaryEntity(transform);

    DstEntityManager.AddComponentData(entity, new DotsUI.Core.RectTransform()
    {
        AnchorMin = transform.anchorMin,
        AnchorMax = transform.anchorMax,
        Pivot = transform.pivot,
        Position = transform.anchoredPosition,
        SizeDelta = transform.sizeDelta,
    });

    DstEntityManager.AddComponent(entity, typeof(WorldSpaceRect));
    DstEntityManager.AddComponent(entity, typeof(WorldSpaceMask));

    DstEntityManager.RemoveComponent(entity, typeof(Translation));
    DstEntityManager.RemoveComponent(entity, typeof(Rotation));
    DstEntityManager.RemoveComponent(entity, typeof(NonUniformScale));
}
这部分相关的主要相关代码在Dots UI Core Package当中。
2、UI Mesh Batching
UI Mesh的合批处理是UI模块非常重要的部分,在这部分DOTS UI将需要渲染的网格信息进行合批并存储起来,为之后的渲染步骤做准备。在DOTS UI中这一步主要分成两步完成。
(1)信息收集
首先定义一个NativeHashMap
public NativeHashMap EntityToMaterial;
这里面MaterialInfo包含两个信息,一个是Material类型(Sprite、Text),另一个是MaterialId,在这里指Sprite或Text中记录的NativeMaterialId,实质为Sprite或Text的SCD(SharedComponentData[4])在Chunk中的Index。
spriteData.NativeMaterialId = chunk.GetSharedComponentIndex(assetType);
到网格更新这一步时,遍历ChunkArray中的Chunk,将SpriteImage和TextRenderer的上述信息记录到HashMap中。
(2)网格合批
在MeshBatching的Job中,将上一步的HashMap作为输入,并递归遍历节点之间的父子关系构建三个DynamicBuffer:
private void GoDownRoot(Entity parent,
  ref DynamicBuffer vertices,
  ref DynamicBuffer triangles,
  ref DynamicBuffer subMeshes) {...}
如果连续两个Entity的Material信息相同,则记录到一个SubMesh中,完成合批。如果前后两个Entity信息不同,就会创建一个新的SubMesh,也就是一个新的DrawCall。
bool materialAssigned = EntityToMaterial.TryGetValue(entity, out MaterialInfo material);
if (!materialAssigned)
{
    material.Type = SubMeshType.SpriteImage;
    material.Id = -1;
}

if (m_CurrentMaterialId != material.Id)
{
    subMeshes.Add(new SubMeshInfo()
{
    Offset = triangles.Length,
    MaterialId = material.Id,
    MaterialType = material.Type
});
    m_CurrentMaterialId = material.Id;
}

int startIndex = vertices.Length;
if(VertexPointerFromEntity.Exists(entity))
    VertexPointerFromEntity[entity] = new ElementVertexPointerInMesh(){VertexPointer = startIndex};
3、RenderSystem
完成了UI网格的合批之后,就可以根据已生成的顶点信息、SubMesh等数据生成Mesh,并将这些Buffer信息上传至GPU,最后调用CommandBuffer的DrawMesh进行绘制了。也就是在这一步中使用到了Mesh.SetVertexBufferData等2019.3新支持的Mesh API,可以传递NativeArray参数直接修改Mesh,达到了效率的提升。
但由于这一步的Mesh和CommandBuffer都必须在主线程中完成,所以并不像网格合批可以得益于多线程带来的巨大效率提升。
其主要实现逻辑在HybridRenderSystem.cs中,以下为Build CommandBuffer部分的实现逻辑:
private void BuildCommandBuffer(DynamicBuffer vertexArray, DynamicBuffer indexArray, DynamicBuffer subMeshArray, Mesh unityMesh, CommandBuffer canvasCommandBuffer)
{
    using (new ProfilerSample("RenderSystem.SetVertexBuffer"))
    {
        unityMesh.Clear(true);
        unityMesh.SetVertexBufferParams(vertexArray.Length, m_MeshDescriptors[0], m_MeshDescriptors[1], m_MeshDescriptors[2], m_MeshDescriptors[3], m_MeshDescriptors[4]);
    }
    using (new ProfilerSample("UploadMesh"))
    {
        unityMesh.SetVertexBufferData(vertexArray.AsNativeArray(), 0, 0, vertexArray.Length, 0);
        unityMesh.SetIndexBufferParams(indexArray.Length, IndexFormat.UInt32);
        unityMesh.SetIndexBufferData(indexArray.AsNativeArray(), 0, 0, indexArray.Length);
        unityMesh.subMeshCount = subMeshArray.Length;
        for (int i = 0; i < subMeshArray.Length; i++)
        {
            var subMesh = subMeshArray[i];
            var descr = new SubMeshDescriptor()
            {
                baseVertex = 0,
                bounds = default,
                firstVertex = 0,
                indexCount = i < subMeshArray.Length - 1
                    ? subMeshArray[i + 1].Offset - subMesh.Offset
                    : indexArray.Length - subMesh.Offset,
                indexStart = subMesh.Offset,
                topology = MeshTopology.Triangles,
                vertexCount = vertexArray.Length
            };
            unityMesh.SetSubMesh(i, descr);
        }
        unityMesh.UploadMeshData(false);
    }

    using (new ProfilerSample("BuildCommandBuffer"))
    {
        canvasCommandBuffer.Clear();
        canvasCommandBuffer.SetProjectionMatrix(Matrix4x4.Ortho(0.0f, Screen.width, 0.0f, Screen.height, -100.0f, 100.0f));
        canvasCommandBuffer.SetViewMatrix(Matrix4x4.TRS(Vector3.zero, Quaternion.identity, Vector3.one));
        for (int i = 0; i < unityMesh.subMeshCount; i++)
        {
            var subMesh = subMeshArray[i];
            var renderMaterial = SetMaterial(ref subMesh);
            canvasCommandBuffer.DrawMesh(unityMesh, float4x4.identity, renderMaterial, i, -1, m_TemporaryBlock);
        }
    }
}
四、性能
以下为作者给出的性能对比数据:
这里需要说明的是,由于两者的渲染开销几乎相同,所以主要比较的是UI重建开销。
这里也测试了一个简单的1000个字符更新的Demo,在两个中低端设备上运行Demo,通过Timeline记录了两种UI的重建耗时得到数据如下。
可见DOTS UI在移动端设备上确实是有明显的性能优势。虽然日后必然会随着功能的扩充,逐渐减小这种优势,但目前的实现方式上也还是有优化空间的。所以DOTS UI的性能表现很值得期待。
相关链接:
[1]DOTS UI开源库:https://lab.uwa4d.com/lab/5d3a18365b9dec79de05d348
[2]DOTS UI Github:https://github.com/supron54321/DotsUI
[3]DOTS UI介绍:https://forum.unity.com/threads/showcase-pure-dots-ui-system-detailed-description-feedback.688531/
[4]SharedComponentData:https://docs.unity3d.com/Packages/[email protected]/manual/shared_component_data.html
[5]Mesh API:https://docs.unity3d.com/2019.3/Documentation/ScriptReference/Mesh.html
[6]ConvertToEntity:https://docs.unity3d.com/Packages/[email protected]/api/Unity.Entities.ConvertToEntity.html
今天的推荐就到这儿啦,或者它可直接使用,或者它需要您的润色,或者它启发了您的思路......
请不要吝啬您的点赞和转发,让我们知道我们在做对的事。当然如果您可以留言给出宝贵的意见,我们会越做越好。
【博物纳新】是UWA旨在为开发者推荐新颖、易用、有趣的开源项目,帮助大家在项目研发之余发现世界上的热门项目、前沿技术或者令人惊叹的视觉效果,并探索将其应用到自己项目的可行性。很多时候,我们并不知道自己想要什么,直到某一天我们遇到了它。
更多精彩内容请关注:lab.uwa4d.com


