微服务的脚手架Jhipster集成angular和vue的使用
JHipster简介
JHipster或者称Java Hipster,是一个应用代码产生器,能够创建Spring Boot + AngularJS的应用。开源项目地址:JHipster/Github。
JHipster使用Node.js和Yeoman产生Java应用代码,使用Maven(Gradle)运行产生的代码,产生代码有如下关键特征:
- src/main/java 目录有Spring Boot 配置类在config包中,JHipster使用Spring的Java
- 配置,没有XML配置. JPA实体或MongoDB文档类是在domain包. JPA实体使用缓存和auto-generated 主键配置.如果你使用JHipster产生你的JPA实体, 可以创建1:N和N:N关系。
- 在repostiory包中是Spring Data 仓储.
- 可选,你有通常@Service-beans 在服务层. 这些服务通常是配置为事务的 安全的业务对象。
- REST 端点存在web.rest 包中, 支持Spring MVC的REST
- JHipster也产生 Liquibase 改变日志文件,用来处理数据库更新,增加一个实体将创建特定的schema更新,这将会版本化,当应用重启时可被执行。
- 集成Spring的 Test 上下文测试支持.
- Hipster 创建完整可用的AngularJS 前端,使用CRUD来管理你产生的实体。
使用JHipster开发
一旦使用JHipster产生实体和服务以及前端AngularJS的CRUD以后你就需要开始编码,也就是说,JHipster帮助你完成项目的初始化配置模板。
JHipster提供命令行工具来构建和更新你的应用,Grunt或Gulp.js帮助你构建前端,比如运行grunt serve将启动由Grunt管理的浏览器,当你的HTML JS或CSS代码变动时,就会自动刷新;Bower让你升级或安装Javascript或CSS库包,比如运行bower install ng-table 将安装 ng-table。
你还能使用Spring Boot Maven插件从命令行运行你的Spring Boot应用:mvn spring-boot:run
你能使用Maven Liquibase 的diff自动产生一个Liquibase 改变日志,运行mvn liquibase:diff,将能检查现有的数据库表结构和你已经修改JPA代码有哪些差别,产生改变日志是为了自动更新你的数据库表结构。
你也能使用Docker设置你的开发环境,特定的jhipster-docker项目专门为此创建。
在产品环境管理应用
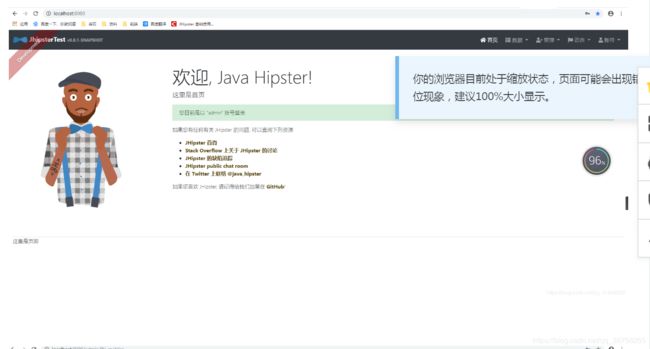
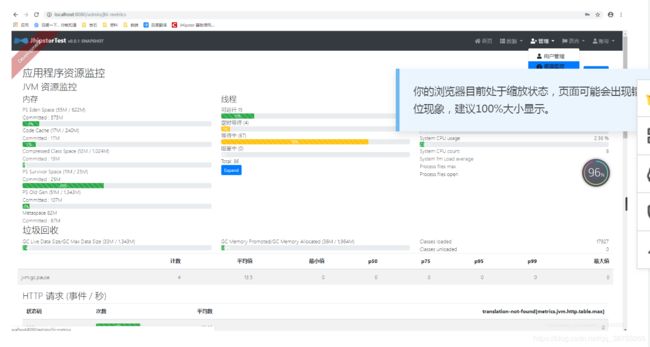
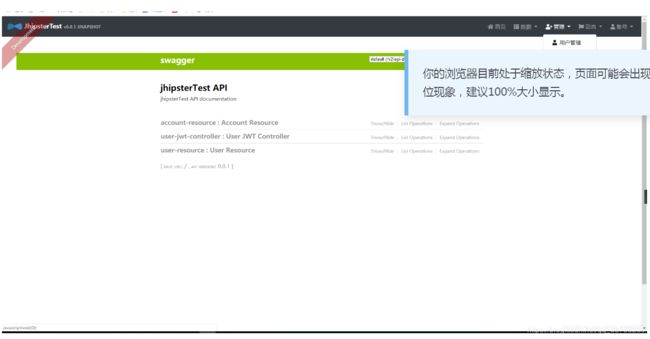
JHipster应用已经默认配置了admin用户,能够访问管理员的页面,三个最有趣的页面是:API页面(使用Swagger),度量页面和日志页面。API页面是陈列了你的Spring Boot应用的REST API,能够让前端开发人员使用Angular.JS调用;度量页面是使用Dropwizard Metric,让你能够发现你应用性能有关细节,包括Spring bean的方法性能;日志页面使用Logback而且让你可以在运行时改变日志级别,比如你可以改变Spring Security日志级别显示出有关你的安全配置的细节信息。
JHipster有development 和 production模型,production模型能最小化和优化前端,比如Gzip压缩,Http缓存等,为了测试production模型,使用prod配置(Maven和Gradle都适用)运行你的应用:mvn spring-boot:run -Pprod。使用Chrome开发工具,你能检查你应用的性能。
安装
1. 安装Java环境
2. 安装npm(安装nodejs时已安装) npm install –g npm
3. 安装Yeoman 命令:npm install –g yo
4. 安装Bower: 命令:npm install –g bower
5. 安装Gulp:命令 npm install –g gulp-cli
6.安装Jhipster 命令:npm install –g generator-jhipster
7.创建项目目录 mkdir 文件名称
8.想使用jhipster生成vue的项目的话就必须要安装 npm jhipster --blueprint vuejs 进行安装。
安装的时候可以选择是用vue还是angular的项目
生成项目
个人喜欢把项目建在F盘  文件夹(jhipster)  F:\jhpster

  cmd 到 F:\jhpste

指令:yo jhipster或者jhipster
出现以下:
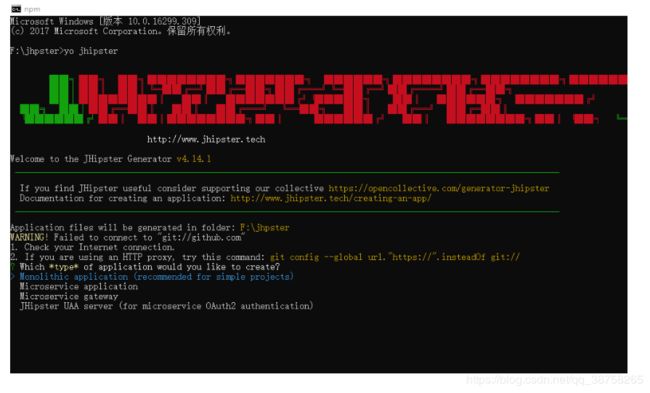
根据一步步step提示选择构建自己的服务项目
windows下:
以下demo选择微服务应用。实际中根据自己需求生产项目。
		1: Which *type* of application would you like to create? (Use arrow keys)
		   Monolithic application (recommended for simple projects)  //简单项目
		   Microservice application // 微服务应用
		   Microservice gateway // 微服务网关
		   JHipster UAA server (for microservice OAuth2 authentication) // 微服务认证
		2 :What is the base name of your application? (huhuawei)
		    输入服务名称
		3: As you are running in a microservice architecture, on which port would like
		    your server to run? It should be unique to avoid port conflicts. (8081)
		    设置服务的端口号
		4:What is your default Java package name? (com.mycompany.myapp)
		    设置包名
		5:Which service discovery server do you want to use? (Use arrow keys)
		     JHipster Registry (uses Eureka)
		     Consul
		     No service discovery
		    选择注册中心。一般选择Registry比较多
		6:Which *type* of authentication would you like to use? (Use arrow keys)
		     JWT authentication (stateless, with a token)  // jwt
		     OAuth 2.0 / OIDC Authentication (stateful, works with Keycloak and
		     Okta)//Oauth2 OIDC 认证服务
		     Authentication with JHipster UAA server (the server must be generated
		     separately) // Oauth2+jwt Uaa认证服务
		     选择授权中心
		7: Which *type* of database would you like to use?
		      SQL (H2, MySQL, MariaDB, PostgreSQL, Oracle, MSSQL)
		      MongoDB
		      Couchbase
		      No database
		      Cassandra
		      选择数据库支持Nosql跟常见RDMB数据库
		8:? Which *production* database would you like to use? (Use arrow keys)
		      MySQL
		      MariaDB
		      PostgreSQL
		      Oracle
		      Microsoft SQL Server
		      选择数据库,这边会出现两次第一次是production 第二次是devlopment
		9:Do you want to use the Spring cache abstraction?
		     根据需求选择缓存
		10:Do you want to use Hibernate 2nd level cache? (Y/n)
		     是否支持二级缓存
		11: Would you like to use Maven or Gradle for building the backend? (Use
		      arrow keys)
		      Maven
		      Gradle
		12:Which other technologies would you like to use?
		       安装一些其他的组件。如ES,KAFKA之类的
		13:Would you like to enable internationalization support? (Y/n)
		       支持国际化?
		14: Please choose the native language of the application (Use arrow keys)
		        English
		        Estonian
		        Farsi
		        French
		        Galician
		        ........
		        选择本地支持的语言包含中文
		15:Please choose additional languages to install
		       可以额外安装其他语言
		16:Besides JUnit and Jest, which testing frameworks would you like to use?
		         Gatling
		         Cucumber
		       选择测试框架,针对微服务http接口测试,生成测试报告
		17:Would you like to install other generators from the JHipster Marketplace?
		       从jhipster市场中选择组件安装
启动项目
1、进入项目的目录下
通过mvnw或mvnw.cmd(windows)起启动项目.
2、将项目导入工具eclipse运行项目就启动成功了。
3、如果在项目构建的项目中有用到anglurjs 的时候,通过npm start 或者yarn start 启动前端项目。只能看看,不同登录。
4、生成生成环境的War包命令:mvnw –Pprod package
5、生成开发环境的war包命令:mvnw –Pdev package
6、进入路径地址然后执行命令:java –jar test-jhipster-0.0.1-SNAPSHOT.war
给项目中批量导入实体类、数据库表、操作数据库CRUD方法、API等
1、生成.jh文件(jhipster-jdl.jh )或者 .jdl 结尾的文件 (myMonolithApp.jdl )
文件的内容如下:
entity Region {
regionName String
}
entity Country {
	countryName String
}

// an ignored comment
/** not an ignored comment */
entity Location {
	streetAddress String,
	postalCode String,
	city String,
	stateProvince String
}

entity Department {
	departmentName String required
}

/**
 * Task entity.
 * @author The JHipster team.
 */
entity Task {
	title String,
	description String
}

/**
 * The Employee entity.
 */
entity Employee {
	/**
	* The firstname attribute.
	*/
	firstName String,
	lastName String,
	email String,
	phoneNumber String,
	hireDate Instant,
	salary Long,
	commissionPct Long
}

entity Job {
	jobTitle String,
	minSalary Long,
	maxSalary Long
}

entity JobHistory {
	startDate Instant,
	endDate Instant,
	language Language
}

enum Language {
    FRENCH, ENGLISH, SPANISH
}

relationship OneToOne {
	Country{region} to Region
}

relationship OneToOne {
	Location{country} to Country
}

relationship OneToOne {
	Department{location} to Location
}

relationship ManyToMany {
	Job{task(title)} to Task{job}
}

// defining multiple OneToMany relationships with comments
relationship OneToMany {
	Employee{job} to Job,
	/**
	* A relationship
	*/
	Department{employee} to
	/**
	* Another side of the same relationship
	*/
	Employee
}

relationship ManyToOne {
	Employee{manager} to Employee
}

// defining multiple oneToOne relationships
relationship OneToOne {
	JobHistory{job} to Job,
	JobHistory{department} to Department,
	JobHistory{employee} to Employee
}

// Set pagination options
paginate JobHistory, Employee with infinite-scroll
paginate Job with pagination

// Use Data Transfert Objects (DTO)
// dto * with mapstruct

// Set service options to all except few
service all with serviceImpl except Employee, Job

// Set an angular suffix
// angularSuffix * with mySuffix
如果需要连数据库:打开之前构建的项目的application-dev.yml配置文件找到数据库的配置改成自己用的数据库
  datasource:
	    type: com.zaxxer.hikari.HikariDataSource
	    url: jdbc:mysql://localhost:3306/jhipsterTest4?useUnicode=true&characterEncoding=utf8&useSSL=false&useLegacyDatetimeCode=false&serverTimezone=UTC
	    username: root
	    password: 123456
如果您不想重新生成实体,则在导入 JDL 时,可以使用 --json-only 标志跳过实体创建部分,并仅在 .jhipster 文件夹中生成 json 文件
jhipster import-jdl ./my-jdl-file.jdl --json-only
默认情况下,import-jdl 仅重新生成已更改的实体,如果需要重新生成所有的实体,则传递 --force 标志。请注意,这将覆盖对实体文件的所有本地更改。
jhipster import-jdl ./my-jdl-file.jdl --force
运行成功之后,然后通过
mvnw.cmd 启动项目。
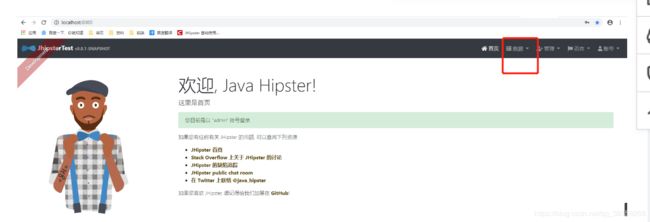
启动之后:首先:数据有实体类、然后在你的数据库中有实体类对应的表示成功了
如果你觉得安装这些环境太麻烦,你又熟悉docker的基本命令,那建议使用docker去生成项目;
选择linux服务器,安装docker;
yum install -y yum-utils device-mapper-persistent-data lvm2
yum-config-manager --add-repo https://download.docker.com/linux/centos/docker-ce.repo
yum list docker-ce --showduplicates | sort -r
sudo yum install -y docker-ce
sudo systemctl start docker
sudo systemctl enable docker

拉取jhipster官方镜像
docker pull jhipster/jhipster:master

启动jhipster镜像,选择一个空文件/jhipster夹挂载到容器中
docker container run --name jhipster
-v  /jhipster:/home/jhipster/app
-v  ~/.m2:/home/jhipster/.m2
-p 8080:8080
-p 9000:9000
-p 3001:3001
-d  -t jhipster/jhipster

进入容器中
docker container exec -it --user root jhipster bash
然后就可以生成项目了。与windows上操作无差别
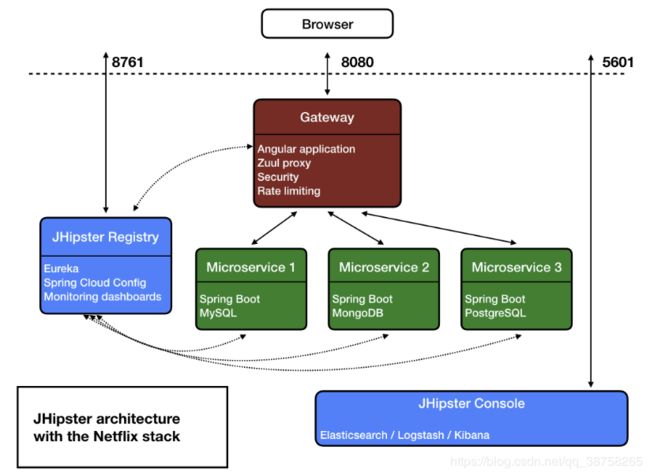
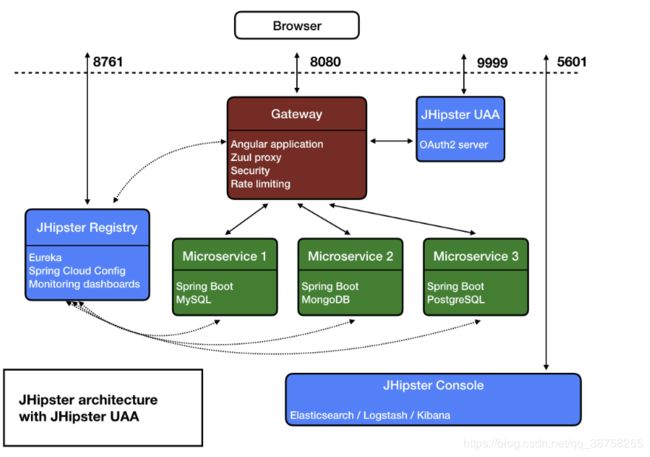
项目的组成简单介绍
Gateway: springcloud Zuul Proxy 进行动态路由微服务。
Registry:主要封装了Eureka以及配置中心Config Server。
Jhipster Console:封装了Elk监控 以及 sleuth zipkin 等分布式链路监控组件。
Jhipster Uaa: 采用UAA用户登录认证 OAUTH2集中式认证,默认不使用的话则是JWT无状态认证
总结
上述仅仅是大体的架构,Jhipster内部使用了很多插件来进行敏捷开发,包括实体类JDL快速生成从数据库到Controller代码,开发效率非常之高。适合中小型企业采用,而且Jhipster支持DockerFile与Compose文件生成,可以帮助我们快速容器化服务部署。
