java实现串口通信
1.搭建串口通信开发环境
1.1. 下载串口通信支持库
下载javacomm20-win32.zip
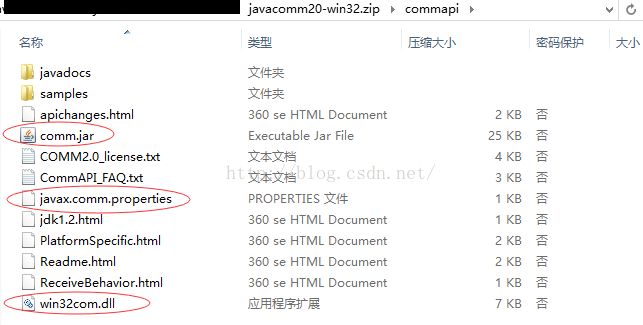
图1 javacomm20-win32目录结构图
打开图1中的Readme.html,进入Installation Instructions and Platform Specific notes 就可以看到环境的搭建方法,翻译过来如下:
a).复制win32com.dll 到
C:\>copyc:\commapi\win32com.dll to c:\jdk1.1.6\bin
b).复制comm.jar 到
C:\>copyc:\commapi\comm.jar c:\jdk1.1.6\lib
c).复制javax.comm.properties 到
C:\>copyc:\commapi\javax.comm.properties c:\jdk1.1.6\lib
d).其中b)的comm.jar可以选择直接复制到项目中,如果放入
C:\>setCLASSPATH=c:\jdk1.1.6\lib\comm.jar;%classpath%
(The javax.comm.properties file must be installed. If it is not, no portswill be found by the system.)
2.串口通信类编写
<下面的串口通信类可以直接copy到项目中使用>
【SerialIO.java】
public class SerialIO
{
	private SerialPort serialPort = null;	//串口对象
	private InputStream is = null;	//输入流
	private OutputStream os = null;	//输出流

	private int datebits = DATABITS_8;	//默认8位数据位
	private int stopbits = STOPBITS_1;	//默认1位停止位
	private int parity = PARITY_NONE;	//默认无校验位

	public final static int DATABITS_5 = SerialPort.DATABITS_5;
	public final static int DATABITS_6 = SerialPort.DATABITS_6;
	public final static int DATABITS_7 = SerialPort.DATABITS_7;
	public final static int DATABITS_8 = SerialPort.DATABITS_8;

	public final static int STOPBITS_1 = SerialPort.STOPBITS_1;
	public final static int STOPBITS_1_5 = SerialPort.STOPBITS_1_5;
	public final static int STOPBITS_2 = SerialPort.STOPBITS_2;

	public final static int PARITY_EVEN = SerialPort.PARITY_EVEN;
	public final static int PARITY_MARK = SerialPort.PARITY_MARK;
	public final static int PARITY_NONE = SerialPort.PARITY_NONE;
	public final static int PARITY_ODD = SerialPort.PARITY_ODD;
	public final static int PARITY_SPACE = SerialPort.PARITY_SPACE;

	/**
	 * 设置数据位
	 * @param databits
	 * DATABITS_5

	 * DATABITS_6

	 * DATABITS_7

	 * DATABITS_8
	 */
	public void setDatabits(int databits)
	{
		this.datebits = databits;
	}

	/**
	 * 设置停止位
	 * @param stopbits
	 * STOPBITS_1

	 * STOPBITS_1_5

	 * STOPBITS_2
	 */
	public void setStopbits(int stopbits)
	{
		this.stopbits = stopbits;
	}

	/**
	 * 设置校验位
	 * @param parity
	 * PARITY_EVEN

	 * PARITY_MARK

	 * PARITY_NONE

	 * PARITY_ODD

	 * PARITY_SPACE
	 */
	public void setParity(int parity)
	{
		this.parity = parity;
	}

	/**
	 * 打开串口
	 * @param com	串口号
	 * @param baud	波特率
	 * @return
	 * true - 成功

	 * false - 失败
	 */
	public boolean open(int com, int baud)
	{
		if ( !isPortBaudSupported(baud) )
		{
			System.out.println("暂不支持的波特率");
			return false;
		}

		try
		{
			CommPortIdentifier portId = CommPortIdentifier.getPortIdentifier("COM" + com);
			serialPort = (SerialPort)portId.open("DeviceTestSystem", 0);	 //立即返回
			serialPort.setSerialPortParams(baud, datebits, stopbits, parity);//设置串口波特率,数据位,停止位,校验位
			is = serialPort.getInputStream();
			os = serialPort.getOutputStream();
		}
		catch(NoSuchPortException nspe)
		{
			nspe.printStackTrace();
			return false;
		}
		catch(PortInUseException piue)
		{
			piue.printStackTrace();
			return false;
		}
		catch(UnsupportedCommOperationException ucoe)
		{
			ucoe.printStackTrace();
			return false;
		}
		catch(IOException ioe)
		{
			ioe.printStackTrace();
			return false;
		}

		return true;
	}

	/**
	 * 设置串口超时时间
	 * @param timeout	超时时间(秒),若为-1则永不超时
	 * @return
	 * true - 成功

	 * false - 失败
	 */
	public boolean setReceiveTimeout(int timeout)
	{
		if ( serialPort == null )
		{
			System.out.println("尚未初始化SerialPort");
			return false;
		}

		try
		{
			if ( timeout < -1 )
			{
				return false;
			}
			else if ( timeout == -1 )
			{
				serialPort.disableReceiveTimeout();
			}
			else
			{
				serialPort.enableReceiveTimeout(1000*timeout);
			}
		}
		catch(UnsupportedCommOperationException ucoe)
		{
			ucoe.printStackTrace();
			return false;
		}

		return true;
	}

	/**
	 * 读数据
	 * @return	当前的字节,如果为-1,代表已读到末尾或者超时,如果为-2,代表读取异常
	 */
	public int read()
	{
		if ( is == null )
		{
			System.out.println("尚未初始化InputStream");
			return -2;
		}

		try
		{
			return is.read();
		}
		catch(IOException ioe)
		{
			ioe.printStackTrace();
			return -2;
		}
	}

	/**
	 * 读数据
	 * @param readByte 存放读取数据的字节数组
	 * @return	总共读取的字节数,如果为0,代表超时,如果为-1,代表已读到末尾,如果为-2,代表读取异常
	 */
	public int read(byte[] readByte)
	{
		if ( is == null )
		{
			System.out.println("尚未初始化InputStream");
			return -2;
		}

		try
		{
			return is.read(readByte);
		}
		catch(IOException ioe)
		{
			ioe.printStackTrace();
			return -2;
		}
	}

	/**
	 * 写数据
	 * @param writeByte	存放写入数据的字节数组
	 * @return
	 * true - 成功

	 * false - 失败
	 */
	public boolean write(byte[] writeByte)
	{
		if ( os == null )
		{
			System.out.println("尚未初始化OutputStream");
			return false;
		}

		try
		{
			os.write(writeByte);
			os.flush();
		}
		catch(IOException ioe)
		{
			ioe.printStackTrace();
			return false;
		}

		return true;
	}

	/**
	 * 关闭串口
	 * @return
	 * true - 成功

	 * false - 失败
	 */
	public boolean close()
	{
		if ( serialPort != null )
		{
			if ( is != null )
			{
				try
				{
					is.close();
				}
				catch(IOException ioe)
				{
					ioe.printStackTrace();
					return false;
				}
			}

			if ( os != null )
			{
				try
				{
					os.close();
				}
				catch(IOException ioe)
				{
					ioe.printStackTrace();
					return false;
				}
			}

			serialPort.close();
			serialPort = null;
			return true;
		}

		return true;
	}

	/*
	 * 检查波特率是否支持
	 * @param portBaud	波特率
	 */
	private boolean isPortBaudSupported(int baud)
	{
		int[] supportedPortBaudList = {300, 600, 1200, 2400, 4800, 9600, 19200, 38400, 57600, 115200};	//支持的波特率
		for ( int i = 0; i < supportedPortBaudList.length; i++ )
		{
			if ( baud == supportedPortBaudList[i] )
			{
				return true;
			}
		}

		return false;
	}
}3.串口通信类使用方法
SerialIO serialIO = new SerialIO();
【打开串口】
serialIo.open(com,baud); //根据需要传入相应的串口号和波特率
【像串口写数据】
serialIO.write(byteArray); //写入数据byte[]
【从串口读取数据】
serialIO.read(byteArrayPointer); //读取数据 byte[]
serialIO.read(); //读取数据 byte
【关闭串口】
serialIO.close(); //关闭串口