ELK你这么学就对了-Elasticsearch篇
ELK你这么学就对了-Elasticsearch篇
- Elasticsearch安装(6.8.5为例)
- 一、主机层面设置
- 1.1 最大化限制swap使用
- 1.2 虚拟内存区域
- 1.3 java配置,建立软连接
- 1.4 安装备份软件
- 1.5 关闭防火墙
- 1.6 关闭selinux
- 二、ES初始化
- 2.1 创建目录和用户
- 2.1.1 创建对应用户
- 2.1.2 创建目录
- 2.2 ES软件下载和安装
- 2.3 授权
- 2.4 修改配置文件
- 三. ES插件安装
- 3.1 X-pack介绍
- 3.2 X-pack安装及使用
- 3.2.1 默认生成elastic-stack-ca.p12和elastic-certificates.p12
- 3.2.2 在配置文件增加认证配置
- 3.2.3 生成密码
- 3.2.4 通过info api查看x-pack的基本功能
- 3.2.5 查看权限
- 3.2.6 修改密码
- 3.2.7 role_mapping api的使用
- (一)将user角色授予所有的用户
- (二)将user和admin角色授权给特定的用户
- (三)将超级用户角色授权给esadmin 和 cn=admin,dc=example,dc=com 组
- (四)授权给特定领域
- 3.2.8 查看和创建角色
- (一)查看所有角色
- (二)创建my_admin_role角色
- (三)删除角色
- 3.2.9 查看和创建用户
- (一)查看所有用户
- (二)创建用户
- (三)删除用户
- (四)回收用户权限
- 3.3 Cerebro 辅助组件的安装
- 3.3.1 Cerebro简介
- 3.3.2 Cerebro安装
- (一)简单安装
- (二)做成服务
- 3.3.3 Cerebro使用
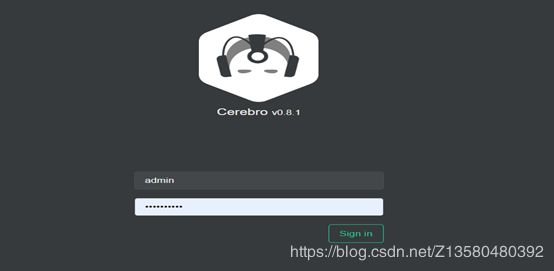
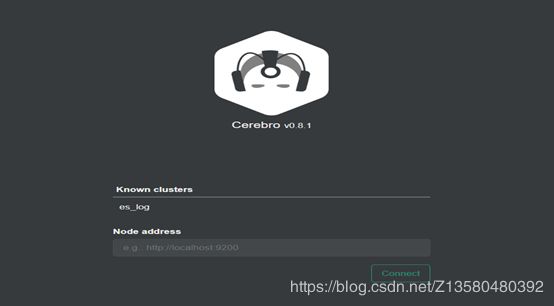
- (一) 登录
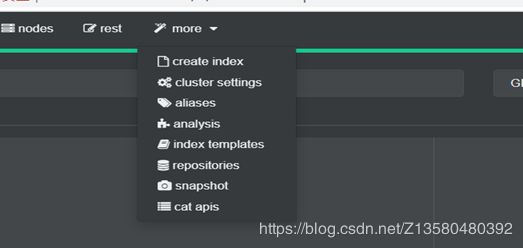
- (二)概要信息
- 3.4 Head组件安装
- (一)安装步骤
- (二)在Elasticsearch增加head配置
- (三)浏览器展示
Elasticsearch安装(6.8.5为例)
一、主机层面设置
1.1 最大化限制swap使用
echo 1 > /proc/sys/vm/swappiness
echo "vm.swappiness=1" >> /etc/sysctl.conf
sysctl -p
1.2 虚拟内存区域
echo "vm.max_map_count = 262144" >> /etc/sysctl.conf && sysctl -p
vim /etc/security/limits.conf
elasticsearch soft memlock unlimited
elasticsearch hard memlock unlimited
elasticsearch soft nofile 65536
elasticsearch hard nofile 65536
elasticsearch soft nproc 65536
elasticsearch hard nproc 65536
1.3 java配置,建立软连接
ln -s `which java` /usr/local/bin/java
1.4 安装备份软件
yum install -y nfs-utils rpcbind
systemctl start rpcbind
systemctl start nfs
systemctl enable rpcbind ; systemctl enable nfs-server.service
1.5 关闭防火墙
systemctl stop firewalld.service
systemctl disable firewalld.service
1.6 关闭selinux
setenforce 0
vi /etc/selinux/config
SELINUX=disabled
二、ES初始化
2.1 创建目录和用户
2.1.1 创建对应用户
group -g 1004 elastcisearch
useradd -u 1004 -g 1004 elasticsearch -s /sbin/nologin
2.1.2 创建目录
mkdir -p /appdata/elasticsearch /applog/elasticsearch /backup/elasticsearch
2.2 ES软件下载和安装
官网下载地址:
https://www.elastic.co/cn/downloads/past-releases/elasticsearch-6-8-5
cd /usr/local/
wget https://artifacts.elastic.co/downloads/elasticsearch/elasticsearch-6.8.5.tar.gz
tar -zxvf elasticsearch-6.8.5.tar.gz
ln -s /usr/local/elasticsearch-6.8.5 /usr/local/elasticsearch
2.3 授权
chown -R elasticsearch:elasticsearch /appdata/elasticsearch /applog/elasticsearch /backup/elasticsearch /usr/local/elasticsearch-6.8.5 /usr/local/elasticsearch
2.4 修改配置文件
vim /usr/local/elasticsearch/config/elasticsearch.yml
参考配置文件(6.8.5)
cluster.name: ${sysname}_es
node.name: ${HOSTNAME}
#5个节点内不进行master和data分离
node.master: true
node.data: true
#max_master/2+1
discovery.zen.minimum_master_nodes: 2
path.data: /appdata/elasticsearch
path.logs: /applog/elasticsearch
network.host: 0.0.0.0
http.port: 9200
transport.tcp.port: 9300
#用于节点节点间投票
discovery.zen.ping.unicast.hosts: ["192.168.0.1:9300","192.168.0.2:9300","192.168.0.3:9300"]
http.cors.enabled: true
bootstrap.system_call_filter: true
gateway.recover_after_nodes: 1
action.auto_create_index: true
action.destructive_requires_name: true
##防止同一台机器有相同的shard
cluster.routing.allocation.same_shard.host:true
http.cors.allow-origin: "*"
http.cors.allow-headers: Authorization,Content-Type
path.repo: ["/backup/elasticsearch"]
bootstrap.memory_lock: true
indices.memory.index_buffer_size: 30%
thread_pool.search.queue_size: 1000
thread_pool.bulk.queue_size: 1000
thread_pool.index.queue_size: 1000
#thread_pool.index.size: 56
thread_pool.search.size: 56

#xpack配置
xpack.security.enabled: true
xpack.security.transport.ssl.enabled: true
xpack.security.transport.ssl.verification_mode: certificate
xpack.security.transport.ssl.keystore.path: elastic-certificates.p12
xpack.security.transport.ssl.truststore.path: elastic-certificates.p12
jvm设置(原则上小于32G,最好设置为30G)
vim /usr/local/elasticsearch/config/jvm.options
-Xms30g
-Xmx30g
三. ES插件安装
ES插件主要包括:安全加密工具x-pack的配置,辅助工具cerebro以及Head的安装
3.1 X-pack介绍
Elasticsearch的x-pack功能在6.8和7.1默认提供安全认证功能。在介绍安全认证功能前,我们先看看完整的官方插件有哪些功能。官方的 X-Pack 提供安全保护比较全面,包括:
- 身份认证,鉴定用户是否合法
- 用户鉴权,指定某个用户可以访问哪个索引
- 传输加密,使用 SSL/TLS 加密节点间的传输,防止监听和篡改
- 审计日志,记录用户对系统执行了哪些操作
本文就不在详细解答以上原理,具体可以查看官当
https://www.elastic.co/guide/en/elasticsearch/reference/6.8/configuring-security.html
3.2 X-pack安装及使用
x-pack安装主要包括以下三步
- 生成节点证书
- 修改节点配置,启用 TLS
- 配置完毕后需要对集群执行完全重启。
3.2.1 默认生成elastic-stack-ca.p12和elastic-certificates.p12
/usr/local/elasticsearch-6.8.5/bin/elasticsearch-certutil ca
/usr/local/elasticsearch-6.8.5/bin/elasticsearch-certutil cert --ca elastic-stack-ca.p12
3.2.2 在配置文件增加认证配置
xpack.security.enabled: true
xpack.security.transport.ssl.enabled: true
xpack.security.transport.ssl.verification_mode: certificate
xpack.security.transport.ssl.keystore.path: /usr/local/elasticsearch-6.8.5/config/elastic-certificates.p12
xpack.security.transport.ssl.truststore.path: /usr/local/elasticsearch-6.8.5/config/elastic-certificates.p12
3.2.3 生成密码
/usr/local/elasticsearch-6.8.5/bin/elasticsearch-setup-passwords interactive/auto
interactive: 为给用户手动输入密码
auto: 为给用户随机生成密码
3.2.4 通过info api查看x-pack的基本功能
该功能主要包括:
- 创建信息:包括x-pack创建的序列号以及创建的时间
- License信息:当前x-pack更新的基本安全信息
- 特性信息:当前认证支持的各种特性
[root@elasticsearch-zxb1 config]#  curl -XGET -uelastic:"paic1234A"  http://192.168.248.231:9201/_xpack?pretty
{
  "build" : {
    "hash" : "78990e9",
    "date" : "2019-11-13T20:04:24.100411Z"
  },
  "license" : {
    "uid" : "7145fe99-a050-4671-ad2c-5c1f1aa850db",
    "type" : "basic",
    "mode" : "basic",
    "status" : "active"
  },
  "features" : {
    "ccr" : {
      "description" : "Cross Cluster Replication",
      "available" : false,
      "enabled" : true
    },
    "graph" : {
      "description" : "Graph Data Exploration for the Elastic Stack",
      "available" : false,
      "enabled" : true
    },
    "ilm" : {
      "description" : "Index lifecycle management for the Elastic Stack",
      "available" : true,
      "enabled" : true
    },
    "logstash" : {
      "description" : "Logstash management component for X-Pack",
      "available" : false,
      "enabled" : true
    },
    "ml" : {
      "description" : "Machine Learning for the Elastic Stack",
      "available" : false,
      "enabled" : true,
      "native_code_info" : {
        "version" : "6.8.5",
        "build_hash" : "b07c2d9433ee6d"
      }
    },
    "monitoring" : {
      "description" : "Monitoring for the Elastic Stack",
      "available" : true,
      "enabled" : true
    },
    "rollup" : {
      "description" : "Time series pre-aggregation and rollup",
      "available" : true,
      "enabled" : true
    },
    "security" : {
      "description" : "Security for the Elastic Stack",
      "available" : true,
      "enabled" : true
    },
    "sql" : {
      "description" : "SQL access to Elasticsearch",
      "available" : true,
      "enabled" : true
    },
    "watcher" : {
      "description" : "Alerting, Notification and Automation for the Elastic Stack",
      "available" : false,
      "enabled" : true
    }
  },
  "tagline" : "You know, for X"
}
3.2.5 查看权限
curl -u apm_system:"mdTtqZgfOJ5bu8Gl2bMo" http://192.168.248.231:9201/_xpack/security/_authenticate?pretty
curl -u elastic:"A0c3OhCqMRcUXj3OMvFf" http://192.168.248.231:9201/_xpack/security/_authenticate?pretty
3.2.6 修改密码
curl -u elastic:"A0c3OhCqMRcUXj3OMvFf" -H "Content-Type: application/json" -XPOST http://192.168.248.231:9201/_xpack/security/user/apm_system/_password  -d '{"password" : "paic1234A"}'
curl -u elastic:"A0c3OhCqMRcUXj3OMvFf" -H "Content-Type: application/json" -XPOST http://192.168.248.231:9201/_xpack/security/user/elastic/_password  -d '{"password" : "paic1234A"}'
3.2.7 role_mapping api的使用
主要语法:
POST /_xpack/security/role_mapping/
PUT /_xpack/security/role_mapping/
描述:
role mappings定义了每个用户对应那种角色,每一个mapping有对应的规则来辨别用户和授予用户的一系列角色
(一)将user角色授予所有的用户
curl -X POST "localhost:9200/_xpack/security/role_mapping/mapping1?pretty" -H 'Content-Type: application/json' -d'
{
  "roles": [ "user"],
  "enabled": true,
  "rules": {
    "field" : { "username" : "*" }
  },
  "metadata" : {
    "version" : 1
  }
}'
(二)将user和admin角色授权给特定的用户
curl -X POST "localhost:9200/_xpack/security/role_mapping/mapping2?pretty" -H 'Content-Type: application/json' -d'
{
  "roles": [ "user", "admin" ],
  "enabled": true,
  "rules": {
     "field" : { "username" : [ "esadmin01", "esadmin02" ] }
  }
}'
(三)将超级用户角色授权给esadmin 和 cn=admin,dc=example,dc=com 组
curl -X POST "localhost:9200/_xpack/security/role_mapping/mapping3?pretty" -H 'Content-Type: application/json' -d'
{
  "roles": [ "superuser" ],
  "enabled": true,
  "rules": {
    "any": [
      {
        "field": {
          "username": "esadmin"
        }
      },
      {
        "field": {
          "groups": "cn=admins,dc=example,dc=com"
        }
      }
    ]
  }
}'
(四)授权给特定领域
curl -X POST "localhost:9200/_xpack/security/role_mapping/mapping4?pretty" -H 'Content-Type: application/json' -d'
{
  "roles": [ "ldap-user" ],
  "enabled": true,
  "rules": {
    "field" : { "realm.name" : "ldap1" }
  }
}'
3.2.8 查看和创建角色
(一)查看所有角色
curl -uelastic:"paic1234A" -XGET http://localhost:9201/_xpack/security/role?pretty
(二)创建my_admin_role角色
curl -uelastic:"paic1234A" -X POST "localhost:9201/_xpack/security/role/my_admin_role?pretty" -H 'Content-Type: application/json' -d'
{
  "cluster": ["all"],
  "indices": [
    {
      "names": [ "bank", "logstash*" ],
      "privileges": ["all"]
      }
  ],
  "applications": [
    {
      "application": "myapp",
      "privileges": [ "admin", "read" ],
      "resources": [ "*" ]
    }
  ],
  "run_as": [ "other_user" ], // optional
  "metadata" : { // optional
    "version" : 1
  }
}'
{
  "role" : {
    "created" : true
  }
}
白金版支持:
curl -X POST "localhost:9200/_xpack/security/role/my_admin_role?pretty" -H 'Content-Type: application/json' -d'
{
  "cluster": ["all"],
  "indices": [
    {
      "names": [ "index1", "index2" ],
      "privileges": ["all"],
      "field_security" : { // optional
        "grant" : [ "title", "body" ]
      },
      "query": "{\"match\": {\"title\": \"foo\"}}" // optional
    }
  ],
  "applications": [
    {
      "application": "myapp",
      "privileges": [ "admin", "read" ],
      "resources": [ "*" ]
    }
  ],
  "run_as": [ "other_user" ], // optional
  "metadata" : { // optional
    "version" : 1
  }
}'
(三)删除角色
DELETE /_xpack/security/role/my_admin_role
3.2.9 查看和创建用户
(一)查看所有用户
curl -uelastic:"paic1234A" -XGET http://localhost:9201/_xpack/security/user?pretty
(二)创建用户
curl -uelastic:"paic1234A" -X POST "localhost:9201/_xpack/security/user/zxb?pretty" -H 'Content-Type: application/json' -d'
{
  "password" : "paic1234A",
  "roles" : [ "admin", "my_admin_role" ],
  "full_name" : "Jack Nicholson",
  "email" : "[email protected]",
  "metadata" : {
    "intelligence" : 7
  }
}'
(三)删除用户
curl -X DELETE "localhost:9200/_xpack/security/user/zxb?pretty"
(四)回收用户权限
curl -X PUT "localhost:9200/_xpack/security/user/zxb/_disable?pretty"
3.3 Cerebro 辅助组件的安装
3.3.1 Cerebro简介
cerebro是一个使用Scala,Play Framework,AngularJS和Bootstrap构建的开源(MIT许可)elasticsearch web管理工具
安装环境需求
需要Java 1.8或更高版本才能运行。
3.3.2 Cerebro安装
(一)简单安装
下载解压
https://github.com/lmenezes/cerebro/releases
cd /usr/local
wget https://github.com/lmenezes/cerebro/releases/download/v0.8.1/cerebro-0.8.1.tgz
tar -xzf cerebro-0.8.1.tgz
ln -s /usr/local/cerebro-0.8.1 cerebro
指定端口启动
/usr/local/cerebro/bin/cerebro -Dhttp.port=8080 &
可以指定登录用户名密码以及集群名字
hosts = [
  #{
   # host = "http://192.168.248.231:9200"
   #name = "es_zxb"
  #},
  # Example of host with authentication
  {
    host = "http://192.168.248.231:9200"
    name = "es_zxb"
    auth = {
      username = "admin"
      password = "admin"
    }
  }
]
(二)做成服务
创建用户
useradd -s /sbin/nologin cerebro
解压安装文件
cd /tmp/;wget https://github.com/lmenezes/cerebro/releases/download/v0.8.1/cerebro-0.8.1.tgz;tar xf /tmp/cerebro-0.8.1.tgz -C /usr/local/;ln -s /usr/local/cerebro-0.8.1 /usr/local/cerebro;chown -R cerebro. /usr/local/{cerebro-0.8.1, cerebro}
更改配置
auth.settings:访问Cerebro的用户名及密码
hosts:要监控的Elasticsearch集群,host:节点访问地址,name:标识,一般用ES的cluster_name
tee  /usr/local/cerebro/conf/application.conf << 'EOF'
secret="ki:s:[[@=Ag?QI`W2jMwkY:eqvrJ]JqoJyi2axj3ZvOv^/KavOT4ViJSv?6YY4[N"
basePath="/"
pidfile.path="/usr/local/cerebro/cerebro.pid"
data.path="/appdata/cerebro/data/cerebro.db"
es={
    gzip=true
}
auth={
    type: basic
    settings: {
        username="admin"
        password="Admin_2018"
    }
}
hosts=[
  {
    host="http://192.168.1.141:9200"
    name="es_log"
  }
]
EOF
创建服务
tee /etc/systemd/system/cerebro.service << 'EOF'
[Unit]
Description=Cerebro
After=network.target

[Service]
Type=folking
PIDFile=/usr/local/cerebro/cerebro.pid
User=cerebro
Group=cerebro
LimitNOFILE=65535
ExecStart=/usr/local/cerebro/bin/cerebro -Dconfig.file=/usr/local/cerebro/conf/application.conf -Dhttp.port=8080
Restart=on-failure
WorkingDirectory=/usr/local/cerebro

[Install]
WantedBy=multi-user.target
EOF
启动
ln -s /usr/local/jdk/jdk1.8.0_211/bin/java /usr/bin/java
systemctl daemon-reload;
一键式安装脚本
#!/bin/bash
#author zxb
#version 1.0
#date 2020/04/06

user=$1
pwd=$2
es_name=$3
es_ip=$4
es_port=$5

#Create directory
echo "Start to create directory"
useradd -s /sbin/nologin cerebro;
cd /tmp/;
wget https://github.com/lmenezes/cerebro/releases/download/v0.8.1/cerebro-0.8.1.tgz;
tar xf /tmp/cerebro-0.8.1.tgz -C /usr/local/;
ln -s /usr/local/cerebro-0.8.1 /usr/local/cerebro;
chown -R cerebro.  /usr/local/{cerebro-0.8.1, cerebro};

if [ !-d /appdata/cerebro ];then
mkdir -p  /appdata/cerebro/data;
chown -R cerebro. /appdata/cerebro;
fi

if [ $? -eq 0 ];then
echo "Create dir Success!"
else
echo "Create dir Failed!"
    exit 1;
fi

#配置应用文件
echo "Start to configure application.conf"
tee  /usr/local/cerebro/conf/application.conf << 'EOF'
secret="ki:s:[[@=Ag?QI`W2jMwkY:eqvrJ]JqoJyi2axj3ZvOv^/KavOT4ViJSv?6YY4[N"
basePath="/"
pidfile.path="/usr/local/cerebro/cerebro.pid"
data.path="/appdata/cerebro/data/cerebro.db"
es={
    gzip=true
}
auth={
    type: basic
    settings: {
        username="${user}"
        password="${pwd}"
    }
}
hosts=[
  {
    host="http://${es_ip}:${es_port}"
    name="${es_name}"
  }
]
EOF

if [ $? -eq 0 ];then
echo "configure application.conf Success!"
else
echo "configure application.conf Failed!"
    exit 1;
fi
#配置服务,并设置开机自启动
echo "Start to create cerebro.service!"
tee /etc/systemd/system/cerebro.service << 'EOF'
[Unit]
Description=Cerebro
After=network.target

[Service]
Type=folking
PIDFile=/usr/local/cerebro/cerebro.pid
User=cerebro
Group=cerebro
LimitNOFILE=65535
ExecStart=/usr/local/cerebro/bin/cerebro -Dconfig.file=/usr/local/cerebro/conf/application.conf -Dhttp.port=8080
Restart=on-failure
WorkingDirectory=/usr/local/cerebro

[Install]
WantedBy=multi-user.target
EOF

if [ $? -eq 0 ];then
echo "Create cerebro.service Success!"
else
echo "Create cerebro.service Failed!"
    exit 1;
fi

echo "Begin to start the service"
ln -s /usr/local/jdk/jdk1.8.0_211/bin/java /usr/bin/java
systemctl daemon-reload;
systemctl enable cerebro;
systemctl start cerebro;
systemctl status cerebro

if [ $? -eq 0 ];then
echo "Start cerebro.service Success!"
else
echo "Start cerebro.service Failed!"
    exit 1;
fi
使用方法
sh cerebro_install.sh admin "admin" es_zxb 192.168.248.231 9200
3.3.3 Cerebro使用
(一) 登录
(二)概要信息
3.4 Head组件安装
参考:https://github.com/mobz/elasticsearch-head
(一)安装步骤
git clone git://github.com/mobz/elasticsearch-head.git
cd elasticsearch-head
#安装node.js
curl --silent --location https://rpm.nodesource.com/setup_10.x | bash
yum install -y nodejs
npm install
npm run start
(二)在Elasticsearch增加head配置
vim /usr/local/elasticsearch/config/elasticsearch.yml
http.cors.enabled: true
http.cors.allow-origin: "*"
(三)浏览器展示
访问地址:http://192.168.248.231:9100/?auth_user=elastic&auth_password=xxxx

参考文献
Elasticsearch
https://www.elastic.co/guide/en/elasticsearch/reference/6.8/configuring-security.html
https://www.elastic.co/guide/en/elasticsearch/reference/6.8/xpack-api.html
cerebro
https://cerebroapp.com
https://github.com/KELiON/cerebro
Head
https://github.com/mobz/elasticsearch-head


