Android与PC蓝牙交互
前言
蓝牙( Bluetooth® ):是一种无线技术标准,可实现固定设备、移动设备和楼宇个人域网之间的短距离数据交换
我之所以会来做Android与PC蓝牙通信的了解,是源于公司年会的时候做的抽奖活动,当时是用笔记本来运行的,因为要把屏幕投影到墙上,启动抽奖、停止抽奖都得笔记本控制。我想这个真的太不方便了,为什么不能用手机来操控,于是我想到了PC与手机的通信,最简单的方式就是通过蓝牙来通信。
废话不多说,下面进入正题。
开发环境
PC(笔记本电脑)
笔者的笔记本是Window 10 64位操作系统的,自带蓝牙模块。
PC端开发环境一览:
| 名称 | 版本 |
|---|---|
| JDK | 1.8.0u91 |
| IDE | Intellij Idea |
Android端开发环境一览:
| 名称 | 版本 |
|---|---|
| Android SDK | 23.1 |
| Android Studio | 2.1 |
代码说明
PC端开发(服务器)
之所以选择标准的Java环境来开发PC端,是因为Java简单易学,开发成本低。虽然比起C++来说,运行效率低了很多,但是这样的一个情况下Java足够了,如果用C++来做的话,代价高了很多。
PC端蓝牙开发资料少之又少,原因你懂的。不过PC端选择Java开发蓝牙通信的话,暂且只能用BlueCove开源框架来做。只是从这个封装好的插件的最后发布日期(2008年12月25日)来看,这个项目已经很久没有维护了。
首先要下载BlueCove库,直接从官网上下载的JAR文件在64位系统上运行的话会出现native lib 错误,怎么办呢?笔者从谷歌论坛上某一页找到了国外技术大牛重新编译的64位lib。下载库之后放入项目路径,引用即可。
两个设备之间建立通信连接的首要条件,是要有一个相同的UUID,这里我们选择的UUID是
00001101-0000-1000-8000-00805F9B34FB
PC端代码中填写UUID的时候需要去掉中间的短横线。
Android端与PC端的基本通信手段是使用流连接(StreamConnection),PC端需要建立一个流连接监听器(StreamConnectionNotifier)
streamConnectionNotifier = (StreamConnectionNotifier) Connector.open("btspp://localhost:" + SERVER_UUID.toString());监听器设置后,建立一个独立线程去监听所有可能的Socket连接并接受:
@Override
public void run() {
    while (isListening) {
        StreamConnection streamConnection;
        try {
            //接受并打开连接
            streamConnection = streamConnectionNotifier.acceptAndOpen();

            byte[] buffer = new byte[200];
            //打开输入输出流
            InputStream inputStream = streamConnection.openInputStream();
            OutputStream outputStream = streamConnection.openOutputStream();

            outputStream.write("message from server".getBytes());

            inputStream.read(buffer);
            String message = new String(buffer);
            System.out.println("Receive message : " + message);

            inputStream.close();
            outputStream.close();
            streamConnection.close();

            if (message.contains("EXIT_APP")) {
                //退出循环监听,将结束整个服务器端的程序运行
                isListening = false;
            }
        } catch (IOException e) {
            e.printStackTrace();
        }
    }
}
Android端开发(客户端)
Android就相对比较简单了,只要遵循蓝牙通信的基本步骤即可。
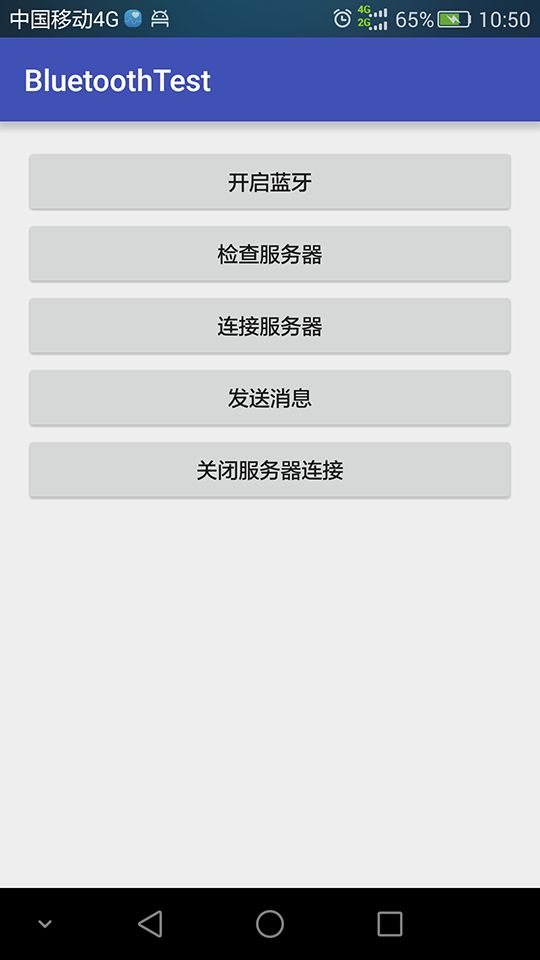
一共一个界面,先来看看布局文件:
<LinearLayout xmlns:android="http://schemas.android.com/apk/res/android"
    xmlns:tools="http://schemas.android.com/tools"
    android:layout_width="match_parent"
    android:layout_height="match_parent"
    android:orientation="vertical"
    android:paddingBottom="@dimen/activity_vertical_margin"
    android:paddingLeft="@dimen/activity_horizontal_margin"
    android:paddingRight="@dimen/activity_horizontal_margin"
    android:paddingTop="@dimen/activity_vertical_margin"
    tools:context="exp.com.bluetoothtest.MainActivity">

    <Button
        android:id="@+id/btn_open"
        android:layout_width="match_parent"
        android:layout_height="wrap_content"
        android:onClick="onOpen"
        android:text="@string/open_bluetooth" />

    <Button
        android:layout_width="match_parent"
        android:layout_height="wrap_content"
        android:onClick="onCheck"
        android:text="@string/check_service" />

    <Button
        android:id="@+id/btn_connect"
        android:layout_width="match_parent"
        android:layout_height="wrap_content"
        android:onClick="onConnect"
        android:text="@string/connect_server" />

    <Button
        android:id="@+id/btn_send_message"
        android:layout_width="match_parent"
        android:layout_height="wrap_content"
        android:onClick="onSend"
        android:text="@string/send_message" />

    <Button
        android:id="@+id/btn_disconnect"
        android:layout_width="match_parent"
        android:layout_height="wrap_content"
        android:onClick="onDisconnect"
        android:text="@string/disconnect_server" />

    <TextView
        android:id="@+id/tv_msg"
        android:layout_width="match_parent"
        android:layout_height="wrap_content" />
LinearLayout>
MainActivity的代码比较简单,首先在onCreate函数中注册蓝牙扫描的广播:
 IntentFilter intentFilter = new IntentFilter();
 intentFilter.addAction(BluetoothDevice.ACTION_FOUND);
 intentFilter.addAction(BluetoothAdapter.ACTION_DISCOVERY_FINISHED);
 registerReceiver(broadcastReceiver, intentFilter);
广播接收器代码:
 private BroadcastReceiver broadcastReceiver = new BroadcastReceiver() {
        @Override
        public void onReceive(Context context, Intent intent) {
            String action = intent.getAction();
            Log.e(TAG, "Receive Broadcast : " + action);
            //找到设备
            if (BluetoothDevice.ACTION_FOUND.equals(action)) {
                BluetoothDevice device = intent
                        .getParcelableExtra(BluetoothDevice.EXTRA_DEVICE);

                Log.e(TAG, "Find device: [" + device.getName() + ","
                    + device.getAddress() + ", "
                    + (device.getBondState() == BluetoothDevice.BOND_BONDED ?
                        "bonded" : "default") + "]");

                if (device.getAddress().equals(SERVICE_ADDRESS)) {
                    service = device;
                    showMessage("Service found and bound");
                }
            } else if (BluetoothAdapter.ACTION_DISCOVERY_FINISHED.equals(action)) {
                text.append("\n搜索完成");
                scanCompleted = true;
            }
        }
    };
Socket连接、输入输出等操作均为阻塞式调用,均需要在独立线程中完成。
开启Socket连接:
if (service != null && scanCompleted) {
        new Thread(new Runnable() {
                @Override
                public void run() {
                    try {
                        //创建Socket连接
                        bluetoothSocket = service.createRfcommSocketToServiceRecord(UUID.fromString(serverUUID));
                        //开启连接
                        bluetoothSocket.connect();
                        showMessage("Successfully connect");
                    } catch (IOException e) {
                        e.printStackTrace();
                    }
                }
            }).start();
        }
发送和接收消息:
if (service != null && scanCompleted) {
            new Thread(new Runnable() {
                @Override
                public void run() {
                    OutputStream outputStream;
                    try {
                        //打开输出流并写入消息
                        outputStream = bluetoothSocket.getOutputStream();
                        outputStream.write("A message from android device".getBytes());
                        showMessage("Successfully send message");
                    } catch (IOException e) {
                        e.printStackTrace();
                    }
                    InputStream inputStream;
                    try {
                        //打开输入流并读取消息
                        inputStream = bluetoothSocket.getInputStream();
                        byte[] buffer = new byte[200];
                        inputStream.read(buffer);

                        showMessage("Concurrently receive message : " + new String(buffer));

                    } catch (IOException e) {
                        e.printStackTrace();
                    }
                }
            }).start();
        }
发送“关闭服务器”指令:
if (bluetoothSocket != null) {
            new Thread(new Runnable() {
                @Override
                public void run() {
                    OutputStream outputStream;
                    try {
                        outputStream = bluetoothSocket.getOutputStream();
                        outputStream.write("EXIT_APP".getBytes());
                        showMessage("Successfully send message");
                    } catch (IOException e) {
                        e.printStackTrace();
                    }
                }
            }).start();
        }
运行程序
运行前请手动启动PC端蓝牙设备。
Android端点击开启蓝牙打开蓝牙设备。并点击检查服务器检查PC端蓝牙,如果没有配对,即会开始搜索蓝牙设备,搜索完成之后即可配对。
搜索到PC端并配对之后,点击连接服务器开启流连接。然后点击发送消息。
再次点击连接服务器重新开启流连接,发送关闭服务器指令:
这个DEMO就完成了,后续更复杂的开发基于这个DEMO代码改进就行。感谢你的阅读,如果你对这篇文章有什么意见或者建议请联系我或者留言。
源代码地址:点击进入下载页


