服务器利用docker搭建CTFd平台、webug靶场,并映射到公网IP
搭建CTFd平台
老规矩,看版本吧,是Ubuntu 16.04
root@cat:~/CTFd# cat /etc/issue
Ubuntu 16.04.3 LTS \n \l
先来安装docker跟Docker-compose
wget -qO- https://get.docker.com/ | sh
sudo usermod -aG docker username ##你的用户名
##安装完成之后,可以看看docker版本
#使用dockers --version可以查看
root@cat:~/CTFd# docker --version
Docker version 19.03.1, build *******
curl -L https://github.com/docker/compose/releases/download/1.25.0-rc1/docker-compose-`uname -s`-`uname -m` -o /usr/local/bin/docker-compose
chmod +x /usr/local/bin/docker-compose
安装完成之后记得查看一下,我这是后记录的,可能跟安装时有偏差,emma:
root@cat:~/CTFd# docker-compose verison
No such command: verison

Commands:
  build              Build or rebuild services
  bundle             Generate a Docker bundle from the Compose file
  config             Validate and view the Compose file
  create             Create services
  down               Stop and remove containers, networks, images, and volumes
  events             Receive real time events from containers
  exec               Execute a command in a running container
  help               Get help on a command
  images             List images
  kill               Kill containers
  logs               View output from containers
  pause              Pause services
  port               Print the public port for a port binding
  ps                 List containers
  pull               Pull service images
  push               Push service images
  restart            Restart services
  rm                 Remove stopped containers
  run                Run a one-off command
  scale              Set number of containers for a service
  start              Start services
  stop               Stop services
  top                Display the running processes
  unpause            Unpause services
  up                 Create and start containers
  version            Show the Docker-Compose version information
然后咱们再来安装一下CTFd,我是root,天下无敌......
git clone https://github.com/CTFd/CTFd.git && cd CTFd
docker-compose up -d
然后我们来查看一下容器:
root@cat:~/CTFd# docker-compose ps
    Name                  Command               State           Ports
------------------------------------------------------------------------------
ctfd_cache_1   docker-entrypoint.sh redis ...   Up
ctfd_ctfd_1    /opt/CTFd/docker-entrypoint.sh   Up      0.0.0.0:8000->8000/tcp
ctfd_db_1      docker-entrypoint.sh mysql ...   Up
虽说搭建完了,但是,还是没法在公网上访问,接下来就映射一下(我也不知道咋搞,大佬勿喷,我就记录下日常)
iptables -t nat -A DOCKER -p tcp --dport 8001 -j DNAT --to-destination IP地址:8000不过,记得在服务器上加上这个端口
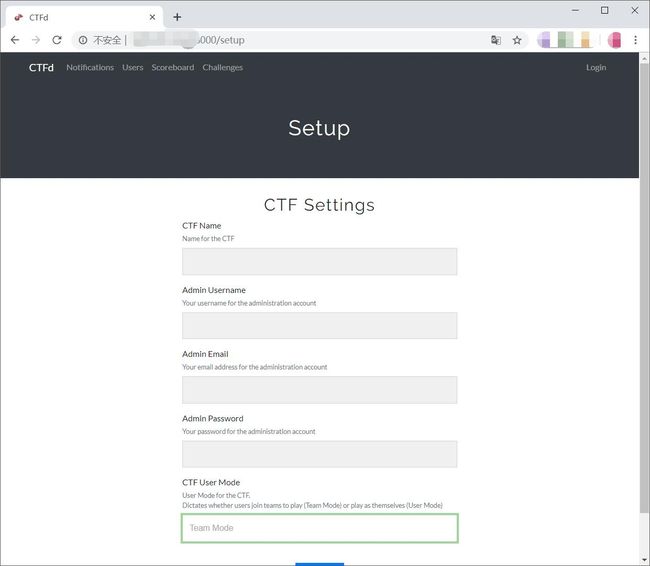
然后就到了激动人心的时候了:
这个地方自己配置下,然后,就,就没有然后了呀
博客搜集了网上很多教程,总结了下,太多了,就不都写了,若有侵犯,联系删,打扰了
搭建webug靶场
先从docker hub把webug靶场pull下来
root@cat:~# docker pull area39/webug
Using default tag: latest
latest: Pulling from area39/webug
a7344f52cb74: Pull complete
515c9bb51536: Pull complete
e1eabe0537eb: Pull complete
4701f1215c13: Pull complete
47e9dc58a04a: Pull complete
e2f5bef92572: Pull complete
d4ff2baf456b: Pull complete
8bcee2bcac01: Pull complete
bed1605ff912: Pull complete
c76295730308: Pull complete
c9546d0b81a1: Pull complete
9f15afb3efc0: Pull complete
Digest: sha256:6618efa0a7df17f92af86969397ea2098c01848f6dcecafe6cd82f25c8e4ef2f
Status: Downloaded newer image for area39/webug:latest
docker.io/area39/webug:latest
然后启动这个镜像:
root@cat:~# docker run -d -P area39/webug
6a751485b6cb389f21d3ba4c50538525ac56936e12862b44115093cd4444a630
然后咱们将端口映射到公网上的端口,记得要在服务器上开启这个端口哦,这里我不贴图了,跟上面一样:
root@cat:~# iptables -t nat -A DOCKER -p tcp --dport 32771 -j DNAT --to-destination IP地址:32771我们看一下已经启动的docker镜像们
root@cat:~# docker ps -a
CONTAINER ID        IMAGE               COMMAND                  CREATED             STATUS              PORTS                    NAMES
c232b4f6273f        area39/webug        "httpd-foreground"       7 minutes ago       Up 7 minutes        0.0.0.0:32771->80/tcp    beautiful_wing
cb227de9496d        ctfd_ctfd           "/opt/CTFd/docker-en…"   30 hours ago        Up 30 hours         0.0.0.0:8000->8000/tcp   ctfd_ctfd_1
8a4f65f5bc08        redis:4             "docker-entrypoint.s…"   30 hours ago        Up 30 hours                                  ctfd_cache_1
bd0fb8e68088        mariadb:10.4        "docker-entrypoint.s…"   30 hours ago        Up 21 hours                                  ctfd_db_1


