手动安装openstack并配置虚拟化集成VM
手动安装openstack并配置虚拟化集成VM
云计算含义:
弹性质
可以随便增加内存和cpu,硬盘
对用户是透明的
对数据进行去重
应用,数据,跑的时间,中间件,系统
虚拟机,服务器,存储,网络
计算分层
云计算绝不等于虚拟化
云计算用到虚拟化的技术
nova负责计算节点
quantum 负责虚拟网络
swift 负责云存储‘
libvirt 负责 虚拟机管理,虚拟机设备管理 远程过程
目录:
安装先决条件
1.环境
2.域名解析和关闭防火墙
3.配置时间同步服务器(NTP)
4.安装软件包
5.安装数据库
6.验证数据库
7.安装rabbitmq服务
8.安装Memcached
安装目录:
1.安装配置keystone身份认证服务
2.镜像服务
3.(nova)的安装及配置
4.网络服务neutron服务器端的安装及配置
5.安装dashboard组件
6.安装cinder
7.EXSI集成VM虚拟化
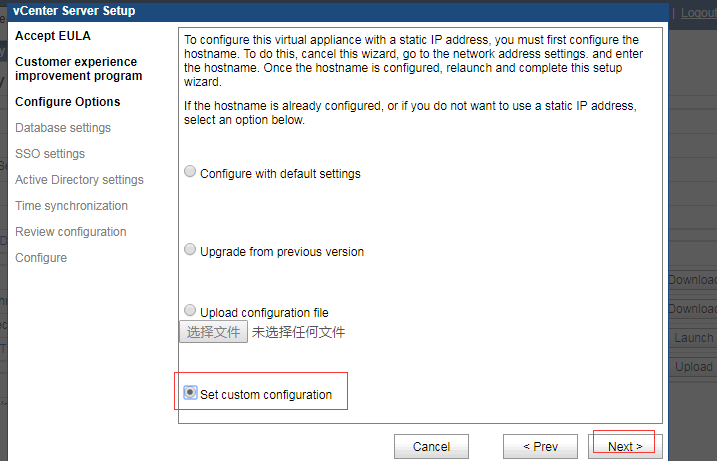
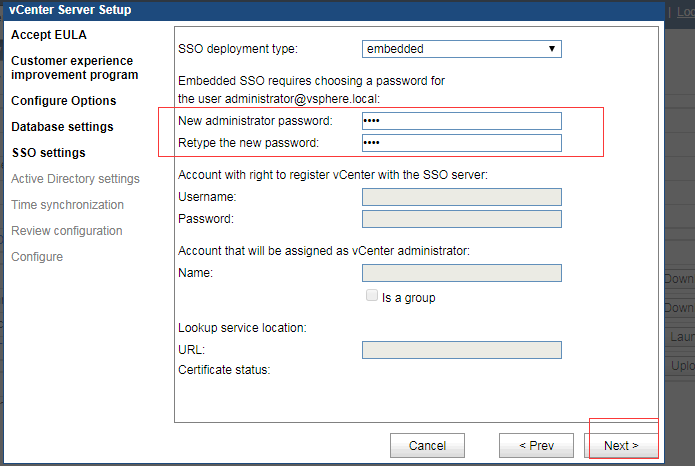
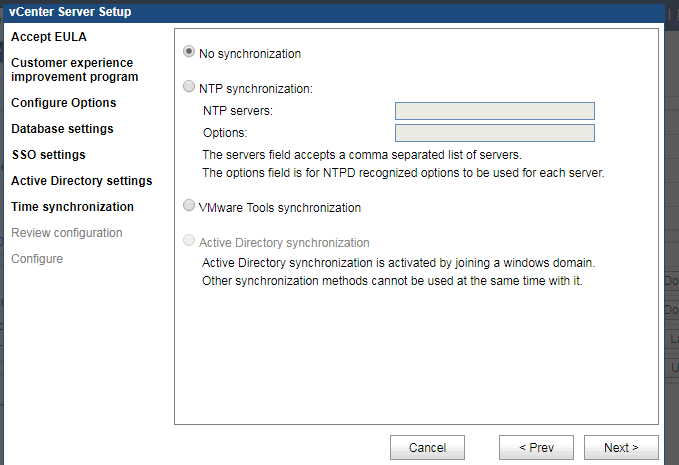
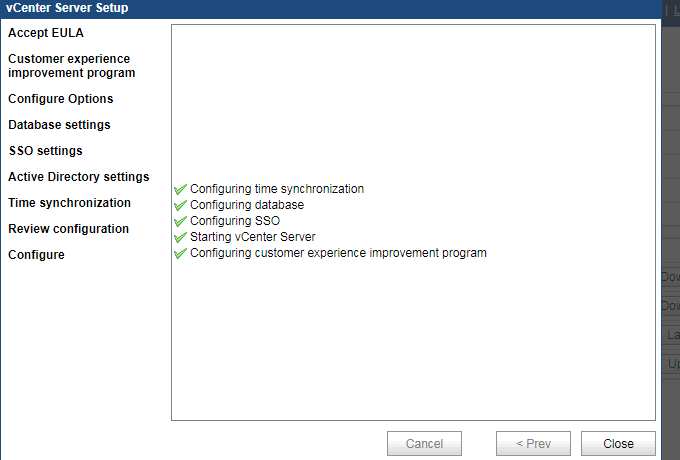
8.安装 VMware vCenter Appliance 的 的 OVF
9.集成vmware
1.环境
手动安装openstack
openstack-newton版
192.168.2.34 controller
192.168.2.35 compute1
CentOS 7.3系统 2 台
controller即作为控制节点,也作为计算节点.
compute1 就只是计算节点
拓扑图
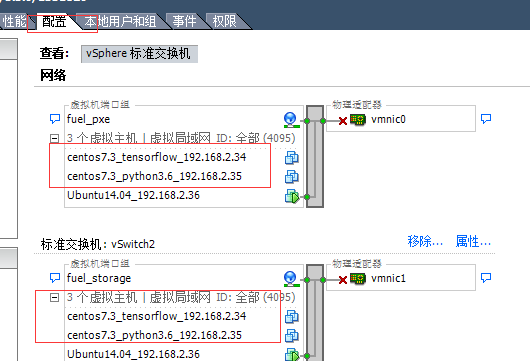
在ESXI里面创建虚拟交换机
现在我们开始在ESXI上部署网络
ESXI创建两个虚拟交换机,一个命名为fuel_pxe,一个命名为fuel_storage,加上原有的vm network总共三个交换机。
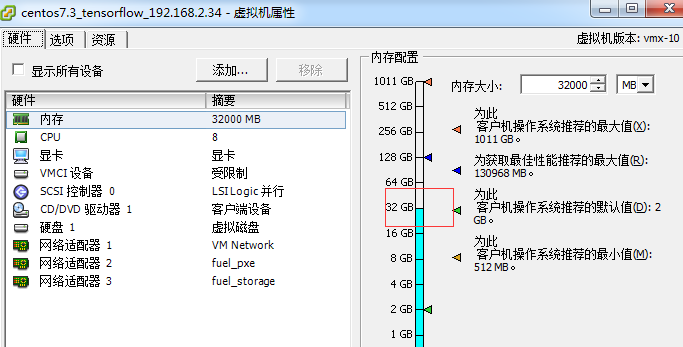
创建虚拟机,内存8G以上,硬盘100G以上,创建三个网卡。
控制节点去操控计算节点,计算节点上可以创建虚拟机
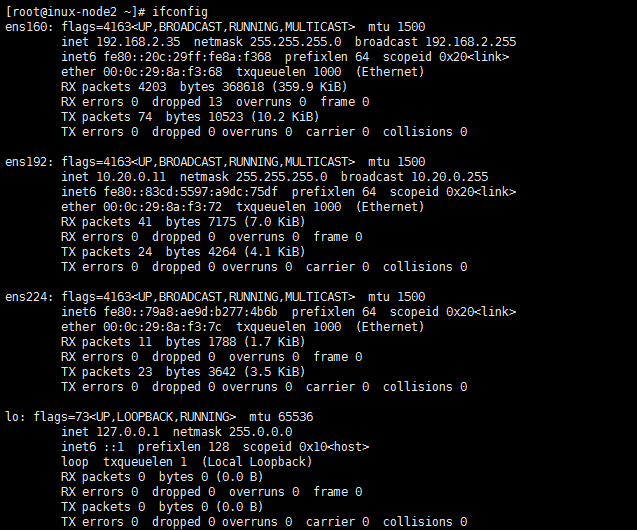
controller 192.168.2.34 网卡 NAT ens160
(ens160是内网网卡,下面neutron配置文件里会设置到)
compute1 192.168.2.35 网卡 NAT ens160
2.域名解析和关闭防火墙 (控制节点和计算节点都做)
/etc/hosts#主机名一开始设置好
后面就不能更改了,否则就会出问题!这里设置好ip与主机名的对应关系
192.168.2.34 controller
192.168.2.35 compute1
setenforce 0
systemctl start firewalld.service
systemctl stop firewalld.service
systemctl disable firewalld.service
3.配置时间同步服务器(NTP)
控制节点
yum install chrony -y
#安装服务
sed -i 's/#allow 192.168\/2/allow 192.168\/2/g' /etc/chrony.conf
cp /usr/share/zoneinfo/Asia/Shanghai /etc/localtime
#更改时区
启动NTP服务
systemctl enable chronyd.service
systemctl start chronyd.service
配置计算节点
yum install chrony -y
sed -i 's/^server.*$//g' /etc/chrony.conf
sed -i "N;2aserver controller iburst" /etc/chrony.conf
cp /usr/share/zoneinfo/Asia/Shanghai /etc/localtime
更改时区
systemctl enable chronyd.service
systemctl start chronyd.servic
4.安装软件包
sudo yum install -y centos-release-openstack-newton
sudo yum update -y
sudo yum install -y openstack-packstack
yum install python-openstackclient openstack-selinux -y
5.安装数据库
控制节点下操作
yum install mariadb mariadb-server python2-PyMySQL -y
[root@controller openstack]# vim /etc/my.cnf.d/openstack.cnf
[mysqld]
bind-address = 192.168.2.34           #本服务器的ip
default-storage-engine = innodb
innodb_file_per_table
max_connections = 4096
collation-server = utf8_general_ci
character-set-server = utf8
启动数据库
systemctl enable mariadb.service
systemctl start mariadb.service
5.初始化数据库
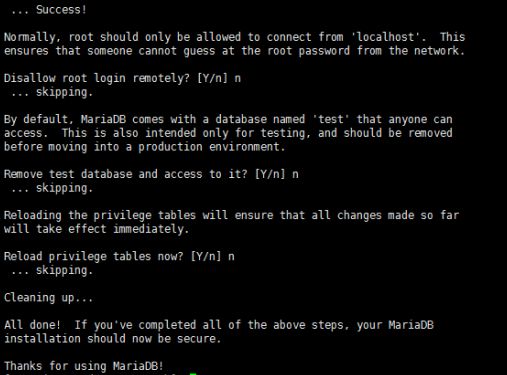
# mysql_secure_installation
数据库密码为123456
6.验证数据库
[root@controller openstack]# mysql -uroot -p123456
Welcome to the MariaDB monitor. Commands end with ; or \g.
Your MariaDB connection id is 8
Server version: 10.1.20-MariaDB MariaDB Server
Copyright (c) 2000, 2016, Oracle, MariaDB Corporation Ab and others.
Type 'help;' or '\h' for help. Type '\c' to clear the current input statement.
MariaDB [(none)]>
7.消息队列
openstack使用一个消息队列的服务之间进行协调的操作和状态的信息。消息队列服务通常在控制器节点上运行。OpenStack的支持多种消息队列服务,包括RabbitMQ的, Qpid和ZeroMQ。
8.安装rabbitmq
yum install rabbitmq-server -y
9.启动rabbitmq服务
systemctl enable rabbitmq-server.service
systemctl start rabbitmq-server.service
9.创建openstack用户这里使用RABBIT_PASS做openstack用户的密码
[root@controller ~]# rabbitmqctl add_user openstack RABBIT_PASS
Creating user "openstack" ...
10.允许openstack用户的配置,写入和读取的访问
rabbitmqctl set_permissions openstack ".*" ".*" ".*"
Setting permissions for user "openstack" in vhost "/" ...
11.安装Memcached
yum install memcached python-memcached -y
12.启动服务
systemctl enable memcached.service
systemctl start memcached.service
安装配置keystone身份认证服务
[root@controller ~]# mysql -uroot -p123456
# 创建keystone数据库
MariaDB [(none)]> CREATE DATABASE keystone;
Query OK, 1 row affected (0.00 sec)
# 授予数据库访问权限
MariaDB [(none)]> GRANT ALL PRIVILEGES ON keystone.* TO 'keystone'@'localhost' IDENTIFIED BY '123456';
Query OK, 0 rows affected (0.00 sec)
MariaDB [(none)]> GRANT ALL PRIVILEGES ON keystone.* TO 'keystone'@'%' IDENTIFIED BY '123456';
Query OK, 0 rows affected (0.00 sec)
# 用合适的密码替换KEYSTONE_DBPASS。
2.安装软件包
[root@controller ~]# yum install openstack-keystone httpd mod_wsgi -y
3.编辑/etc/keystone/keystone.conf文件
[root@controller ~]# cd /etc/keystone/
[root@controller keystone]# cp keystone.conf keystone.conf.bak
[root@controller keystone]# egrep -v "^#|^$" keystone.conf.bak > keystone.conf
[root@controller keystone]# vim keystone.conf
添加如下内容
[database]
connection = mysql+pymysql://keystone:123456@controller/keystone
[token]
provider = fernet
4.导入数据库
su -s /bin/sh -c "keystone-manage db_sync" keystone
5.初始化存储库
[root@controller ~]# keystone-manage fernet_setup --keystone-user keystone --keystone-group keystone
[root@controller ~]# keystone-manage credential_setup --keystone-user keystone --keystone-group keystone
6.引导身份认证
keystone-manage bootstrap --bootstrap-password admin --bootstrap-admin-url http://controller:35357/v3/ --bootstrap-internal-url http://controller:35357/v3/ --bootstrap-public-url http://controller:5000/v3/ --bootstrap-region-id RegionOne
7.配置http
[root@controller ~]# sed -i 's/#ServerName www.example.com:80/ServerName controller/g' /etc/httpd/conf/httpd.conf
[root@controller ~]# ln -s /usr/share/keystone/wsgi-keystone.conf /etc/httpd/conf.d/
systemctl enable httpd.service
systemctl start httpd.service
netstat -lntp |grep http
Oct 11 22:26:28 controller systemd[1]: Failed to start The Apache HTTP Server.
Oct 11 22:26:28 controller systemd[1]: Unit httpd.service entered failed state.
Oct 11 22:26:28 controller systemd[1]: httpd.service failed.
[root@localhost conf.d]# vi/etc/httpd/conf/httpd.conf
353行是这一行,我们把它注释掉。
353 IncludeOptional conf.d/*.conf
systemctl start httpd.service
9.配置管理用户
export OS_USERNAME=admin
export OS_PASSWORD=admin
export OS_PROJECT_NAME=admin
export OS_USER_DOMAIN_NAME=Default
export OS_PROJECT_DOMAIN_NAME=Default
export OS_AUTH_URL=http://controller:35357/v3
export OS_IDENTITY_API_VERSION=3
10.创建用户、域、角色
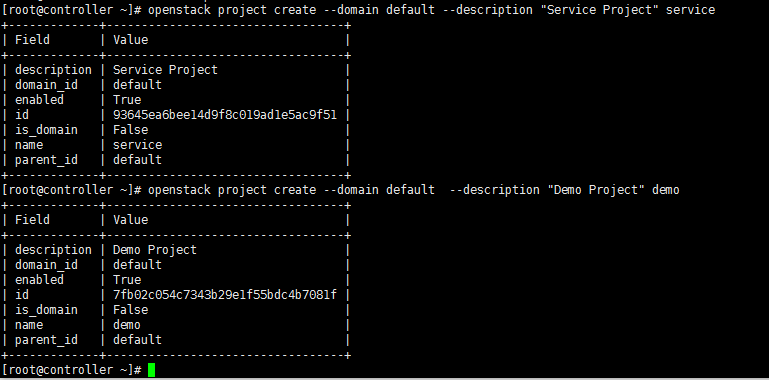
openstack project create --domain default --description "Service Project" service
[root@controller ~]# openstack project create --domain default --description "Service Project" service
Discovering versions from the identity service failed when creating the password plugin. Attempting to determine version from URL.
Unable to establish connection to http://controller:35357/v3/auth/tokens: HTTPConnectionPool(host='controller', port=35357): Max retries exceeded with url: /v3/auth/tokens (Caused by NewConnectionError('
[root@controller ~]# vi /etc/profile
[root@controller ~]# curl -I http://controller:35357/v3
curl: (7) Failed connect to controller:35357; Connection refused
[root@localhost conf.d]# vi/etc/httpd/conf/httpd.conf
353行是这一行,我们把注释去掉。
353 IncludeOptional conf.d/*.conf
systemctl restart httpd.service
[root@controller ~]# curl -I http://controller:35357/v3
HTTP/1.1 200 OK
Date: Wed, 11 Oct 2017 14:51:23 GMT
Server: Apache/2.4.6 (CentOS) mod_wsgi/3.4 Python/2.7.5
Vary: X-Auth-Token
x-openstack-request-id: req-f9541e9b-255e-4979-99b5-ebb2292ab555
Content-Length: 250
Content-Type: application/json
[root@controller ~]# openstack project create --domain default --description "Service Project" service
+-------------+----------------------------------+
| Field       | Value                            |
+-------------+----------------------------------+
| description | Service Project                  |
| domain_id   | default                          |
| enabled     | True                             |
| id          | 93645ea6bee14d9f8c019ad1e5ac9f51 |
| is_domain   | False                            |
| name        | service                          |
| parent_id   | default                          |
+-------------+----------------------------------+
[root@controller ~]#
openstack project create --domain default --description "Demo Project" demo
openstack user create --domain default --password-prompt demo
密码123456
openstack role create user
openstack role add --project demo --user demo user
验证脚本
[root@controller openstack]# vi admin-openrc
export OS_PROJECT_DOMAIN_NAME=Default
export OS_USER_DOMAIN_NAME=Default
export OS_PROJECT_NAME=admin
export OS_USERNAME=admin
export OS_PASSWORD=admin
export OS_AUTH_URL=http://controller:35357/v3
export OS_IDENTITY_API_VERSION=3
export OS_IMAGE_API_VERSION=2
[root@controller openstack]# vim demo-openrc
export OS_PROJECT_DOMAIN_NAME=Default
export OS_USER_DOMAIN_NAME=Default
export OS_PROJECT_NAME=demo
export OS_USERNAME=demo
export OS_PASSWORD=123456
export OS_AUTH_URL=http://controller:35357/v3
export OS_IDENTITY_API_VERSION=3
export OS_IMAGE_API_VERSION=2
[root@controller openstack]# openstack token issue
[root@controller openstack]#
+------------+---------------------------------------------------------------------------------------------------------------------------------------+
| Field      | Value                                                                                                                                 |
+------------+---------------------------------------------------------------------------------------------------------------------------------------+
| expires    | 2017-10-11 15:58:45+00:00                                                                                                             |
| id         | gAAAAABZ3jGlmx9cC0uHRqFZCaIYAeWkdQxkmsZJ2IgOzjs1z2WKIiXK814IYHmOz8EhLbgE5IHz-                                                         |
|            | rJrxNN97c3FkDnZYb6JNnI5N4aJVpi0veEEr0qDguF62AgBLEbx0OL9_n7Q3tK7AkCJdihUfT33DVwGPxDusgCqi28xbUptNi7v3F7FqOc                            |
| project_id | 7fb02c054c7343b29e1f55bdc4b7081f                                                                                                      |
| user_id    | 3f567d42de46423388b2f20c4ec9dd6d                                                                                                      |
+------------+---------------------------------------------------------------------------------------------------------------------------------------+
镜像服务
镜像服务(glance)是用户能够发现,注册和检索虚拟机的镜像,它提供了一个REST API,使您能够查询虚拟机映像元数据并检索实际映像。可以将通过Image服务提供的虚拟机映像存储在各种位置,从简单文件系统到对象存储系统(如OpenStack对象存储)。镜像默认放在/var/lib/glance/images/。
下面说一下glance服务的安装及配置
1.创建数据库
mysql -uroot -p123456
CREATE DATABASE glance;
GRANT ALL PRIVILEGES ON glance.* TO 'glance'@'localhost' IDENTIFIED BY '123456';
GRANT ALL PRIVILEGES ON glance.* TO 'glance'@'%' IDENTIFIED BY '123456';
GLANCE_DBPASS 123456
创建glance用户
[root@controller openstack]# . admin-openrc
[root@controller openstack]# openstack user create --domain default --password-prompt glance
User Password:
Repeat User Password:
+---------------------+----------------------------------+
| Field               | Value                            |
+---------------------+----------------------------------+
| domain_id           | default                          |
| enabled             | True                             |
| id                  | e9f633cf1a8b4de39939ec3c1677a4d8 |
| name                | glance                           |
| password_expires_at | None                             |
+---------------------+----------------------------------+
[root@controller openstack]#
openstack role add --project service --user glance admin
将admin角色添加到glance用户和服务项目中
创建glance服务实例
openstack service create --name glance --description "OpenStack Image" image
4.创建image服务API端点
openstack endpoint create --region RegionOne image public http://controller:9292
[root@controller openstack]# openstack endpoint create --region RegionOne image public http://controller:9292
+--------------+----------------------------------+
| Field        | Value                            |
+--------------+----------------------------------+
| enabled      | True                             |
| id           | 8ee8707b390847308e31f13b096d381b |
| interface    | public                           |
| region       | RegionOne                        |
| region_id    | RegionOne                        |
| service_id   | 6a2785ef1e954a819b6adf00f52d7bff |
| service_name | glance                           |
| service_type | image                            |
| url          | http://controller:9292           |
+--------------+----------------------------------+

openstack endpoint create --region RegionOne image internal http://controller:9292
openstack endpoint create --region RegionOne image admin http://controller:9292
5.安装服务
yum install openstack-glance -y
6.配置服务
修改/etc/glance/glance-api.conf
[root@controller ~]# cd /etc/glance/
[root@controller glance]# cp glance-api.conf glance-api.conf.bak
[root@controller glance]# egrep -v "^#|^$" glance-api.conf.bak > glance-api.conf
[root@controller glance]# vim glance-api.conf
[DEFAULT]
[cors]
[cors.subdomain]
[database]
connection = mysql+pymysql://glance:123456@controller/glance

[glance_store]
stores = file,http
default_store = file
filesystem_store_datadir = /var/lib/glance/images/
[image_format]

[keystone_authtoken]
auth_uri = http://controller:5000
auth_url = http://controller:35357
memcached_servers = controller:11211
auth_type = password
project_domain_name = Default
user_domain_name = Default
project_name = service
username = glance
password = 123456

[matchmaker_redis]
[oslo_concurrency]
[oslo_messaging_amqp]
[oslo_messaging_notifications]
[oslo_messaging_rabbit]
[oslo_messaging_zmq]
[oslo_middleware]
[oslo_policy]

[paste_deploy]
flavor = keystone
[profiler]
[store_type_location_strategy]
[task]
[taskflow_executor]
[root@controller ~]# cd /etc/glance/
[root@controller glance]# cp glance-registry.conf glance-registry.conf.bak
[root@controller glance]# egrep -v "^#|^$" glance-registry.conf.bak > glance-registry.conf
vim glance-registry.conf
[DEFAULT]
[database]
connection = mysql+pymysql://glance:123456@controller/glance
[keystone_authtoken]
auth_uri = http://controller:5000
auth_url = http://controller:35357
memcached_servers = controller:11211
auth_type = password
project_domain_name = Default
user_domain_name = Default
project_name = service
username = glance
password = 123456
[matchmaker_redis]
[oslo_messaging_amqp]
[oslo_messaging_notifications]
[oslo_messaging_rabbit]
[oslo_messaging_zmq]
[oslo_policy]
[paste_deploy]
flavor = keystone
[profiler]
7.填充数据库
[root@controller glance]# su -s /bin/sh -c "glance-manage db_sync" glance
Option "verbose" from group "DEFAULT" is deprecated for removal.  Its value may be silently ignored in the future.
/usr/lib/python2.7/site-packages/oslo_db/sqlalchemy/enginefacade.py:1171: OsloDBDeprecationWarning: EngineFacade is deprecated; please use oslo_db.sqlalchemy.enginefacade
  expire_on_commit=expire_on_commit, _conf=conf)
8.启动服务
[root@controller glance]# systemctl enable openstack-glance-api.service openstack-glance-registry.service
[root@controller glance]# systemctl restart openstack-glance-api.service openstack-glance-registry.service
9.下载镜像
wget http://download.cirros-cloud.net/0.3.4/cirros-0.3.4-x86_64-disk.img
scp -r root@192.168.2.36:/root/CentOS-7-x86_64-GenericCloud.qcow2 /opt/openstack/
[root@controller openstack]# glance image-create --name "CentOS7" --file cirros-0.3.4-x86_64-disk.img --disk-format qcow2 --container-format bare --visibility public --progress
[=============================>] 100%
+------------------+--------------------------------------+
| Property         | Value                                |
+------------------+--------------------------------------+
| checksum         | 90956b2310c742b42e80c5eee9e6efb4     |
| container_format | bare                                 |
| created_at       | 2017-10-11T15:23:20Z                 |
| disk_format      | qcow2                                |
| id               | c3265e82-3245-46eb-b9b4-cdce4440d660 |
| min_disk         | 0                                    |
| min_ram          | 0                                    |
| name             | CentOS6_5                            |
| owner            | 249493ec92ae4f569f65b9bfb40ca371     |
| protected        | False                                |
| size             | 854851584                            |
| status           | active                               |
| tags             | []                                   |
| updated_at       | 2017-10-11T15:23:24Z                 |
| virtual_size     | None                                 |
| visibility       | public                               |
+------------------+--------------------------------------+
[root@controller openstack]#
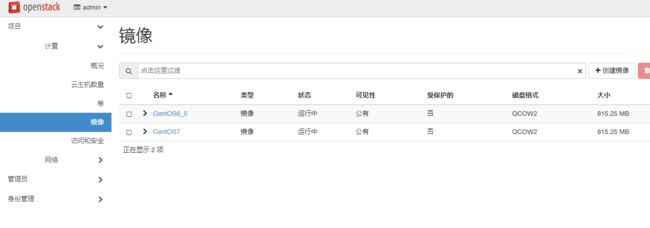
[root@controller openstack]# openstack image list
+--------------------------------------+-----------+--------+
| ID                                   | Name      | Status |
+--------------------------------------+-----------+--------+
| a4afd509-e63f-42dc-af05-08e80e530680 | CentOS7   | active |
| c3265e82-3245-46eb-b9b4-cdce4440d660 | CentOS6_5 | active |
+--------------------------------------+-----------+--------+
(nova)的安装及配置。
一、安装和配置控制器节点
1.配置数据库
mysql -uroot -p123456
CREATE DATABASE nova_api;
CREATE DATABASE nova;
GRANT ALL PRIVILEGES ON nova_api.* TO 'nova'@'localhost' IDENTIFIED BY '123456';
GRANT ALL PRIVILEGES ON nova_api.* TO 'nova'@'%' IDENTIFIED BY '123456';
GRANT ALL PRIVILEGES ON nova.* TO 'nova'@'localhost' IDENTIFIED BY '123456';
GRANT ALL PRIVILEGES ON nova.* TO 'nova'@'%' IDENTIFIED BY '123456';
2.获取admin权限
# . admin-openrc
3.创建服务
创建nova用户
[root@controller openstack]# openstack user create --domain default --password-prompt nova
User Password:123456
Repeat User Password:123456
+---------------------+----------------------------------+
| Field               | Value                            |
+---------------------+----------------------------------+
| domain_id           | default                          |
| enabled             | True                             |
| id                  | b0c274d46433459f8048cf5383d81e91 |
| name                | nova                             |
| password_expires_at | None                             |
+---------------------+----------------------------------+
将admin角色添加到nova用户
openstack role add --project service --user nova admin
创建nova服务实体
openstack service create --name nova --description "OpenStack Compute" compute
4.创建API
openstack endpoint create --region RegionOne compute public http://controller:8774/v2.1/%\(tenant_id\)s
[root@controller openstack]# openstack endpoint create --region RegionOne compute public http://controller:8774/v2.1/%\(tenant_id\)s
+--------------+-------------------------------------------+
| Field        | Value                                     |
+--------------+-------------------------------------------+
| enabled      | True                                      |
| id           | c73837b6665a4583a1885b70e2727a2e          |
| interface    | public                                    |
| region       | RegionOne                                 |
| region_id    | RegionOne                                 |
| service_id   | e511923b761e4103ac6f2ff693c68639          |
| service_name | nova                                      |
| service_type | compute                                   |
| url          | http://controller:8774/v2.1/%(tenant_id)s |
+--------------+-------------------------------------------+
[root@controller openstack]#
openstack endpoint create --region RegionOne compute internal http://controller:8774/v2.1/%\(tenant_id\)s
openstack endpoint create --region RegionOne compute admin http://controller:8774/v2.1/%\(tenant_id\)s
安装软件包
yum install openstack-nova-api openstack-nova-conductor openstack-nova-console openstack-nova-novncproxy openstack-nova-scheduler -y
6.编辑/etc/nova/nova.conf
[root@controller ~]# cd /etc/nova/
[root@controller nova]# cp nova.conf nova.conf.bak
[root@controller nova]# egrep -v "^$|^#" nova.conf.bak > nova.conf
[root@controller nova]# vim nova.conf
添加如下内容
[DEFAULT]
enabled_apis = osapi_compute,metadata
transport_url = rabbit://openstack:RABBIT_PASS@controller
auth_strategy = keystone
my_ip = 192.168.2.34
use_neutron = True
firewall_driver = nova.virt.firewall.NoopFirewallDriver

[api_database]
connection = mysql+pymysql://nova:123456@controller/nova_api

[database]
connection = mysql+pymysql://nova:123456@controller/nova

[keystone_authtoken]
auth_uri = http://controller:5000
auth_url = http://controller:35357
memcached_servers = controller:11211
auth_type = password
project_domain_name = Default
user_domain_name = Default
project_name = service
username = nova
password = 123456

[vnc]
vncserver_listen = $my_ip
vncserver_proxyclient_address = $my_ip

[glance]
api_servers = http://controller:9292

[oslo_concurrency]
lock_path = /var/lib/nova/tmp
7.导入数据库
su -s /bin/sh -c "nova-manage api_db sync" nova
su -s /bin/sh -c "nova-manage db sync" nova
忽略此输出的任何弃用消息
8.开启服务
systemctl enable openstack-nova-api.service openstack-nova-consoleauth.service openstack-nova-scheduler.service openstack-nova-conductor.service openstack-nova-novncproxy.service
systemctl start openstack-nova-api.service openstack-nova-consoleauth.service openstack-nova-scheduler.service openstack-nova-conductor.service openstack-nova-novncproxy.service
验证
[root@controller nova]# nova service-list
+----+------------------+------------+----------+---------+-------+------------+-----------------+
| Id | Binary           | Host       | Zone     | Status  | State | Updated_at | Disabled Reason |
+----+------------------+------------+----------+---------+-------+------------+-----------------+
| 1  | nova-consoleauth | controller | internal | enabled | up    | -          | -               |
| 2  | nova-conductor   | controller | internal | enabled | up    | -          | -               |
| 5  | nova-scheduler   | controller | internal | enabled | up    | -          | -               |
+----+------------------+------------+----------+---------+-------+------------+-----------------+
nova计算节点服务安装
安装配置计算节点
yum install openstack-nova-compute -y
2.编辑/etc/nova/nova.conf
[root@compute1 ~]# cd /etc/nova/
[root@compute1 nova]# cp nova.conf nova.conf.bak
[root@compute1 nova]# egrep -v "^#|^$" nova.conf.bak > nova.conf
[root@compute1 nova]# vim nova.conf
[DEFAULT]
...
enabled_apis = osapi_compute,metadata
transport_url = rabbit://openstack:RABBIT_PASS@controller
auth_strategy = keystone
my_ip = 192.168.2.35
use_neutron = True
firewall_driver = nova.virt.firewall.NoopFirewallDriver
[keystone_authtoken]
...
auth_uri = http://controller:5000
auth_url = http://controller:35357
memcached_servers = controller:11211
auth_type = password
project_domain_name = Default
user_domain_name = Default
project_name = service
username = nova
password = 123456
[vnc]
...
enabled = True
vncserver_listen = 0.0.0.0
vncserver_proxyclient_address = $my_ip
novncproxy_base_url = http://controller:6080/vnc_auto.html
[glance]
...
api_servers = http://controller:9292
[oslo_concurrency]
...
lock_path = /var/lib/nova/tmp
3.确定计算节点是否支持虚拟化。
# egrep -c '(vmx|svm)' /proc/cpuinfo
如果返回值大于1表示支持虚拟化
0
如果不支持请更改/etc/nova/nova.conf
[libvirt]
...
virt_type = qemu
systemctl enable libvirtd.service openstack-nova-compute.service
systemctl start libvirtd.service openstack-nova-compute.service
启动报错
2017-10-11 16:13:04.611 15074 ERROR nova Acce***efused: (0, 0): (403) ACCESS_REFUSED - Login was refused using authentication mechanism AMQPLAIN. For details see the broker logfile.
rabbitmqctl add_user openstack RABBIT_PASS
rabbitmqctl set_permissions openstack ".*" ".*" ".*"
systemctl restart rabbitmq-server.service
重启所有nova服务 在控制节点上
[root@controller openstack]# systemctl stop openstack-nova-api.service openstack-nova-consoleauth.service openstack-nova-scheduler.service openstack-nova-conductor.service openstack-nova-novncproxy.service
[root@controller openstack]# systemctl start openstack-nova-api.service openstack-nova-consoleauth.service openstack-nova-scheduler.service openstack-nova-conductor.service openstack-nova-novncproxy.service
[root@controller openstack]# openstack compute service list
+----+------------------+------------+----------+---------+-------+----------------------------+
| ID | Binary           | Host       | Zone     | Status  | State | Updated At                 |
+----+------------------+------------+----------+---------+-------+----------------------------+
|  1 | nova-consoleauth | controller | internal | enabled | up    | 2017-10-11T08:27:57.000000 |
|  2 | nova-conductor   | controller | internal | enabled | up    | 2017-10-11T08:27:57.000000 |
|  5 | nova-scheduler   | controller | internal | enabled | up    | 2017-10-11T08:27:57.000000 |
+----+------------------+------------+----------+---------+-------+----------------------------+
[root@controller openstack]# nova service-list
+----+------------------+------------+----------+---------+-------+----------------------------+-----------------+
| Id | Binary           | Host       | Zone     | Status  | State | Updated_at                 | Disabled Reason |
+----+------------------+------------+----------+---------+-------+----------------------------+-----------------+
| 1  | nova-consoleauth | controller | internal | enabled | up    | 2017-10-11T08:28:57.000000 | -               |
| 2  | nova-conductor   | controller | internal | enabled | up    | 2017-10-11T08:28:57.000000 | -               |
| 5  | nova-scheduler   | controller | internal | enabled | up    | 2017-10-11T08:28:57.000000 | -               |
| 9  | nova-compute     | compute1   | nova     | enabled | up    | 2017-10-11T08:29:03.000000 | -               |
+----+------------------+------------+----------+---------+-------+----------------------------+-----------------+
[root@controller openstack]#
网络服务neutron服务器端的安装及配置
mysql -u root -p123456
CREATE DATABASE neutron;
GRANT ALL PRIVILEGES ON neutron.* TO 'neutron'@'localhost' IDENTIFIED BY '123456';
GRANT ALL PRIVILEGES ON neutron.* TO 'neutron'@'%' IDENTIFIED BY '123456';
2.获取admin权限
# . admin-openrc
3.创建neutron服务
# openstack user create --domain default --password-prompt neutron
[root@controller ~]# openstack user create --domain default --password-prompt neutron
User Password:123456
Repeat User Password:123456
+---------------------+----------------------------------+
| Field               | Value                            |
+---------------------+----------------------------------+
| domain_id           | default                          |
| enabled             | True                             |
| id                  | 6d0d3ffc8b3247d5b2e35ccd93cb5fb6 |
| name                | neutron                          |
| password_expires_at | None                             |
+---------------------+----------------------------------+
openstack role add --project service --user neutron admin
openstack service create --name neutron  --description "OpenStack Networking" network
+-------------+----------------------------------+
| Field       | Value                            |
+-------------+----------------------------------+
| description | OpenStack Networking             |
| enabled     | True                             |
| id          | 41251fae3b584d96a5485739033a700e |
| name        | neutron                          |
| type        | network                          |
+-------------+----------------------------------+
4.创建网络服务API端点
openstack endpoint create --region RegionOne network public http://controller:9696
openstack endpoint create --region RegionOne network internal http://controller:9696
openstack endpoint create --region RegionOne network admin http://controller:9696
[root@controller openstack]# openstack endpoint create --region RegionOne  network public http://controller:9696
+--------------+----------------------------------+
| Field        | Value                            |
+--------------+----------------------------------+
| enabled      | True                             |
| id           | 91146c03d2084c89bbbd211faa35868f |
| interface    | public                           |
| region       | RegionOne                        |
| region_id    | RegionOne                        |
| service_id   | 41251fae3b584d96a5485739033a700e |
| service_name | neutron                          |
| service_type | network                          |
| url          | http://controller:9696           |
+--------------+----------------------------------+
[root@controller openstack]# openstack endpoint create --region RegionOne  network internal http://controller:9696

+--------------+----------------------------------+
| Field        | Value                            |
+--------------+----------------------------------+
| enabled      | True                             |
| id           | 190cb2b5ad914451933c2931a34028a8 |
| interface    | internal                         |
| region       | RegionOne                        |
| region_id    | RegionOne                        |
| service_id   | 41251fae3b584d96a5485739033a700e |
| service_name | neutron                          |
| service_type | network                          |
| url          | http://controller:9696           |
+--------------+----------------------------------+
[root@controller openstack]# openstack endpoint create --region RegionOne  network admin http://controller:9696

+--------------+----------------------------------+
| Field        | Value                            |
+--------------+----------------------------------+
| enabled      | True                             |
| id           | c9e4a664a2eb49b7bf9670e53ee834f8 |
| interface    | admin                            |
| region       | RegionOne                        |
| region_id    | RegionOne                        |
| service_id   | 41251fae3b584d96a5485739033a700e |
| service_name | neutron                          |
| service_type | network                          |
| url          | http://controller:9696           |
+--------------+----------------------------------+
网络选择网络1模式:Provider networks
yum install openstack-neutron openstack-neutron-ml2 openstack-neutron-linuxbridge ebtables -y
5.编辑 /etc/neutron/neutron.conf
[root@controller ~]# cd /etc/neutron/
[root@controller neutron]# cp neutron.conf neutron.conf.bak
[root@controller neutron]# egrep -v "^$|^#" neutron.conf.bak > neutron.conf
[root@controller neutron]# vim neutron.conf
[database]
...
connection = mysql+pymysql://neutron:123456@controller/neutron
[keystone_authtoken]
...
auth_uri = http://controller:5000
auth_url = http://controller:35357
memcached_servers = controller:11211
auth_type = password
project_domain_name = Default
user_domain_name = Default
project_name = service
username = neutron
password = 123456
[nova]
...
auth_url = http://controller:35357
auth_type = password
project_domain_name = Default
user_domain_name = Default
region_name = RegionOne
project_name = service
username = nova
password = 123456
[oslo_concurrency]
...
lock_path = /var/lib/neutron/tmp
[DEFAULT]
core_plugin = ml2
service_plugins =
transport_url = rabbit://openstack:RABBIT_PASS@controller
auth_strategy = keystone
notify_nova_on_port_status_changes = True
notify_nova_on_port_data_changes = True
6.编辑/etc/neutron/plugins/ml2/ml2_conf.ini
[root@controller ~]# cd /etc/neutron/plugins/ml2/
[root@controller ml2]# cp ml2_conf.ini ml2_conf.ini.bak
[root@controller ml2]# egrep -v "^$|^#" ml2_conf.ini.bak > ml2_conf.ini
[root@controller ml2]# vim ml2_conf.ini
[ml2]
...
type_drivers = flat,vlan
tenant_network_types =
mechanism_drivers = linuxbridge
extension_drivers = port_security
[ml2_type_flat]
...
flat_networks = provider
[securitygroup]
...
enable_ipset = True
6.编辑/etc/neutron/plugins/ml2/linuxbridge_agent.ini
[root@controller ~]# cd /etc/neutron/plugins/ml2/
[root@controller ml2]# cp linuxbridge_agent.ini linuxbridge_agent.ini.bak
[root@controller ml2]# egrep -v "^$|^#" linuxbridge_agent.ini.bak >linuxbridge_agent.ini
[root@controller ml2]# vim linuxbridge_agent.ini
7.编辑/etc/neutron/dhcp_agent.ini
[linux_bridge]
physical_interface_mappings = provider:eth0
[vxlan]
enable_vxlan = False
[securitygroup]
...
enable_security_group = True
firewall_driver = neutron.agent.linux.iptables_firewall.IptablesFirewallDriver
[root@controller ~]# cd /etc/neutron/
[root@controller neutron]# cp dhcp_agent.ini dhcp_agent.ini.bak
[root@controller neutron]# egrep -v "^$|^#" dhcp_agent.ini.bak > dhcp_agent.ini
[root@controller neutron]# vim dhcp_agent.ini
[DEFAULT]
...
interface_driver = neutron.agent.linux.interface.BridgeInterfaceDriver
dhcp_driver = neutron.agent.linux.dhcp.Dnsmasq
enable_isolated_metadata = True
8.修改/etc/neutron/metadata_agent.ini
[root@controller ~]# cd /etc/neutron/
[root@controller neutron]# cp metadata_agent.ini metadata_agent.ini.bak
[root@controller neutron]# egrep -v "^$|^#" metadata_agent.ini.bak metadata_agent.ini
[root@controller neutron]# egrep -v "^$|^#" metadata_agent.ini.bak > metadata_agent.ini
[root@controller neutron]# vim metadata_agent.ini
[DEFAULT]
...
nova_metadata_ip = controller
metadata_proxy_shared_secret = mate
8.编辑/etc/nova/nova.conf
[root@controller ~]# cd /etc/nova/
[root@controller nova]# cp nova.conf nova.conf.nova
[root@controller nova]# vim nova.conf
[neutron]
...
url = http://controller:9696
auth_url = http://controller:35357
auth_type = password
project_domain_name = Default
user_domain_name = Default
region_name = RegionOne
project_name = service
username = neutron
password = NEUTRON_PASS
service_metadata_proxy = True
metadata_proxy_shared_secret = mate
9.创建链接
ln -s /etc/neutron/plugins/ml2/ml2_conf.ini /etc/neutron/plugin.ini
10.导入数据库
su -s /bin/sh -c "neutron-db-manage --config-file /etc/neutron/neutron.conf  --config-file /etc/neutron/plugins/ml2/ml2_conf.ini upgrade head" neutron

INFO  [alembic.runtime.migration] Running upgrade 89ab9a816d70 -> c879c5e1ee90, Add segment_id to subnet
INFO  [alembic.runtime.migration] Running upgrade c879c5e1ee90 -> 8fd3918ef6f4, Add segment_host_mapping table.
INFO  [alembic.runtime.migration] Running upgrade 8fd3918ef6f4 -> 4bcd4df1f426, Rename ml2_dvr_port_bindings
INFO  [alembic.runtime.migration] Running upgrade 4bcd4df1f426 -> b67e765a3524, Remove mtu column from networks.
INFO  [alembic.runtime.migration] Running upgrade b67e765a3524 -> a84ccf28f06a, migrate dns name from port
INFO  [alembic.runtime.migration] Running upgrade a84ccf28f06a -> 7d9d8eeec6ad, rename tenant to project
INFO  [alembic.runtime.migration] Running upgrade 7d9d8eeec6ad -> a8b517cff8ab, Add routerport bindings for L3 HA
INFO  [alembic.runtime.migration] Running upgrade a8b517cff8ab -> 3b935b28e7a0, migrate to pluggable ipam
INFO  [alembic.runtime.migration] Running upgrade 3b935b28e7a0 -> b12a3ef66e62, add standardattr to qos policies
INFO  [alembic.runtime.migration] Running upgrade b12a3ef66e62 -> 97c25b0d2353, Add Name and Description to the networksegments table
INFO  [alembic.runtime.migration] Running upgrade 97c25b0d2353 -> 2e0d7a8a1586, Add binding index to RouterL3AgentBinding
INFO  [alembic.runtime.migration] Running upgrade 2e0d7a8a1586 -> 5c85685d616d, Remove availability ranges.
INFO  [alembic.runtime.migration] Running upgrade 67daae611b6e -> 6b461a21bcfc, uniq_floatingips0floating_network_id0fixed_port_id0fixed_ip_addr
INFO  [alembic.runtime.migration] Running upgrade 6b461a21bcfc -> 5cd92597d11d, Add ip_allocation to port
  OK
11.重启nova-api服务
systemctl restart openstack-nova-api.service
12.启动服务
systemctl enable neutron-server.service neutron-linuxbridge-agent.service neutron-dhcp-agent.service neutron-metadata-agent.service
systemctl start neutron-server.service neutron-linuxbridge-agent.service neutron-dhcp-agent.service neutron-metadata-agent.service
systemctl enable neutron-l3-agent.service
systemctl start neutron-l3-agent.service
验证:
[root@controller ~]# openstack network agent list
+--------------------------------------+----------------+------------+-------------------+-------+-------+------------------------+
| ID | Agent Type | Host | Availability Zone | Alive | State | Binary |
+--------------------------------------+----------------+------------+-------------------+-------+-------+------------------------+
| 5d6eb39f-5a04-41e3-9403-20319ef8c816 | DHCP agent | controller | nova | True | UP | neutron-dhcp-agent |
| 70fbc282-4dd1-4cd5-9af5-2434e8de9285 | Metadata agent | controller | None | True | UP | neutron-metadata-agent |
+--------------------------------------+----------------+------------+-------------------+-------+-------+------------------------+
[root@controller ~]#
网卡地址不对
Failed to start OpenStack Neutron Linux Bridge Agent.
解决办法:
编辑/etc/neutron/plugins/ml2/linuxbridge_agent.ini
在linux_bridge部分将physical_interface_mappings改为physnet1:ens160,重启neutron-linuxbridge-agent服务即可
[linux_bridge]
...
physical_interface_mappings = physnet1:ens160
[root@controller ~]# openstack network agent list
+--------------------------------------+--------------------+------------+-------------------+-------+-------+---------------------------+
| ID                                   | Agent Type         | Host       | Availability Zone | Alive | State | Binary                    |
+--------------------------------------+--------------------+------------+-------------------+-------+-------+---------------------------+
| 0207fffa-ae6b-4e06-a901-cc6ccb6c1404 | Linux bridge agent | controller | None              | True  | UP    | neutron-linuxbridge-agent |
| 5d6eb39f-5a04-41e3-9403-20319ef8c816 | DHCP agent         | controller | nova              | True  | UP    | neutron-dhcp-agent        |
| 70fbc282-4dd1-4cd5-9af5-2434e8de9285 | Metadata agent     | controller | None              | True  | UP    | neutron-metadata-agent    |
+--------------------------------------+--------------------+------------+-------------------+-------+-------+---------------------------+
[root@cntroller ~]#
网络服务计算节点的安装及配置
1.安装服务
# yum install openstack-neutron-linuxbridge ebtables ipset -y
2.修改/etc/neutron/neutron.conf
[database]
...
connection = mysql+pymysql://neutron:123456@controller/neutron
[keystone_authtoken]
...
auth_uri = http://controller:5000
auth_url = http://controller:35357
memcached_servers = controller:11211
auth_type = password
project_domain_name = Default
user_domain_name = Default
project_name = service
username = neutron
password = 123456
[nova]
...
auth_url = http://controller:35357
auth_type = password
project_domain_name = Default
user_domain_name = Default
region_name = RegionOne
project_name = service
username = nova
password = 123456
[oslo_concurrency]
...
lock_path = /var/lib/neutron/tmp
[DEFAULT]
core_plugin = ml2
service_plugins =
transport_url = rabbit://openstack:RABBIT_PASS@controller
auth_strategy = keystone
notify_nova_on_port_status_changes = True
notify_nova_on_port_data_changes = True
3.修改/etc/neutron/plugins/ml2/linuxbridge_agent.ini
[linux_bridge]
physical_interface_mappings = provider:ens160
[vxlan]
enable_vxlan = False
[securitygroup]
...
enable_security_group = True
firewall_driver = neutron.agent.linux.iptables_firewall.IptablesFirewallDriver
4.修改/etc/nova/nova.conf
[neutron]
...
url = http://controller:9696
auth_url = http://controller:35357
auth_type = password
project_domain_name = Default
user_domain_name = Default
region_name = RegionOne
project_name = service
username = neutron
password = 123456
5.重启nova-compute服务
systemctl restart openstack-nova-compute.service
6.启动服务
systemctl enable neutron-linuxbridge-agent.service
systemctl start neutron-linuxbridge-agent.service
7.验证
openstack network agent list
[root@controller ~]# openstack network agent list
+--------------------------------------+--------------------+------------+-------------------+-------+-------+---------------------------+
| ID                                   | Agent Type         | Host       | Availability Zone | Alive | State | Binary                    |
+--------------------------------------+--------------------+------------+-------------------+-------+-------+---------------------------+
| 0207fffa-ae6b-4e06-a901-cc6ccb6c1404 | Linux bridge agent | controller | None              | True  | UP    | neutron-linuxbridge-agent |
| 5d6eb39f-5a04-41e3-9403-20319ef8c816 | DHCP agent         | controller | nova              | True  | UP    | neutron-dhcp-agent        |
| 70fbc282-4dd1-4cd5-9af5-2434e8de9285 | Metadata agent     | controller | None              | True  | UP    | neutron-metadata-agent    |
| ab7efa23-4957-475a-8c80-58b786e96cdd | Linux bridge agent | compute1   | None              | True  | UP    | neutron-linuxbridge-agent |
+--------------------------------------+--------------------+------------+-------------------+-------+-------+---------------------------+
安装dashboard组件
yum install openstack-dashboard httpd mod_wsgi memcached python-memcached
WEBROOT = '/dashboard/'
配置dashboard
编辑文件 /etc/openstack-dashboard/local_settings 完成下面内容
a.配置dashboard使用OpenStack服务【控制节点】
OPENSTACK_HOST = "192.168.2.34"
b.允许hosts 访问dashboard
ALLOWED_HOSTS = ['*']
c.配置缓存会话存储服务:
CACHES = {
'default': {
'BACKEND': 'django.core.cache.backends.memcached.MemcachedCache',
'LOCATION': '192.168.2.34:11211',
}
}
注意:
注释掉其它 session存储配置
d.配置user为默认角色
OPENSTACK_KEYSTONE_DEFAULT_ROLE = "user"
e.配置时区
TIME_ZONE = "Asia/Shanghai"
完成安装
1.CentOS,配置 SELinux允许 web server 连接 to OpenStack 服务:
setsebool -P httpd_can_network_connect on
2.可能包bug,dashboard CSS 加载失败,运行下面命令解决
chown -R apache:apache /usr/share/openstack-dashboard/static
3.启动服务,并设置开机启动
systemctl enable httpd.service memcached.service
systemctl restart httpd.service memcached.service
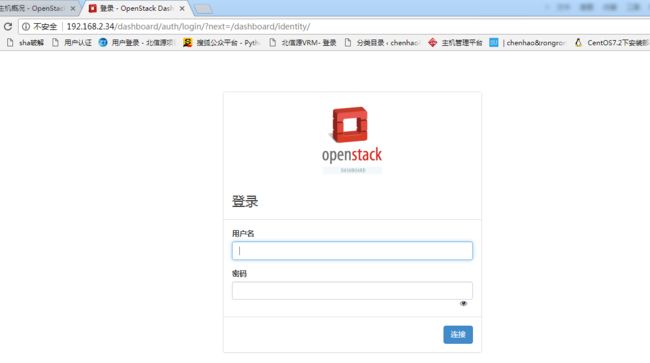
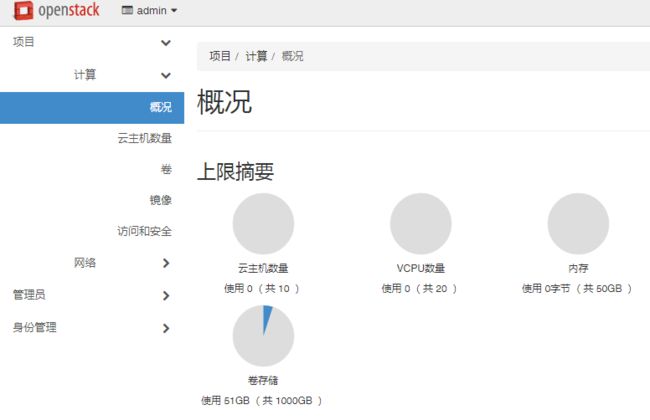
http://controller/dashboard/
输入管理员的用户名和密码
[root@compute1 ~]# curl -I http://controller/dashboard/
HTTP/1.1 500 Internal Server Error
Date: Thu, 12 Oct 2017 12:16:13 GMT
Server: Apache/2.4.6 (CentOS) mod_wsgi/3.4 Python/2.7.5
Connection: close
Content-Type: text/html; charset=iso-8859-1
vim /etc/httpd/conf.d/openstack-dashboard.conf
添加WSGIApplicationGroup %{GLOBAL}
Not Found
The requested URL /auth/login/ was not found on this server.
[:error] [pid 16188] WARNING:py.warnings:RemovedInDjango19Warning: The use of the language code 'zh-cn' is deprecated. Please use the 'zh-hans' translation instead.
修改vim /etc/httpd/conf.d/openstack-dashboard.conf
WEBROOT = '/dashboard/'
安装cinder
CREATE DATABASE cinder;
GRANT ALL PRIVILEGES ON cinder.* TO 'cinder'@'localhost' IDENTIFIED BY '123456';
GRANT ALL PRIVILEGES ON cinder.* TO 'cinder'@'%' IDENTIFIED BY '123456';
GRANT ALL PRIVILEGES ON root.* TO 'root'@'%' IDENTIFIED BY '123456';
[root@controller neutron]# openstack user create --domain default --password-prompt cinder
User Password:123456
Repeat User Password:123456
'+---------------------+----------------------------------+
| Field | Value |
+---------------------+----------------------------------+
| domain_id | default |
| enabled | True |
| id | cb24c3d7a80647d79fa851c8680e4880 |
| name | cinder |
| password_expires_at | None |
+---------------------+----------------------------------+'
openstack role add --project service --user cinder admin[root@ontroller neutron]# openstack service create --name cinder --description "OpenStack Block Storage" volume
+-------------+----------------------------------+
| Field | Value |
+-------------+----------------------------------+
| description | OpenStack Block Storage |
| enabled | True |
| id | 686dd8eed2d44e4081513673e76e8060 |
| name | cinder |
| type | volume |
+-------------+----------------------------------+[root@controller neutron]# openstack service create --name admin --description "OpenStack Block Storage" volume
+-------------+----------------------------------+
| Field | Value |
+-------------+----------------------------------+
| description | OpenStack Block Storage |
| enabled | True |
| id | 635e003e1979452e8f7f63c70b999fb2 |
| name | admin |
| type | volume |
+-------------+----------------------------------+[root@controller neutron]# openstack service create --name public --description "OpenStack Block Storage" volume
+-------------+----------------------------------+
| Field | Value |
+-------------+----------------------------------+
| description | OpenStack Block Storage |
| enabled | True |
| id | 87fd1a9b8b3240458ac3b5fa8925b79b |
| name | public |
| type | volume |
+-------------+----------------------------------+[root@controller neutron]# openstack service create --name internal --description "OpenStack Block Storage" volume
+-------------+----------------------------------+
| Field | Value |
+-------------+----------------------------------+
| description | OpenStack Block Storage |
| enabled | True |
| id | 1ff8370f7d7c4da4b6a2567c9fe83254 |
| name | internal |
| type | volume |
+-------------+----------------------------------+[root@controller neutron]#
[root@controller ~]# openstack service create --name admin --description "OpenStack Block Storage" volumev2
+-------------+----------------------------------+
| Field       | Value                            |
+-------------+----------------------------------+
| description | OpenStack Block Storage          |
| enabled     | True                             |
| id          | 12eaeb14115548b09688bd64bfee0af2 |
| name        | admin                            |
| type        | volumev2                         |
+-------------+----------------------------------+
You have new mail in /var/spool/mail/root
[root@controller ~]# openstack service create --name public --description "OpenStack Block Storage" volumev2
+-------------+----------------------------------+
| Field       | Value                            |
+-------------+----------------------------------+
| description | OpenStack Block Storage          |
| enabled     | True                             |
| id          | b1dfc4b8c3084d9789c0b0731e0f4a2a |
| name        | public                           |
| type        | volumev2                         |
+-------------+----------------------------------+
[root@controller ~]# openstack service create --name internal  --description "OpenStack Block Storage" volumev2
+-------------+----------------------------------+
| Field       | Value                            |
+-------------+----------------------------------+
| description | OpenStack Block Storage          |
| enabled     | True                             |
| id          | b8d90f1e658e402f9871a2fbad1d21b0 |
| name        | internal                         |
| type        | volumev2                         |
openstack service create --name cinderv2 --description "OpenStack Block Storage" volumev2
openstack endpoint create --region RegionOne volume public http://controller:8776/v1/%\(tenant_id\)s
openstack endpoint create --region RegionOne volume internal http://controller:8776/v1/%\(tenant_id\)s
openstack endpoint create --region RegionOne volume admin http://controller:8776/v1/%\(tenant_id\)s
openstack endpoint create --region RegionOne volumev2 public http://controller:8776/v2/%\(tenant_id\)s
openstack endpoint create --region RegionOne volumev2 internal http://controller:8776/v2/%\(tenant_id\)s
openstack endpoint create --region RegionOne volumev2 admin http://controller:8776/v2/%\(tenant_id\)s
安装
yum install openstack-cinder -y
cd /etc/cinder/
cp cinder.conf cinder.conf.bak
egrep -v "^$|^#" cinder.conf.bak > cinder.conf
vim cinder.conf
[DEFAULT]
transport_url = rabbit://openstack:RABBIT_PASS@controller
auth_strategy = keystone
my_ip = 192.168.2.34
[database]
connection = mysql://cinder:123456@controller:3306/cinder
[keystone_authtoken]
auth_uri = http://controller:5000
auth_url = http://controller:35357
memcached_servers = controller:11211
auth_type = password
project_domain_name = Default
user_domain_name = Default
project_name = service
username = cinder
password = 123456
[oslo_concurrency]
lock_path = /var/lib/cinder/tmp
[cinder]
os_region_name = RegionOne
su -s /bin/sh -c "cinder-manage db sync" cinder
[root@controller cinder]# systemctl restart openstack-nova-api.service
[root@controller cinder]# systemctl enable openstack-cinder-api.service openstack-cinder-scheduler.service
Created symlink from /etc/systemd/system/multi-user.target.wants/openstack-cinder-api.service to /usr/lib/systemd/system/openstack-cinder-api.service.
Created symlink from /etc/systemd/system/multi-user.target.wants/openstack-cinder-scheduler.service to /usr/lib/systemd/system/openstack-cinder-scheduler.service.
[root@controller cinder]# systemctl restart openstack-cinder-api.service openstack-cinder-scheduler.service安装cinder节点(本人真实机不足以开启三个节点,cinder节点安装在compute上)
compute
安装LVM作为后端存储
compute#
yum install lvm2 -y
配置LVM(需要在各个使用LVM的服务节点上配置LVM,让其显示,能被扫描到)
(本人的计算节点自带LVM,所以需要加上之前的LVM信息sda)
compute#
vi /etc/lvm/lvm.conf file
devices {
...
filter = [ "a/sda/","a/sdb/", "r/.*/"]
如果存储节点上本身自带LVM(节点操作系统在sda盘的LVM上),则需要加上sda的配置。
cinder#
filter = [ "a/sda/", "a/sdb/", "r/.*/"]
如果计算节点上本身自带LVM(节点操作系统在sda盘的LVM上),则需要配置sda的配置。
compute#
filter = [ "a/sda/", "r/.*/"]
}
systemctl enable lvm2-lvmetad.service
systemctl restart lvm2-lvmetad.service
yum install openstack-cinder targetcli python-keystone -y
建立物理卷和逻辑组
compute#
pvcreate /dev/sdb
vgcreate cinder-volumes /dev/sdb
[root@compute1 ~]# pvcreate /dev/sdb
  Physical volume "/dev/sdb" successfully created.
[root@compute1 ~]# vgcreate cinder-volumes /dev/sdb
  Volume group "cinder-volumes" successfully created
yum install openstack-cinder targetcli python-keystone -y
配置cinder各个组件的配置文件(备份配置文件,删除配置文件里的所有数据,使用提供的配置):
vi /etc/cinder/cinder.conf
[database]
connection = mysql+pymysql://cinder:123456@controller:3306/cinder
[DEFAULT]
transport_url = rabbit://openstack:RABBIT_PASS@controller
auth_strategy = keystone
my_ip = 192.168.2.35
enabled_backends = lvm
glance_api_servers = http://controller:9292
[keystone_authtoken]
auth_uri = http://controller:5000
auth_url = http://controller:35357
memcached_servers = controller:11211
auth_type = password
project_domain_name = default
user_domain_name = default
project_name = service
username = cinder
password = cinder
[lvm]
volume_driver = cinder.volume.drivers.lvm.LVMVolumeDriver
volume_group = cinder-volumes
iscsi_protocol = iscsi
iscsi_helper = lioadm
[oslo_concurrency]
lock_path = /var/lib/cinder/tmp
systemctl enable openstack-cinder-volume.service target.service
systemctl restart openstack-cinder-volume.service target.service
[root@controller cinder]# openstack volume service list
+------------------+--------------+------+---------+-------+----------------------------+
| Binary           | Host         | Zone | Status  | State | Updated At                 |
+------------------+--------------+------+---------+-------+----------------------------+
| cinder-scheduler | controller   | nova | enabled | up    | 2017-10-12T10:02:31.000000 |
| cinder-volume    | compute1@lvm | nova | enabled | up    | 2017-10-12T10:03:32.000000 |
+------------------+--------------+------+---------+-------+----------------------------+
[root@controller cinder]#
创建卷
controller#
命令:openstack volume create --size [多少Gb] [卷名]
例子: openstack volume create --size 1 volume1
[root@controller cinder]# openstack volume create --size 50 volume1
+---------------------+--------------------------------------+
| Field               | Value                                |
+---------------------+--------------------------------------+
| attachments         | []                                   |
| availability_zone   | nova                                 |
| bootable            | false                                |
| consistencygroup_id | None                                 |
| created_at          | 2017-10-12T10:03:51.987431           |
| description         | None                                 |
| encrypted           | False                                |
| id                  | 51596429-b877-4f24-9574-dc266b3f4451 |
| migration_status    | None                                 |
| multiattach         | False                                |
| name                | volume1                              |
| properties          |                                      |
| replication_status  | disabled                             |
| size                | 50                                   |
| snapshot_id         | None                                 |
| source_volid        | None                                 |
| status              | creating                             |
| type                | None                                 |
| updated_at          | None                                 |
| user_id             | 01f1a4a6e97244ec8a915cb120caa564     |
+---------------------+--------------------------------------+
查看卷详情
controller#
openstack volume list
[root@controller cinder]# openstack volume list
+--------------------------------------+--------------+-----------+------+-------------+
| ID                                   | Display Name | Status    | Size | Attached to |
+--------------------------------------+--------------+-----------+------+-------------+
| 51596429-b877-4f24-9574-dc266b3f4451 | volume1      | available |   50 |             |
+--------------------------------------+--------------+-----------+------+-------------+
在192.168.2.53 VMEXSI主机上操作
集成VM虚拟化
# vi /etc/vmware/config
libdir = "/usr/lib/vmware"
authd.proxy.vim = "vmware-hostd:hostd-vmdb"
authd.proxy.nfc = "vmware-hostd:ha-nfc"
authd.proxy.nfcssl = "vmware-hostd:ha-nfcssl"
authd.proxy.vpxa-nfcssl = "vmware-vpxa:vpxa-nfcssl"
authd.proxy.vpxa-nfc = "vmware-vpxa:vpxa-nfc"
authd.fullpath = "/sbin/authd"
authd.soapServer = "TRUE"
vmauthd.server.alwaysProxy = "TRUE"
vhv.enable = "TRUE"
安装 VMware vCenter Appliance 的 的 OVF
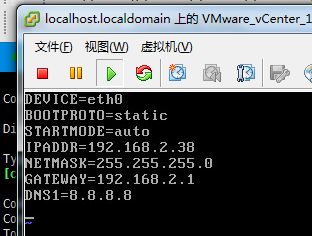
点进login设置网卡
Service network restart
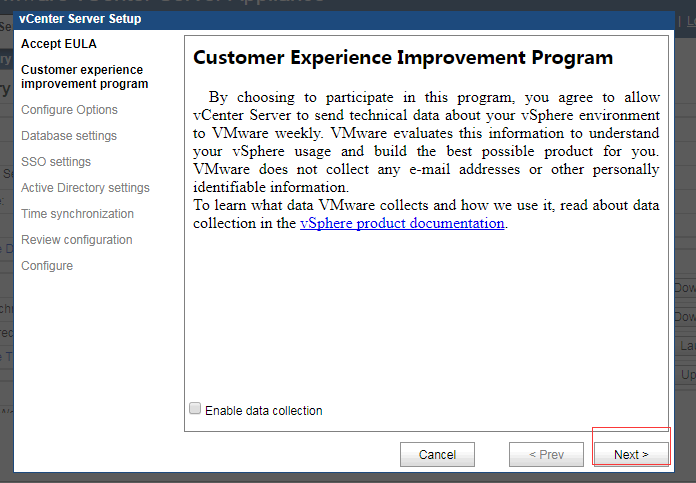
安装 VMware vCenter
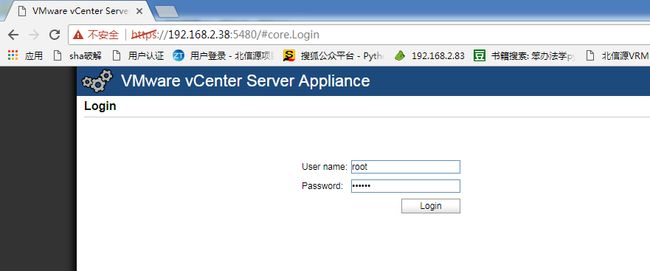
浏览器打开 https://192.168.2.38:5480,登录root 密码vmware
集成vmware
(1)在控制节点安装 nova-compute。
yum install openstack-nova-compute python-suds
(2)备份 nova.conf
cp /etc/nova/nova.conf /etc/nova/nova.conf.bak
(3)修改 nova.conf 集成 VMware vCenter。
vi /etc/nova/nova.conf
添加以下配置:
在 [DEFAULT] 段落添加:
compute_driver = vmwareapi.VMwareVCDriver
在 [vmware] 段落添加:
vif_driver = nova.virt.baremetal.vif_driver.BareMetalVIFDriver
host_ip = 192.168.2.38 # vCenter 的 IP 地址
host_username = root # vCenter 用户名
host_password = vmware  # vCenter 密码
datastore_regex = datastore5 # ESXi 存储
cluster_name = openstack  # vCenter 群集
api_retry_count = 10
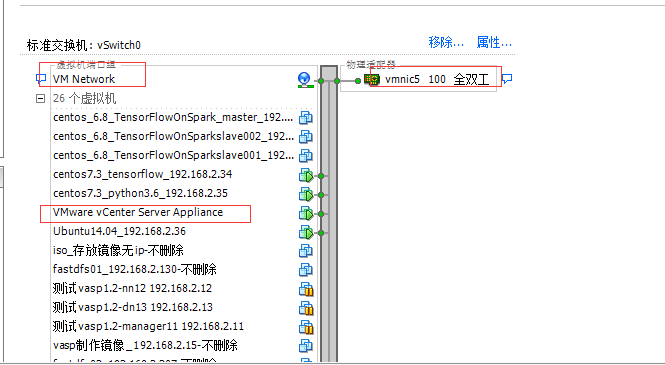
integration_bridge = VM Network  # ESXi 虚拟机网络端口组
vlan_interface = vmnic5 # ESXi 网卡
(4)将 nova-compute 服务设置为自动启动,重新启动控制节点。
chkconfig openstack-nova-compute on
shutdown -r now
或将以下服务重启:
service openstack-nova-api restart
service openstack-nova-cert restart
service openstack-nova-consoleauth restart
service openstack-nova-scheduler restart
service openstack-nova-conductor restart
service openstack-nova-novncproxy restart
service openstack-nova-compute restart
(5)检查 OpenStack 是否已集成 VMware vCenter。
nova connectionError: HTTPSConnectionPool(host='192.168.2.38', port=443): Max retries exceeded with url: /sdk/vimService.wsdl (Caused by NewConnectionError('
如果之前没有配置SSL(缺省是没有),需要修改代码,禁止VMwareVCDriver使用SSL认证,否则在创建虚机的时候会报错“error:14090086:SSL routines:SSL3_GET_SERVER_CERTIFICATE:certificate verify failed”。
需要编辑/usr/lib/python2.7/site-packages/oslo_vmware/service.py,注释掉如下行:
#self.verify = cacert if cacert else not insecure
并修改self.verify的值为False,如下所示:
[python] view plain copy
class RequestsTransport(transport.Transport):
def __init__(self, cacert=None, insecure=True, pool_maxsize=10):
transport.Transport.__init__(self)
# insecure flag is used only if cacert is not
# specified.
#self.verify = cacert if cacert else not insecure
self.verify = False
self.session = requests.Session()
self.session.mount('file:///',
LocalFileAdapter(pool_maxsize=pool_maxsize))
self.cookiejar = self.session.cookies
[root@controller nova]# service openstack-nova-compute restart
Redirecting to /bin/systemctl restart openstack-nova-compute.service
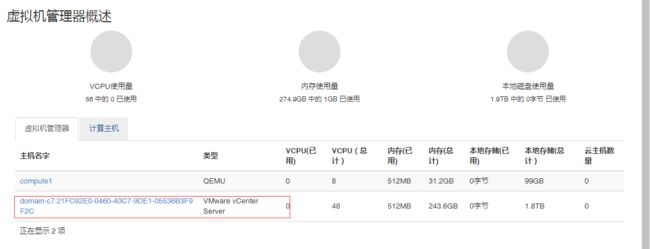
[root@controller nova]# nova hypervisor-list
+----+------------------------------------------------+-------+---------+
| ID | Hypervisor hostname | State | Status |
+----+------------------------------------------------+-------+---------+
| 1 | compute1 | up | enabled |
| 2 | domain-c7.21FC92E0-0460-40C7-9DE1-05536B3F9F2C | up | enabled |
+----+------------------------------------------------+-------+---------+
[root@controller nova]#
以上是我安装笔记。

