ssm整合中springSecurity的基本权限管理设置
ssm整合中springSecurity的使用、配置页面控制、后台控制Two):
https://blog.csdn.net/wilson27/article/details/89922412
一、Spring Security安全框架
1.1 权限管理概述
BRAC的模型:基于角色的访问控制模型。
1.2 Security框架基本介绍
Spring Security 的前身是 Acegi Security ,是 Spring 项目组中用来提供安全认证服务的框架。(https://projects.spring.io/spring-security/)
Spring Security 为基于J2EE企业应用软件提供了全面安全服务。特别是使用领先的J2EE解决方案-Spring框架开发的企业软件项目。人们使用Spring Security有很多种原因,不过通常吸引他们的是在J2EE Servlet规范或EJB规范中找不到典型企业应用场景的解决方案。
特别要指出的是他们不能再WAR 或 EAR 级别进行移植。这样,如果你更换服务器环境,就要,在新的目标环境进行大量的工作,对你的应用系统进行重新配 置安全。使用Spring Security 解决了这些问题,也为你提供很多有用的,完全可以指定的其他安全特性。
安全包括两个主要操作。
- “认证”,是为用户建立一个他所声明的主体。主题一般是指用户,设备或可以在你系统中执行动作的其他系统。
- “授权”指的是一个用户能否在你的应用中执行某个操作,在到达授权判断之前,身份的主题已经由 身份验证过程建立了。
这些概念是通用的,不是Spring Security特有的。在身份验证层面,Spring Security广泛支持各种身份验证模式,这些验证模型绝大多数都由第三方提供,或则正在开发的有关标准机构提供的,例如 Internet Engineering Task Force.作为补充,Spring Security 也提供了自己的一套验证功能。
Spring Security 目前支持认证一体化如下认证技术:

	HTTP BASIC authentication headers (一个基于IEFT  RFC 的标准)
	HTTP Digest authentication headers (一个基于IEFT  RFC 的标准)
	HTTP X.509 client certificate exchange  (一个基于IEFT RFC 的标准)
	LDAP (一个非常常见的跨平台认证需要做法,特别是在大环境)
	Form-based authentication (提供简单用户接口的需求)
	OpenID authentication
	Computer Associates Siteminder
	JA-SIG Central Authentication Service  (CAS,这是一个流行的开源单点登录系统)
	Transparent authentication context  propagation for Remote Method Invocation and HttpInvoker  (一个Spring远程调用协议)
Maven依赖
<dependencies>
    <dependency>
        <groupId>org.springframework.securitygroupId>
        <artifactId>spring-security-webartifactId>
        <version>5.0.1.RELEASEversion>
    dependency>
dependencies>
1.3 SpringSecurity入门案例
1.3.1 创建一个war包工程
创建一个普通的war包工程,名字可以叫springsecurity-demo,引入相关依赖
pom.xml
<project xmlns="http://maven.apache.org/POM/4.0.0"
         xmlns:xsi="http://www.w3.org/2001/XMLSchema-instance"
         xsi:schemaLocation="http://maven.apache.org/POM/4.0.0 http://maven.apache.org/xsd/maven-4.0.0.xsd">
    <modelVersion>4.0.0modelVersion>

    <groupId>com.lovejavagroupId>
    <artifactId>springsecurity-demoartifactId>
    <version>1.0-SNAPSHOTversion>


    <packaging>warpackaging>

    <properties>
        <spring.version>5.0.2.RELEASEspring.version>
        <spring.security.version>5.0.1.RELEASEspring.security.version>
    properties>
    <dependencies>

        <dependency>
            <groupId>org.springframework.securitygroupId>
            <artifactId>spring-security-webartifactId>
            <version>5.0.1.RELEASEversion>
        dependency>
        <dependency>
            <groupId>org.springframework.securitygroupId>
            <artifactId>spring-security-configartifactId>
            <version>5.0.1.RELEASEversion>
        dependency>


        <dependency>
            <groupId>javax.servletgroupId>
            <artifactId>javax.servlet-apiartifactId>
            <version>3.1.0version>
            <scope>providedscope>
        dependency>
    dependencies>

project>
1.3.2 配置web.xml
其中监听器主要用于加载配置文件,过滤器用于配置用户拦截,过滤器名字必须为 springSecurityFilterChain
<web-app xmlns="http://xmlns.jcp.org/xml/ns/javaee"
         xmlns:xsi="http://www.w3.org/2001/XMLSchema-instance"
         xsi:schemaLocation="http://xmlns.jcp.org/xml/ns/javaee http://xmlns.jcp.org/xml/ns/javaee/web-app_3_1.xsd"
         version="3.1">

    <context-param>
        <param-name>contextConfigLocationparam-name>
        <param-value>classpath:spring-security.xmlparam-value>
    context-param>
    <listener>
        <listener-class>org.springframework.web.context.ContextLoaderListenerlistener-class>
    listener>

    <filter>
        <filter-name>springSecurityFilterChainfilter-name>
        <filter-class>org.springframework.web.filter.DelegatingFilterProxyfilter-class>
    filter>
    <filter-mapping>
        <filter-name>springSecurityFilterChainfilter-name>
        <url-pattern>/*url-pattern>
    filter-mapping>
web-app>
1.3.3 配置spring-security.xml
<beans xmlns="http://www.springframework.org/schema/beans"
       xmlns:security="http://www.springframework.org/schema/security"
       xmlns:xsi="http://www.w3.org/2001/XMLSchema-instance"
       xsi:schemaLocation="http://www.springframework.org/schema/beans
    http://www.springframework.org/schema/beans/spring-beans.xsd
    http://www.springframework.org/schema/security
    http://www.springframework.org/schema/security/spring-security.xsd">


    <security:http auto-config="true" use-expressions="false">

        <security:intercept-url pattern="/**" access="ROLE_USER" />
    security:http>


    <security:authentication-manager>
        <security:authentication-provider>
            <security:user-service>

                <security:user name="admin" password="{noop}admin" authorities="ROLE_USER" />
            security:user-service>
        security:authentication-provider>
    security:authentication-manager>

beans>
1.3.4 测试
当访问index.jsp页面时发现会弹出登录窗口,可能你会奇怪,我们没有建立下面的登录页面,为什么Spring Security会跳到上面的登录页面呢?这是我们设置http的auto-config=”true”时Spring Security自动为我们生成的。
1.3.5 使用自定义页面
我们分别创建一个登录成功页面和登录失败页面以及登录页面,并且实现自定义登录成功、失败、登录等跳转。
1.3.5.1 登录页面 login.html
<html>
<head>
<meta charset="UTF-8">
<title>Insert title heretitle>
head>
<body>

<form action="login" method="post">
<table>
    <tr>
        <td>用户名:td>
        <td><input type="text" name="username" />td>
    tr>
    <tr>
        <td>密码:td>
        <td><input type="password" name="password" />td>
    tr>
    <tr>
        <td colspan="2" align="center"><input type="submit" value="登录" />
            <input type="reset" value="重置" />td>
    tr>
table>
form>
body>
html>
1.3.5.2 登录成功页面 success.html
<html>
<head>
<meta charset="UTF-8">
<title>Insert title heretitle>
head>
<body>
success html<br>
<a href="logout">退出a>
body>
html>
1.3.5.3 登录失败页面 failer.html
<html>
<head>
<meta charset="UTF-8">
<title>Insert title heretitle>
head>
<body>
	登录失败
body>
html>
1.3.5.4 自定义页面跳转[配置spring-security.xml
<beans xmlns="http://www.springframework.org/schema/beans"
       xmlns:security="http://www.springframework.org/schema/security"
       xmlns:xsi="http://www.w3.org/2001/XMLSchema-instance"
       xsi:schemaLocation="http://www.springframework.org/schema/beans
    http://www.springframework.org/schema/beans/spring-beans.xsd
    http://www.springframework.org/schema/security
    http://www.springframework.org/schema/security/spring-security.xsd">


    <security:http pattern="/login.html" security="none" />
    <security:http pattern="/failer.html" security="none" />


    <security:http auto-config="true" use-expressions="false">

        <security:intercept-url pattern="/**" access="ROLE_USER" />

        <security:form-login
            login-page="/login.html"
            login-processing-url="/login"
            default-target-url="/success.html"
            authentication-failure-url="/failer.html"
        />


        <security:csrf disabled="true" />


        <security:logout
                logout-success-url="/login.html"
                invalidate-session="true"
                logout-url="/logout"
        />
    security:http>


    <security:authentication-manager>
        <security:authentication-provider>
            <security:user-service>

                <security:user name="admin" password="{noop}admin" authorities="ROLE_USER" />
            security:user-service>
        security:authentication-provider>
    security:authentication-manager>
beans>
二、搭建用户的开发环境
2.1 创建表结构
mysql
--创建用户表
CREATE TABLE `sys_user` (
  `id` int(10) NOT NULL AUTO_INCREMENT,
  `username` varchar(50) DEFAULT NULL,
  `email` varchar(50) DEFAULT NULL,
  `PASSWORD` varchar(80) DEFAULT NULL,
  `phoneNum` varchar(20) DEFAULT NULL,
  `STATUS` int(1) DEFAULT NULL,
  PRIMARY KEY (`id`)
) ENGINE=InnoDB DEFAULT CHARSET=utf8;
2.2 创建SysUser
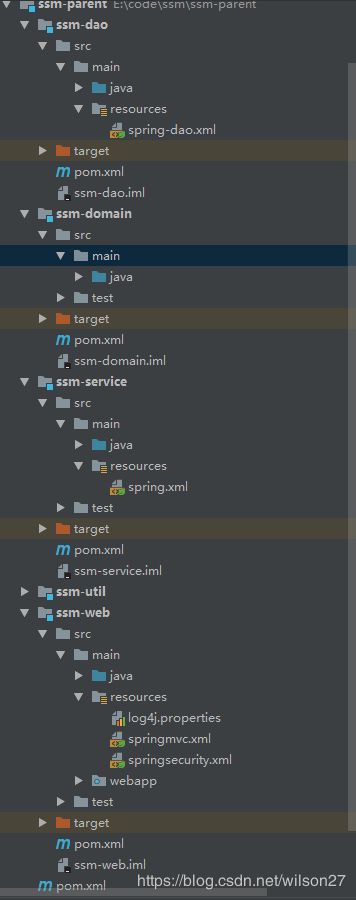
在ssm-model中创建SysUser
public class SysUser {

    private Long id;
    private String username;
    private String email;
    private String password;
    private String phoneNum;
    private int status;

	//get...set...
}
2.3 自定义认证程序
2.3.1 导入依赖包
在ssm-parent中引入依赖管理
<properties>


	<spring.security.version>5.0.1.RELEASEspring.security.version>
properties>

//依赖管理
<dependencies>


  <dependency>
    <groupId>org.springframework.securitygroupId>
    <artifactId>spring-security-webartifactId>
    <version>${spring.security.version}version>
  dependency>
  <dependency>
    <groupId>org.springframework.securitygroupId>
    <artifactId>spring-security-configartifactId>
    <version>${spring.security.version}version>
  dependency>
dependencies>
在ssm-service中引入依赖
<dependency>
    <groupId>org.springframework.securitygroupId>
    <artifactId>spring-security-webartifactId>
dependency>
<dependency>
    <groupId>org.springframework.securitygroupId>
    <artifactId>spring-security-configartifactId>
dependency>
2.3.2 自定义认证类
在ssm-service中创建UserService接口,让该接口继承UserDetailsService
public interface UserService extends UserDetailsService {
}
创建UserServiceImpl实现UserService,同时实现loadUserByUsername方法,在该方法中写登录认证程序
@Service
public class UserServiceImpl implements UserService {

    @Override
    public UserDetails loadUserByUsername(String username) throws UsernameNotFoundException {
        // 先设置假的权限
        List<GrantedAuthority> authorities = new ArrayList<>();
        // 传入角色
        authorities.add(new SimpleGrantedAuthority("ROLE_USER"));
        // 创建用户
        User user = new User(username, "{noop}admin", authorities) ;
        return user;
    }
}
2.3.3 继承SpringSecurity
2.3.3.1 过滤器配置
在ssm-web中修改web.xml,加入springsecurity过滤器
<filter>
  <filter-name>springSecurityFilterChainfilter-name>
  <filter-class>org.springframework.web.filter.DelegatingFilterProxyfilter-class>
filter>
<filter-mapping>
  <filter-name>springSecurityFilterChainfilter-name>
  <url-pattern>/*url-pattern>
filter-mapping>
2.3.3.2 配置springsecurity.xml
<beans xmlns="http://www.springframework.org/schema/beans"
       xmlns:security="http://www.springframework.org/schema/security"
       xmlns:xsi="http://www.w3.org/2001/XMLSchema-instance"
       xsi:schemaLocation="http://www.springframework.org/schema/beans
    http://www.springframework.org/schema/beans/spring-beans.xsd
    http://www.springframework.org/schema/security
    http://www.springframework.org/schema/security/spring-security.xsd">


    <security:http pattern="/*.jsp" security="none" />
    <security:http pattern="/css/**" security="none" />
    <security:http pattern="/img/**" security="none" />
    <security:http pattern="/plugins/**" security="none" />


    <security:http auto-config="true" use-expressions="false">

        <security:intercept-url pattern="/index.jsp" access="ROLE_USER" />
        <security:intercept-url pattern="/**" access="ROLE_USER" />

        <security:form-login
            login-page="/login.jsp"
            login-processing-url="/login"
            default-target-url="/pages/main.jsp"
            authentication-failure-url="/failer.jsp"
        />


        <security:csrf disabled="true" />


        <security:logout
                logout-success-url="/login.jsp"
                invalidate-session="true"
                logout-url="/logout"
        />
    security:http>


    <security:authentication-manager>

        <security:authentication-provider user-service-ref="userServiceImpl">
        security:authentication-provider>
    security:authentication-manager>

beans>
4.3.3.3 引入springsecurity配置
修改springmvc.xml,添加导入springsecurity.xml
<import resource="spring-security.xml" />
4.3.3.4 修改登录地址
修改login.jsp,将action地址改成/login
<form action="${pageContext.request.contextPath}/login" method="post">
	//...略
form>
4.3.3.5 修改index.jsp
<%@ page language="java" contentType="text/html; charset=UTF-8"
	pageEncoding="UTF-8"%>

<html>
<head>
<meta http-equiv="Content-Type" content="text/html; charset=UTF-8">
<title>主页title>
head>
<body>
<script>
	location.href="/pages/main.jsp";
script>
body>
html>
至此,可以实现登录校验了。
2.4 数据库校验
可以将上述功能写死的账号密码从数据库获取,只需要修改UserServiceImpl,调用Dao从数据库查询即可。
2.4.1 Dao实现数据库查询
创建UserDao
public interface UserDao {
    /***
     * 查询用户信息
     * @param name
     * @return
     */
    @Select("select * from sys_user where username=#{username}")
    SysUser getByUserName(String name);
}
2.4.2 调用Dao实现数据库查询账号信息
@Service
public class UserServiceImpl implements UserService {
@Autowired
private UserDao userDao;

@Override
public UserDetails loadUserByUsername(String username) throws UsernameNotFoundException {
    // 先设置假的权限
    List<GrantedAuthority> authorities = new ArrayList<>();
    // 传入角色
    authorities.add(new SimpleGrantedAuthority("ROLE_USER"));

    //通过账号查询用户信息
    SysUser sysUser = userDao.getByUserName(username);

    // 创建用户,此方法将会对用户名和密码进行校验,并赋予权限,User对象是springsecurity内部的User对象
    User user = new User(username, "{noop}"+sysUser.getPassword(), authorities) ;
    return user;
	}
}
2.6springsecurity的基本入门就这样,分享即快乐


