Hololens 开发笔记(1)——HelloWorld
Hololens是微软在2015年推出的一款混合现实(MR)眼镜,官方网站点击这里。这个眼镜具体能干啥,文字表述总是太过乏力,下面给出一些相关视频,帮助大家感受下。
- Microsoft HoloLens: Build 2016 Keynote
- TED - A futuristic vision of the age of holograms
- 科技美学 - 微软 HoloLens 开发者体验 混合现实
- 没玩过微软的这个产品还敢说你了解高科技?——微软HoloLens
一、环境搭建
| 名称 | 环境 |
|---|---|
| 操作系统 | Win10 专业版 1703【请确保至少保证为Win10,推荐1703+】 |
| Visual Studio | Visual Studio Community 2017 |
| Unity | Unity 2018.2 |
首先请熟悉Hololens的基本操作,可以参考说明书,或者文章开头的三方体验视频,或者自己百度啊啥的,然后在PC上搭建VS + Unity的开发环境。
二、Mixed Reality Unity 项目
本章将演示一个简单的使用Unity实现的混合现实应用,基于教程:MR Basics 100: Getting started with Unity
2.1 创建项目
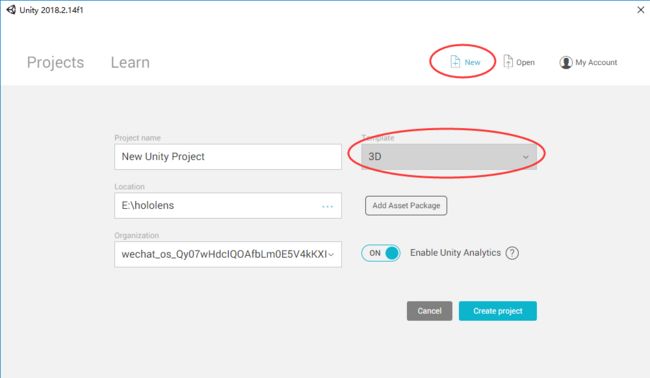
- 点击右上角New按钮,然后你会看到如图的设置项
- 请指定项目名和项目位置
- 请确保选择3D模式
- 点击创建项目按钮
2.2 设置相机
-
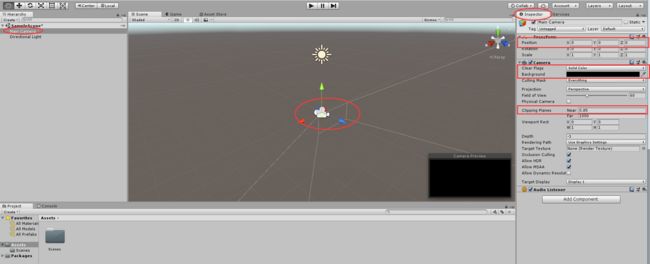
进入主页面后,选中最左侧的
Main Camera,或者点击中间窗口的相机图标,进入到相机的设置。 -
点击右侧的
Inspector,进入到相机的详细设置。 -
将相机移动到坐标轴的起始位置,将
position的坐标轴改为**(X:0 Y:0 Z:0)**。 -
将
Clear Flags从SkyBox(天空盒)更改为Solid Color(纯色)。 -
将下面的
Background颜色修改为黑色,即RGBA为**(0, 0, 0, 0)**。 -
修改Clipping Planes的
Near的值为 0.85,防止当用户接近一个对象时,对象被渲染到离用户眼镜太近的位置。
在 Hololens 应用中,摄像机位置就是用户的头部的位置,摄像机就代表了用户的眼镜。
当场景中存在多个摄像机时,Unity会使用
MainCamera标签来确定使用哪个摄像机来进行立体世界渲染。
2.3 切换项目平台
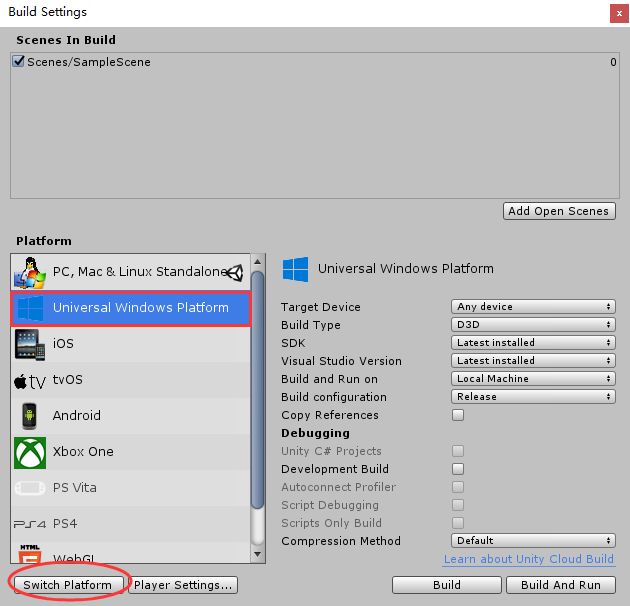
点击菜单栏 File-> Build Setting,或者快捷键Ctrl + Shift + B,点击Universal Windows Platform平台,然后点击左下角的Switch Platform。
如果该平台没有安装,选择右边的open download按钮,下载对应的平台插件。
2.4 更改项目设置
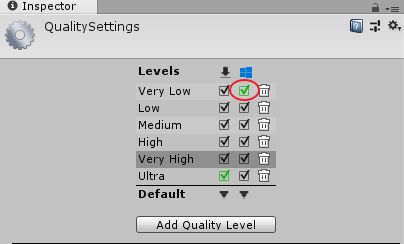
点击菜单栏 Edit -> Project Settings -> Quality,在右侧的Inspector中,点击windows图标下的Default的下拉框,如图所示,将值修改为Very Low。
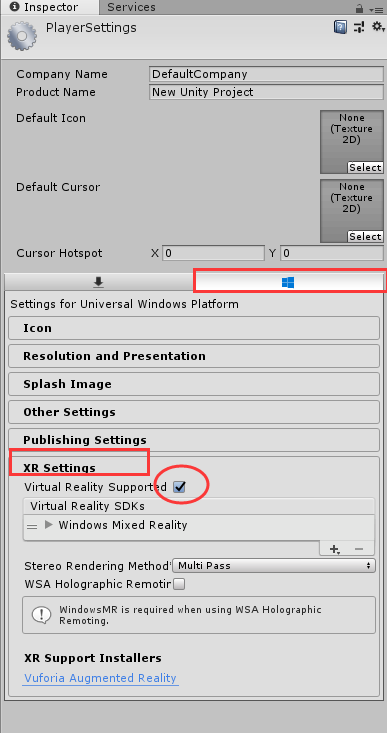
点击菜单栏Edit -> Project Settings -> Player,选中Windwos图标选项卡,选中XR Settings,勾选Virtual Reality Supported,会看到下面有一项Windows Mixed Reality。
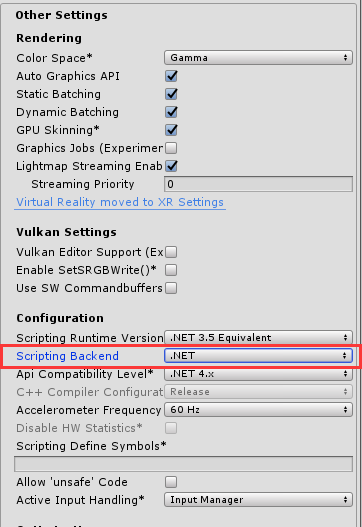
选中Other Settings,将Scripting Backend的值修改为**.NET**。
2.5 添加立方体
- 在左侧项目列表空白处,右击选择
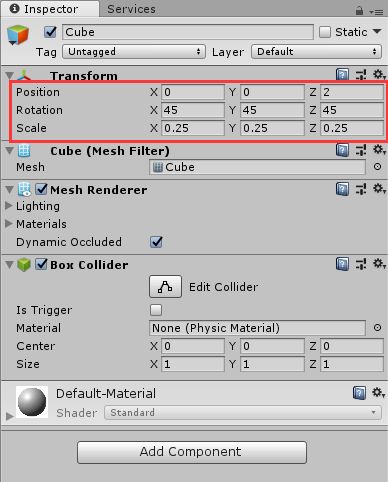
3D Object -> Crub新建一个立方体。 - 修改立方体坐标为**(X:0 Y:0 Z:2),更改旋转为(X:45 Y:45 Z:45),将立方体缩放为0.25**。
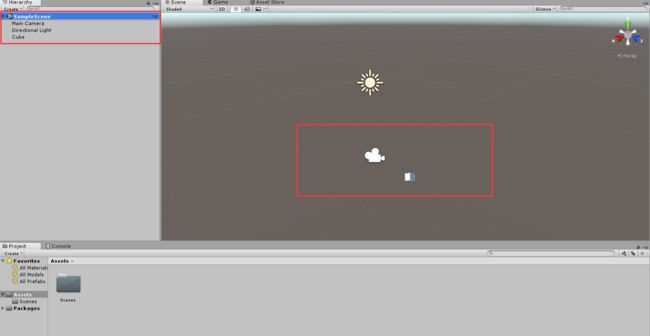
至此整个项目结构如图所示:
三、运行程序
3.1 Hololens设置
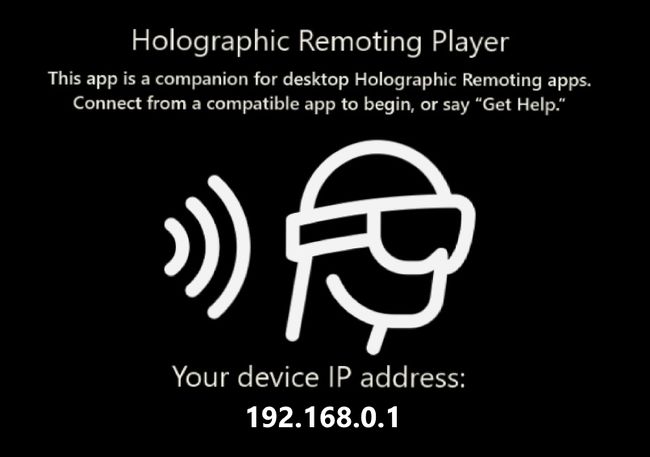
戴上Hololens眼镜,在Hololens的Windos Store商店中,下载应用Holographic Remoting Player,并进入,此时应该出现Hololens的IP地址信息,形如:
确保你的PC与Hololens在同一网络下。
也可以使用USB连接,参考官方:原文链接:
For other mixed reality supported headsets
- Connect the headset to your development PC using the USB cable and the HDMI or display port cable.
- Launch the Mixed Reality Portal and ensure you have completed the first run experience.
- From Unity, you can now press the Play button.
3.2 从Unity部署
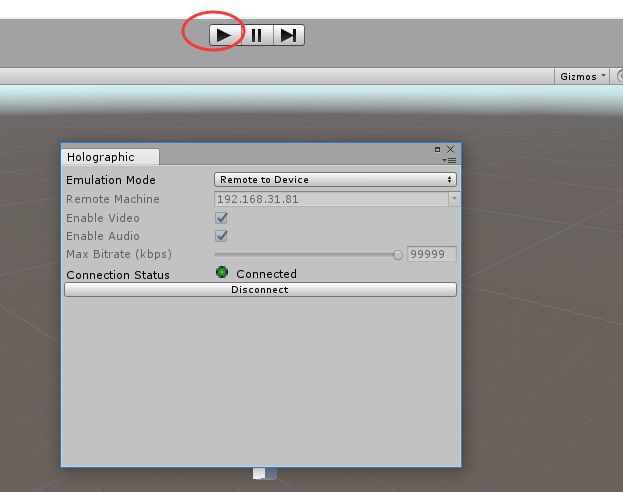
点击菜单栏的 Window -> XR -> Holographic Emulation,在弹出框选中 Remote to Device,填入Hololens的IP地址,点击连接。
连接成功后,点击启动图标,启动程序,再点击下关闭程序,如下:
当程序启动后,你就能通过Hololens看见一个立方体了!Hello World!
3.3 从Visual Studio构建并部署到设备
现在我们准备将项目编译到Visual Studio并部署到目标设备。
3.3.1 导出为 VS 解决方案
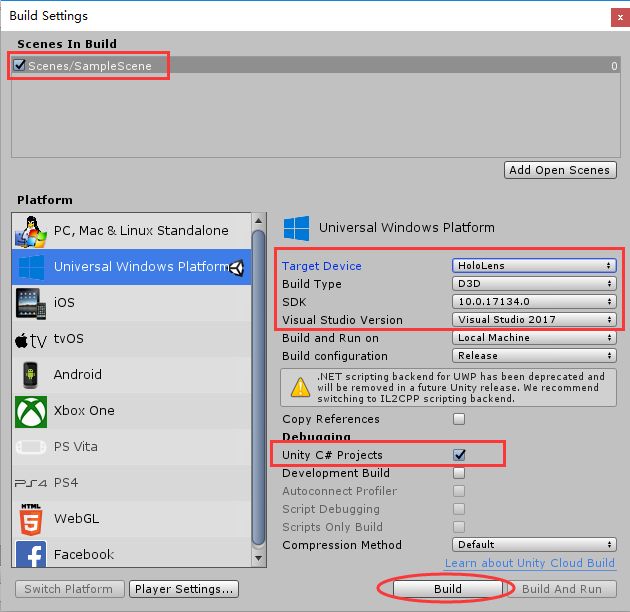
(1)点击菜单栏File->Build Settings,确保当前项目已经被添加到Scenes In Build,如果没有,请点击Add Open Scenes按钮。
(2)修改Target Device为Hololens;Build Type为D3D;SDK选择Latest installed即可,我这里指定了10.0的版本;VS版本我制定了VS 2017;勾选下方的Unity C# Projects按钮,点击Build按钮。
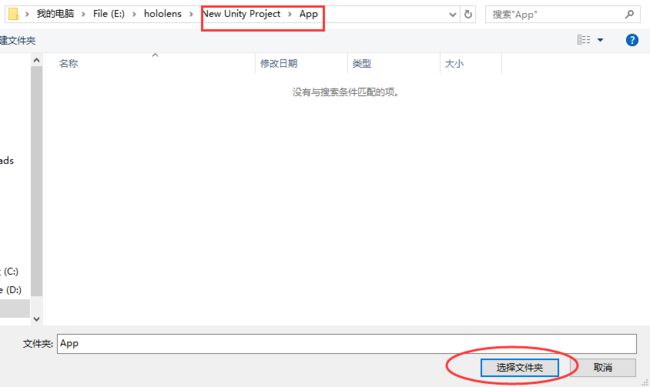
(3) 在弹出的目录中新建文件夹APP。
(4)进入到App文件夹下,点击选择文件夹按钮。
(5)Build完成后,点击App目录下的.sln文件,在VS中打开项目。
3.3.2 运行解决方案
具体参考官方:https://docs.microsoft.com/zh-cn/windows/mixed-reality/using-visual-studio
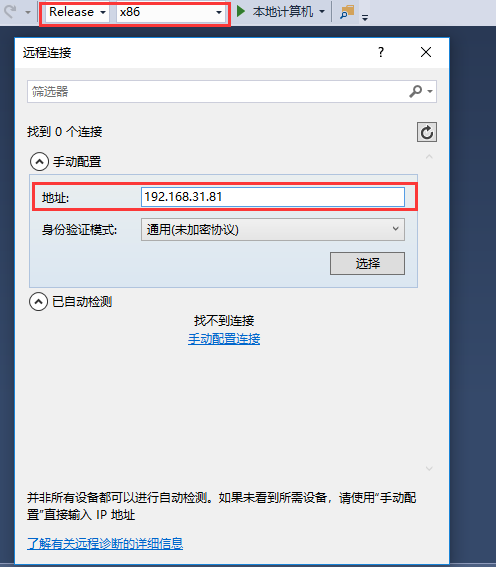
点击右上方选择为Release,平台选择x86,选择远程计算机,然后会弹出一个如图的远程连接对话框,在其中填入Hololens的IP地址,点击选择按钮。
点击菜单栏调试->开始执行(不调试)按钮,或按快捷键Ctrl + F5。
如果没有异常,经过一段漫长的等待(取决于网速、电脑配置,我用了3分钟吧),在Hololens中就可以看到立方体了。
四、问题
(1)关于textmeshpro的错误
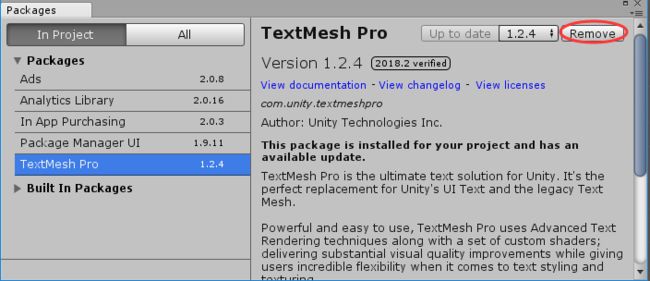
请将刚刚创建的App文件夹整个删掉,在Unity中,点击菜单栏Window > Package Manager,移除TextMesh Pro,如图所示,然后重新导出解决方案即可。
解决方案来源:https://github.com/MicrosoftDocs/mixed-reality/issues/557
(2)要求输入Pin码
参考官方,原文链接
The first time you deploy an app from Visual Studio to your HoloLens, you will be prompted for a PIN. On the HoloLens, generate a PIN by launching the Settings app, go to Update > For Developers and tap on Pair. A PIN will be displayed on your HoloLens; type this PIN in Visual Studio. After pairing is complete, tap Done on your HoloLens to dismiss the dialog. This PC is now paired with the HoloLens and you will be able to deploy apps automatically. Repeat these steps for every subsequent PC that is used to deploy apps to your HoloLens.
To un-pair your HoloLens from all computers it was paired with, launch the Settings app, go to Update > For Developers and tap on Clear.
