SpringBoot整合SpringDataJPA 教程
前言:
各位同学大家好, 最近在学springboot 整合的SpringDataJPA框架,有点小心得就想着分享给大家 ,正好今天2020 7月12号是我27岁生日(步入中年)就把这篇SpringBoot整合SpringDataJPA 教程 送给大家希望大家喜欢 废话不多说 我们正式开始
准备工作:
1安装好idea 或者eclispe +sts开发环境
2安装maven 并配置环境
怎么使用idea 这个工具一键创建springboot工程
这些在我之前的教程都讲的很清楚 这里我就不展开细说 有兴趣的同学可以去看我以前的文章】
Springboot搭建零基础教程:https://www.jianshu.com/p/c48595fdbf39
需要用到的三方库
            org.springframework.boot
            spring-boot-starter-web


            org.springframework.boot
            spring-boot-starter-data-jpa


            mysql
            mysql-connector-java
application.ymal 的配置 如下图:
server:
  port: 8081
  servlet:
    context-path:
limit:
  minMoney: 0.01
  maxMoney: 9999
  description: 最少要发${limit.minMoney}元, 最多${limit.maxMoney}元
spring:
  datasource:
    driver-class-name: com.mysql.cj.jdbc.Driver
    url: jdbc:mysql://127.0.0.1:3306/luckymoney?characterEncoding=utf-8&serverTimezone=UTC
    username: root
    password: 123456
  jpa:
    hibernate:
      ddl-auto: update
    show-sql: true
准备按设置了utf-8编码和 serverTimezone=UTC 和时区 以及数据库账号和密码 jdbc 驱动 这些都配置好以后我们启动一下
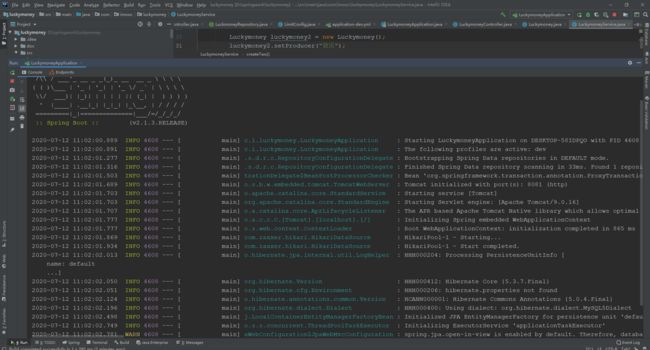
我们看到项目正常的启动了我们打开postman工具访问一下 测试类
package com.imooc.luckymoney;
import org.springframework.beans.factory.annotation.Autowired;
import org.springframework.web.bind.annotation.*;
import java.util.HashMap;
import java.util.Map;
/**
 * Created by xuqing
 * 2020年7月12日10:40:43
 * @Controller + @ResponseBody = @RestController
 *
 *
 */
@RestController
@RequestMapping("/hello")
public class HelloController {

	@Autowired
	private LimitConfig limitConfig;

	@PostMapping("/say")
	public String say(@RequestParam(value = "id", required = false, defaultValue = "0") Integer myId) {
	//	return "说明:" + limitConfig.getDescription();
	return "id:" + myId;
	}

    @GetMapping("/index")
	public  Object index(){
		Map map=new HashMap<>();
		map.put("msg","部署成功");
		return  map;
	}

    @GetMapping("/getsay")
	public  String say(){
		return "说明:" + limitConfig.getDescription();
	}

}
我们访问 index 这个方法 请求的接口地址就是 :http://localhost:8081/luckymoney/hello/index
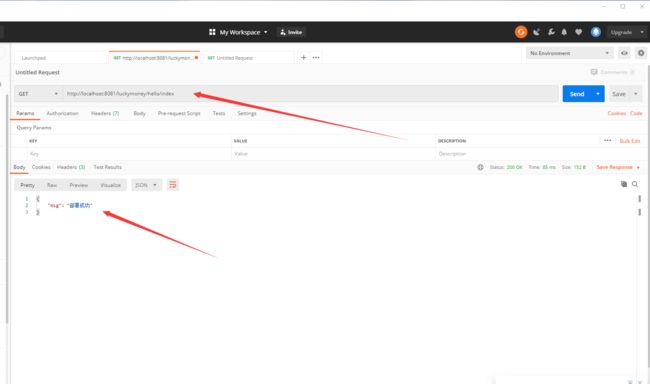
我们看到有json数据返回,项目整个算是正常启动成功我们需要加入一些业务逻辑代码来配合SpringDataJPA框架 来实现我们的业务需求
具体实现:
1 创建bean类(数据模型)
package com.imooc.luckymoney;
import javax.persistence.Entity;
import javax.persistence.GeneratedValue;
import javax.persistence.Id;
import java.math.BigDecimal;

/**
 * Created by xuqing
 * 2020年7月12日10:40:18
 */
@Entity
public class Luckymoney {

	@Id
	@GeneratedValue
	private Integer id;

	private BigDecimal money;

	/**
	 * 发送方
	 */
	private String producer;

	/**
	 * 接收方
	 */
	private String consumer;

	public Luckymoney() {
	}

	public Integer getId() {
		return id;
	}

	public void setId(Integer id) {
		this.id = id;
	}

	public BigDecimal getMoney() {
		return money;
	}

	public void setMoney(BigDecimal money) {
		this.money = money;
	}

	public String getProducer() {
		return producer;
	}

	public void setProducer(String producer) {
		this.producer = producer;
	}

	public String getConsumer() {
		return consumer;
	}

	public void setConsumer(String consumer) {
		this.consumer = consumer;
	}
}
类名上面我们要加上 @Entity 注解这样一来代码会自动帮我在MySQL里面创建 Luckymoney
然后我们要在表的头ID上面加上
@Id
@GeneratedValue
这个两行注解这样在MySQL创建的表里面就会是头ID是主键非空并且自增的
2 继承jpa
package com.imooc.luckymoney;

import org.springframework.data.jpa.repository.JpaRepository;

/**
* Created by xuqing
* 2020年7月12日10:40:31
*/
public interface LuckmoneyRepository extends JpaRepository {


  }
我们只需要写一个类继承JpaRepository 然后在<>中传入我们数据模型bean类(对应是数据库的表)就可以对数据库进行增删改查的操作,不用在写sql语句了 是不是很方便很爽 哈哈哈
3 controller 层具体业务逻辑实现:
首先我们需要用@Autowired注解将我们集成JpaRepository 的LuckmoneyRepository 类 注入进来
@Autowired
private LuckmoneyRepository repository;
然后我们就可以调用里面LuckmoneyRepository 父类里面的一些方法对数据库进行操作了 。
1查询数据库调用 finaAll();方法查询整张表的数据
/**
* 获取红包列表
*/
@GetMapping("/luckymoneys")
public List list() {
   return repository.findAll();
}
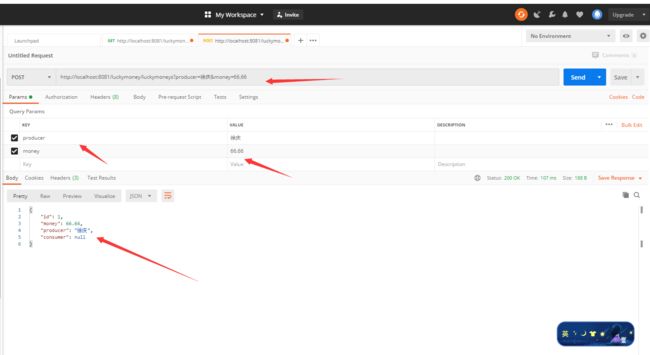
2 增加数据 调用save方法传入对象即可
/**
 * 创建红包(发红包)
 */
@PostMapping("/luckymoneys")
public Luckymoney create(@RequestParam("producer") String producer,
							 @RequestParam("money") BigDecimal money) {
		Luckymoney luckymoney = new Luckymoney();
		luckymoney.setProducer(producer);
		luckymoney.setMoney(money);
		return repository.save(luckymoney);
}
请求效果:
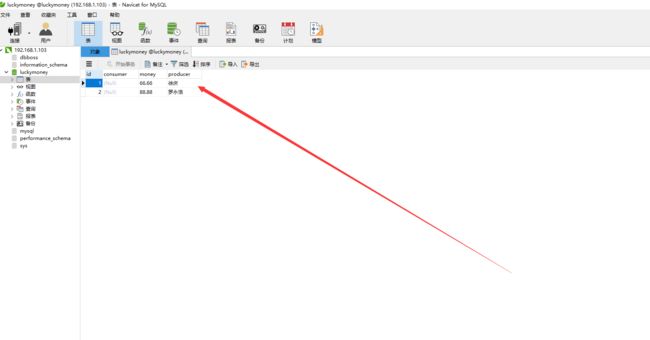
数据库查看
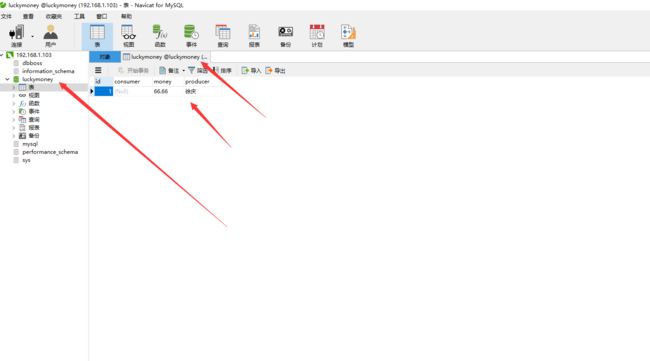
我们看到数据库有
3 更新数据 先通过查询方法查询然后 bean类中的set方法然后 再调用save方法即可完成数据更新操作
/**
 * 更新红包(领红包)
 */
@PutMapping("/luckymoneys/{id}")
public Luckymoney update(@PathVariable("id") Integer id,
							 @RequestParam("consumer") String consumer) {
		Optional optional = repository.findById(id);
		if (optional.isPresent()) {
			Luckymoney luckymoney = optional.get();
			luckymoney.setConsumer(consumer);
			return repository.save(luckymoney);
		}
		return null;
	}
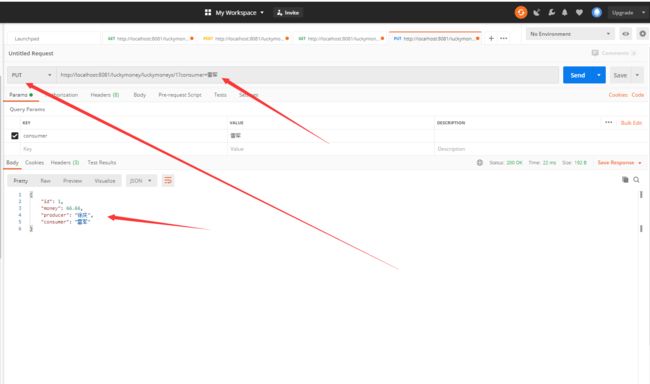
操作更新后的数据
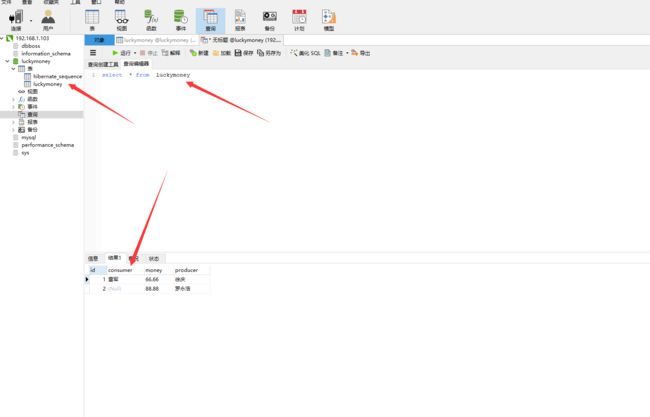
到此整个SpringBoot整合SpringDataJPA 的知识点我们就讲完了
最后总结:
相对于过去的java web jsp的写法 这个SpringBoot整合SpringDataJPA, 写法要简洁很多 基本不用写sql就可以操作数据库 。但是在这里还是要说明下如果出现多表查询的复杂的业务逻辑我们还是要引进sql语句才行的,我们这一期文章就不展开讲了 有兴趣的同学可以底下留言 后期我会抽时间更新复杂的业务逻辑使用SpringBoot整合SpringDataJPA 如何处理 。 最后希望我的文章能帮助到各位解决问题 ,以后我还会贡献更多有用的代码分享给大家。各位同学如果觉得文章还不错 ,麻烦给关注和star,小弟在这里谢过啦 也可以加我个人QQ/微信(1693891473)
项目地址
GitHub : https://github.com/xq19930522/springbootjpa
码云地址 :https://gitee.com/qiuyu123/springbootjpa.git

